Prerequisites
Warning
Copilot Studio copilots with names that are longer than 30 characters will fail to connect when you follow the instructions in this article. Ensure your copilot's name contains less than 30 characters before you proceed.
Connect your copilot to Dynamics 365 Customer Service
In Copilot Studio, open your copilot.
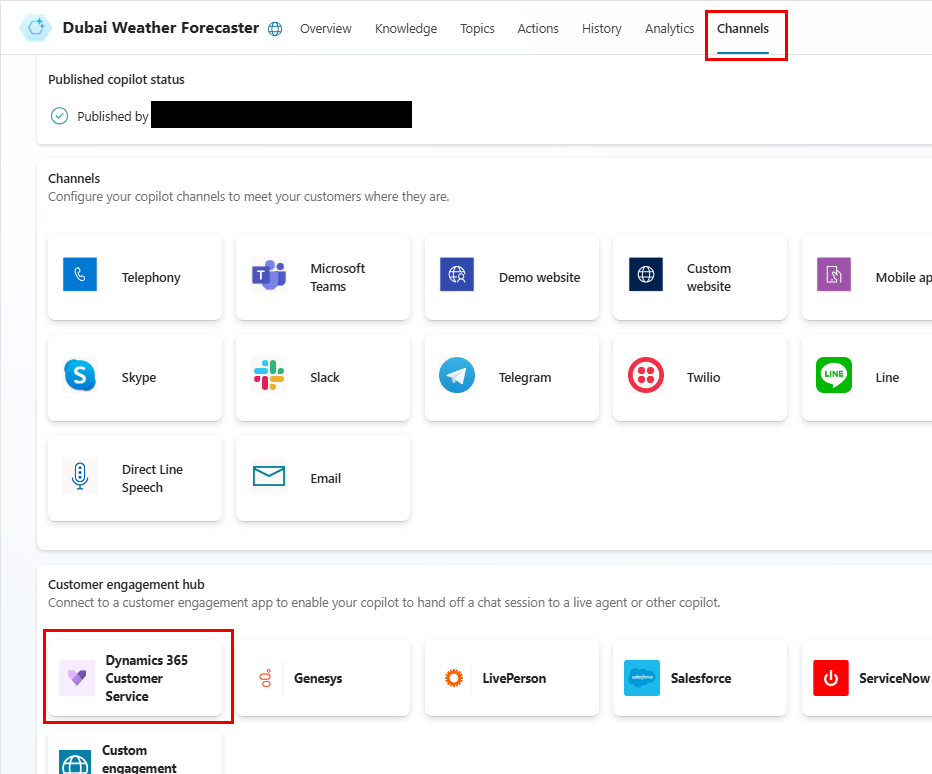
In the navigation menu, select Channels, and then under Customer engagement hub, select the Dynamics 365 Customer Service tile.
Select Connect.
- The Dynamics 365 Customer Service package installation must be in the same environment as the copilot.
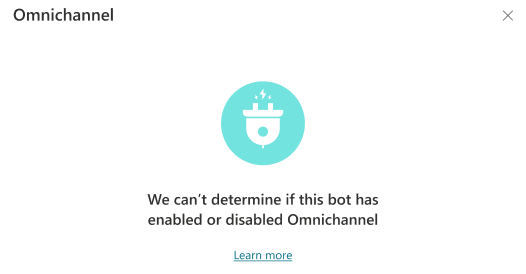
- If you're using Application Lifecycle Management (ALM), you might see a message that we can't determine if Dynamics 365 Customer Service integration is enabled for the environment. For more information, see Copilots with ALM.
Select View in Dynamics 365 to continue configuring the copilot connection in Dynamics 365 Customer Service.
Important
To test the copilot on your custom website, you must use the embed code that's specified in the chat widget you set up in Dynamics 365 Customer Service. If you use the embed code from Copilot Studio, handoff doesn't work. For more information, see Embed chat widget in your website or portal.
Copilots with Application Lifecycle Management
Suppose you've set up Application Lifecycle Management (ALM) for your copilots, and are exporting and importing copilots between development (unmanaged) and test or production (managed) environments. In that case, you might see a message that we can't determine if Dynamics 365 Customer Service integration is enabled for the environment.
If the copilot you exported has Dynamics 365 capabilities enabled, you can ignore this message. The copilot will still work properly. The message will disappear after you export the latest version of your copilot from your development environment and then import it into a targeted test or production environment with managed copilots.
If you continue to see the message after you export and import the latest version of your managed copilot, make sure to remove any unmanaged layers:
Sign in to Power Apps and select the managed copilot's environment.
In the navigation menu, select Solutions, and then select the solution that contains the copilot with the unmanaged layer.
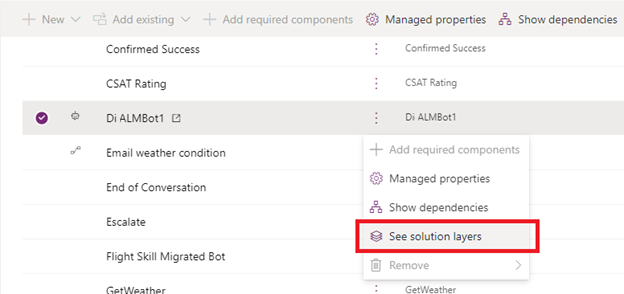
Next to the copilot component in the solution, select More commands (⋮), and then select See solution layers.
Select the unmanaged layer, and then select Remove unmanaged layer.

If your copilot doesn't have Dynamics 365 capabilities enabled, the message is always displayed.
Dynamics 365 Customer Service expects a conversation to end after a period of inactivity. This feature is important to ensure the supervisor view displays the correct ongoing conversations and manages agent loads and metrics correctly. When you create a copilot from Dynamics 365 Customer Service, the default copilot content includes two topics: Session Timeout Reminder and Session Timeout. These topics use the Inactivity trigger to first remind the user, and then close the conversation after a set inactivity timeout value, which can be configured in the topic. But if you create the copilot from the Copilot Studio portal, those topics aren't included in the copilot. To create them, follow the steps below:
Create a Session Timeout topic
From the left navigation, select Topics.
From the top bar, select New topic and From blank.
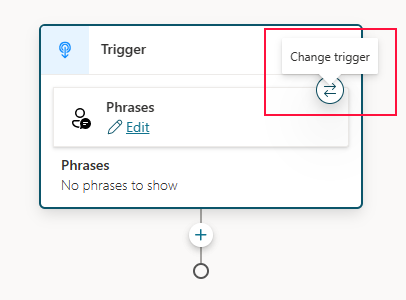
Hover the trigger Phrases and select the Change trigger icon.
Select Inactivity from the list.
Select Edit in the Trigger node to configure the inactivity duration.
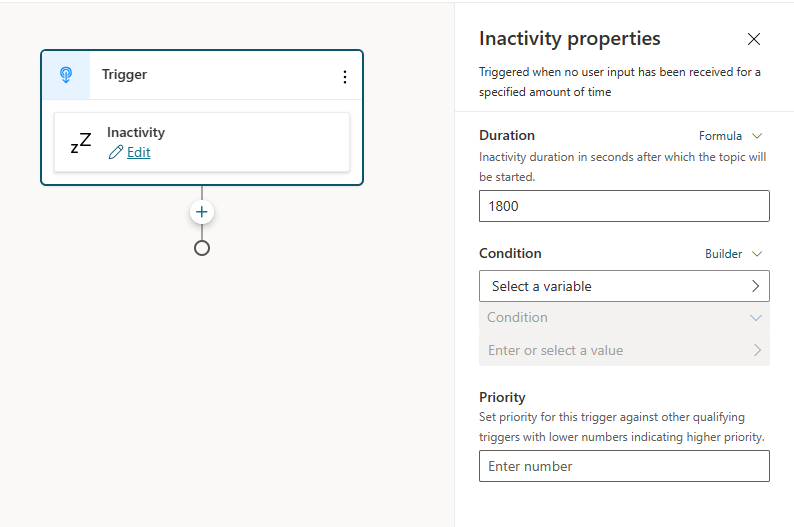
Select a Value from the dropdown, or enter an arbitrary value (in seconds) using a Formula entry. This value is the amount of inactive time it takes for the topic to trigger.
Select the channel it applies to by using the Condition option. For Dynamics 365, under the Condition block, select Select a variable, select the System tab, and Activity.Channel.
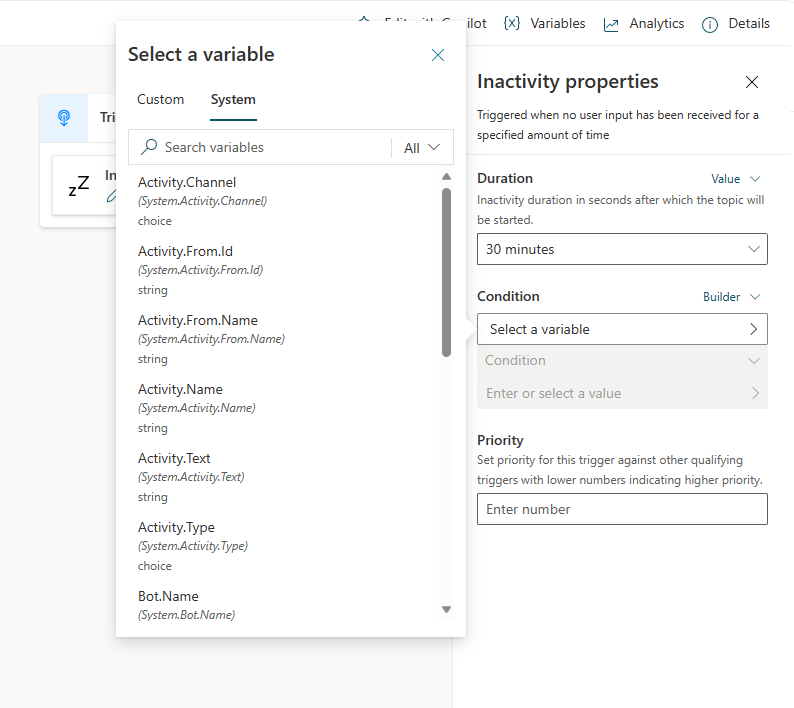
Select Dynamics 365 from the dropdown.
Finally, add a message, and at the end, add an End Conversation node so the conversation ends. Click on the (+) sign, select Topic management, and then select End conversation.
Finally, save and publish your copilot.
Manage your copilot's Dynamics 365 capabilities
Select Settings, Agent transfers, and then select the Dynamics 365 tile. Here you can disconnect your copilot and find the link to go to the Dynamics 365 Customer Service admin center to view the connection details.
Disconnect your copilot from Dynamics 365 Customer Service or disable the connection
If you select Disconnect, the application user that represents the copilot in your Dynamics 365 Customer Service instance is disabled. Your copilot effectively disconnects from the Dynamics 365 Customer Service environment and stops receiving any traffic from your Dynamics 365 Customer Service instance.
To add your copilot back, you need to connect it again, starting at Step 2.
Known limitations
See limitations when using Copilot Studio with the Chat Add-in for Dynamics 365 Customer Service.
Recommended extensions
The following extensions aren't required to hand off to Dynamics 365 Customer Service, but they provide copilot authors with a better experience by providing extra variables and actions.
Install Dynamics 365 Copilot Studio extension.
Prerequisites
Connect your copilot to Dynamics 365 Customer Service
Note
If you connected your copilot to Dynamics 365 Customer Service engagement before November 2021, the settings on the Dynamics 365 tile will look as if they haven't been configured. This is a known issue. It doesn't affect the copilot or its Dynamics 365 capabilities, which will continue to run normally. Select Enable to refresh the settings and show the actual connection details.
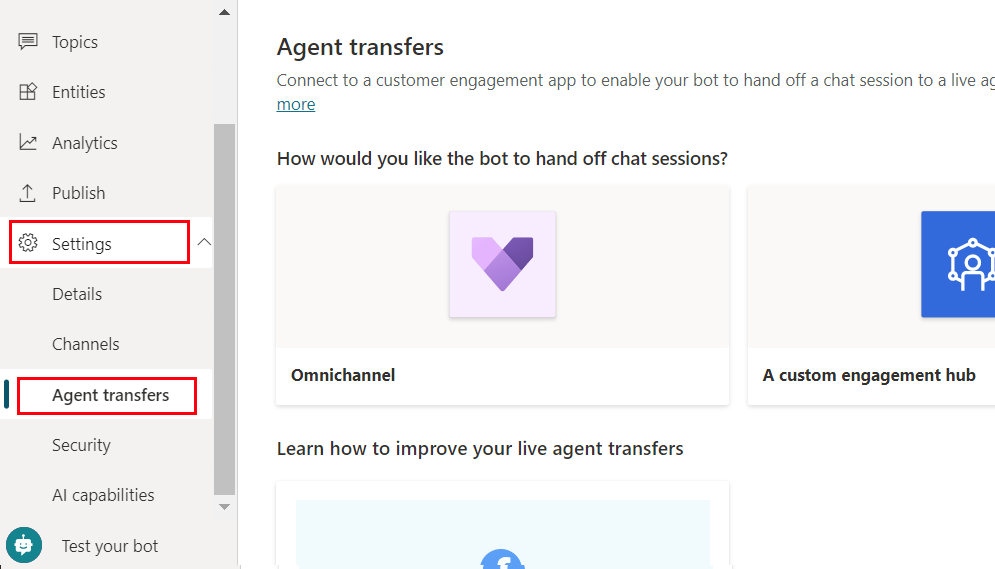
In Copilot Studio, edit your copilot. In the navigation menu, select Settings, Agent transfers, and then select the Dynamics 365 tile.
Select Enable.
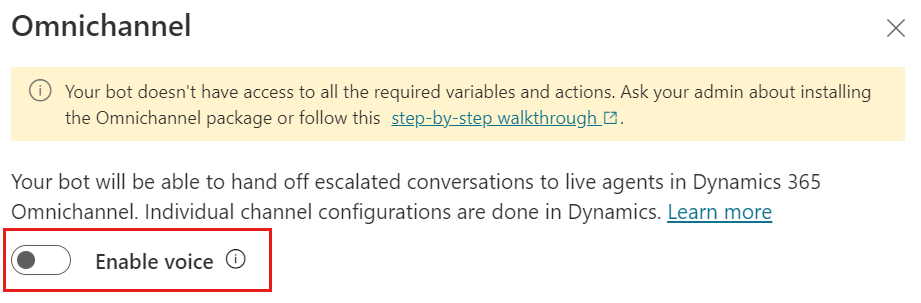
If the required extensions aren't installed, you see a message that your copilot doesn't have access to the variables, or actions it needs.

If you're using Application Lifecycle Management (ALM), you might see a message that we can't determine if Dynamics 365 Customer Service integration is enabled for the environment. For more information, see Copilots with ALM.
Under See the environment this copilot is connected to, select the environment where you have Dynamics 365 Customer Service integration turned on. If your copilot and Dynamics 365 Customer Service are in different environments, Analytics for Dynamics 365 Customer Service don't work for your copilot.
If you didn't set up Dynamics 365 Customer Service in that environment, you see a message that invites you to begin a trial.

Select See how to register a new Application ID and follow the steps to find or create the app registration for Copilot Studio.
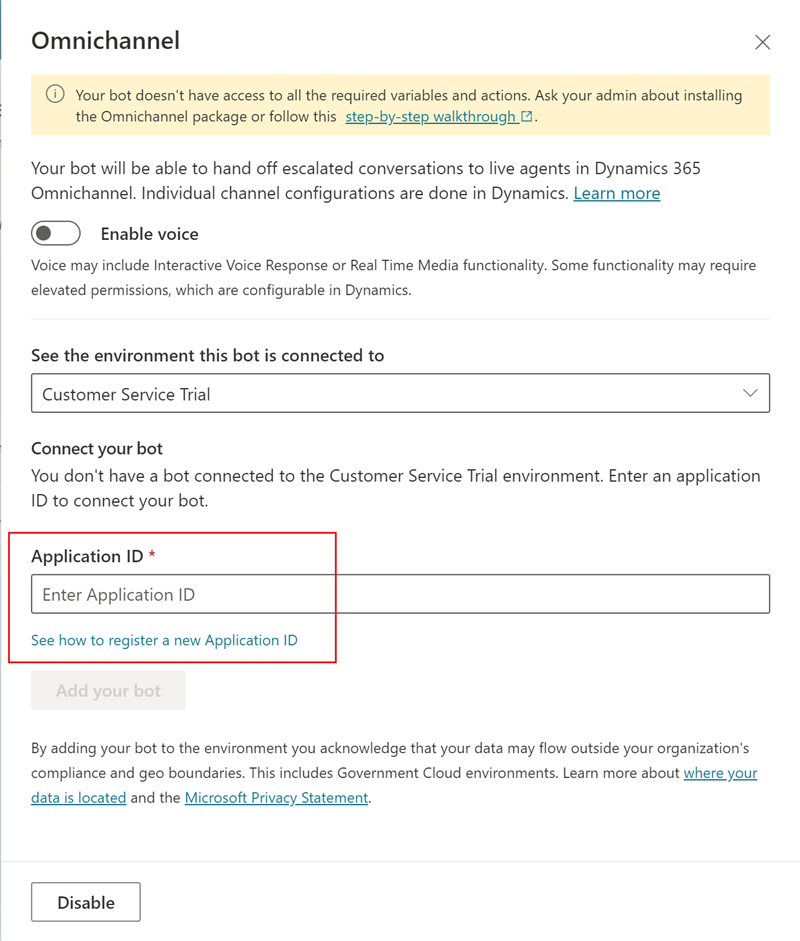
On the Azure portal go to App registrations, then select Overview. Copy the Application (client) ID.
Return to the Dynamics 365 pane in Copilot Studio and paste the Application ID in the Application ID box.
Important
Dynamics 365 Customer Service models copilots as "application users." As a result, the Application ID that you use must be unique to your Copilot Studio copilot. Reusing an Application ID across copilots will cause error code 1004 (DuplicateBotAppId).
Select Add your copilot.
Copilot Studio uses a Teams channel to communicate with Dynamics 365 Customer Service. If one isn't turned on, a Teams channel is enabled when you select Add your copilot.
Select the View details in Dynamics 365 link to continue configuring the copilot connection in Dynamics 365 Customer Service.
Important
To test the copilot on your custom website, you must use the embed code that's specified in the chat widget you set up in Dynamics 365 Customer Service. If you use the embed code from Copilot Studio, handoff won't work. For more information, see Embed chat widget in your website or portal.
To add voice capabilities after you connect your copilot to Dynamics 365 Customer Service, you must disconnect the copilot from your Dynamics 365 Customer Service and reconnect it.
Copilots with Application Lifecycle Management
If you set up Application Lifecycle Management (ALM) for your copilots, and are exporting and importing copilots between development (unmanaged) and test or production (managed) environments, you might see a message that we can't determine if Dynamics 365 Customer Service integration is enabled for the environment.
If the copilot you exported has Dynamics 365 capabilities enabled, you can ignore this message. The copilot continues to work properly. The message will disappear after you export the latest version of your copilot from your development environment, and then import it into a targeted test or production environment with managed copilots.
If you continue to see the message after you export and import the latest version of your managed copilot, make sure to remove any unmanaged layers:
Sign in to Power Apps and select the managed copilot's environment.
In the navigation menu, select Solutions, and then select the solution that contains the copilot with the unmanaged layer.
Next to the copilot component in the solution, select More commands (⋮), and then select See solution layers.
Select the unmanaged layer, and then select Remove unmanaged layer.
If your copilot doesn't have Dynamics 365 capabilities enabled, the message is always displayed.
Manage your copilot's Dynamics 365 capabilities
Select Settings, Agent transfers, and then select the Dynamics 365 tile. Here you can disconnect or disable your bot, refresh the connection, or open the Dynamics 365 Customer Service admin center to view the connection details.
Disconnect your bot from Dynamics 365 Customer Service or disable the connection
If you select Disconnect bot, the application user that represents the bot in your Dynamics 365 Customer Service instance is disabled. Your bot is effectively disconnected from the Dynamics 365 Customer Service environment.
To add your bot back, you need to connect it again, starting at Step 3.
If you select Disable, the connection between your Dynamics 365 Customer Service instance and Copilot Studio is disabled. Your bot stops receiving any traffic from your Dynamics 365 Customer Service instance.
Refresh the connection
If you select Refresh, the connection between your bot and the Dynamics 365 Customer Service instance is tested and verified.
It's a good idea to refresh the connection after you add your bot to an Dynamics 365 Customer Service workstream to make sure that the connection was successful.
Voice-based capabilities
The Copilot Studio telephony extension adds several actions and variables to Copilot Studio.
Select Enable voice to turn voice capabilities on or off for the entire bot, not for individual bot sessions or connections. When voice is enabled, any connection with the bot can use voice, text, or both voice and text.
Important
If a copilot is connected to an Dynamics 365 voice workstream or queue and takes calls, and the voice is disabled, the calls will start to fail. Ensure that the copilot is disconnected from Dynamics 365 workstreams or queues before you disable voice in the Copilot Studio configuration.
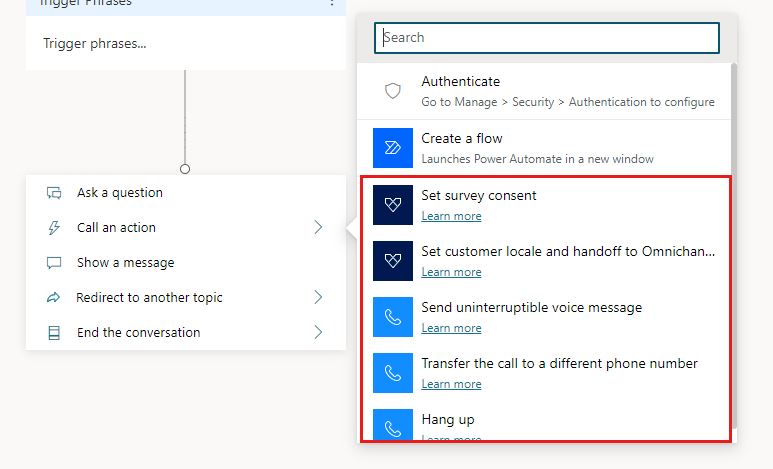
Set survey consent
Use this action to ask callers if they're willing to take a survey at the end of their call.
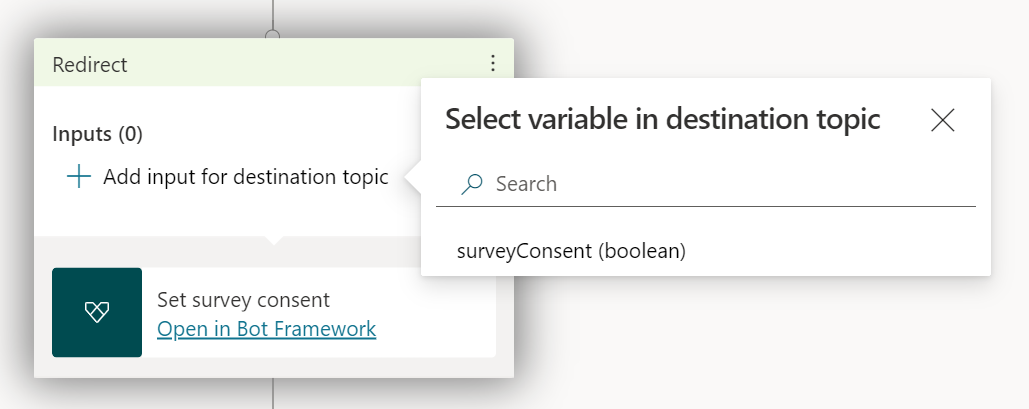
Add the action.
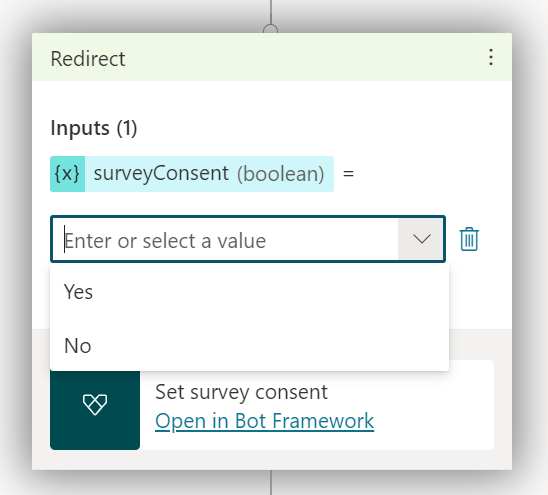
Select Add input for destination topic, and then select surveyConsent (boolean).
Select Yes or No, or enter a custom response.
Set customer locale and handoff to Dynamics 365 Customer Service
Use this action to ask callers for their preferred language.
Add the action.
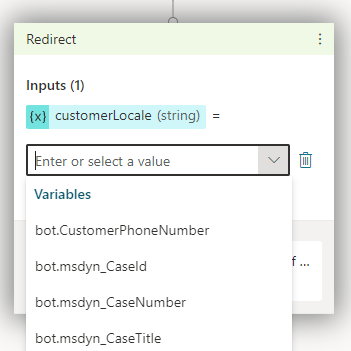
Select Add input for destination topic, and then select customerLocale (string).
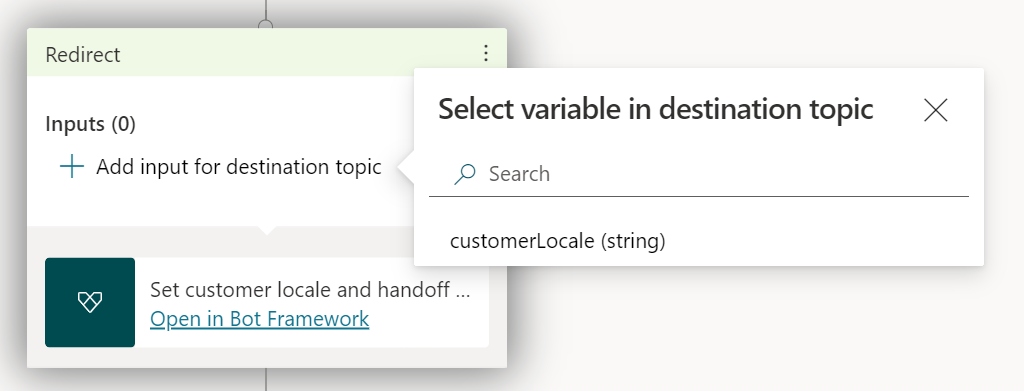
Select a variable that defines the locale code, or enter a locale code.
Refer to the list of languages supported in Dynamics 365 Customer Service for valid locale codes. Only a subset of these languages is supported in Copilot Studio. For more information, see Supported languages.
Send uninterruptible voice message
Use this action to send a voice message that the caller can't interrupt.
Add the action.
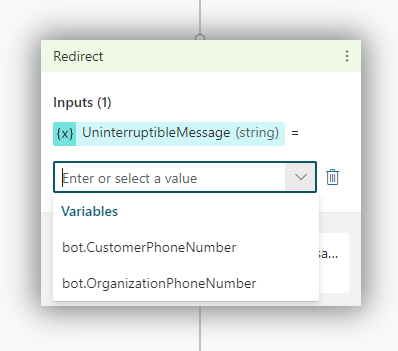
Select Add input for destination topic, and then select UninterruptibleMessage (string).
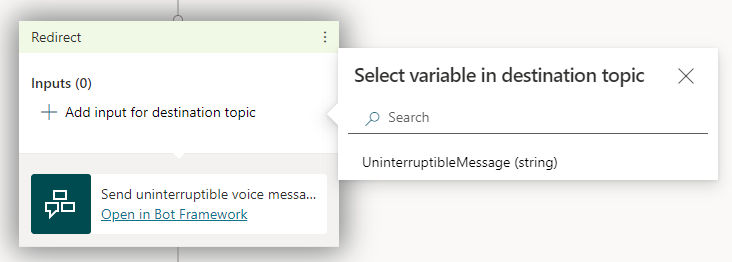
Select a variable that defines the message content, or enter a message.
Transfer the call to a different phone number
Use this action to transfer the call to a different phone number.
Add the action.
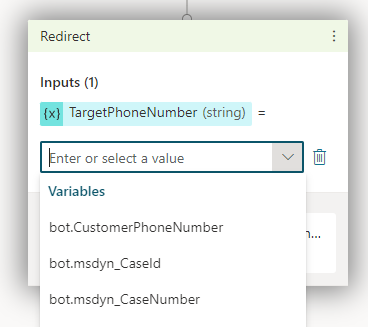
Select Add input for destination topic, and then select TargetPhoneNumber (string).
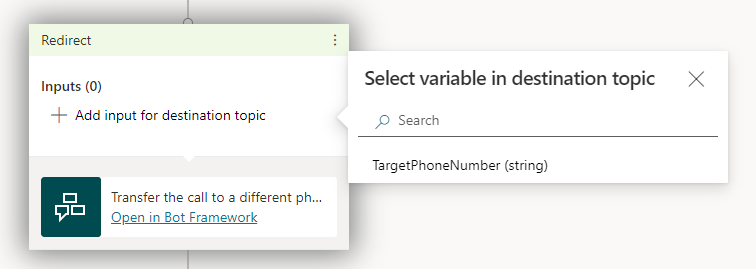
Select a variable that defines the phone number to transfer the call to, or enter a phone number.
Warning
Don't add a plus symbol, "+", before the phone number.
The phone number you enter must have the Make calls privilege. Without it, transfers to the number will fail.
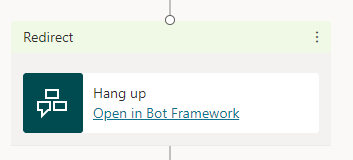
Hang up
Use this action to end the call.
Add the action.
bot.CustomerPhoneNumber
This variable contains the customer's phone number, also known as CallerID.
You can use the "Is Empty" condition with bot.CustomerPhoneNumber to find out the customer's communication channel. If the conversation is from a call, "Is Empty" always returns False. If it's from messaging, "Is Empty" always returns True.
bot.OrganizationPhoneNumber
This variable contains the phone number the customer dialed.
Dynamics 365 variables
Dynamics 365 Customer Service provides more context variables for Copilot Studio copilots.
Authoring considerations
Authentication isn't supported for voice-based handoff to Dynamics 365 Customer Service instances. If you set up authentication for your copilot, the authentication variables don't include authentication information when they're sent to your Dynamics 365 Customer Service instance.
If your copilot incorporates adaptive cards, make sure you use Bot Framework Composer so that the voice copilot correctly reads their speak property.
If your topics include markdown content, the voice copilot reads the asterisk (*). Adjust your markdown content accordingly, and always test your copilot using voice to make sure you get the desired result.
Known limitations
See limitations when using Copilot Studio with the Chat Add-in for Dynamics 365 Customer Service.
For limits on the size of variables that are shared with Dynamics 365 when Copilot Studio transfers the conversation, see Copilot Studio maximum channel data message size limits.
Recommended extensions
The following extensions aren't required to hand off to Dynamics 365 Customer Service, but they provide bot authors with a better experience by providing extra variables and actions.
Typically, the extensions are automatically installed in your Dynamics 365 Customer Service environment. However, if the environment that you connected Dynamics 365 Customer Service to isn't the same environment your copilot is in, you need to manually install the extensions.
Text and voice handoff
For both text and voice handoff, install the following extensions in this order:
- Power Virtual Agents telephony extension
- Dynamics 365 Copilot Studio extension
- Dynamics 365 Voice Copilot Studio extension
Text (messaging) handoff
For only Text (messaging) handoff, install Dynamics 365 Copilot Studio extension.
If you still see the following warning after installing the Dynamics 365 Copilot Studio extension, and you don't need voice capabilities, you can safely ignore it.