Avvio rapido: Creare un assistente vocale personalizzato
In questo argomento di avvio rapido si userà Speech SDK per creare un'applicazione di assistente vocale personalizzato che si connette a un bot già creato e configurato. Se è necessario creare un bot, vedere l'esercitazione correlata per una guida più completa.
Dopo aver soddisfatto alcuni prerequisiti, la connessione dell'assistente vocale personalizzato richiede solo pochi passaggi:
- Creare un oggetto
BotFrameworkConfigdalla chiave e dall'area di sottoscrizione. - Creare un oggetto
DialogServiceConnectortramite l'oggettoBotFrameworkConfigspecificato. - Usando l'oggetto
DialogServiceConnector, avviare il processo di ascolto per una singola espressione. - Controllare l'elemento
ActivityReceivedEventArgsrestituito.
Nota
Speech SDK per C++, JavaScript, Objective-C, Python e Swift supportano assistenti vocali personalizzati, ma non è ancora stata inclusa una guida qui.
È possibile visualizzare o scaricare tutti gli esempi C# di Speech SDK in GitHub.
Prerequisiti
Prima di iniziare, assicurarsi di:
- Creare una risorsa Voce
- Configurare l'ambiente di sviluppo e creare un progetto vuoto
- Creare un bot connesso al canale Direct Line Speech
- Assicurarsi di avere accesso a un microfono per l'acquisizione audio
Nota
Consultare l'elenco delle aree supportate per gli assistenti vocali e assicurarsi che le risorse vengano distribuite in una di queste aree.
Aprire il progetto in Visual Studio
Il primo passaggio consiste nel verificare che il progetto sia aperto in Visual Studio.
Iniziare con un codice boilerplate
Aggiungere codice che funga da scheletro del progetto.
In Esplora soluzioni aprire
MainPage.xaml.Nella visualizzazione XAML della finestra di progettazione sostituire l'intero contenuto con il frammento di codice seguente che definisce un'interfaccia utente rudimentale:
<Page
    x:Class="helloworld.MainPage"
    xmlns="http://schemas.microsoft.com/winfx/2006/xaml/presentation"
    xmlns:x="http://schemas.microsoft.com/winfx/2006/xaml"
    xmlns:local="using:helloworld"
    xmlns:d="http://schemas.microsoft.com/expression/blend/2008"
    xmlns:mc="http://schemas.openxmlformats.org/markup-compatibility/2006"
    mc:Ignorable="d"
    Background="{ThemeResource ApplicationPageBackgroundThemeBrush}">

    <Grid>
        <StackPanel Orientation="Vertical" HorizontalAlignment="Center"
                    Margin="20,50,0,0" VerticalAlignment="Center" Width="800">
            <Button x:Name="EnableMicrophoneButton" Content="Enable Microphone"
                    Margin="0,0,10,0" Click="EnableMicrophone_ButtonClicked"
                    Height="35"/>
            <Button x:Name="ListenButton" Content="Talk to your bot"
                    Margin="0,10,10,0" Click="ListenButton_ButtonClicked"
                    Height="35"/>
            <StackPanel x:Name="StatusPanel" Orientation="Vertical"
                        RelativePanel.AlignBottomWithPanel="True"
                        RelativePanel.AlignRightWithPanel="True"
                        RelativePanel.AlignLeftWithPanel="True">
                <TextBlock x:Name="StatusLabel" Margin="0,10,10,0"
                           TextWrapping="Wrap" Text="Status:" FontSize="20"/>
                <Border x:Name="StatusBorder" Margin="0,0,0,0">
                    <ScrollViewer VerticalScrollMode="Auto"
                                  VerticalScrollBarVisibility="Auto" MaxHeight="200">
                        <!-- Use LiveSetting to enable screen readers to announce
                             the status update. -->
                        <TextBlock
                            x:Name="StatusBlock" FontWeight="Bold"
                            AutomationProperties.LiveSetting="Assertive"
                            MaxWidth="{Binding ElementName=Splitter, Path=ActualWidth}"
                            Margin="10,10,10,20" TextWrapping="Wrap"  />
                    </ScrollViewer>
                </Border>
            </StackPanel>
        </StackPanel>
        <MediaElement x:Name="mediaElement"/>
    </Grid>
</Page>
La visualizzazione Progettazione viene aggiornata per mostrare l'interfaccia utente dell'applicazione.
- In Esplora soluzioni aprire il file di origine code-behind
MainPage.xaml.cs(raggruppato inMainPage.xaml). Sostituire il contenuto del file con il seguente, che include:
Istruzioni
usingper gli spazi dei nomiSpeecheSpeech.DialogUn'implementazione semplice per garantire l'accesso al microfono, collegato a un gestore del pulsante
Helper di base dell'interfaccia utente per presentare i messaggi e gli errori nell'applicazione
Un punto di destinazione per il percorso del codice di inizializzazione che verrà popolato più avanti
Helper per riprodurre il testo in voce (senza supporto per lo streaming)
Un gestore del pulsante vuoto per iniziare ad ascoltare che verrà popolato più avanti
using Microsoft.CognitiveServices.Speech;
using Microsoft.CognitiveServices.Speech.Audio;
using Microsoft.CognitiveServices.Speech.Dialog;
using System;
using System.Diagnostics;
using System.IO;
using System.Text;
using Windows.Foundation;
using Windows.Storage.Streams;
using Windows.UI.Xaml;
using Windows.UI.Xaml.Controls;
using Windows.UI.Xaml.Media;

namespace helloworld
{
    public sealed partial class MainPage : Page
    {
        private DialogServiceConnector connector;

        private enum NotifyType
        {
            StatusMessage,
            ErrorMessage
        };

        public MainPage()
        {
            this.InitializeComponent();
        }

        private async void EnableMicrophone_ButtonClicked(
            object sender, RoutedEventArgs e)
        {
            bool isMicAvailable = true;
            try
            {
                var mediaCapture = new Windows.Media.Capture.MediaCapture();
                var settings =
                    new Windows.Media.Capture.MediaCaptureInitializationSettings();
                settings.StreamingCaptureMode =
                    Windows.Media.Capture.StreamingCaptureMode.Audio;
                await mediaCapture.InitializeAsync(settings);
            }
            catch (Exception)
            {
                isMicAvailable = false;
            }
            if (!isMicAvailable)
            {
                await Windows.System.Launcher.LaunchUriAsync(
                    new Uri("ms-settings:privacy-microphone"));
            }
            else
            {
                NotifyUser("Microphone was enabled", NotifyType.StatusMessage);
            }
        }

        private void NotifyUser(
            string strMessage, NotifyType type = NotifyType.StatusMessage)
        {
            // If called from the UI thread, then update immediately.
            // Otherwise, schedule a task on the UI thread to perform the update.
            if (Dispatcher.HasThreadAccess)
            {
                UpdateStatus(strMessage, type);
            }
            else
            {
                var task = Dispatcher.RunAsync(
                    Windows.UI.Core.CoreDispatcherPriority.Normal,
                    () => UpdateStatus(strMessage, type));
            }
        }

        private void UpdateStatus(string strMessage, NotifyType type)
        {
            switch (type)
            {
                case NotifyType.StatusMessage:
                    StatusBorder.Background = new SolidColorBrush(
                        Windows.UI.Colors.Green);
                    break;
                case NotifyType.ErrorMessage:
                    StatusBorder.Background = new SolidColorBrush(
                        Windows.UI.Colors.Red);
                    break;
            }
            StatusBlock.Text += string.IsNullOrEmpty(StatusBlock.Text)
                ? strMessage : "\n" + strMessage;

            if (!string.IsNullOrEmpty(StatusBlock.Text))
            {
                StatusBorder.Visibility = Visibility.Visible;
                StatusPanel.Visibility = Visibility.Visible;
            }
            else
            {
                StatusBorder.Visibility = Visibility.Collapsed;
                StatusPanel.Visibility = Visibility.Collapsed;
            }
            // Raise an event if necessary to enable a screen reader
            // to announce the status update.
            var peer = Windows.UI.Xaml.Automation.Peers.FrameworkElementAutomationPeer.FromElement(StatusBlock);
            if (peer != null)
            {
                peer.RaiseAutomationEvent(
                    Windows.UI.Xaml.Automation.Peers.AutomationEvents.LiveRegionChanged);
            }
        }

        // Waits for and accumulates all audio associated with a given
        // PullAudioOutputStream and then plays it to the MediaElement. Long spoken
        // audio will create extra latency and a streaming playback solution
        // (that plays audio while it continues to be received) should be used --
        // see the samples for examples of this.
        private void SynchronouslyPlayActivityAudio(
            PullAudioOutputStream activityAudio)
        {
            var playbackStreamWithHeader = new MemoryStream();
            playbackStreamWithHeader.Write(Encoding.ASCII.GetBytes("RIFF"), 0, 4); // ChunkID
            playbackStreamWithHeader.Write(BitConverter.GetBytes(UInt32.MaxValue), 0, 4); // ChunkSize: max
            playbackStreamWithHeader.Write(Encoding.ASCII.GetBytes("WAVE"), 0, 4); // Format
            playbackStreamWithHeader.Write(Encoding.ASCII.GetBytes("fmt "), 0, 4); // Subchunk1ID
            playbackStreamWithHeader.Write(BitConverter.GetBytes(16), 0, 4); // Subchunk1Size: PCM
            playbackStreamWithHeader.Write(BitConverter.GetBytes(1), 0, 2); // AudioFormat: PCM
            playbackStreamWithHeader.Write(BitConverter.GetBytes(1), 0, 2); // NumChannels: mono
            playbackStreamWithHeader.Write(BitConverter.GetBytes(16000), 0, 4); // SampleRate: 16kHz
            playbackStreamWithHeader.Write(BitConverter.GetBytes(32000), 0, 4); // ByteRate
            playbackStreamWithHeader.Write(BitConverter.GetBytes(2), 0, 2); // BlockAlign
            playbackStreamWithHeader.Write(BitConverter.GetBytes(16), 0, 2); // BitsPerSample: 16-bit
            playbackStreamWithHeader.Write(Encoding.ASCII.GetBytes("data"), 0, 4); // Subchunk2ID
            playbackStreamWithHeader.Write(BitConverter.GetBytes(UInt32.MaxValue), 0, 4); // Subchunk2Size

            byte[] pullBuffer = new byte[2056];

            uint lastRead = 0;
            do
            {
                lastRead = activityAudio.Read(pullBuffer);
                playbackStreamWithHeader.Write(pullBuffer, 0, (int)lastRead);
            }
            while (lastRead == pullBuffer.Length);

            var task = Dispatcher.RunAsync(
                Windows.UI.Core.CoreDispatcherPriority.Normal, () =>
            {
                mediaElement.SetSource(
                    playbackStreamWithHeader.AsRandomAccessStream(), "audio/wav");
                mediaElement.Play();
            });
        }

        private void InitializeDialogServiceConnector()
        {
            // New code will go here
        }

        private async void ListenButton_ButtonClicked(
            object sender, RoutedEventArgs e)
        {
            // New code will go here
        }
    }
}
Aggiungere il frammento di codice seguente al corpo del metodo di
InitializeDialogServiceConnector. Tale codice crea l'elementoDialogServiceConnectorcon le informazioni della sottoscrizione.// Create a BotFrameworkConfig by providing a Speech service subscription key // the botConfig.Language property is optional (default en-US) const string speechSubscriptionKey = "YourSpeechSubscriptionKey"; // Your subscription key const string region = "YourServiceRegion"; // Your subscription service region. var botConfig = BotFrameworkConfig.FromSubscription(speechSubscriptionKey, region); botConfig.Language = "en-US"; connector = new DialogServiceConnector(botConfig);Nota
Consultare l'elenco delle aree supportate per gli assistenti vocali e assicurarsi che le risorse vengano distribuite in una di queste aree.
Nota
Per informazioni sulla configurazione del bot, vedere la documentazione di Bot Framework relativa al canale Direct Line Speech.
Sostituire le stringhe
YourSpeechSubscriptionKeyeYourServiceRegioncon i propri valori per la sottoscrizione e larea del servizio Voce.Aggiungere il frammento di codice seguente alla fine del corpo del metodo di
InitializeDialogServiceConnector. Tale codice imposta i gestori per gli eventi su cui si basaDialogServiceConnectorper comunicare le attività del bot, i risultati del riconoscimento vocale e altre informazioni.// ActivityReceived is the main way your bot will communicate with the client // and uses bot framework activities connector.ActivityReceived += (sender, activityReceivedEventArgs) => { NotifyUser( $"Activity received, hasAudio={activityReceivedEventArgs.HasAudio} activity={activityReceivedEventArgs.Activity}"); if (activityReceivedEventArgs.HasAudio) { SynchronouslyPlayActivityAudio(activityReceivedEventArgs.Audio); } }; // Canceled will be signaled when a turn is aborted or experiences an error condition connector.Canceled += (sender, canceledEventArgs) => { NotifyUser($"Canceled, reason={canceledEventArgs.Reason}"); if (canceledEventArgs.Reason == CancellationReason.Error) { NotifyUser( $"Error: code={canceledEventArgs.ErrorCode}, details={canceledEventArgs.ErrorDetails}"); } }; // Recognizing (not 'Recognized') will provide the intermediate recognized text // while an audio stream is being processed connector.Recognizing += (sender, recognitionEventArgs) => { NotifyUser($"Recognizing! in-progress text={recognitionEventArgs.Result.Text}"); }; // Recognized (not 'Recognizing') will provide the final recognized text // once audio capture is completed connector.Recognized += (sender, recognitionEventArgs) => { NotifyUser($"Final speech to text result: '{recognitionEventArgs.Result.Text}'"); }; // SessionStarted will notify when audio begins flowing to the service for a turn connector.SessionStarted += (sender, sessionEventArgs) => { NotifyUser($"Now Listening! Session started, id={sessionEventArgs.SessionId}"); }; // SessionStopped will notify when a turn is complete and // it's safe to begin listening again connector.SessionStopped += (sender, sessionEventArgs) => { NotifyUser($"Listening complete. Session ended, id={sessionEventArgs.SessionId}"); };Aggiungere il frammento di codice seguente al corpo del metodo
ListenButton_ButtonClickednella classeMainPage. Tale codice impostaDialogServiceConnectorper l'ascolto, dal momento che la configurazione è già stata stabilita e i gestori degli eventi sono già stati registrati.if (connector == null) { InitializeDialogServiceConnector(); // Optional step to speed up first interaction: if not called, // connection happens automatically on first use var connectTask = connector.ConnectAsync(); } try { // Start sending audio to your speech-enabled bot var listenTask = connector.ListenOnceAsync(); // You can also send activities to your bot as JSON strings -- // Microsoft.Bot.Schema can simplify this string speakActivity = @"{""type"":""message"",""text"":""Greeting Message"", ""speak"":""Hello there!""}"; await connector.SendActivityAsync(speakActivity); } catch (Exception ex) { NotifyUser($"Exception: {ex.ToString()}", NotifyType.ErrorMessage); }
Compilare ed eseguire l'app
A questo punto è possibile compilare l'app e testare l'assistente vocale personalizzato con il servizio Voce.
Dalla barra dei menu scegliere Compila>Compila soluzione per compilare l'applicazione. Il codice dovrebbe ora risultare compilato senza errori.
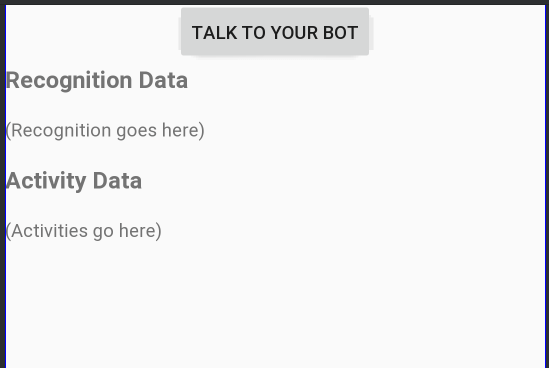
Scegliere Debug>Avvia debug o premere F5 per avviare l'applicazione. Verrà visualizzata la finestra helloworld.
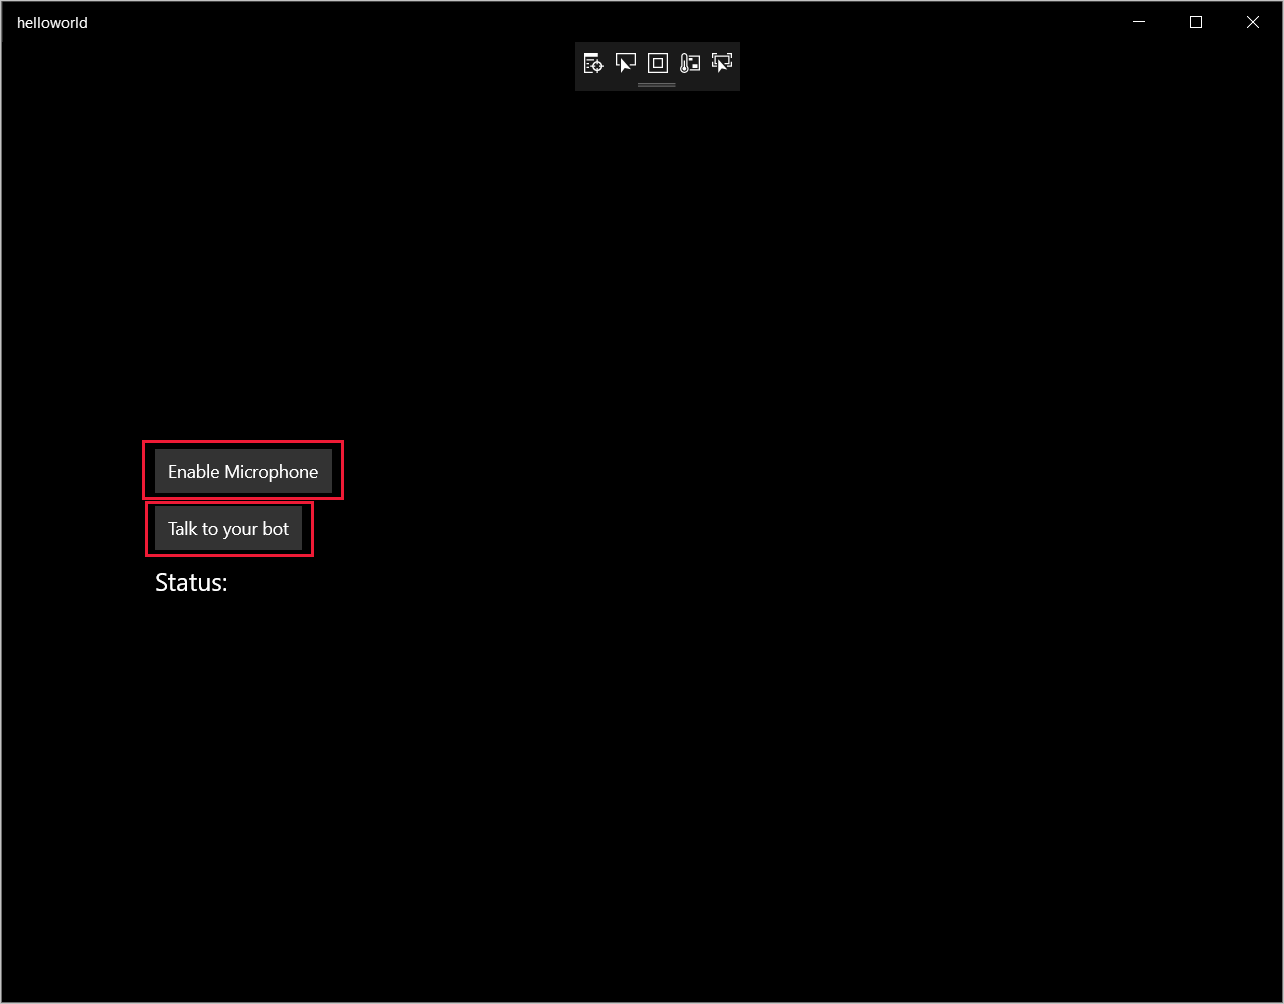
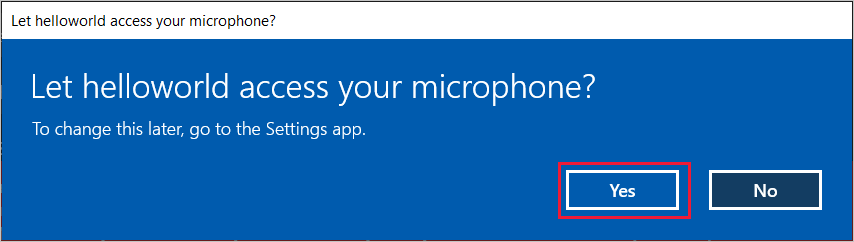
Fare clic su Enable Microphone (Abilita microfono) e, quando viene visualizzata la richiesta di autorizzazione di accesso, fare clic su Sì.
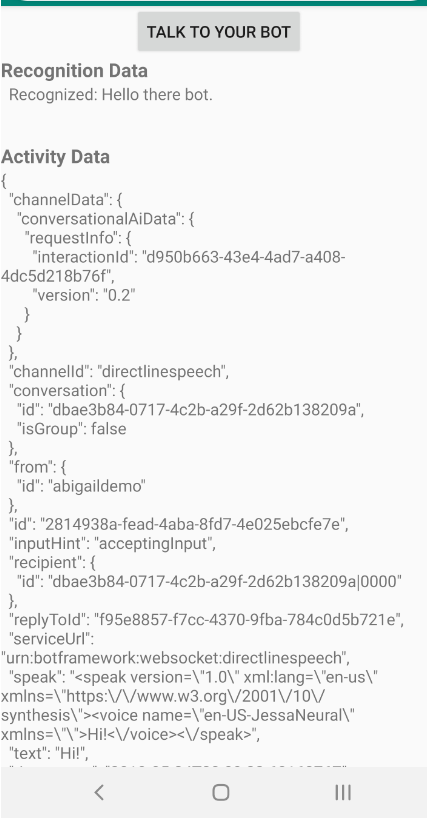
Selezionare Talk to your bot (Parla al bot) e pronunciare una frase o un'espressione nel microfono del dispositivo. Il contenuto vocale viene trasmesso al canale Direct Line Speech e trascritto come testo che viene visualizzato nella finestra.
Passaggi successivi
È possibile visualizzare o scaricare tutti gli esempi Java di Speech SDK in GitHub.
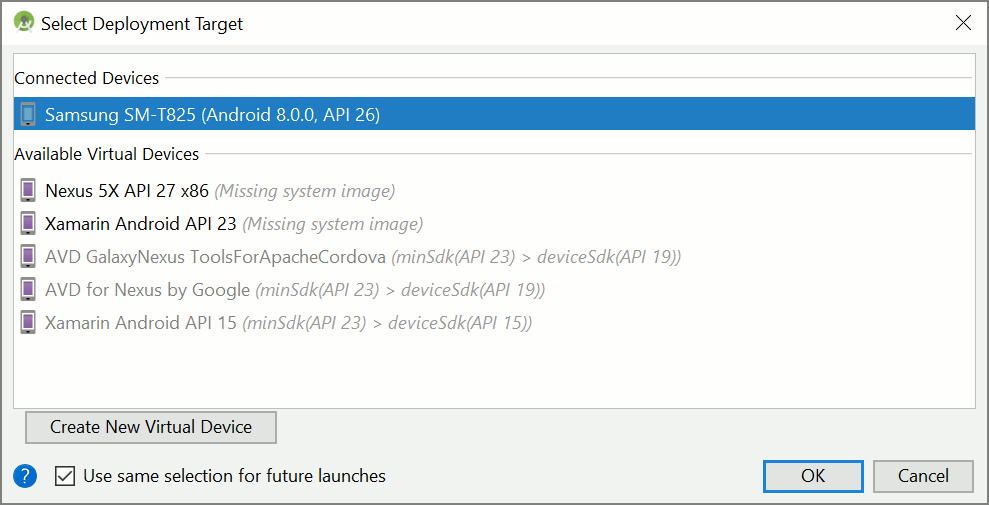
Scegliere l'ambiente di destinazione
Prerequisiti
Prima di iniziare, assicurarsi di:
- Creare una risorsa Voce
- Configurare l'ambiente di sviluppo e creare un progetto vuoto
- Creare un bot connesso al canale Direct Line Speech
- Assicurarsi di avere accesso a un microfono per l'acquisizione audio
Nota
Consultare l'elenco delle aree supportate per gli assistenti vocali e assicurarsi che le risorse vengano distribuite in una di queste aree.
Creare e configurare un progetto
Creare un progetto Eclipse e installare Speech SDK.
Per abilitare la registrazione, aggiornare inoltre il file pom.xml in modo da includere la dipendenza seguente:
 <dependency>
     <groupId>org.slf4j</groupId>
     <artifactId>slf4j-simple</artifactId>
     <version>1.7.5</version>
 </dependency>
Aggiungere il codice di esempio
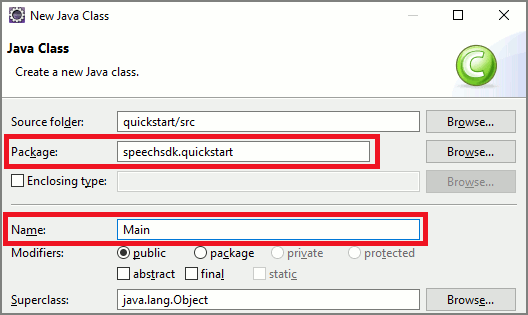
Per aggiungere una nuova classe vuota al progetto Java, selezionare File>Nuovo>Classe.
Nella finestra Nuova classe Java immettere speechsdk.quickstart nel campo Pacchetto e Main nel campo Nome.
Aprire la classe
Mainappena creata e sostituire il contenuto del fileMain.javacon il codice iniziale seguente:package speechsdk.quickstart; import com.microsoft.cognitiveservices.speech.audio.AudioConfig; import com.microsoft.cognitiveservices.speech.audio.PullAudioOutputStream; import com.microsoft.cognitiveservices.speech.dialog.BotFrameworkConfig; import com.microsoft.cognitiveservices.speech.dialog.DialogServiceConnector; import org.slf4j.Logger; import org.slf4j.LoggerFactory; import javax.sound.sampled.AudioFormat; import javax.sound.sampled.AudioSystem; import javax.sound.sampled.DataLine; import javax.sound.sampled.SourceDataLine; import java.io.InputStream; public class Main { final Logger log = LoggerFactory.getLogger(Main.class); public static void main(String[] args) { // New code will go here } private void playAudioStream(PullAudioOutputStream audio) { ActivityAudioStream stream = new ActivityAudioStream(audio); final ActivityAudioStream.ActivityAudioFormat audioFormat = stream.getActivityAudioFormat(); final AudioFormat format = new AudioFormat( AudioFormat.Encoding.PCM_SIGNED, audioFormat.getSamplesPerSecond(), audioFormat.getBitsPerSample(), audioFormat.getChannels(), audioFormat.getFrameSize(), audioFormat.getSamplesPerSecond(), false); try { int bufferSize = format.getFrameSize(); final byte[] data = new byte[bufferSize]; SourceDataLine.Info info = new DataLine.Info(SourceDataLine.class, format); SourceDataLine line = (SourceDataLine) AudioSystem.getLine(info); line.open(format); if (line != null) { line.start(); int nBytesRead = 0; while (nBytesRead != -1) { nBytesRead = stream.read(data); if (nBytesRead != -1) { line.write(data, 0, nBytesRead); } } line.drain(); line.stop(); line.close(); } stream.close(); } catch (Exception e) { e.printStackTrace(); } } }Nel metodo
mainè prima necessario configurareDialogServiceConfige usarlo per creare un'istanza diDialogServiceConnector. Questa istanza si connette al canale Direct Line Speech per interagire con il bot. Viene inoltre usata un'istanza diAudioConfigper specificare l'origine dell'input audio. In questo esempio il microfono predefinito viene usato conAudioConfig.fromDefaultMicrophoneInput().- Sostituire la stringa
YourSubscriptionKeycon la chiave della risorsa Voce, che è possibile ottenere dal portale di Azure. - Sostituire la stringa con l'area
YourServiceRegionassociata alla risorsa Voce.
Nota
Consultare l'elenco delle aree supportate per gli assistenti vocali e assicurarsi che le risorse vengano distribuite in una di queste aree.
final String subscriptionKey = "YourSubscriptionKey"; // Your subscription key final String region = "YourServiceRegion"; // Your speech subscription service region final BotFrameworkConfig botConfig = BotFrameworkConfig.fromSubscription(subscriptionKey, region); // Configure audio input from a microphone. final AudioConfig audioConfig = AudioConfig.fromDefaultMicrophoneInput(); // Create a DialogServiceConnector instance. final DialogServiceConnector connector = new DialogServiceConnector(botConfig, audioConfig);- Sostituire la stringa
Il connettore
DialogServiceConnectorsi basa su diversi eventi per comunicare le attività del bot, i risultati del riconoscimento vocale e altre informazioni. Aggiungere più avanti questi listener di eventi.// Recognizing will provide the intermediate recognized text while an audio stream is being processed. connector.recognizing.addEventListener((o, speechRecognitionResultEventArgs) -> { log.info("Recognizing speech event text: {}", speechRecognitionResultEventArgs.getResult().getText()); }); // Recognized will provide the final recognized text once audio capture is completed. connector.recognized.addEventListener((o, speechRecognitionResultEventArgs) -> { log.info("Recognized speech event reason text: {}", speechRecognitionResultEventArgs.getResult().getText()); }); // SessionStarted will notify when audio begins flowing to the service for a turn. connector.sessionStarted.addEventListener((o, sessionEventArgs) -> { log.info("Session Started event id: {} ", sessionEventArgs.getSessionId()); }); // SessionStopped will notify when a turn is complete and it's safe to begin listening again. connector.sessionStopped.addEventListener((o, sessionEventArgs) -> { log.info("Session stopped event id: {}", sessionEventArgs.getSessionId()); }); // Canceled will be signaled when a turn is aborted or experiences an error condition. connector.canceled.addEventListener((o, canceledEventArgs) -> { log.info("Canceled event details: {}", canceledEventArgs.getErrorDetails()); connector.disconnectAsync(); }); // ActivityReceived is the main way your bot will communicate with the client and uses Bot Framework activities. connector.activityReceived.addEventListener((o, activityEventArgs) -> { final String act = activityEventArgs.getActivity().serialize(); log.info("Received activity {} audio", activityEventArgs.hasAudio() ? "with" : "without"); if (activityEventArgs.hasAudio()) { playAudioStream(activityEventArgs.getAudio()); } });Per connettere
DialogServiceConnectora Direct Line Speech, richiamare il metodoconnectAsync(). Per testare il bot, è possibile richiamare il metodolistenOnceAsyncper inviare l'input audio dal microfono. Inoltre, è anche possibile usare il metodosendActivityAsyncper inviare un'attività personalizzata sotto forma di stringa serializzata. Queste attività personalizzate possono fornire dati aggiuntivi che verranno usati dal bot nella conversazione.connector.connectAsync(); // Start listening. System.out.println("Say something ..."); connector.listenOnceAsync(); // connector.sendActivityAsync(...)Salvare le modifiche apportate al file
Main.Per supportare la riproduzione delle risposte, verrà aggiunta un'ulteriore classe che trasformerà l'oggetto PullAudioOutputStream restituito dall'API getAudio() in un oggetto Java InputStream per una gestione semplificata. Questo oggetto
ActivityAudioStreamè una classe specializzata che gestirà la risposta audio restituita dal canale Direct Line Speech. Fornirà le funzioni di accesso per il recupero delle informazioni sul formato audio necessarie per la gestione della riproduzione. Selezionare quindi File>New (Nuovo) >Class (Classe).Nella finestra New Java Class (Nuova classe Java) immettere speechsdk.quickstart nel campo Package (Pacchetto) e ActivityAudioStream nel campo Name (Nome).
Aprire la classe
ActivityAudioStreamappena creata e sostituirne il contenuto con il codice seguente:package com.speechsdk.quickstart; import com.microsoft.cognitiveservices.speech.audio.PullAudioOutputStream; import java.io.IOException; import java.io.InputStream; public final class ActivityAudioStream extends InputStream { /** * The number of samples played per second (16 kHz). */ public static final long SAMPLE_RATE = 16000; /** * The number of bits in each sample of a sound that has this format (16 bits). */ public static final int BITS_PER_SECOND = 16; /** * The number of audio channels in this format (1 for mono). */ public static final int CHANNELS = 1; /** * The number of bytes in each frame of a sound that has this format (2). */ public static final int FRAME_SIZE = 2; /** * Reads up to a specified maximum number of bytes of data from the audio * stream, putting them into the given byte array. * * @param b the buffer into which the data is read * @param off the offset, from the beginning of array <code>b</code>, at which * the data will be written * @param len the maximum number of bytes to read * @return the total number of bytes read into the buffer, or -1 if there * is no more data because the end of the stream has been reached */ @Override public int read(byte[] b, int off, int len) { byte[] tempBuffer = new byte[len]; int n = (int) this.pullStreamImpl.read(tempBuffer); for (int i = 0; i < n; i++) { if (off + i > b.length) { throw new ArrayIndexOutOfBoundsException(b.length); } b[off + i] = tempBuffer[i]; } if (n == 0) { return -1; } return n; } /** * Reads the next byte of data from the activity audio stream if available. * * @return the next byte of data, or -1 if the end of the stream is reached * @see #read(byte[], int, int) * @see #read(byte[]) * @see #available * <p> */ @Override public int read() { byte[] data = new byte[1]; int temp = read(data); if (temp <= 0) { // we have a weird situation if read(byte[]) returns 0! return -1; } return data[0] & 0xFF; } /** * Reads up to a specified maximum number of bytes of data from the activity audio stream, * putting them into the given byte array. * * @param b the buffer into which the data is read * @return the total number of bytes read into the buffer, or -1 if there * is no more data because the end of the stream has been reached */ @Override public int read(byte[] b) { int n = (int) pullStreamImpl.read(b); if (n == 0) { return -1; } return n; } /** * Skips over and discards a specified number of bytes from this * audio input stream. * * @param n the requested number of bytes to be skipped * @return the actual number of bytes skipped * @throws IOException if an input or output error occurs * @see #read * @see #available */ @Override public long skip(long n) { if (n <= 0) { return 0; } if (n <= Integer.MAX_VALUE) { byte[] tempBuffer = new byte[(int) n]; return read(tempBuffer); } long count = 0; for (long i = n; i > 0; i -= Integer.MAX_VALUE) { int size = (int) Math.min(Integer.MAX_VALUE, i); byte[] tempBuffer = new byte[size]; count += read(tempBuffer); } return count; } /** * Closes this audio input stream and releases any system resources associated * with the stream. */ @Override public void close() { this.pullStreamImpl.close(); } /** * Fetch the audio format for the ActivityAudioStream. The ActivityAudioFormat defines the sample rate, bits per sample, and the # channels. * * @return instance of the ActivityAudioFormat associated with the stream */ public ActivityAudioStream.ActivityAudioFormat getActivityAudioFormat() { return activityAudioFormat; } /** * Returns the maximum number of bytes that can be read (or skipped over) from this * audio input stream without blocking. * * @return the number of bytes that can be read from this audio input stream without blocking. * As this implementation does not buffer, this will be defaulted to 0 */ @Override public int available() { return 0; } public ActivityAudioStream(final PullAudioOutputStream stream) { pullStreamImpl = stream; this.activityAudioFormat = new ActivityAudioStream.ActivityAudioFormat(SAMPLE_RATE, BITS_PER_SECOND, CHANNELS, FRAME_SIZE, AudioEncoding.PCM_SIGNED); } private PullAudioOutputStream pullStreamImpl; private ActivityAudioFormat activityAudioFormat; /** * ActivityAudioFormat is an internal format which contains metadata regarding the type of arrangement of * audio bits in this activity audio stream. */ static class ActivityAudioFormat { private long samplesPerSecond; private int bitsPerSample; private int channels; private int frameSize; private AudioEncoding encoding; public ActivityAudioFormat(long samplesPerSecond, int bitsPerSample, int channels, int frameSize, AudioEncoding encoding) { this.samplesPerSecond = samplesPerSecond; this.bitsPerSample = bitsPerSample; this.channels = channels; this.encoding = encoding; this.frameSize = frameSize; } /** * Fetch the number of samples played per second for the associated audio stream format. * * @return the number of samples played per second */ public long getSamplesPerSecond() { return samplesPerSecond; } /** * Fetch the number of bits in each sample of a sound that has this audio stream format. * * @return the number of bits per sample */ public int getBitsPerSample() { return bitsPerSample; } /** * Fetch the number of audio channels used by this audio stream format. * * @return the number of channels */ public int getChannels() { return channels; } /** * Fetch the default number of bytes in a frame required by this audio stream format. * * @return the number of bytes */ public int getFrameSize() { return frameSize; } /** * Fetch the audio encoding type associated with this audio stream format. * * @return the encoding associated */ public AudioEncoding getEncoding() { return encoding; } } /** * Enum defining the types of audio encoding supported by this stream. */ public enum AudioEncoding { PCM_SIGNED("PCM_SIGNED"); String value; AudioEncoding(String value) { this.value = value; } } }Salvare le modifiche apportate al file
ActivityAudioStream.
Compilare ed eseguire l'app
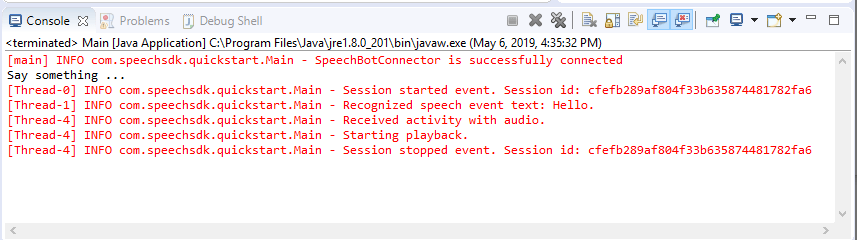
Premere F11 o selezionare Esegui>Debug.
La console visualizza il messaggio "Dire qualcosa". A questo punto, parla una frase o una frase inglese che il bot può comprendere. La frase viene trasmessa al bot tramite il canale Direct Line Speech in cui viene riconosciuta ed elaborata dal bot. La risposta viene restituita come un'entità. Se il bot restituisce una risposta di tipo parlato, l'audio verrà riprodotto usando la classe AudioPlayer.
Passaggi successivi
È possibile visualizzare o scaricare tutti gli esempi Go di Speech SDK in GitHub.
Prerequisiti
Prima di iniziare:
- Creare una risorsa voce
- Configurare l'ambiente di sviluppo e creare un progetto vuoto
- Creare un bot connesso al canale Direct Line Speech
- Assicurarsi di avere accesso a un microfono per l'acquisizione audio
Nota
Consultare l'elenco delle aree supportate per gli assistenti vocali e assicurarsi che le risorse vengano distribuite in una di queste aree.
Configurare l'ambiente
Aggiornare il file go.mod con la versione più recente dell'SDK aggiungendo questa riga
require (
    github.com/Microsoft/cognitive-services-speech-sdk-go v1.15.0
)
Iniziare con un codice boilerplate
Sostituire il contenuto del file origine (ad esempio, quickstart.go) con il seguente, che include:
- definizione del pacchetto "principale"
- importazione dei moduli necessari dall'SDK di Voce
- variabili per l'archiviazione delle informazioni bot che verranno sostituite più avanti in questo argomento di Avvio rapido
- implementazione semplice con il microfono per l'input audio
- gestori dell’evento per diversi eventi che si verificano durante un'interazione con il riconoscimento vocale
package main

import (
    "fmt"
    "time"

    "github.com/Microsoft/cognitive-services-speech-sdk-go/audio"
    "github.com/Microsoft/cognitive-services-speech-sdk-go/dialog"
    "github.com/Microsoft/cognitive-services-speech-sdk-go/speech"
)

func main() {
    subscription :=  "YOUR_SUBSCRIPTION_KEY"
    region := "YOUR_BOT_REGION"

    audioConfig, err := audio.NewAudioConfigFromDefaultMicrophoneInput()
    if err != nil {
        fmt.Println("Got an error: ", err)
        return
    }
    defer audioConfig.Close()
    config, err := dialog.NewBotFrameworkConfigFromSubscription(subscription, region)
    if err != nil {
        fmt.Println("Got an error: ", err)
        return
    }
    defer config.Close()
    connector, err := dialog.NewDialogServiceConnectorFromConfig(config, audioConfig)
    if err != nil {
        fmt.Println("Got an error: ", err)
        return
    }
    defer connector.Close()
    activityReceivedHandler := func(event dialog.ActivityReceivedEventArgs) {
        defer event.Close()
        fmt.Println("Received an activity.")
    }
    connector.ActivityReceived(activityReceivedHandler)
    recognizedHandle := func(event speech.SpeechRecognitionEventArgs) {
        defer event.Close()
        fmt.Println("Recognized ", event.Result.Text)
    }
    connector.Recognized(recognizedHandle)
    recognizingHandler := func(event speech.SpeechRecognitionEventArgs) {
        defer event.Close()
        fmt.Println("Recognizing ", event.Result.Text)
    }
    connector.Recognizing(recognizingHandler)
    connector.ListenOnceAsync()
    <-time.After(10 * time.Second)
}
Sostituire i valori YOUR_SUBSCRIPTION_KEY e YOUR_BOT_REGION con i valori effettivi della risorsa Voce.
Passare al portale di Azure e aprire la risorsa Voce
In Chiavi ed endpoint a sinistra sono disponibili due chiavi di sottoscrizione
- Usare una delle due in sostituzione del valore
YOUR_SUBSCRIPTION_KEY
- Usare una delle due in sostituzione del valore
In Panoramica a sinistra prendere nota dell'area e associarla all'identificatore di area
- Usare l'identificatore di area in sostituzione del valore
YOUR_BOT_REGION, ad esempio"westus"per Stati Uniti occidentali
Nota
Consultare l'elenco delle aree supportate per gli assistenti vocali e assicurarsi che le risorse vengano distribuite in una di queste aree.
Nota
Per informazioni sulla configurazione del bot, vedere la documentazione di Bot Framework relativa al canale Direct Line Speech.
- Usare l'identificatore di area in sostituzione del valore
Spiegazione del codice
Per creare un oggetto di configurazione vocale sono necessarie la chiave e l'area della sottoscrizione di Voce. L'oggetto di configurazione è necessario per creare un'istanza di un oggetto riconoscimento vocale.
L'istanza del riconoscimento espone diversi modi per il riconoscimento vocale. In questo esempio, la voce viene riconosciuta in modo continuativo. Questa funzionalità consente al servizio Voce di rilevare che si sta inviando molte frasi per il riconoscimento e di interrompere il riconoscimento vocale una volta terminato il programma. Quando i risultati vengono restituiti, il codice li scrive nella console.
Compilazione ed esecuzione
A questo punto è possibile configurare per compilare il progetto e testare l'assistente vocale personalizzato con il servizio Voce.
- Compilare il progetto, ad esempio, "passare a Compilazione"
- Eseguire il modulo e pronunciare una frase o un'espressione nel microfono del dispositivo. Il contenuto vocale viene trasmesso al canale Direct Line Speech e trascritto come testo che viene come output.
Nota
Speech SDK per impostazione predefinita riconosce l'uso di en-us per la lingua, vedere Come riconoscere la voce per informazioni sulla scelta della lingua di origine.
Passaggi successivi
Supporto per piattaforme e linguaggi aggiuntivi
Se si è fatto clic su questa scheda, è probabile che non sia stato visualizzato un argomento di avvio rapido nel linguaggio di programmazione preferito. In GitHub sono comunque disponibili altri articoli ed esempi di codice. Usare la tabella per trovare l'esempio appropriato per il proprio linguaggio di programmazione e la combinazione di piattaforma/sistema operativo.
| Linguaggio | Esempi di codice |
|---|---|
| C# | .NET Framework, .NET Core, UWP, Unity, Xamarin |
| C++ | Windows, Linux, macOS |
| Java | Android, JRE |
| JavaScript | Browser, Node.js |
| Objective-C | iOS, macOS |
| Python | Windows, Linux, macOS |
| Swift | iOS, macOS |