クイック スタート:Azure Stack Hub 内で PowerShell を使用して Linux サーバー VM を作成する
Azure Stack Hub PowerShell を使用して Ubuntu Server 20.04 LTS 仮想マシン (VM) を作成できます。 この記事では、仮想マシンを作成し、使用します。 この記事では、次の方法についても説明します。
- リモート クライアントを使用して VM に接続する。
- NGINX Web サーバーをインストールし、既定のホーム ページを表示する。
- 使用されていないリソースをクリーンアップします。
前提条件
Azure Stack Hub Marketplace 内の Linux イメージ。 Azure Stack Hub Marketplace には、既定では Linux イメージが含まれていません。 Azure Stack Hub オペレーターに、必要な Ubuntu Server 20.04 LTS イメージを提供してもらう。 オペレーターは、「Azure から Azure Stack Hub に Marketplace の項目をダウンロードする」の手順を使用できます。
Azure Stack Hub には、そのリソースを作成して管理するために、Azure CLI の特定のバージョンが必要です。
- Azure Stack Hub 用に構成された PowerShell がない場合は、「PowerShell for Azure Stack Hub をインストールする」を参照してください。
- Azure Stack Hub PowerShell を設定したら、ご自身の Azure Stack Hub 環境に接続します。 手順については、「ユーザーとして PowerShell を使用して Azure Stack Hub に接続する」を参照してください。
Windows ユーザー プロファイルの .ssh ディレクトリに保存された id_rsa.pub という名前の Secure Shell (SSH) 公開キー。 SSH キーの作成の詳細については、「Azure Stack Hub で SSH キーの組を使用する」を参照してください。
リソース グループを作成する
リソース グループは、Azure Stack Hub リソースのデプロイと管理を行うことができる論理コンテナーです。 リソース グループを作成するには、次のコード ブロックを実行してください。
Note
次のコード例では、すべての変数に値が割り当てられています。 しかし、独自の値を割り当てることができます。
# Create variables to store the location and resource group names.
$location = "local"
$ResourceGroupName = "myResourceGroup"

New-AzResourceGroup `
  -Name $ResourceGroupName `
  -Location $location
ストレージ リソースの作成
ブート診断の出力を格納するために使用されるストレージ アカウントを作成します。
# Create variables to store the storage account name and the storage account SKU information
$StorageAccountName = "mystorageaccount"
$SkuName = "Standard_LRS"

# Create a new storage account
$StorageAccount = New-AzStorageAccount `
  -Location $location `
  -ResourceGroupName $ResourceGroupName `
  -Type $SkuName `
  -Name $StorageAccountName

Set-AzCurrentStorageAccount `
  -StorageAccountName $storageAccountName `
  -ResourceGroupName $resourceGroupName
ネットワーク リソースの作成
仮想ネットワーク、サブネット、パブリック IP アドレスを作成します。 これらのリソースは、VM にネットワーク接続を提供するために使用されます。
# Create a subnet configuration
$subnetConfig = New-AzVirtualNetworkSubnetConfig `
  -Name mySubnet `
  -AddressPrefix 192.168.1.0/24

# Create a virtual network
$vnet = New-AzVirtualNetwork `
  -ResourceGroupName $ResourceGroupName `
  -Location $location `
  -Name MyVnet `
  -AddressPrefix 192.168.0.0/16 `
  -Subnet $subnetConfig

# Create a public IP address and specify a DNS name
$pip = New-AzPublicIpAddress `
  -ResourceGroupName $ResourceGroupName `
  -Location $location `
  -AllocationMethod Static `
  -IdleTimeoutInMinutes 4 `
  -Name "mypublicdns$(Get-Random)"
ネットワーク セキュリティ グループとネットワーク セキュリティ グループの規則を作成する
ネットワーク セキュリティ グループは、受信規則と送信規則を使用して VM をセキュリティで保護します。 ポート 3389 に、受信リモート デスクトップ接続を許可する受信規則を作成し、ポート 80 に、受信 Web トラフィックを許可する受信規則を作成します。
# Create variables to store the network security group and rules names.
$nsgName = "myNetworkSecurityGroup"
$nsgRuleSSHName = "myNetworkSecurityGroupRuleSSH"
$nsgRuleWebName = "myNetworkSecurityGroupRuleWeb"


# Create an inbound network security group rule for port 22
$nsgRuleSSH = New-AzNetworkSecurityRuleConfig -Name $nsgRuleSSHName -Protocol Tcp `
-Direction Inbound -Priority 1000 -SourceAddressPrefix * -SourcePortRange * -DestinationAddressPrefix * `
-DestinationPortRange 22 -Access Allow

# Create an inbound network security group rule for port 80
$nsgRuleWeb = New-AzNetworkSecurityRuleConfig -Name $nsgRuleWebName -Protocol Tcp `
-Direction Inbound -Priority 1001 -SourceAddressPrefix * -SourcePortRange * -DestinationAddressPrefix * `
-DestinationPortRange 80 -Access Allow

# Create a network security group
$nsg = New-AzNetworkSecurityGroup -ResourceGroupName $ResourceGroupName -Location $location `
-Name $nsgName -SecurityRules $nsgRuleSSH,$nsgRuleWeb
VM 用のネットワーク カードを作成する
ネットワーク カードは、VM をサブネット、ネットワーク セキュリティ グループ、パブリック IP アドレスに接続します。
# Create a virtual network card and associate it with public IP address and NSG
$nic = New-AzNetworkInterface `
  -Name myNic `
  -ResourceGroupName $ResourceGroupName `
  -Location $location `
  -SubnetId $vnet.Subnets[0].Id `
  -PublicIpAddressId $pip.Id `
  -NetworkSecurityGroupId $nsg.Id
VM の作成
VM 構成を作成します。 この構成には、VM をデプロイするときに使用する設定 (たとえば、ユーザーの資格情報、サイズ、VM イメージ) が含まれています。
# Define a credential object
$UserName='demouser'
$securePassword = ConvertTo-SecureString ' ' -AsPlainText -Force
$cred = New-Object System.Management.Automation.PSCredential ($UserName, $securePassword)

# Create the VM configuration object
$VmName = "VirtualMachinelatest"
$VmSize = "Standard_D1"
$VirtualMachine = New-AzVMConfig `
  -VMName $VmName `
  -VMSize $VmSize

$VirtualMachine = Set-AzVMOperatingSystem `
  -VM $VirtualMachine `
  -Linux `
  -ComputerName "MainComputer" `
  -Credential $cred

$VirtualMachine = Set-AzVMSourceImage `
  -VM $VirtualMachine `
  -PublisherName "Canonical" `
  -Offer "UbuntuServer" `
  -Skus "20.04-LTS" `
  -Version "latest"

# Set the operating system disk properties on a VM
$VirtualMachine = Set-AzVMOSDisk `
  -VM $VirtualMachine `
  -CreateOption FromImage | `
  Set-AzVMBootDiagnostic -ResourceGroupName $ResourceGroupName `
  -StorageAccountName $StorageAccountName -Enable |`
  Add-AzVMNetworkInterface -Id $nic.Id

# Configure SSH keys
$sshPublicKey = Get-Content "$env:USERPROFILE\.ssh\id_rsa.pub"

# Add the SSH key to the VM
Add-AzVMSshPublicKey -VM $VirtualMachine `
 -KeyData $sshPublicKey `
 -Path "/home/$UserName/.ssh/authorized_keys"

# Create the VM
New-AzVM `
  -ResourceGroupName $ResourceGroupName `
 -Location $location `
  -VM $VirtualMachine
VM の簡易作成:完全なスクリプト
Note
この手順は基本的には上記のコードがマージされたものですが、認証には SSH キーではなくパスワードが使用されます。
## Create a resource group

<#
A resource group is a logical container where you can deploy and manage Azure Stack Hub resources. From your development kit or the Azure Stack Hub integrated system, run the following code block to create a resource group. Though we've assigned values for all the variables in this article, you can use these values or assign new ones.
#>

# Edit your variables, if required

# Create variables to store the location and resource group names
$location = "local"
$ResourceGroupName = "myResourceGroup"

# Create variables to store the storage account name and the storage account SKU information
$StorageAccountName = "mystorageaccount"
$SkuName = "Standard_LRS"

# Create variables to store the network security group and rules names
$nsgName = "myNetworkSecurityGroup"
$nsgRuleSSHName = "myNetworkSecurityGroupRuleSSH"
$nsgRuleWebName = "myNetworkSecurityGroupRuleWeb"

# Create variable for VM password
$VMPassword = 'Password123!'

# End of variables - no need to edit anything past that point to deploy a single VM

# Create a resource group
New-AzResourceGroup `
  -Name $ResourceGroupName `
  -Location $location

## Create storage resources

# Create a storage account, and then create a storage container for the Ubuntu Server 20.04 LTS image

# Create a new storage account
$StorageAccount = New-AzStorageAccount `
  -Location $location `
  -ResourceGroupName $ResourceGroupName `
  -Type $SkuName `
  -Name $StorageAccountName

Set-AzCurrentStorageAccount `
  -StorageAccountName $storageAccountName `
  -ResourceGroupName $resourceGroupName

# Create a storage container to store the VM image
$containerName = 'osdisks'
$container = New-AzureStorageContainer `
  -Name $containerName `
  -Permission Blob


## Create networking resources

# Create a virtual network, a subnet, and a public IP address, resources that are used provide network connectivity to the VM

# Create a subnet configuration
$subnetConfig = New-AzVirtualNetworkSubnetConfig `
  -Name mySubnet `
  -AddressPrefix 192.168.1.0/24

# Create a virtual network
$vnet = New-AzVirtualNetwork `
  -ResourceGroupName $ResourceGroupName `
  -Location $location `
  -Name MyVnet `
  -AddressPrefix 192.168.0.0/16 `
  -Subnet $subnetConfig

# Create a public IP address and specify a DNS name
$pip = New-AzPublicIpAddress `
  -ResourceGroupName $ResourceGroupName `
  -Location $location `
  -AllocationMethod Static `
  -IdleTimeoutInMinutes 4 `
  -Name "mypublicdns$(Get-Random)"


### Create a network security group and a network security group rule

<#
The network security group secures the VM by using inbound and outbound rules. Create an inbound rule for port 3389 to allow incoming Remote Desktop connections and an inbound rule for port 80 to allow incoming web traffic.
#>

# Create an inbound network security group rule for port 22
$nsgRuleSSH = New-AzNetworkSecurityRuleConfig -Name $nsgRuleSSHName -Protocol Tcp `
-Direction Inbound -Priority 1000 -SourceAddressPrefix * -SourcePortRange * -DestinationAddressPrefix * `
-DestinationPortRange 22 -Access Allow

# Create an inbound network security group rule for port 80
$nsgRuleWeb = New-AzNetworkSecurityRuleConfig -Name $nsgRuleWebName -Protocol Tcp `
-Direction Inbound -Priority 1001 -SourceAddressPrefix * -SourcePortRange * -DestinationAddressPrefix * `
-DestinationPortRange 80 -Access Allow

# Create a network security group
$nsg = New-AzNetworkSecurityGroup -ResourceGroupName $ResourceGroupName -Location $location `
-Name $nsgName -SecurityRules $nsgRuleSSH,$nsgRuleWeb

### Create a network card for the VM

# The network card connects the VM to a subnet, network security group, and public IP address.

# Create a virtual network card and associate it with public IP address and NSG
$nic = New-AzNetworkInterface `
  -Name myNic `
  -ResourceGroupName $ResourceGroupName `
  -Location $location `
  -SubnetId $vnet.Subnets[0].Id `
  -PublicIpAddressId $pip.Id `
  -NetworkSecurityGroupId $nsg.Id

## Create a VM
<#
Create a VM configuration. This configuration includes the settings used when deploying the VM. For example: user credentials, size, and the VM image.
#>

# Define a credential object
$UserName='demouser'
$securePassword = ConvertTo-SecureString $VMPassword -AsPlainText -Force
$cred = New-Object System.Management.Automation.PSCredential ($UserName, $securePassword)

# Create the VM configuration object
$VmName = "VirtualMachinelatest"
$VmSize = "Standard_D1"
$VirtualMachine = New-AzVMConfig `
  -VMName $VmName `
  -VMSize $VmSize

$VirtualMachine = Set-AzVMOperatingSystem `
  -VM $VirtualMachine `
  -Linux `
  -ComputerName "MainComputer" `
  -Credential $cred

$VirtualMachine = Set-AzVMSourceImage `
  -VM $VirtualMachine `
  -PublisherName "Canonical" `
  -Offer "UbuntuServer" `
  -Skus "20.04-LTS" `
  -Version "latest"

$osDiskName = "OsDisk"
$osDiskUri = '{0}vhds/{1}-{2}.vhd' -f `
  $StorageAccount.PrimaryEndpoints.Blob.ToString(),`
  $vmName.ToLower(), `
  $osDiskName

# Set the operating system disk properties on a VM
$VirtualMachine = Set-AzVMOSDisk `
  -VM $VirtualMachine `
  -Name $osDiskName `
  -VhdUri $OsDiskUri `
  -CreateOption FromImage | `
  Add-AzVMNetworkInterface -Id $nic.Id

# Create the VM
New-AzVM `
  -ResourceGroupName $ResourceGroupName `
 -Location $location `
  -VM $VirtualMachine
VM に接続します
VM をデプロイしたら、その SSH 接続を構成します。 VM のパブリック IP アドレスを取得するために、Get-AzPublicIpAddress コマンドを使用します。
Get-AzPublicIpAddress -ResourceGroupName myResourceGroup | Select IpAddress
SSH がインストールされているクライアント システムから、次のコマンドを使用して VM に接続します。 Windows 上で作業している場合は、PuTTY を使用して接続を作成できます。
ssh <Public IP Address>
入力を求められたら、azureuser としてサインインします。 SSH キーを作成したときにパスフレーズを使用した場合は、そのパスフレーズを入力する必要があります。
NGINX Web サーバーのインストール
パッケージ リソースを更新し、最新の NGINX パッケージをインストールするため、次のスクリプトを実行します。
#!/bin/bash

# update package source
apt-get -y update

# install NGINX
apt-get -y install nginx
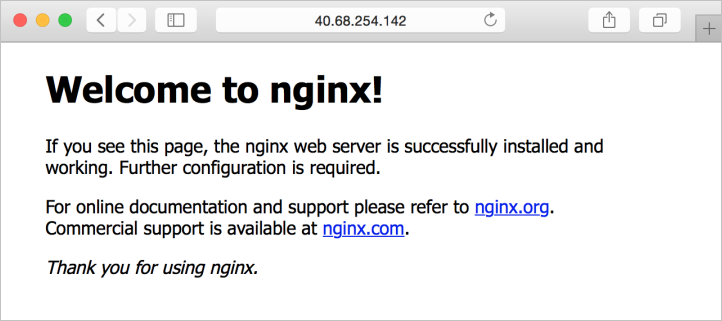
NGINX のようこそページの表示
NGINX Web サーバーがインストールされ、VM 上のポート 80 が開かれたので、その VM のパブリック IP アドレスを使用して Web サーバーにアクセスできます。 Web ブラウザーを開き、http://<public IP address> に移動します。
リソースをクリーンアップする
不要になったリソースは、Remove-AzResourceGroup コマンドを使用してクリーンアップできます。 リソース グループとそのすべてのリソースを削除するには、次のコマンドを実行します。
Remove-AzResourceGroup -Name myResourceGroup
次のステップ
このクイック スタートでは、基本の Linux サーバー VM をデプロイしました。 Azure Stack Hub VM の詳細については、Azure Stack Hub の VM の考慮事項に関する記事に進んでください。
フィードバック
以下は間もなく提供いたします。2024 年を通じて、コンテンツのフィードバック メカニズムとして GitHub の issue を段階的に廃止し、新しいフィードバック システムに置き換えます。 詳細については、「https://aka.ms/ContentUserFeedback」を参照してください。
フィードバックの送信と表示