バッチ ドキュメント翻訳クライアント ライブラリ
ドキュメント翻訳は、サポートされている言語とさまざまなファイル形式でドキュメント全体を非同期的に翻訳する Azure AI Translator サービスのクラウドベースの機能です。 このクイックスタートでは、ドキュメント翻訳と任意のプログラミング言語を使用して、構造とテキストの書式設定を維持しながら、ソース ドキュメントをターゲット言語に翻訳する方法について説明します。
重要
ドキュメント翻訳は現在、Translator (単一サービス) リソースでのみサポートされており、Azure AI サービス (マルチサービス) リソースには含まれていません。
ドキュメント翻訳は有料レベルでサポートされます。 Language Studio では、S1 または D3 のインスタンス層のみがサポートされます。 ドキュメント翻訳を試すには、Standard S1 を選ぶことをお勧めします。 「Azure AI サービスの価格 - Translator」をご覧ください。
前提条件
開始するには、以下が必要です。
アクティブな Azure アカウント。 アカウントがない場合は、無料アカウントを作成できます。
単一サービス Translator リソース (マルチサービス Azure AI サービス リソースとは異なる):。 マネージド ID 認可でドキュメント翻訳機能を使用する予定の場合は、米国東部などの地理的リージョンを選択します。 Standard S1 または D3 または価格レベルを選択します。
Azure Blob Storage アカウント。 Azure Blob Storage アカウント内に、ソースおよびターゲット ファイル用のコンテナーを作成します。
- ソースのコンテナー。 このコンテナーは、翻訳対象のファイルをアップロードする場所です (必須)。
- ターゲットのコンテナー。 このコンテナーは、翻訳されたファイルを格納する場所です (必須)。
ストレージ コンテナーの承認
Translator リソースへのアクセスを承認するには、次のいずれかのオプションを選択できます。
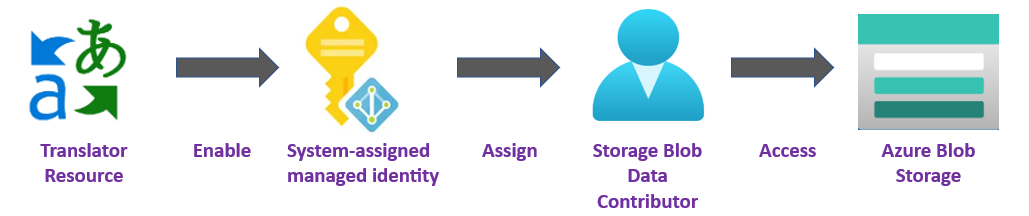
✔️マネージド ID。 マネージド ID は、Microsoft Entra ID と、Azure 管理対象リソースの固有アクセス許可を作成するサービス プリンシパルです。 マネージド ID を使用すると、コードに資格情報を埋め込む必要なく、Translator アプリケーションを実行できます。 マネージド ID は、ストレージ データへのアクセスを許可し、ソース URL とターゲット URL に Shared Access Signature トークン (SAS) を含めるように要件を置き換えるためのより安全な方法です。
詳細については、ドキュメント翻訳のマネージド ID をご覧ください。
✔️ Shared Access Signature (SAS)。 共有アクセス署名は、Translator サービスに対して、指定した期間の制限付きアクセスを許可する URL です。 この方法を使うには、ソースおよびターゲット コンテナー用に Shared Access Signature (SAS) トークンを作成する必要があります。 sourceUrl と targetUrl には Shared Access Signature (SAS) トークンを含める必要があり、クエリ文字列として追加します。 トークンは、コンテナーまたは特定の BLOB に割り当てることができます。
- ソースのコンテナーまたは BLOB には、読み取りと一覧表示のアクセス権が指定されている必要があります。
- ターゲットのコンテナーまたは BLOB には、書き込みと一覧表示のアクセス権が指定されている必要があります。
詳細については、「SAS トークンの作成」をご覧ください。

アプリケーションをビルドする
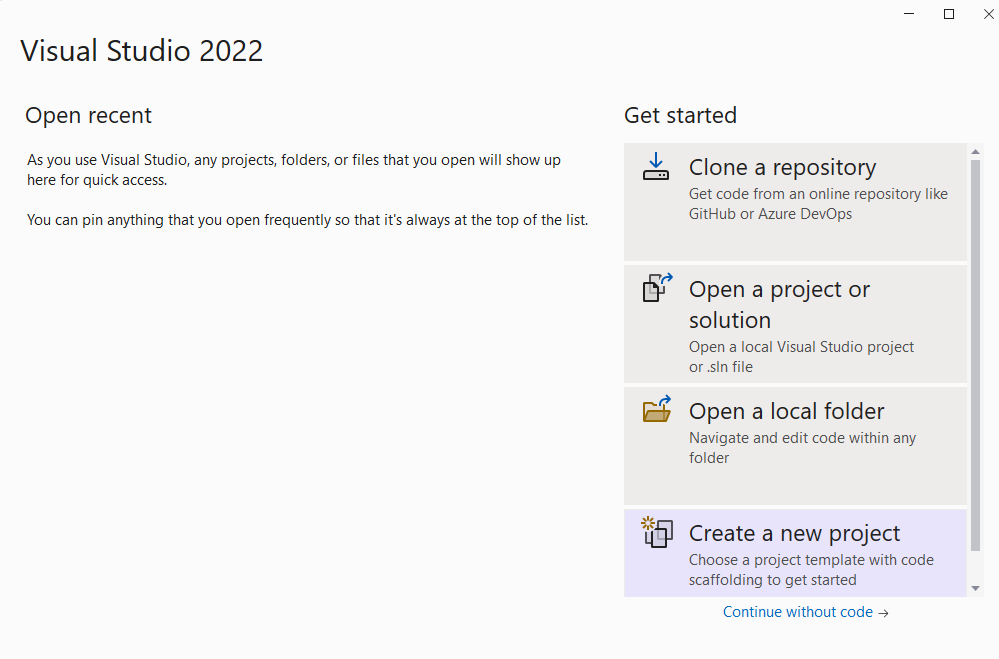
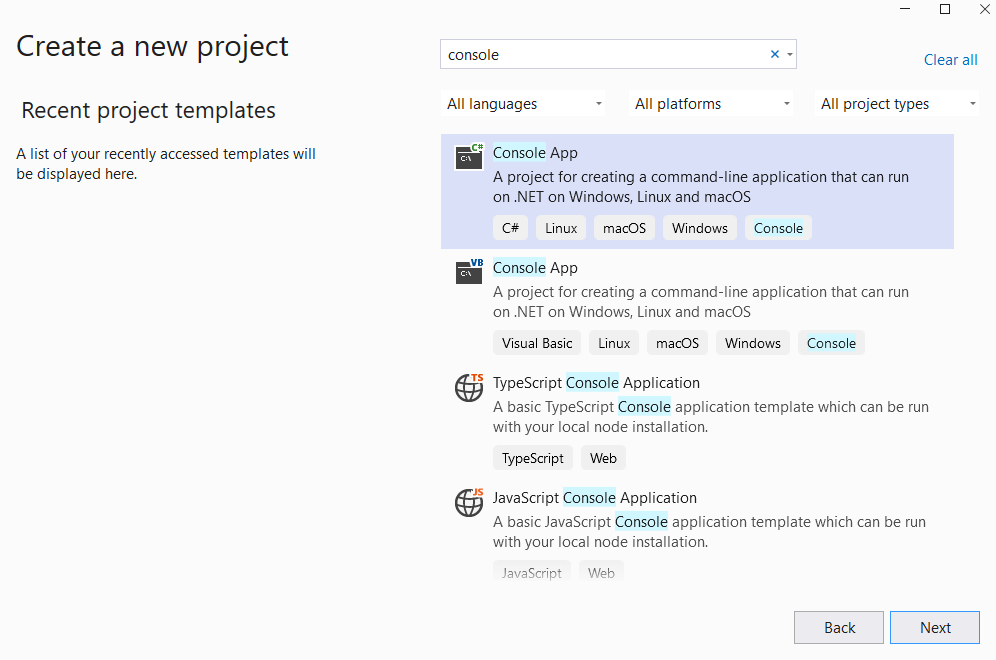
Translator C#/.NET アプリケーションの作成、ビルド、実行に使用できるツールがいくつかあります。 ここでは、コマンド ライン インターフェイス (CLI) または Visual Studio を使用する方法について説明します。 開始するには、次のいずれかのタブを選択します。
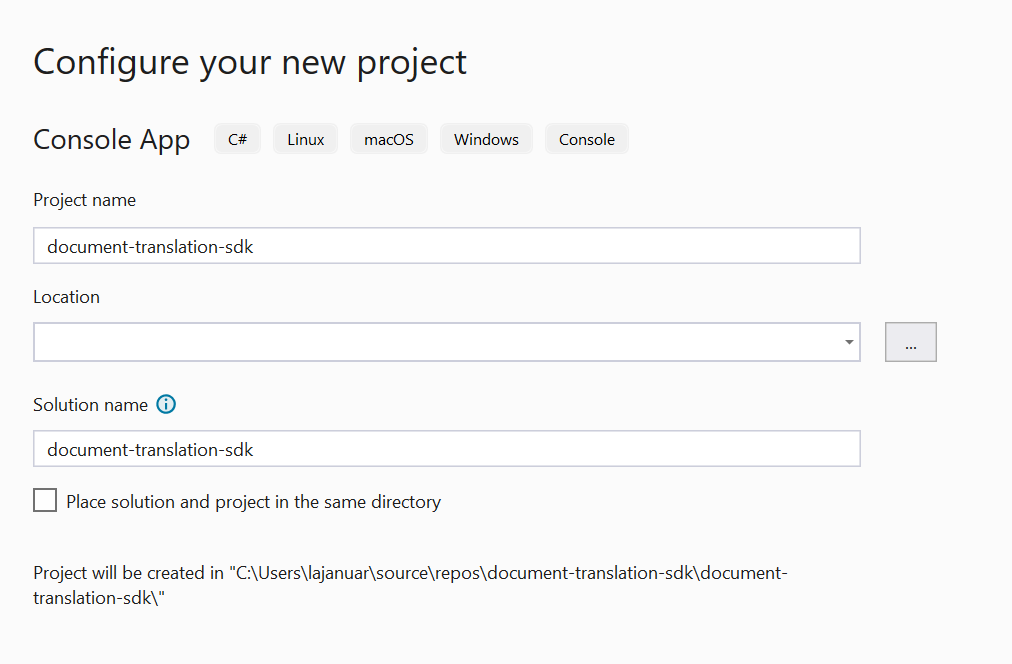
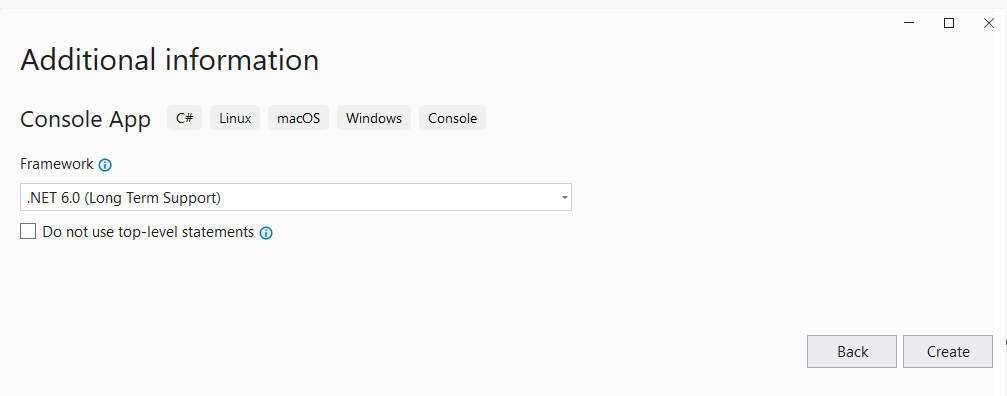
プロジェクトの設定
コンソール ウィンドウ (cmd、PowerShell、Bash など) で、dotnet new コマンドを使用し、batch-document-translation という名前で新しいコンソール アプリを作成します。 このコマンドにより、1 つのソース ファイルを使用する単純な "Hello World" C# プロジェクトが作成されます。Program.cs。
dotnet new console -n batch-document-translation
新しく作成されたアプリ フォルダーにディレクトリを変更します。 次のコマンドでアプリケーションをビルドします。
dotnet build
ビルドの出力に警告やエラーが含まれないようにする必要があります。
...
Build succeeded.
 0 Warning(s)
 0 Error(s)
...
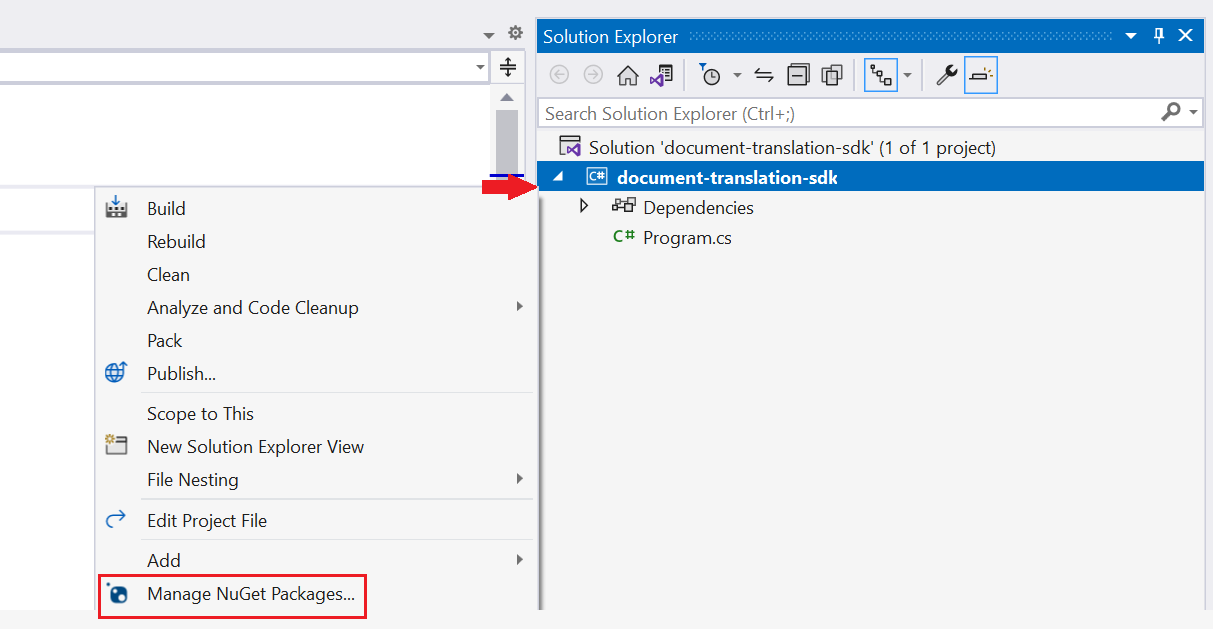
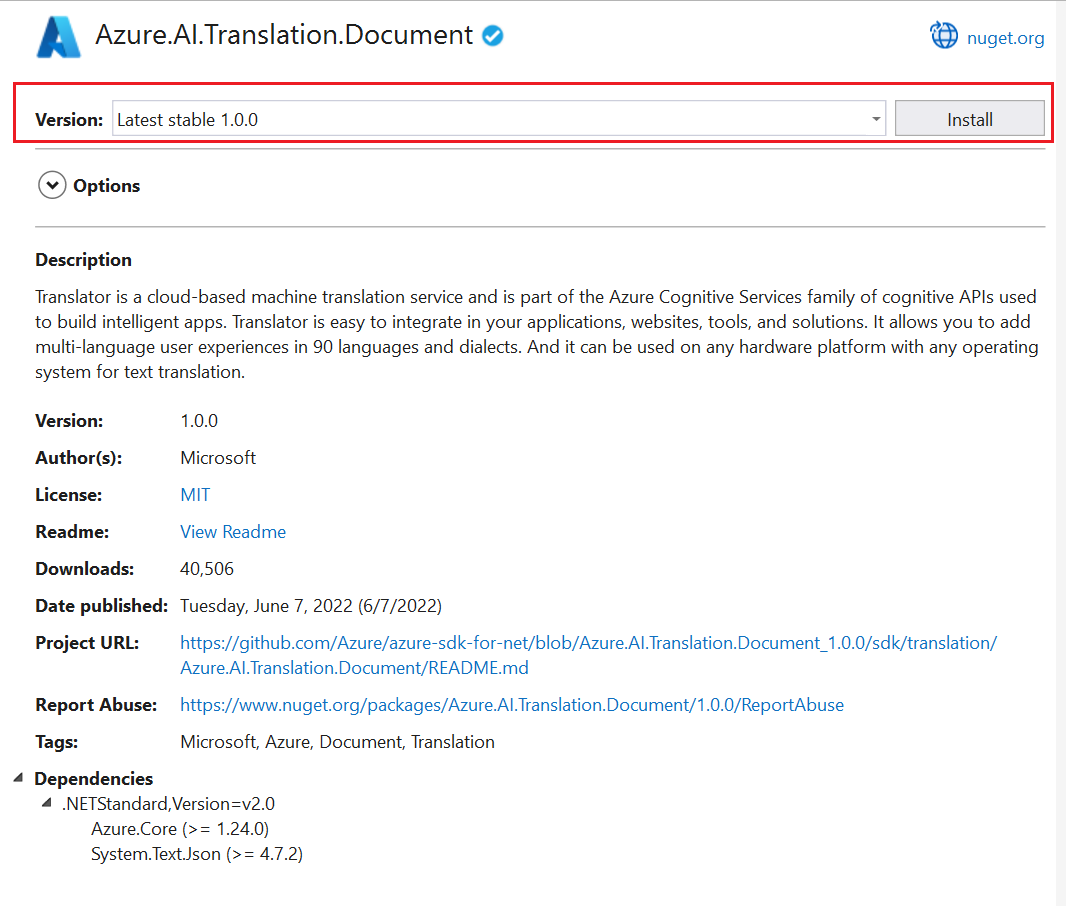
クライアント ライブラリをインストールする
アプリケーション ディレクトリ内で、.NET 用のドキュメント翻訳クライアント ライブラリをインストールします。
dotnet add package Azure.AI.Translation.Document --version 1.0.0
ドキュメントまたはバッチ ファイルを翻訳する
このプロジェクトでは、ソース コンテナーにアップロードされたソース ドキュメントが必要です。 このクイックスタートでは、ドキュメント翻訳のサンプル ドキュメントをダウンロードできます。 ソース言語は英語です。
プロジェクト ディレクトリから、好みのエディターまたは IDE で Program.cs ファイルを開きます。 行
Console.WriteLine("Hello World!")を含む既存のコードを削除します。アプリケーションの Program.cs で、対象のキーとカスタム エンドポイントの変数を作成します。 詳細については、「キーとカスタム ドメイン エンドポイントを取得する」を "参照してください"。
private static readonly string endpoint = "<your-document-translation-endpoint>"; private static readonly string key = "<your-key>";StartTranslationAsyncメソッドを呼び出して、1 つの BLOB コンテナー内の 1 つ以上のドキュメントについて翻訳操作を開始します。StartTranslationAsyncを呼び出すには、以下のsourceUri、targetUri、targetLanguageCodeパラメーターを含むDocumentTranslationInputオブジェクトを初期化する必要があります。マネージド ID 承認の場合は、次の変数を作成します。
sourceUri。 翻訳するドキュメントが含まれるソース コンテナーの URI。
targetUri。翻訳されたドキュメントが書き込まれるターゲット コンテナーの URL。
targetLanguageCode。 翻訳されるドキュメントの言語コード。 言語コードは、言語サポートに関するページに記載されています。
ソース URL とターゲット URL を見つけるには、Azure portal のストレージ アカウントに移動します。 左側のサイドバーの [データ ストレージ] で [コンテナー] を選び、以下の手順に従ってソース ドキュメントとターゲット コンテナー
URLSを取得します。source 移行先 1. ソース コンテナーの横にあるチェック ボックスをオンにします。 1. ターゲット コンテナーの横にあるチェック ボックスをオンにします。 2.メイン ウィンドウ領域から、翻訳するファイルまたはドキュメントを選びます。 2. 右側にある省略記号を選択し、[プロパティ] を選択します。 3. ソース URL は、[プロパティ] リストの上部にあります。 3. ターゲット URL は、[プロパティ] リストの上部にあります。
Shared Access Signature (SAS) 承認の場合、これらの変数を作成します
- sourceUri。 変換するドキュメントを含むソース コンテナーの SAS トークンがクエリ文字列として追加された SAS URI。
- targetUri SAS URI。SAS トークンがクエリ文字列として追加され、翻訳されたドキュメントの書き込み先のターゲット コンテナーに対します。
- targetLanguageCode。 翻訳されるドキュメントの言語コード。 言語コードは、言語サポートに関するページに記載されています。
コード サンプル
重要
終わったらコードからキーを削除し、公開しないよう注意してください。 運用環境では、Azure Key Vault などの資格情報を格納してアクセスする安全な方法を使用します。 詳しくは、Azure AI サービスのセキュリティを "ご覧ください"。
次のコード サンプルを入力して、アプリケーションの Program.cs ファイルに貼り付けます。
using Azure;
using Azure.AI.Translation.Document;
using System;
using System.Threading;
using System.Text;

class Program {

  // create variables for your custom endpoint and resource key
  private static readonly string endpoint = "<your-document-translation-endpoint>";
  private static readonly string key = "<your-key>";

  static async Task Main(string[] args) {

    // create variables for your sourceUrl, targetUrl, and targetLanguageCode
    Uri sourceUri = new Uri("<sourceUrl>");
    Uri targetUri = new Uri("<targetUrl>");
    string targetLanguage = "<targetLanguageCode>"

    // initialize a new instance  of the DocumentTranslationClient object to interact with the Document Translation feature
    DocumentTranslationClient client = new DocumentTranslationClient(new Uri(endpoint), new AzureKeyCredential(key));

    // initialize a new instance of the `DocumentTranslationInput` object to provide the location of input for the translation operation
    DocumentTranslationInput input = new DocumentTranslationInput(sourceUri, targetUri, targetLanguage);

    // initialize a new instance of the DocumentTranslationOperation class to track the status of the translation operation
    DocumentTranslationOperation operation = await client.StartTranslationAsync(input);

    await operation.WaitForCompletionAsync();

    Console.WriteLine($"  Status: {operation.Status}");
    Console.WriteLine($"  Created on: {operation.CreatedOn}");
    Console.WriteLine($"  Last modified: {operation.LastModified}");
    Console.WriteLine($"  Total documents: {operation.DocumentsTotal}");
    Console.WriteLine($"    Succeeded: {operation.DocumentsSucceeded}");
    Console.WriteLine($"    Failed: {operation.DocumentsFailed}");
    Console.WriteLine($"    In Progress: {operation.DocumentsInProgress}");
    Console.WriteLine($"    Not started: {operation.DocumentsNotStarted}");

    await foreach(DocumentStatusResult document in operation.Value) {
      Console.WriteLine($"Document with Id: {document.Id}");
      Console.WriteLine($"  Status:{document.Status}");
      if (document.Status == DocumentTranslationStatus.Succeeded) {
        Console.WriteLine($"  Translated Document Uri: {document.TranslatedDocumentUri}");
        Console.WriteLine($"  Translated to language: {document.TranslatedToLanguageCode}.");
        Console.WriteLine($"  Document source Uri: {document.SourceDocumentUri}");
      } else {
        Console.WriteLine($"  Error Code: {document.Error.Code}");
        Console.WriteLine($"  Message: {document.Error.Message}");
      }
    }
  }
}
アプリケーションを実行する
コード サンプルをアプリケーションに追加したら、ターミナルで次のコマンドを入力して、プロジェクト ディレクトリからアプリケーションを実行します。
dotnet run
予想される出力のスニペットを次に示します。
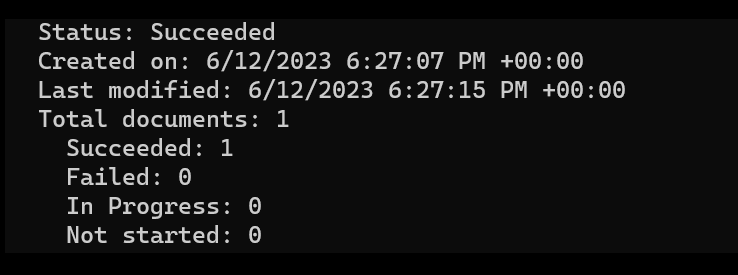


これで完了です。 .NET クライアント ライブラリを使ってストレージ コンテナー内のドキュメントを翻訳するプログラムを作成しました。
プロジェクトの設定
最新バージョンの Python がインストールされていることを確認します。
クライアント ライブラリをインストールする
ドキュメント翻訳クライアント ライブラリの最新バージョンをインストールします。
pip install azure-ai-translation-document==1.0.0
ドキュメントまたはバッチ ファイルを翻訳する
このプロジェクトでは、ソース コンテナーにアップロードされたソース ドキュメントが必要です。 このクイックスタートでは、ドキュメント翻訳のサンプル ドキュメントをダウンロードできます。 ソース言語は英語です。
Python アプリケーション ファイルで、リソース キーとカスタム エンドポイントの変数を作成します。 詳細については、「キーとカスタム ドメイン エンドポイントを取得する」を "参照してください"。
key = "<your-key>"
endpoint = "<your-custom-endpoint>"
DocumentTranslationClientパラメーターとendpointパラメーターを含むkeyオブジェクトを初期化します。begin_translationメソッドを呼び出し、sourceUri、targetUri、targetLanguageCodeパラメーターを渡します。マネージド ID 承認の場合は、次の変数を作成します。
sourceUri。 翻訳するドキュメントが含まれるソース コンテナーの URI。
targetUri。翻訳されたドキュメントが書き込まれるターゲット コンテナーの URL。
targetLanguageCode。 翻訳されるドキュメントの言語コード。 言語コードは、言語サポートに関するページに記載されています。
ソース URL とターゲット URL を見つけるには、Azure portal のストレージ アカウントに移動します。 左側のサイドバーの [データ ストレージ] で [コンテナー] を選び、以下の手順に従ってソース ドキュメントとターゲット コンテナー
URLSを取得します。source 移行先 1. ソース コンテナーの横にあるチェック ボックスをオンにします。 1. ターゲット コンテナーの横にあるチェック ボックスをオンにします。 2.メイン ウィンドウ領域から、翻訳するファイルまたはドキュメントを選びます。 2. 右側にある省略記号を選択し、[プロパティ] を選択します。 3. ソース URL は、[プロパティ] リストの上部にあります。 3. ターゲット URL は、[プロパティ] リストの上部にあります。
Shared Access Signature (SAS) 承認の場合、これらの変数を作成します
- sourceUri。 変換するドキュメントを含むソース コンテナーの SAS トークンがクエリ文字列として追加された SAS URI。
- targetUri SAS URI。SAS トークンがクエリ文字列として追加され、翻訳されたドキュメントの書き込み先のターゲット コンテナーに対します。
- targetLanguageCode。 翻訳されるドキュメントの言語コード。 言語コードは、言語サポートに関するページに記載されています。
コード サンプル
重要
終わったらコードからキーを削除し、公開しないよう注意してください。 運用環境では、Azure Key Vault などの資格情報を格納してアクセスする安全な方法を使用します。 詳しくは、Azure AI サービスのセキュリティを "ご覧ください"。
Python アプリケーションに次のコード サンプルを入力します。
#  import libraries
from azure.core.credentials import AzureKeyCredential
from azure.ai.translation.document import DocumentTranslationClient

# create variables for your resource key, custom endpoint, sourceUrl, targetUrl, and targetLanguage
key = "<your-key>"
endpoint = "<your-custom-endpoint>"
sourceUri = "<your-container-sourceUrl>"
targetUri = "<your-container-targetUrl>"
targetLanguage = "<target-language-code>"


# initialize a new instance of the DocumentTranslationClient object to interact with the Document Translation feature
client = DocumentTranslationClient(endpoint, AzureKeyCredential(key))

# include source and target locations and target language code for the begin translation operation
poller = client.begin_translation(sourceUri, targetUri, targetLanguage)
result = poller.result()

print("Status: {}".format(poller.status()))
print("Created on: {}".format(poller.details.created_on))
print("Last updated on: {}".format(poller.details.last_updated_on))
print(
    "Total number of translations on documents: {}".format(
        poller.details.documents_total_count
    )
)

print("\nOf total documents...")
print("{} failed".format(poller.details.documents_failed_count))
print("{} succeeded".format(poller.details.documents_succeeded_count))

for document in result:
    print("Document ID: {}".format(document.id))
    print("Document status: {}".format(document.status))
    if document.status == "Succeeded":
        print("Source document location: {}".format(document.source_document_url))
        print(
            "Translated document location: {}".format(document.translated_document_url)
        )
        print("Translated to language: {}\n".format(document.translated_to))
    else:
        print(
            "Error Code: {}, Message: {}\n".format(
                document.error.code, document.error.message
            )
        )
アプリケーションを実行する
アプリケーションにコード サンプルを追加したら、ターミナルで次のコマンドを入力します。
python asynchronous-sdk.py
予想される出力のスニペットを次に示します。
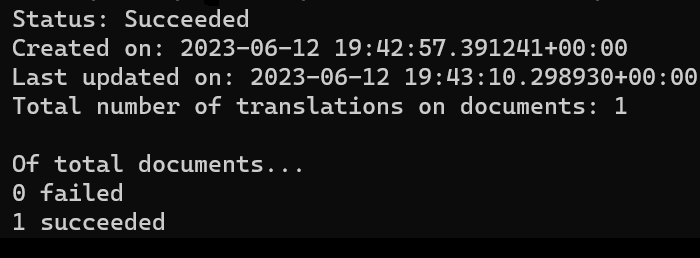
これで完了です。 Python クライアント ライブラリを使ってストレージ コンテナー内のドキュメントを翻訳するプログラムを作成しました。