Always On VPN デバイス トンネルの構成
Always On 機能が、Windows 10 VPN クライアントに導入されました。 Always On は VPN 接続を維持する機能です。 Always On を使用すると、アクティブな VPN プロファイルは、ユーザーのサインイン、ネットワーク状態の変更、またはデバイス画面のアクティブ化などのトリガーに基づいて、自動的に接続し、接続を維持することができます。
ゲートウェイを Always On と共に使用することで、Azure への永続的なユーザー トンネルとデバイス トンネルを確立できます。
Always On VPN 接続には、次の 2 種類のトンネルのいずれかが含まれます。
デバイス トンネル:ユーザーがデバイスにサインインする前に、指定した VPN サーバーに接続します。 サインイン前の接続シナリオとデバイス管理ではデバイス トンネルが使用されます。
ユーザー トンネル:ユーザーがデバイスにサインインした後にのみ接続します。 ユーザー トンネルを使用すると、ユーザーは VPN サーバー経由で組織のリソースにアクセスできます。
デバイス トンネルとユーザー トンネルは、VPN プロファイルとは関係なく動作します。 これらは同時に接続でき、必要に応じてさまざまな認証方法と他の VPN の構成設定を使用できます。
この記事は、Always On VPN デバイス トンネルの構成に役立ちます。 ユーザー トンネルの構成については、「Always On VPN ユーザー トンネルの構成」を参照してください。
ゲートウェイを構成する
記事「ポイント対サイト VPN 接続の構成」を使用して、IKEv2 と証明書ベースの認証を使用するように VPN ゲートウェイを構成します。
デバイス トンネルの構成
デバイス トンネルを正常に確立するには、次の要件を満たす必要があります。
- デバイスが、Windows 10 Enterprise または Education バージョン 1809 以降を実行しているドメイン参加済みのコンピューターであること。
- トンネルが、Windows の組み込み VPN ソリューションに対してのみ構成可能で、IKEv2 とコンピューター証明書認証を使用して確立されていること。
- 構成できるデバイス トンネルは、デバイスごとに 1 つのみ。
- 「ポイント対サイト VPN クライアント」の記事を使用して、Windows 10 以降のクライアントにクライアント証明書をインストールします。 この証明書は、ローカル コンピューターのストアに格納されている必要があります。
- この手順を使用して、VPN プロファイルを作成し、ローカル システム アカウントのコンテキストでデバイス トンネルを構成します。
デバイス トンネルの構成例
仮想ネットワーク ゲートウェイを構成し、Windows 10 以降のクライアントのローカル コンピューター ストアにクライアント証明書をインストールした後、次の例を使用してクライアント デバイス トンネルを構成します。
次のテキストをコピーし、devicecert.ps1 として保存します。
Param( [string]$xmlFilePath, [string]$ProfileName ) $a = Test-Path $xmlFilePath echo $a $ProfileXML = Get-Content $xmlFilePath echo $XML $ProfileNameEscaped = $ProfileName -replace ' ', '%20' $Version = 201606090004 $ProfileXML = $ProfileXML -replace '<', '<' $ProfileXML = $ProfileXML -replace '>', '>' $ProfileXML = $ProfileXML -replace '"', '"' $nodeCSPURI = './Vendor/MSFT/VPNv2' $namespaceName = "root\cimv2\mdm\dmmap" $className = "MDM_VPNv2_01" $session = New-CimSession try { $newInstance = New-Object Microsoft.Management.Infrastructure.CimInstance $className, $namespaceName $property = [Microsoft.Management.Infrastructure.CimProperty]::Create("ParentID", "$nodeCSPURI", 'String', 'Key') $newInstance.CimInstanceProperties.Add($property) $property = [Microsoft.Management.Infrastructure.CimProperty]::Create("InstanceID", "$ProfileNameEscaped", 'String', 'Key') $newInstance.CimInstanceProperties.Add($property) $property = [Microsoft.Management.Infrastructure.CimProperty]::Create("ProfileXML", "$ProfileXML", 'String', 'Property') $newInstance.CimInstanceProperties.Add($property) $session.CreateInstance($namespaceName, $newInstance) $Message = "Created $ProfileName profile." Write-Host "$Message" } catch [Exception] { $Message = "Unable to create $ProfileName profile: $_" Write-Host "$Message" exit } $Message = "Complete." Write-Host "$Message"次のテキストをコピーし、VPNProfile.xml として devicecert.ps1 と同じフォルダーに保存します。 お使いの環境に合わせて次のテキストを編集します。
<Servers>azuregateway-1234-56-78dc.cloudapp.net</Servers> <= Can be found in the VpnSettings.xml in the downloaded profile zip file<Address>192.168.3.5</Address> <= IP of resource in the vnet or the vnet address space<Address>192.168.3.4</Address> <= IP of resource in the vnet or the vnet address space
<VPNProfile>
  <NativeProfile>
<Servers>azuregateway-1234-56-78dc.cloudapp.net</Servers>
<NativeProtocolType>IKEv2</NativeProtocolType>
<Authentication>
  <MachineMethod>Certificate</MachineMethod>
</Authentication>
<RoutingPolicyType>SplitTunnel</RoutingPolicyType>
 <!-- disable the addition of a class based route for the assigned IP address on the VPN interface -->
<DisableClassBasedDefaultRoute>true</DisableClassBasedDefaultRoute>
  </NativeProfile>
  <!-- use host routes(/32) to prevent routing conflicts -->
  <Route>
<Address>192.168.3.5</Address>
<PrefixSize>32</PrefixSize>
  </Route>
  <Route>
<Address>192.168.3.4</Address>
<PrefixSize>32</PrefixSize>
  </Route>
<!-- need to specify always on = true -->
  <AlwaysOn>true</AlwaysOn>
<!-- new node to specify that this is a device tunnel -->
 <DeviceTunnel>true</DeviceTunnel>
<!--new node to register client IP address in DNS to enable manage out -->
<RegisterDNS>true</RegisterDNS>
</VPNProfile>
Sysinternals から PsExec をダウンロードして、C:\PSTools にファイルを抽出します。
管理者コマンド プロンプトから、次を実行して PowerShell を起動します。
32 ビット Windows の場合:
PsExec.exe -s -i powershell64 ビット Windows の場合:
PsExec64.exe -s -i powershell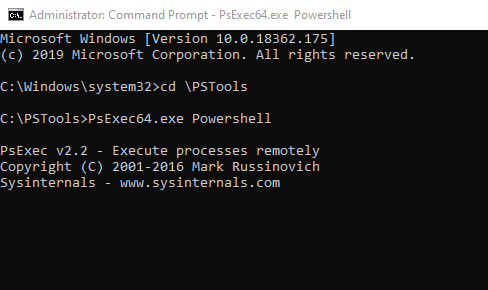
PowerShell で、devicecert.ps1 と VPNProfile.xml が配置されているフォルダーに切り替えて、次のコマンドを実行します。
.\devicecert.ps1 .\VPNProfile.xml MachineCertTest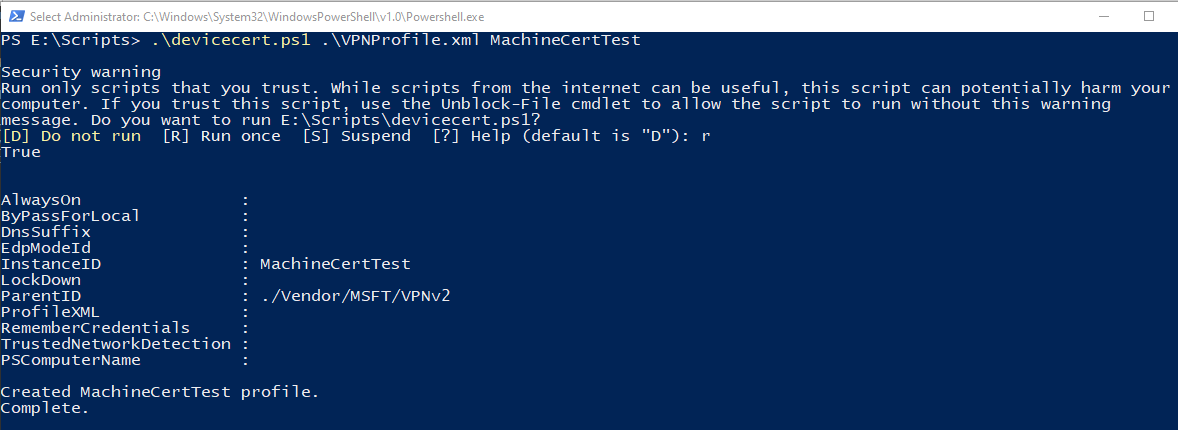
rasphone を実行します。
![rasphone が選択された [実行] ダイアログボックスを示すスクリーンショット。](../includes/media/vpn-gateway-vwan-always-on-device/rasphone.png)
MachineCertTest エントリを探して、 [接続] をクリックします。
![MachineCertTest が選択され、[接続] ボタンが表示された [ネットワーク接続] ダイアログボックスを示すスクリーンショット。](../includes/media/vpn-gateway-vwan-always-on-device/connect.png)
接続に成功したら、コンピューターを再起動します。 トンネルが自動的に接続されます。
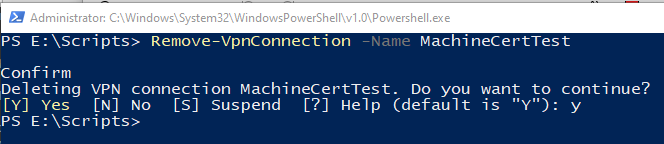
プロファイルを削除するには
プロファイルを削除するには、次のコマンドを実行します。
次のステップ
トラブルシューティングについては、Azure ポイント対サイト接続の問題のページを参照してください。