コパイロットの外観をカスタマイズする
重要
Power Virtual Agents 機能は、生成 AI への多大な投資と Microsoft Copilot 全体の統合の強化により、現在 Microsoft Copilot Studio の一部となっています。
ドキュメントやトレーニング コンテンツが更新される間、一部の記事やスクリーンショットで Power Virtual Agents が参照される場合があります。
コパイロットの外観はキャンバスによって定義されます。 コパイロットをカスタマイズするには、そのキャンバスをカスタマイズする必要があります。 カスタマイズの複雑さに応じて、2 つの方法でキャンバスをカスタマイズできます:
コパイロットを展開する Web サイトの HTML コードで JavaScript のスタイルを使用して、既定のキャンバスをカスタマイズ します。
このアプローチは、コード開発に投資せずに小さなカスタマイズを実行する場合に役立ちます。Bot Framework Web チャット キャンバス に基づいて、カスタム キャンバスを使用します。
このアプローチには、広範な開発者の知識が必要です。 完全にカスタマイズされたエクスペリエンスが必要な組織に役立ちます。
重要
この記事に含まれているサンプル コードは、Microsoft Copilot Studio でのみ使用するためにインストールして使用できます。 サンプル コードは "現状のまま" ライセンスされており、任意のサービスレベル契約やサポート サービスから除外されています。 お客様は、その使用に関するリスクを負うものとします。
Microsoft は、明示的な責任や保証責任または条件を一切負いません。また商品性、特定目的に対する適合性、非侵害性に関するいかなる黙示的保証も除外します。
作成して コパイロットを公開 すると、顧客は コパイロットの Web チャット キャンバスを使用して操作 できます。
会話を自動的に開始するようにコパイロットを構成する と、カスタマイズされたキャンバスを組み合わせることもできます。
最後に、ポータルから直接コパイロットの 名前とアイコンを変更 (Microsoft Teams で共有 されている場合) できます。
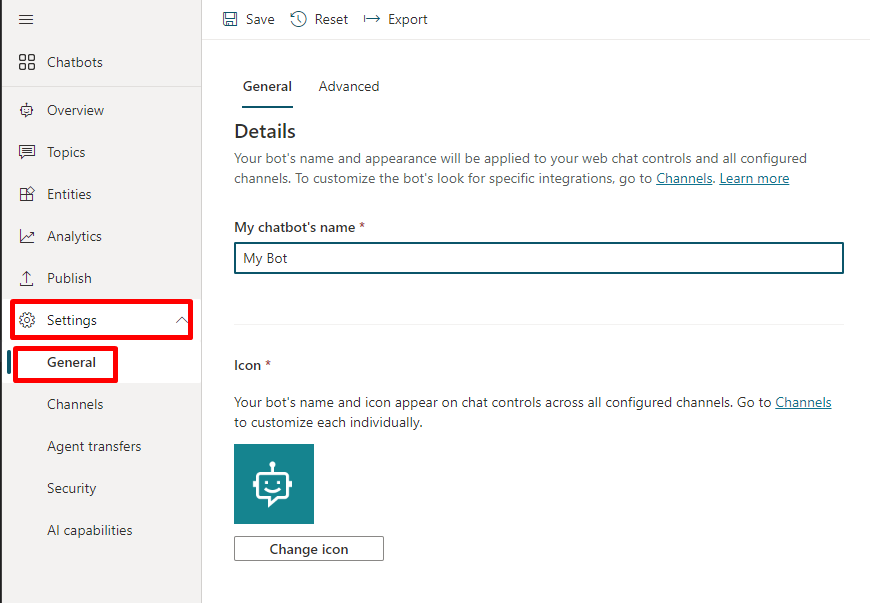
コパイロットの名前とアイコンを変更する
重要
コパイロットが Customer Service 用オムニチャネル に接続されている場合、その名前は、Azure portal の登録の 表示名 プロパティによって定義されます。
コパイロットの名前とアイコンを変更することができます。 これは、コパイロットを公開するすべてのチャネルのアイコンに影響します。
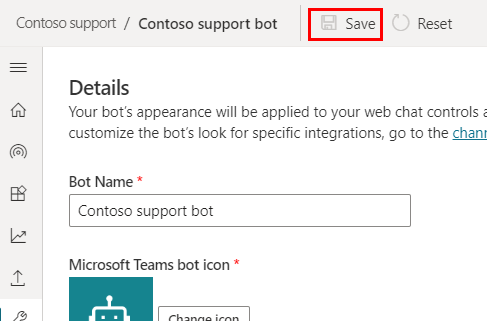
ナビゲーション メニューの 設定 で 詳細 を選択します。
コパイロットの名前とアイコンを変更します。 Microsoft Teams アイコンの形式に関するレコメンデーションを確認する
保存を選択して変更をコミットします。
重要
コパイロットのアイコンを更新した後、新しいアイコンがあらゆるところに表示されるまでは、最大 24 時間かかる場合があります。
トークン エンドポイントを取得する
キャンバスをカスタマイズするには、既定のキャンバスまたは接続するユーザー定義キャンバスでも、コパイロットの詳細を取得する必要があります。
ナビゲーション メニューの 設定 で チャネル を選択します。
モバイル アプリを選択します。
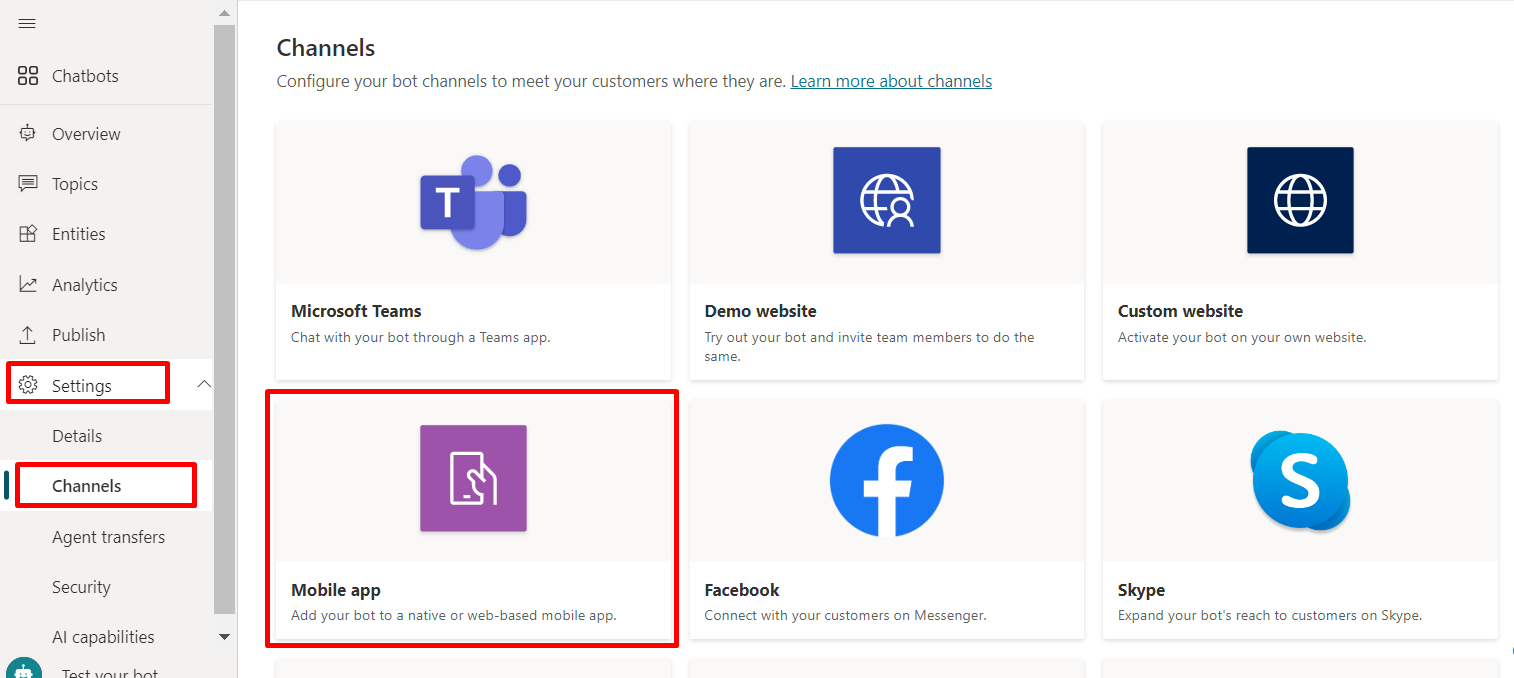
トークン エンドポイントの隣で、コピーを選択します。

既定のキャンバスをカスタマイズする (簡易)
いくつかの簡易な CSS および JavaScript スタイル オプションを使用して、チャット キャンバスの外観を構成します。
最初に、コパイロット キャンバスを展開する場所を構成する必要があります。
コパイロットを作成および公開 します。
次の HTML コードをコピーして貼り付け、index.html と名前を付けて保存します。
次のコードもコピーして、w3schools.com HTML 試用版エディターに貼り付けることができます。 トークン エンドポイントをまだ追加する必要があります。<!doctype html> <html lang="en"> <head> <title>Contoso Sample Web Chat</title> <!-- This styling is for the Web Chat demonstration purposes. It is recommended that style is moved to a separate file for organization in larger projects. Please visit https://github.com/microsoft/BotFramework-WebChat for details about Web Chat. --> <style> html, body { height: 100%; } body { margin: 0; } h1 { color: whitesmoke; font-family: Segoe UI; font-size: 16px; line-height: 20px; margin: 0; padding: 0 20px; } #banner { align-items: center; background-color: black; display: flex; height: 50px; } #webchat { height: calc(100% - 50px); overflow: hidden; position: fixed; top: 50px; width: 100%; } </style> </head> <body> <div> <div id="banner"> <h1>Contoso copilot name</h1> </div> <div id="webchat" role="main"></div> </div> <!-- In this sample, the latest version of Web Chat is being used. In production environment, the version number should be pinned and version bump should be done frequently. Please visit https://github.com/microsoft/BotFramework-WebChat/tree/main/CHANGELOG.md for changelog. --> <script crossorigin="anonymous" src="https://cdn.botframework.com/botframework-webchat/latest/webchat.js"></script> <script> (async function () { // Specifies style options to customize the Web Chat canvas. // Please visit https://microsoft.github.io/BotFramework-WebChat for customization samples. const styleOptions = { // Hide upload button. hideUploadButton: true }; // Specifies the token endpoint URL. // To get this value, visit Copilot Studio > Settings > Channels > Mobile app page. const tokenEndpointURL = new URL('<COPILOT TOKEN ENDPOINT>'); // Specifies the language the copilot and Web Chat should display in: // - (Recommended) To match the page language, set it to document.documentElement.lang // - To use current user language, set it to navigator.language with a fallback language // - To use another language, set it to supported Unicode locale // Setting page language is highly recommended. // When page language is set, browsers will use native font for the respective language. const locale = document.documentElement.lang || 'en'; // Uses language specified in <html> element and fallback to English (United States). // const locale = navigator.language || 'ja-JP'; // Uses user preferred language and fallback to Japanese. // const locale = 'zh-HAnt'; // Always use Chinese (Traditional). const apiVersion = tokenEndpointURL.searchParams.get('api-version'); const [directLineURL, token] = await Promise.all([ fetch(new URL(`/powervirtualagents/regionalchannelsettings?api-version=${apiVersion}`, tokenEndpointURL)) .then(response => { if (!response.ok) { throw new Error('Failed to retrieve regional channel settings.'); } return response.json(); }) .then(({ channelUrlsById: { directline } }) => directline), fetch(tokenEndpointURL) .then(response => { if (!response.ok) { throw new Error('Failed to retrieve Direct Line token.'); } return response.json(); }) .then(({ token }) => token) ]); // The "token" variable is the credentials for accessing the current conversation. // To maintain conversation across page navigation, save and reuse the token. // The token could have access to sensitive information about the user. // It must be treated like user password. const directLine = WebChat.createDirectLine({ domain: new URL('v3/directline', directLineURL), token }); // Sends "startConversation" event when the connection is established. const subscription = directLine.connectionStatus$.subscribe({ next(value) { if (value === 2) { directLine .postActivity({ localTimezone: Intl.DateTimeFormat().resolvedOptions().timeZone, locale, name: 'startConversation', type: 'event' }) .subscribe(); // Only send the event once, unsubscribe after the event is sent. subscription.unsubscribe(); } } }); WebChat.renderWebChat({ directLine, locale, styleOptions }, document.getElementById('webchat')); })(); </script> </body> </html>作成した index.html ファイルで、
const tokenEndpointURL = "<YOUR TOKEN ENDPOINT>";の行にトークン エンドポイントを入力します。最新のブラウザー (例: Microsoft Edge) を使用して index.html を開き、ユーザー定義キャンバスのコパイロットを開きます。
コパイロットをテストして、コパイロットから応答を受信していることと、正常に機能していることを確認します。
問題が発生した場合は、コパイロットを公開したこと、およびトークン エンドポイントが適切な場所に挿入されていることを確認してください。 ボット ID は
const tokenEndpointURL = "<YOUR TOKEN ENDPOINT>"の行の等号 (=) の後にあり、二重引用符 (") で囲む必要があります。
コパイロットのアイコン、背景色、名前をカスタマイズする
カスタマイズしたキャンバスがコパイロットで動作するようになったら、それを変更することができます。
JavaScript styleOptions オプションを使用して、いくつかの事前定義されたスタイルを設定できます。
defaultStyleOptions.js ファイルへのリンク、およびカスタマイズできるものとそれがどのように表示されるかの詳細については、Web チャットのカスタマイズをご覧ください。
コパイロット アイコンを変更する
次のサンプル コードを使用して index.html ファイルを更新します。
const styleOptions = {
  accent: '#00809d',
  botAvatarBackgroundColor: '#FFFFFF',
  botAvatarImage: 'https://learn.microsoft.com/azure/bot-service/v4sdk/media/logo_bot.svg',
  botAvatarInitials: 'BT',
  userAvatarImage: 'https://avatars.githubusercontent.com/u/661465'
};
コパイロットとユーザーのアバター画像を会社の画像に置き換えます。
画像 URL がない場合は、代わりに Base64 エンコードされた画像文字列を使用できます。
背景の色の変更
次のサンプル コードを使用して index.html ファイルを更新します。
const styleOptions = { backgroundColor: 'lightgray' };backgroundColorを好きな色に変更します。 標準の CSS の色の名前、RGB 値、または HEX を使用できます。
コパイロット名を変更する
次のものを使用して index.html ファイルで
<h1>テキストを更新します。<body> <div id="banner"> <h1><img src="contosocopilot-teams.png"> Contoso copilot name</h1> </div>テキストをコパイロットを呼び出すものに変更します。 画像を挿入することもできますが、見出しセクション内に収まるようにスタイル設定する必要があります。
チャット キャンバスをカスタマイズおよびホストする (詳細)
スタンドアロン Web アプリとしてホストされるユーザー定義キャンバスを使用して、Copilot Studio コパイロットを接続できます。 このオプションは、複数の Web ページにわたりカスタマイズした iFrame を埋め込む必要がある場合に最適です。
Note
ユーザー定義キャンバスをホストするには、ソフトウェア開発が必要です。 ここに示すガイダンスは、開発者ツール、ユーティリティ、および IDE を十分に理解している IT 管理者または開発者などの経験豊富な IT プロフェッショナルを対象としています。
カスタマイズするサンプルを選択する
Copilot Studio で動作するようカスタムビルドされたこれらのサンプルの 1 つから始めることをお勧めします:
完全なバンドルは、Copilot Studio からのすべてのリッチ コンテンツを表示できるユーザー定義キャンバスです。 例:
場所とファイルのアップロード は、ユーザーの位置を取得し、Copilot Studio コパイロットに送信できるユーザー定義キャンバスです。 例:
または、Bot Framework により提供された その他のサンプル Web チャット キャンバス から選ぶことができます。
styleSetOptions を使用してキャンバスをカスタマイズする
既定のキャンバスのカスタマイズと同様に、styleSetOptions を使用してユーザー定義キャンバスをカスタマイズできます。 カスタマイズ可能なすべてのプロパティは、defaultStyleOptions.js に一覧表示されます。 カスタマイズできるものとその外観の詳細については、Web チャットのカスタマイズを参照してください。
カスタマイズされたキャンバスを展開する
ユーザー定義キャンバスをホストするには、すべてのファイルを Web アプリに展開します。
関連トピック
フィードバック
以下は間もなく提供いたします。2024 年を通じて、コンテンツのフィードバック メカニズムとして GitHub の issue を段階的に廃止し、新しいフィードバック システムに置き換えます。 詳細については、「https://aka.ms/ContentUserFeedback」を参照してください。
フィードバックの送信と表示