マネージド イメージから新しい仮想マシンを作成する
VM を一般化した後は、マネージド イメージを作成できます。 その後、このマネージド イメージから新しい VM を作成できます。
注意事項
VM から VM イメージをキャプチャすると、VM が使用できなくなります。 さらに、この操作を元に戻すことはできません。
一般化された VM からマネージド イメージを作成する
作成したマネージド イメージには、一般化された VM に関連付けられているすべてのディスクが含まれます。 Azure portal、Azure CLI、または PowerShell を使用して、一般化された VM からマネージド イメージを作成できます。
Azure portal にイメージを作成するには、次の手順に従います。
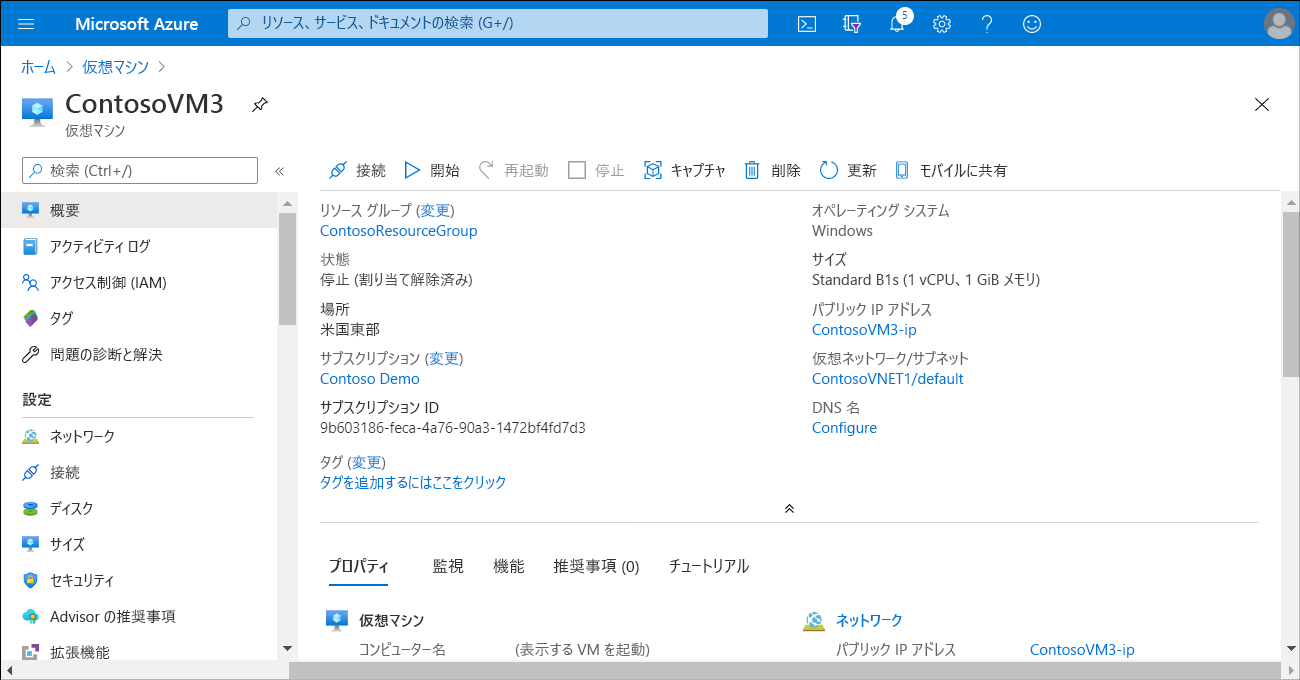
適切な VM を選択します。
ツール バーの [取り込み] を選択します。
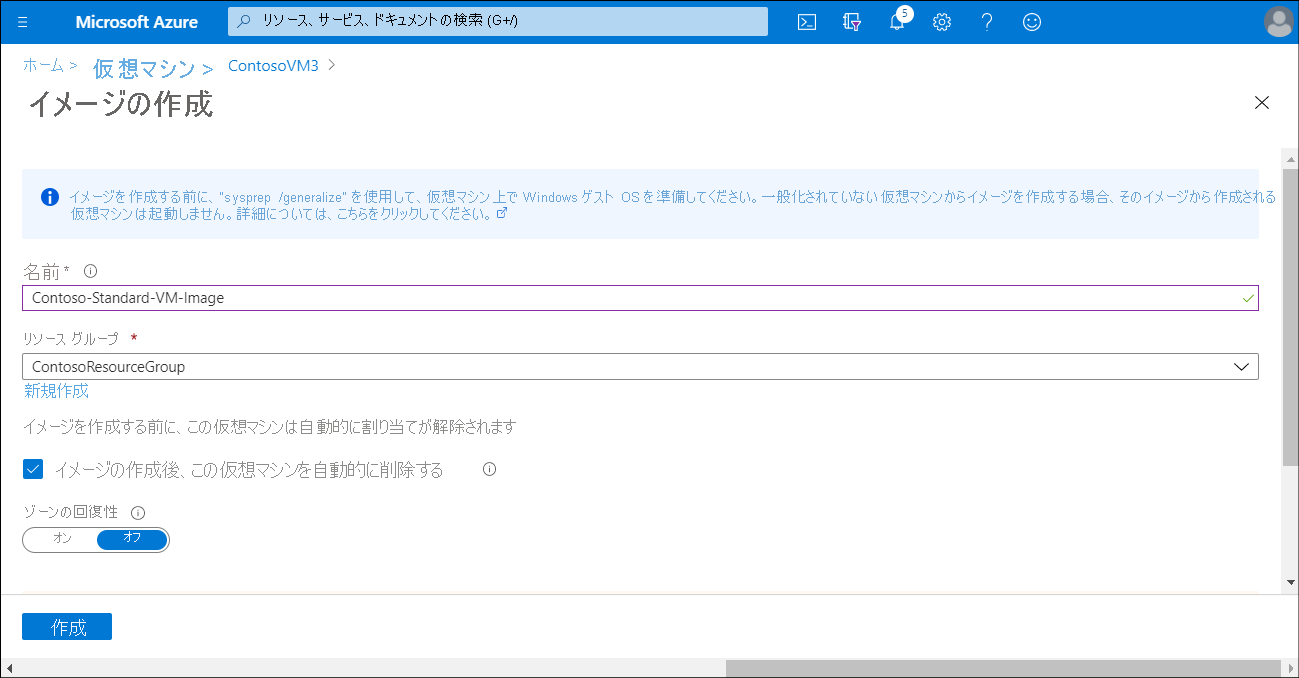
[イメージの作成] ウィンドウで、[名前] を入力し、[リソース グループ] を選択します。
ソース VM を削除する場合、[イメージの作成後、この仮想マシンを自動的に削除します] チェック ボックスをオンにします。
Note
この操作を確認するには、既存の VM 名を入力する必要があります。
[作成] を選択します
ヒント
さらに、ゾーン冗長ストレージによって支えられている回復性があるイメージを作成することもできます。 この機能により、ご利用のイメージの可用性が向上します。 この機能を有効にするには、[ゾーンの回復性] を [オン] に変更します。
ヒント
一般化された Azure VM から VM イメージをキャプチャする前に、Set-AzVm -ResourceGroupName $rgName -Name $vmName -Generalized コマンドを使用して、一般化済みとしてマークする必要があります。
PowerShell で次のコマンドを使用して、一般化され割り当て解除された VM から VM イメージを作成します。
$vm = Get-AzVM -ResourceGroupName <resource group> `
    -Name <generalized virtual machine>

$image = New-AzImageConfig -SourceVirtualMachineId `
    $vm.ID -Location <virtual machine location>

New-AzImage -Image $image `
    -ImageName <image name> `
    -ResourceGroupName <resource group>
Azure CLI の場合は、次のコマンドを使用します。
az image create \
    --name <image name> \
    --resource-group <resource group> \
    --source <generalized virtual machine>
マネージド イメージから新しい VM を作成する
マネージド イメージを作成した後、Azure portal を使用するか、PowerShell または Azure CLI を使用して、新しい VM を作成できます。
Azure portal を使用して新しい VM を作成するには、次の手順を実行します。
Azure portal で、[仮想マシン] に移動し、+ [追加] を選択します。
[サブスクリプション]、[リソース グループ]、[仮想マシン名]、[リージョン] など、必要な詳細を入力します。
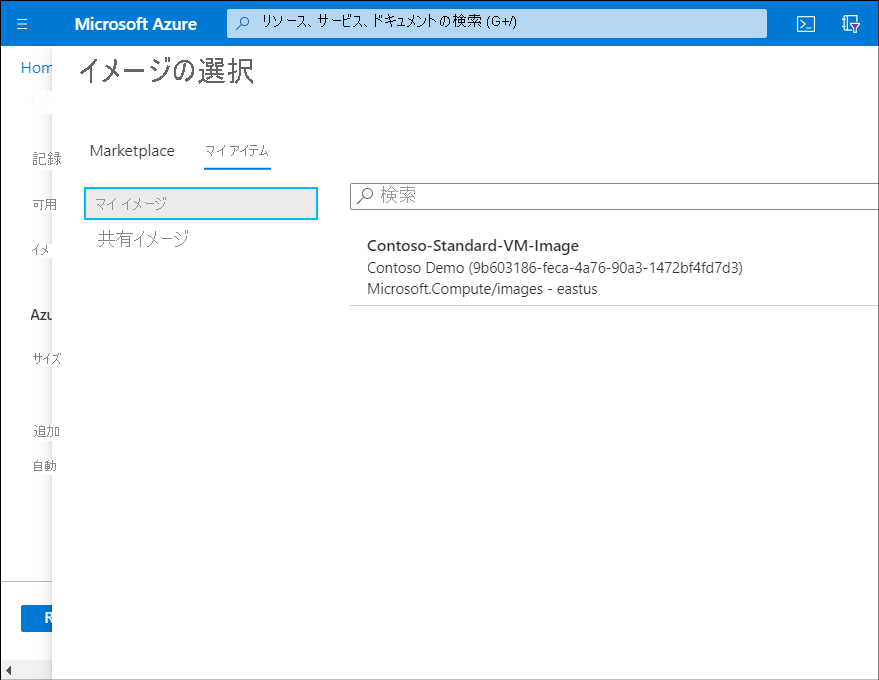
次に、[すべてのパブリック イメージおよびプライベート イメージを参照する] を選択します。
[イメージの選択] ウィンドウで、[マイ アイテム] タブを選択します。
新しく作成したイメージが一覧に表示されます。 それを選択します。
必要な残りの情報 ([サイズ]、[ユーザー名]、[パスワード]、[受信ポートの規則]、[ライセンスの種類]) を構成します。
ヒント
イメージから VM を作成する場合は、[ライセンスの種類] を構成する必要があります。 これは、Azure Marketplace から VM を作成するときには必要ありません。
必要に応じて、[プリセット構成で開始] ウィザードを使用して、[ディスク]、[ネットワーク]、[管理]、[詳細]、[タグ] の各設定を確認します。
完了したら、 [確認および作成] を選択します。
プロンプトが表示されたら、[作成] を選択します。
代わりに、PowerShell の New-AzVm コマンドまたは Azure CLI の az vm create コマンドを使用して、新しい VM を作成することもできます。 構文の例を次の図に示します。
PowerShell の使用
次のコマンドを使用して、PowerShell で新しい VM を作成します。
New-AzVm `
    -ResourceGroupName <resource group> `
    -Name <new virtual machine name> `
    -ImageName <image name> `
    -Location <location of image> `
Azure CLI の使用
Azure CLI を使用して新しい VM を作成するには、次のコマンドを使用します。
az vm create \
    --resource-group <resource group> \
    --name <new virtual machine name> \
    --image <image name> \
    --location <location of image>
Note
学習した内容を試す場合は、「Azure CLI から Azure VM のイメージを作成し、新しい VM をプロビジョニングする」演習を実行します。 サンドボックスに基づいているため、Azure サブスクリプションは必要ありません。
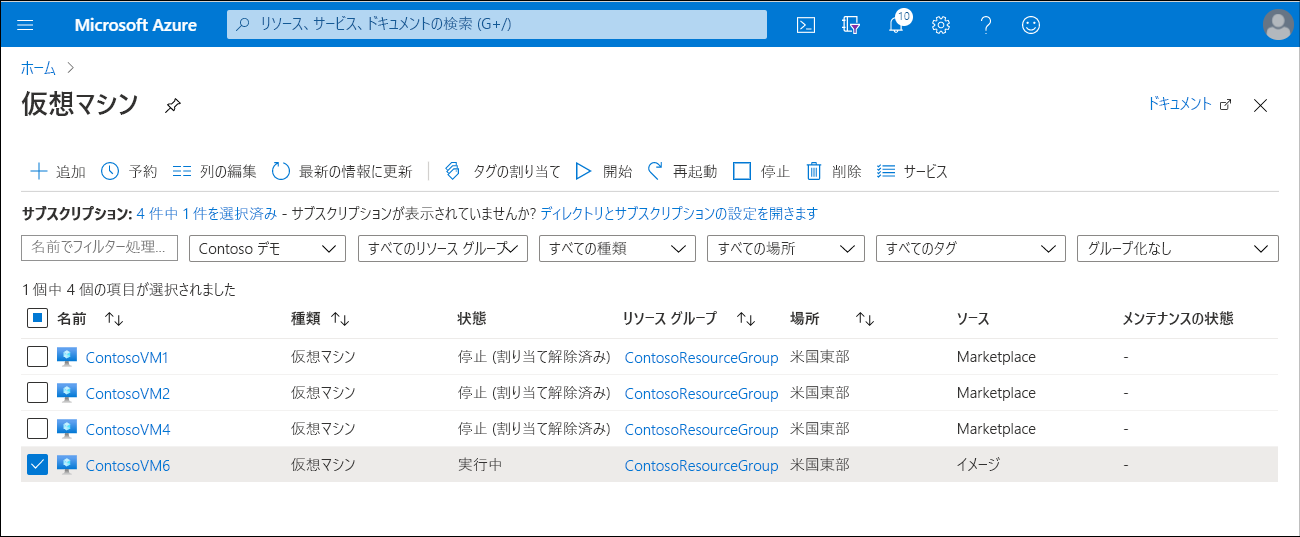
Azure portal 内の VM の一覧を確認すると、マネージド イメージから新しい VM を作成した後、新しい VM でソースが [イメージ] として表示されることがわかります。