Hello, iOS – クイックスタート
警告
iOS Designer は、Visual Studio 2019 バージョン 16.8 および Visual Studio 2019 for Mac バージョン 8.8 で非推奨とされ、Visual Studio 2019 バージョン 16.9 および Visual Studio for Mac バージョン 8.9 から削除されています。 iOS のユーザー インターフェイスについては、Xcode の Interface Builder が実行されている Mac で直接ビルドすることをお勧めします。 詳細については、「Xcode を使用したユーザーインターフェイスの設計」を参照してください。
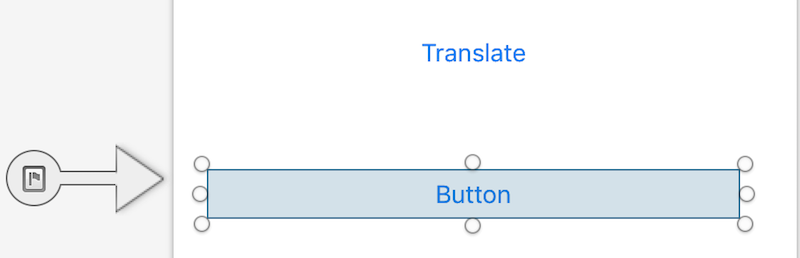
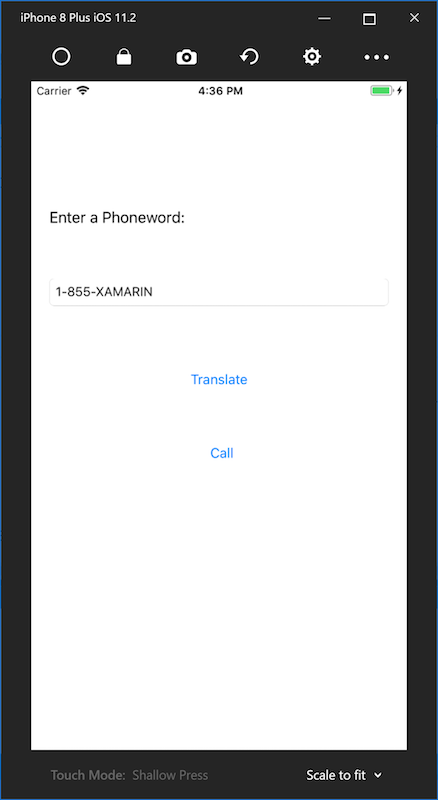
このガイドでは、ユーザーが入力した英字の電話番号を数値の電話番号に変換してから、その番号に電話をかけるアプリケーションの作成方法を説明します。 最終的にアプリケーションは次のようになります。

要件
Xamarin を使用した iOS 開発の要件:
- macOS High Sierra (10.13) 以降を実行している Mac。
- App Store からインストールした最新版の Xcode と iOS SDK。
Xamarin.iOS は次のセットアップで機能します。
- 上記の仕様を満たす最新版の Visual Studio for Mac。
Xamarin.iOS Mac インストール ガイドで段階的インストール手順をご確認いただけます
Xamarin.iOS は次のセットアップで機能します。
- 最新版の Visual Studio 2019 または Visual Studio 2017 Community、Professional、または Enterprise。Windows 10。上記の仕様を満たす Mac ビルド ホストとペア。
Xamarin.iOS Windows インストール ガイドでステップ バイ ステップのインストール手順をご確認いただけます。
始める前に、Xamarin アプリ アイコン セットをダウンロードしてください。
Visual Studio for Mac のチュートリアル
このチュートリアルでは、英数字の電話番号を数字の電話番号に変換する Phoneword という名称のアプリケーションを作成する方法を説明します。
Applications フォルダーまたはスポットライトから Visual Studio for Mac を起動します。
起動画面で、[新しいプロジェクト...] をクリックして、新しい Xamarin.iOS ソリューションを作成します。
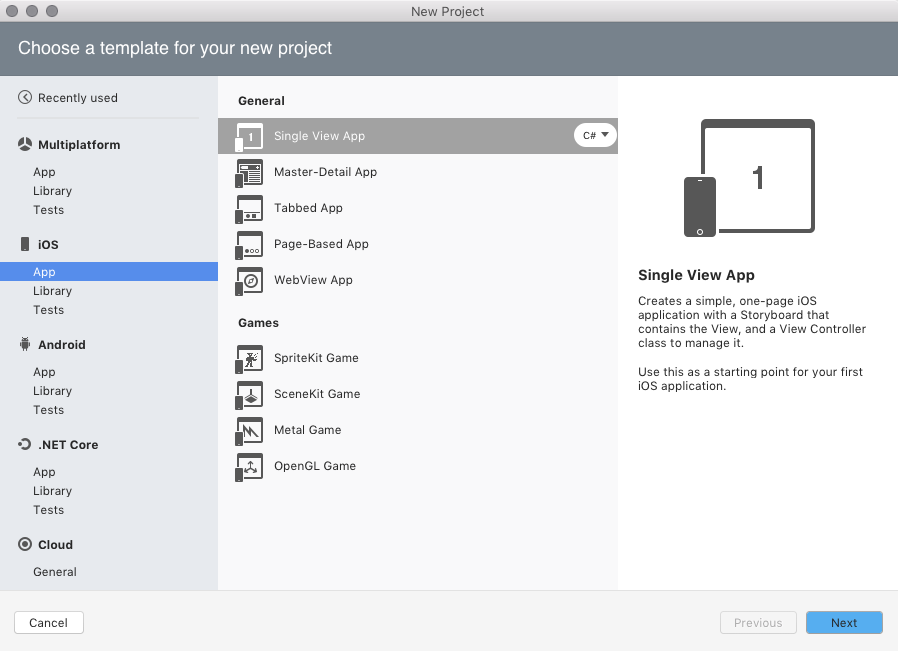
[新しいソリューション] ダイアログで、iOS > アプリ>のシングル ビュー アプリケーション テンプレートを選択し、C# が選択されていることを確認します。 [次へ] をクリックします。
アプリを構成します。 [名前] に
Phoneword_iOSを指定し、他のすべてを既定値のままにします。 [次へ] をクリックします。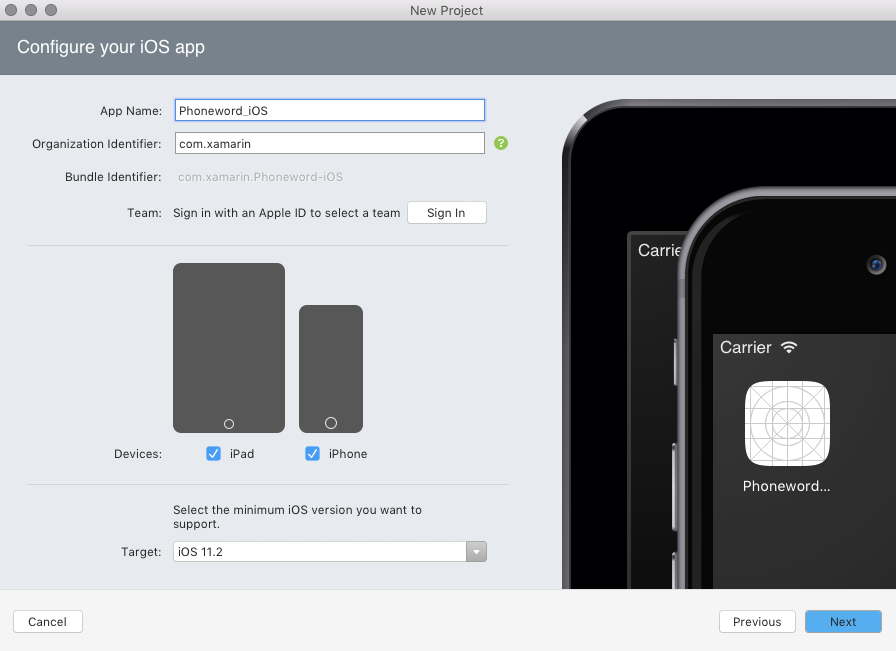
プロジェクトとソリューションの名前はそのままにします。 ここでプロジェクトの場所を選択するか、既定のままにします。
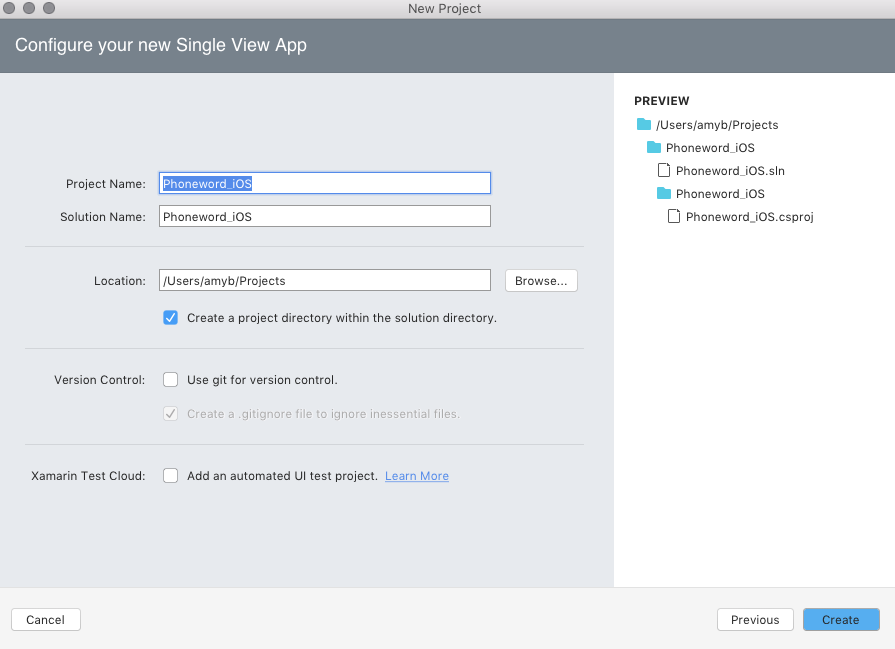
[作成] をクリックしてソリューションを作成します。
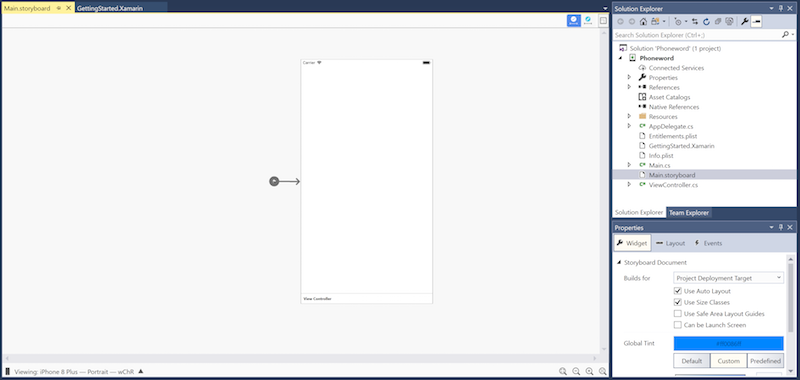
Solution Pad で Main.storyboard ファイルをダブルクリックして開きます。 Visual Studio iOS デザイナーを使用してファイルを開きます (ストーリーボードを右クリックし、[iOS デザイナーで>開く] を選択します)。 これで目視で確認しながら UI を作成できます。
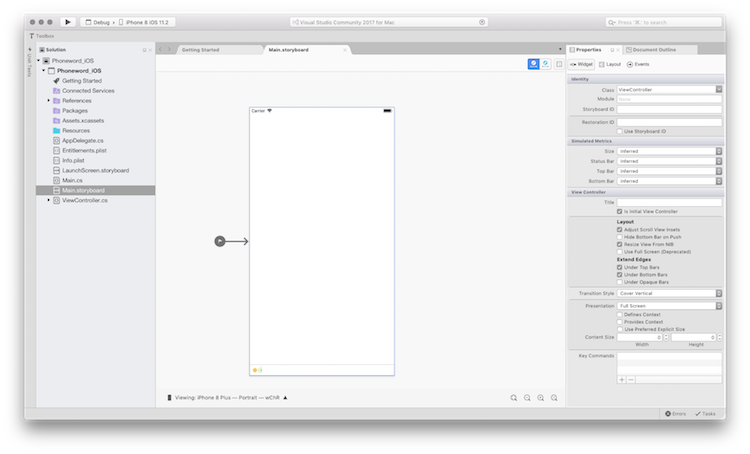
"サイズ クラス" は既定で有効になっています。 詳細については、Unified Storyboards ガイドをご覧ください。
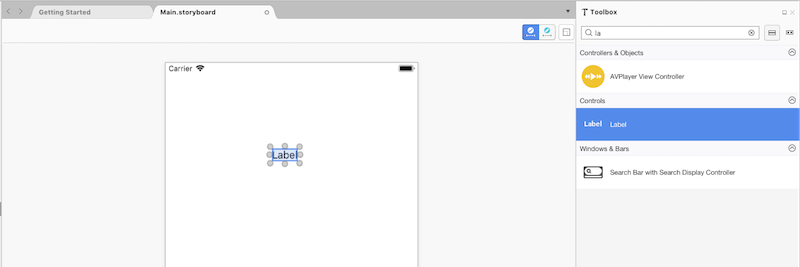
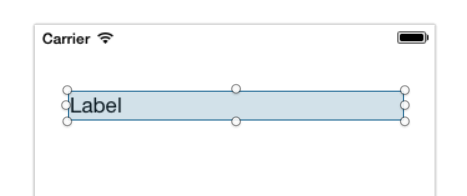
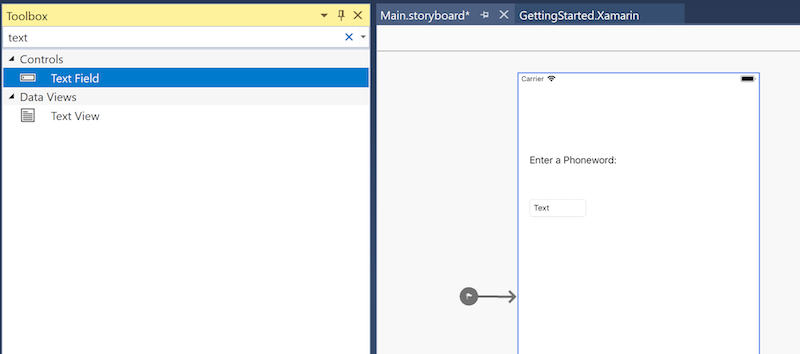
ツールボックス パッドの検索バーに「label」と入力し、デザイン サーフェイス (中央の領域) にラベルをドラッグします。
Note
[プロパティ パッド] または [ツールボックス] は、[パッドの表示] に移動することでいつでも表示>できます。
ドラッグ コントロールのハンドル (コントロールを囲む円) をつかみ、ラベルを大きくします。
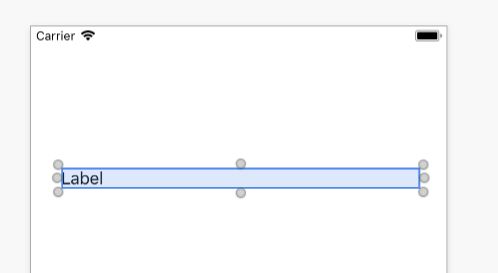
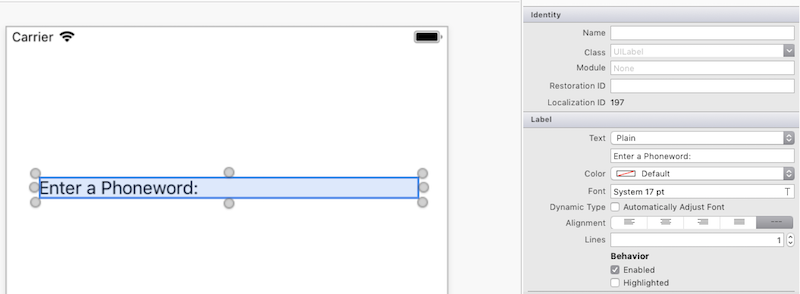
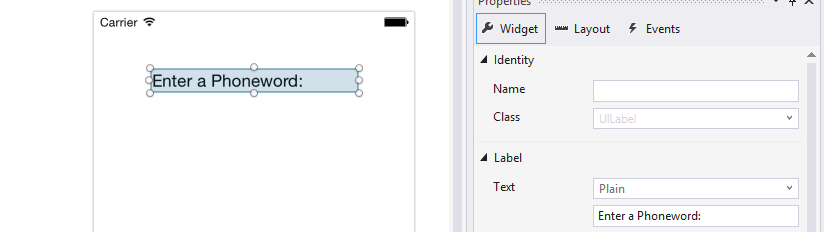
デザイン サーフェイスでラベルが選択されている状態で、[プロパティ] パッドを利用し、[ラベル] の [テキスト] プロパティを "Enter a Phoneword:" に変更します。
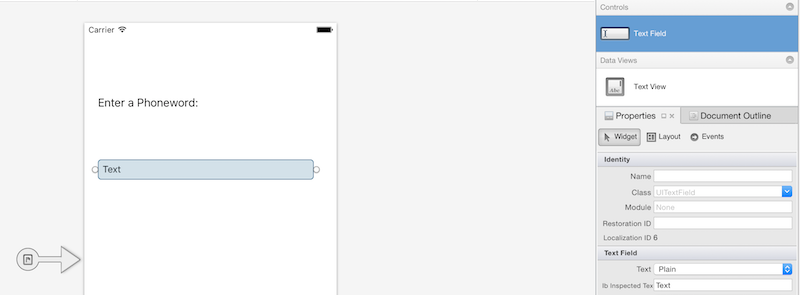
ツールボックス内で “テキスト フィールド” を検索し、[ツールボックス] の [テキスト フィールド] をデザイン サーフェイスにドラッグし、[ラベル] の下に置きます。 テキスト フィールドの幅がラベルの幅と同じになるまで幅を調整します。
デザイン サーフェイスでテキスト フィールドが選択されている状態で、Properties Pad の ID セクションの [テキスト フィールド] の [名前] プロパティを
PhoneNumberTextに変更し、[テキスト] プロパティを "1-855-XAMARIN" に変更します。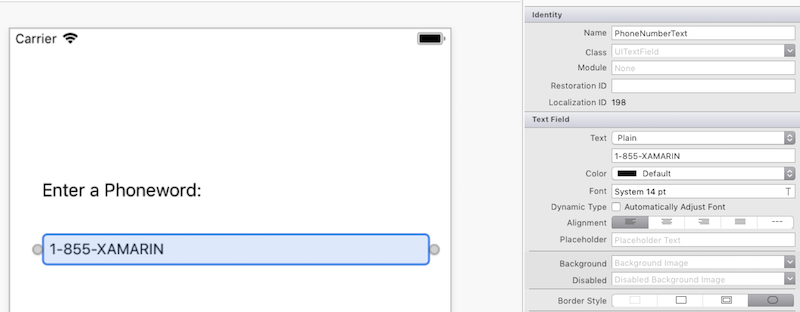
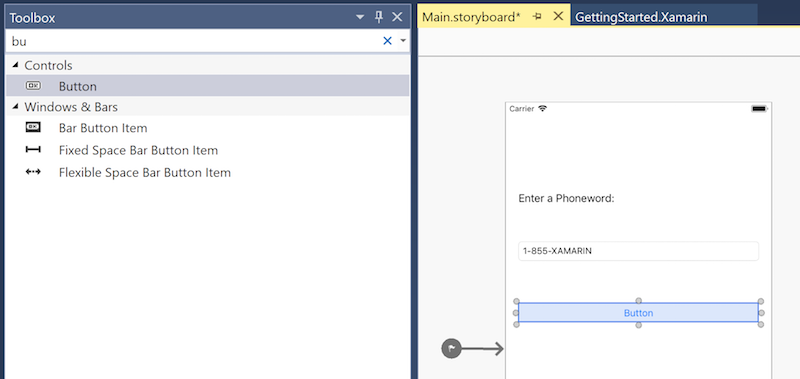
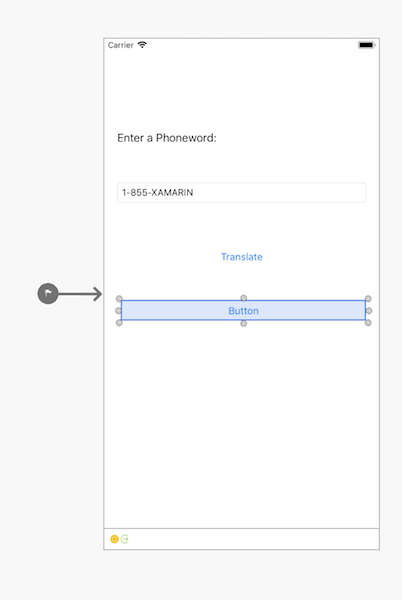
[ボタン] を [ツールボックス] からデザイン サーフェスにドラッグし、[テキスト フィールド] の下に配置します。 ボタンの幅がテキスト フィールドやラベルの幅と同じになるように幅を調整します。
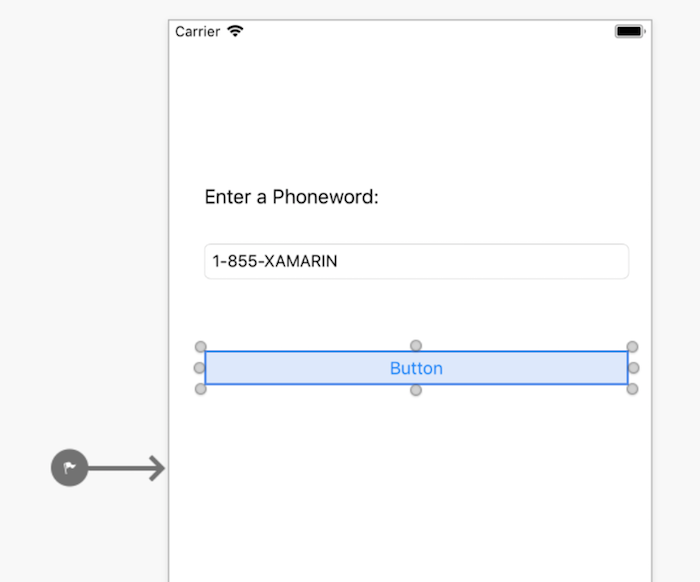
デザイン サーフェイスでボタンが選択されている状態で、Properties Pad の [ID] セクションの [名前] プロパティを
TranslateButtonに変更します。 [タイトル] プロパティを "Translate" に変更します。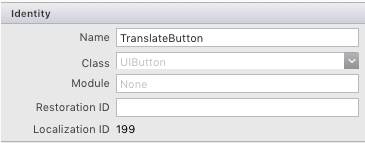
上記の 2 つの手順を繰り返し、[ボタン] を [ツールボックス] からデザイン サーフェスにドラッグし、最初の [ボタン] の下に配置します。 ボタンの幅が最初のボタンの幅と同じになるように幅を調整します。
デザイン サーフェイスで 2 つ目のボタンが選択されている状態で、[プロパティ] パッドの [ID] セクションの [名前] プロパティを
CallButtonに変更します。 [タイトル] プロパティを "Call" に変更します。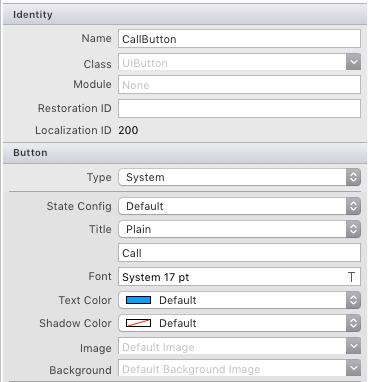
[ファイルの保存] に移動するか、⌘+ s キーを押して変更を保存します。>
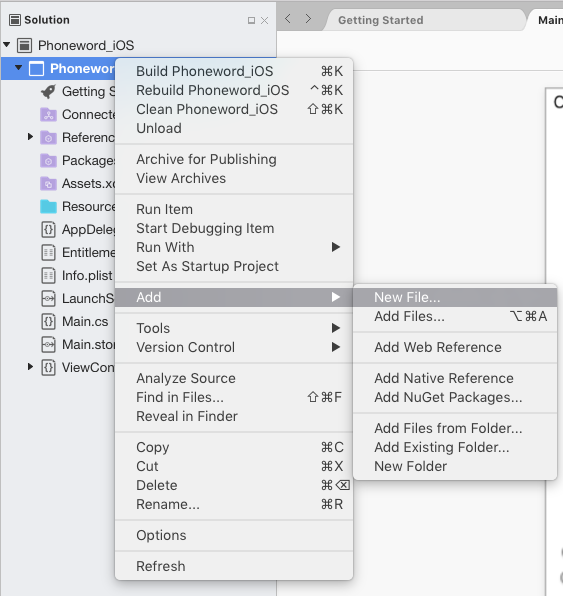
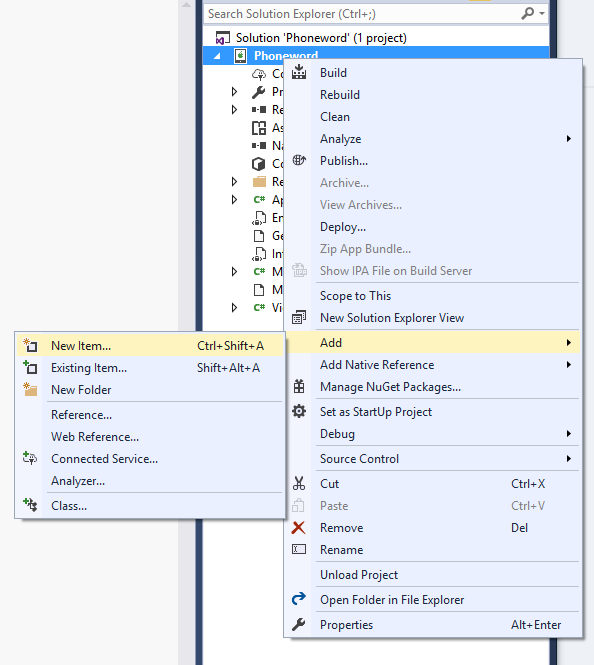
電話番号を英数字から数字に変換するには、いくつかのロジックをアプリに追加する必要があります。 ソリューション パッドで 電話word_iOSプロジェクトを右クリックし、[新しいファイルの追加] を選択するか、⌘+ n キーを押して、新しいファイルをプロジェクトに追加>します。
[新しいファイル] ダイアログで、[全般>空のクラス] を選択し、新しいファイルに名前を付けます
PhoneTranslator。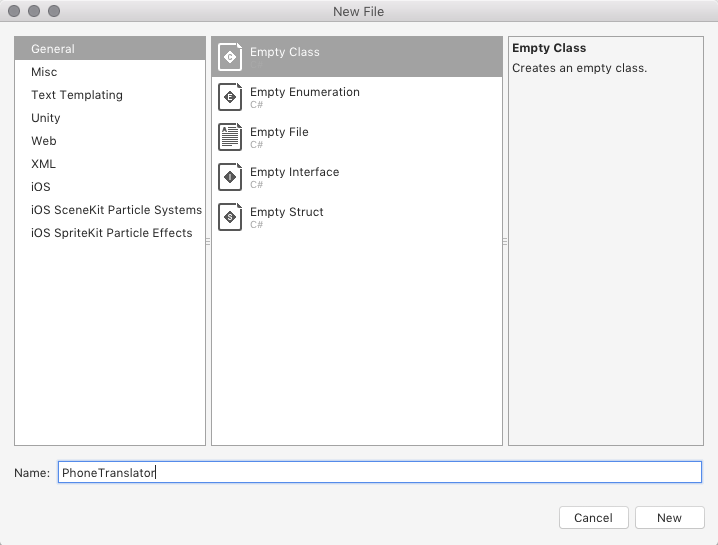
これで、新しい空の C# クラスが作成されます。 テンプレート コードをすべて削除し、次のコードに置き換えます。
using System.Text;
using System;

namespace Phoneword_iOS
{
    public static class PhoneTranslator
    {
        public static string ToNumber(string raw)
        {
            if (string.IsNullOrWhiteSpace(raw)) {
                return "";
            } else {
                raw = raw.ToUpperInvariant();
            }

            var newNumber = new StringBuilder();
            foreach (var c in raw)
            {
                if (" -0123456789".Contains(c)) {
                    newNumber.Append(c);
                } else {
                    var result = TranslateToNumber(c);
                    if (result != null) {
                        newNumber.Append(result);
                    }
                }
                // otherwise we've skipped a non-numeric char
            }
            return newNumber.ToString();
        }

        static bool Contains (this string keyString, char c)
        {
            return keyString.IndexOf(c) >= 0;
        }

        static int? TranslateToNumber(char c)
        {
            if ("ABC".Contains(c)) {
                return 2;
            } else if ("DEF".Contains(c)) {
                return 3;
            } else if ("GHI".Contains(c)) {
                return 4;
            } else if ("JKL".Contains(c)) {
                return 5;
            } else if ("MNO".Contains(c)) {
                return 6;
            } else if ("PQRS".Contains(c)) {
                return 7;
            } else if ("TUV".Contains(c)) {
                return 8;
            } else if ("WXYZ".Contains(c)) {
                return 9;
            }
            return null;
        }
    }
}
PhoneTranslator.cs ファイルを保存して閉じます。
ユーザー インターフェイスを接続するコードを追加します。 Solution Pad で ViewController.cs をダブルクリックして開きます。

最初に
TranslateButtonを接続します。 ViewController クラスで、ViewDidLoadメソッドを見つけ、base.ViewDidLoad()呼び出しの下に次のコードを追加します。string translatedNumber = ""; TranslateButton.TouchUpInside += (object sender, EventArgs e) => { // Convert the phone number with text to a number // using PhoneTranslator.cs translatedNumber = PhoneTranslator.ToNumber( PhoneNumberText.Text); // Dismiss the keyboard if text field was tapped PhoneNumberText.ResignFirstResponder (); if (translatedNumber == "") { CallButton.SetTitle ("Call ", UIControlState.Normal); CallButton.Enabled = false; } else { CallButton.SetTitle ("Call " + translatedNumber, UIControlState.Normal); CallButton.Enabled = true; } };ファイルの名前空間が異なる場合、
using Phoneword_iOS;を追加します。2 つ目のボタンである
CallButtonをユーザーが押したときに応答するためのコードを追加します。TranslateButtonのコードの下に次のコードを配置し、ファイルの一番上にusing Foundation;を追加します。CallButton.TouchUpInside += (object sender, EventArgs e) => { // Use URL handler with tel: prefix to invoke Apple's Phone app... var url = new NSUrl ("tel:" + translatedNumber); // ...otherwise show an alert dialog if (!UIApplication.SharedApplication.OpenUrl (url)) { var alert = UIAlertController.Create ("Not supported", "Scheme 'tel:' is not supported on this device", UIAlertControllerStyle.Alert); alert.AddAction (UIAlertAction.Create ("Ok", UIAlertActionStyle.Default, null)); PresentViewController (alert, true, null); } };変更を保存し、[Build All]\(すべてビルド\) を選択するか、⌘+ B キーを押してアプリケーションをビルド>します。アプリケーションがコンパイルされると、IDE の上部に成功メッセージが表示されます。

エラーがある場合は、アプリケーションが正常にビルドされるまで、前の手順を実行し、誤りを修正します。
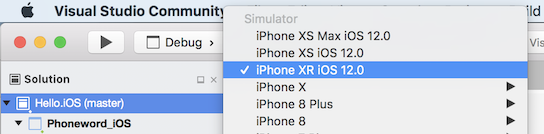
最後に iOS シミュレーターでアプリケーションをテストします。 IDE の左上で、最初のドロップダウンから [デバッグ] を選択し、2 つ目のドロップダウンから [iPhone XR iOS 12.0] (またはその他の使用可能なシミュレーター) を選択し、[開始] (再生ボタンに似た三角形のボタン) を押します。
Note
現在のところ、Apple の要件に起因し、場合によっては、デバイスまたはシミュレーターのコードをビルドするため、開発証明書または "署名 ID" を用意する必要があります。 デバイス プロビジョニング ガイドの手順に従ってこれを設定します。
これにより、iOS シミュレーター内でアプリケーションが起動します。
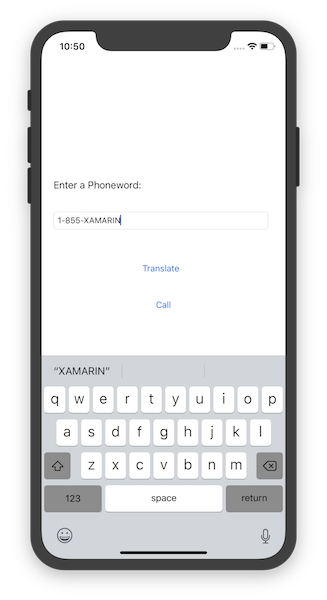
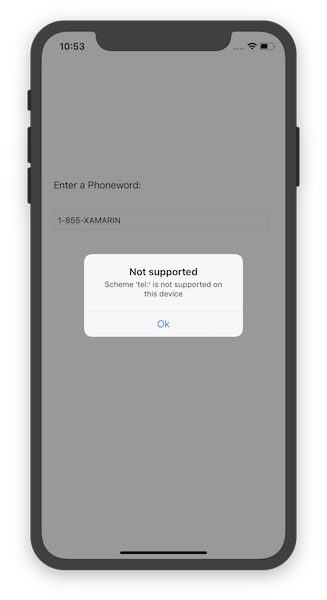
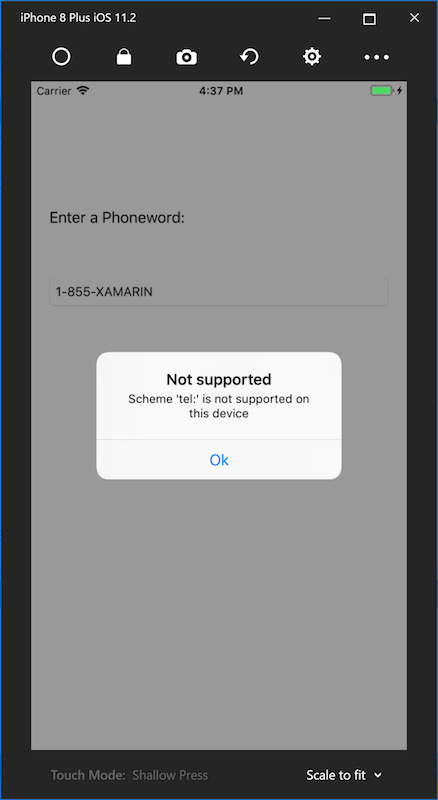
iOS シミュレーターでは通話に対応していません。代わりに、電話をかけようとすると警告ダイアログが表示されます。
Visual Studio チュートリアル
このチュートリアルでは、英数字の電話番号を数字の電話番号に変換する Phoneword という名称のアプリケーションを作成する方法を説明します。
Note
このチュートリアルでは、Windows 10 仮想マシンの Visual Studio Enterprise 2017 を使用します。 上記の要件を満たす限り、実際のセットアップはこれと異なってもかまいません。一部のスクリーンショットが実際とは異なる場合があります。
Note
このチュートリアルを進める前に、Visual Studio から Mac に接続しておく必要があります。 これは、Xamarin.iOS が、アプリケーションのビルドと起動に Apple のツールを利用するからというのが理由です。 「Mac とペアリング」ガイドの手順に従い、設定を始めます。
[スタート] メニューから Visual Studio を起動します。
[新しいプロジェクトのファイル>]を選択して、新しい > Xamarin.iOS ソリューションを作成します。.. >Visual C# > i電話 & iPad > iOS アプリ (Xamarin):
 project type")
次に表示されたダイアログで [単一ビュー アプリ] テンプレートを選択し、[OK] をクリックしてプロジェクトを作成します。

ツール バーの [Xamarin Mac エージェント] アイコンが緑であることを確認します。

緑でない場合は、Mac ビルド ホストへの接続がないことを示しているため、構成ガイドの手順に従って接続します。
ソリューション エクスプローラー で iOS デザイナーの Main.storyboard ファイルをダブルクリックして開きます。
[ツールボックス] タブの検索バーに「label」と入力し、デザイン サーフェイス (中央の領域) にラベルをドラッグします。

次に、ドラッグ コントロールのハンドルをつかみ、ラベルを大きくします。
デザイン サーフェイスでラベルが選択されている状態で、[プロパティ] ウィンドウを利用し、[ラベル] の [テキスト] プロパティを "Enter a Phoneword:" に変更します。
Note
[表示] メニューに移動すれば、[プロパティ] や [ツールボックス] をいつでも表示できます。
ツールボックス内で “テキスト フィールド” を検索し、[ツールボックス] の [テキスト フィールド] をデザイン サーフェイスにドラッグし、[ラベル] の下に置きます。 テキスト フィールドの幅がラベルの幅と同じになるまで幅を調整します。
デザイン サーフェイスでテキスト フィールドが選択されている状態で、[プロパティ] パッドの ID セクションの [テキスト フィールド] の [名前] プロパティを
PhoneNumberTextに変更し、[テキスト] プロパティを "1-855-XAMARIN" に変更します。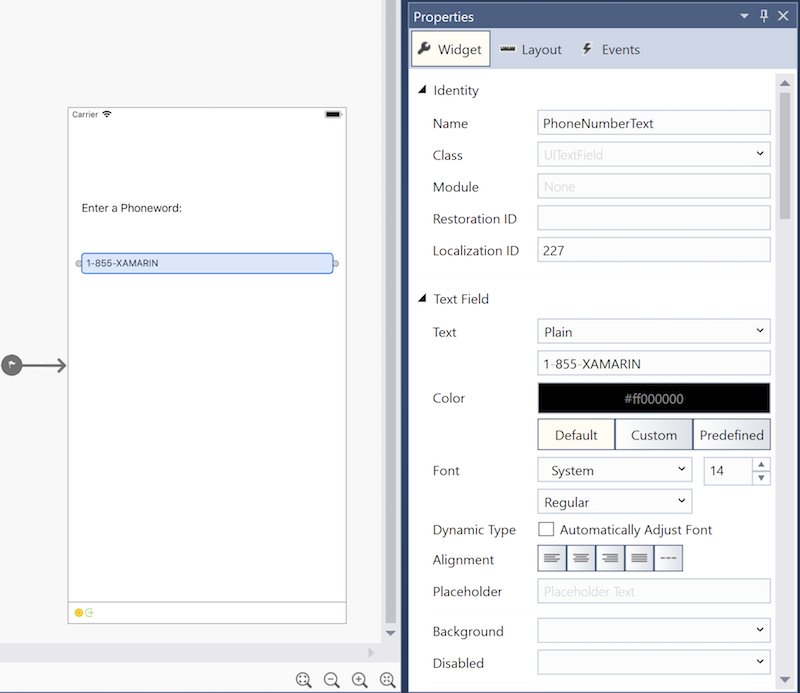
[ボタン] を [ツールボックス] からデザイン サーフェスにドラッグし、[テキスト フィールド] の下に配置します。 ボタンの幅がテキスト フィールドやラベルの幅と同じになるように幅を調整します。
デザイン サーフェイスでボタンが選択されている状態で、[プロパティ] パッドの [ID] セクションの [名前] プロパティを
TranslateButtonに変更します。 [タイトル] プロパティを "Translate" に変更します。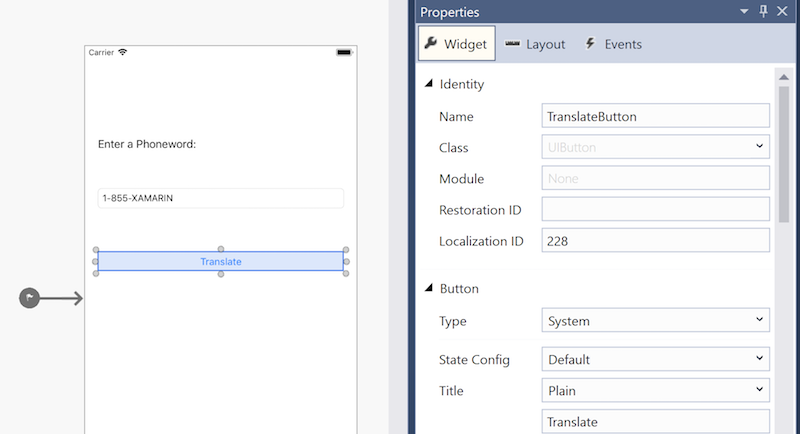
前の 2 つの手順を繰り返し、[ボタン] を [ツールボックス] からデザイン サーフェスにドラッグし、最初の [ボタン] の下に配置します。 ボタンの幅が最初のボタンの幅と同じになるように幅を調整します。
デザイン サーフェイスで 2 つ目のボタンが選択されている状態で、[プロパティ] の [ID] セクションの [名前] プロパティを
CallButtonに変更します。 [タイトル] プロパティを "Call" に変更します。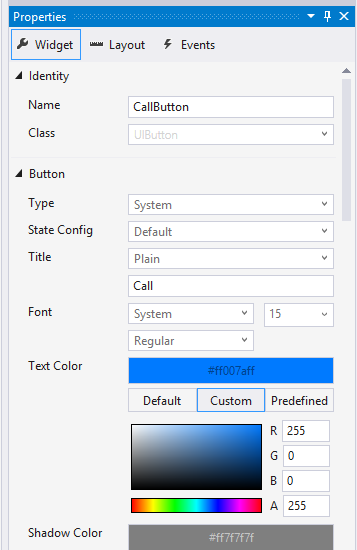
[すべて保存] > に移動するか、Ctrl キーを押しながら s キーを押して、変更を保存します。
電話番号を英数字から数字に変換するコードをいくつか追加します。 これを行うには、まず、ソリューション エクスプローラーの 電話word プロジェクトを右クリックし、[新しい項目の追加]を選択して新しいファイルをプロジェクトに追加>します。または、Ctrl + Shift + A キーを押します。
[新しい項目の追加] ダイアログで (プロジェクトを右クリックし、[新しい項目の追加>...] を選択)、Apple > クラスを選択し、新しいファイル
PhoneTranslatorに名前を付けます。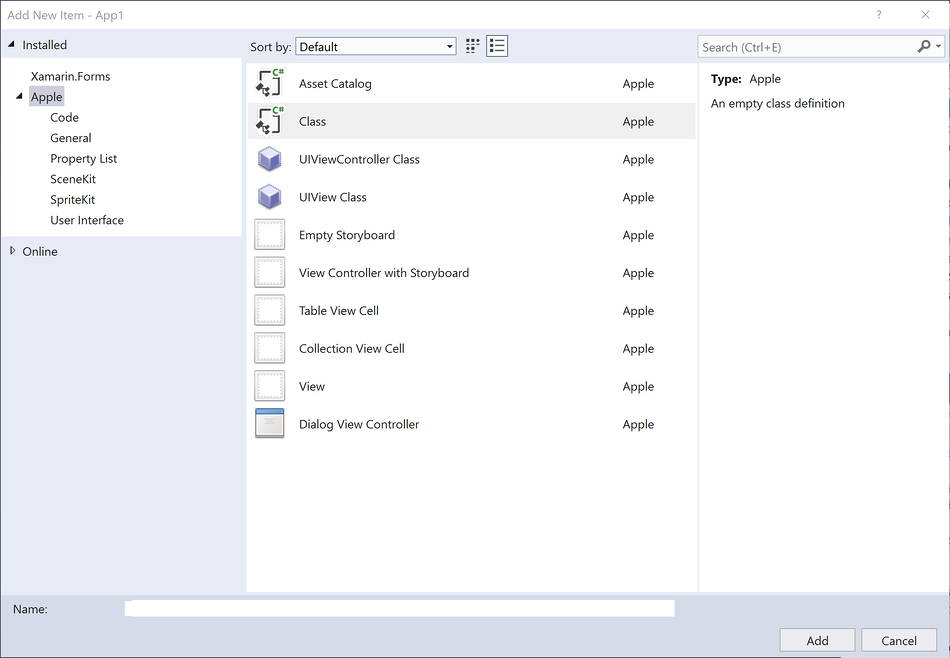
重要
アイコンに C# がある 'class' テンプレートを必ず選択してください。 それ以外を選択すると、この新しいクラスを参照できないことがあります。
これで、新しい C# クラスが作成されます。 テンプレート コードをすべて削除し、次のコードに置き換えます。
using System.Text;
using System;

namespace Phoneword
{
    public static class PhoneTranslator
    {
        public static string ToNumber(string raw)
        {
            if (string.IsNullOrWhiteSpace(raw)) {
                return "";
            } else {
                raw = raw.ToUpperInvariant();
            }

            var newNumber = new StringBuilder();
            foreach (var c in raw)
            {
                if (" -0123456789".Contains(c)) {
                    newNumber.Append(c);
                } else {
                    var result = TranslateToNumber(c);
                    if (result != null) {
                        newNumber.Append(result);
                    }
                }
                // otherwise we've skipped a non-numeric char
            }
            return newNumber.ToString();
        }

        static bool Contains (this string keyString, char c)
        {
            return keyString.IndexOf(c) >= 0;
        }

        static int? TranslateToNumber(char c)
        {
            if ("ABC".Contains(c)) {
                return 2;
            } else if ("DEF".Contains(c)) {
                return 3;
            } else if ("GHI".Contains(c)) {
                return 4;
            } else if ("JKL".Contains(c)) {
                return 5;
            } else if ("MNO".Contains(c)) {
                return 6;
            } else if ("PQRS".Contains(c)) {
                return 7;
            } else if ("TUV".Contains(c)) {
                return 8;
            } else if ("WXYZ".Contains(c)) {
                return 9;
            }
            return null;
        }
    }
}
PhoneTranslator.cs ファイルを保存して閉じます。
ハンドルとボタンの相互作用にロジックを追加できるように、ソリューション エクスプローラーの ViewController.cs をダブルクリックして開きます。
最初に
TranslateButtonを接続します。 ViewController クラスで、ViewDidLoadメソッドを見つけます。ViewDidLoad内のbase.ViewDidLoad()呼び出しの下に次のボタン コードを追加します。string translatedNumber = ""; TranslateButton.TouchUpInside += (object sender, EventArgs e) => { // Convert the phone number with text to a number // using PhoneTranslator.cs translatedNumber = PhoneTranslator.ToNumber(PhoneNumberText.Text); // Dismiss the keyboard if text field was tapped PhoneNumberText.ResignFirstResponder (); if (translatedNumber == "") { CallButton.SetTitle ("Call", UIControlState.Normal); CallButton.Enabled = false; } else { CallButton.SetTitle ("Call " + translatedNumber, UIControlState.Normal); CallButton.Enabled = true; } };ファイルの名前空間が異なる場合、
using Phoneword;を追加します。2 つ目のボタンである
CallButtonをユーザーが押したときに応答するためのコードを追加します。TranslateButtonのコードの下に次のコードを配置し、ファイルの一番上にusing Foundation;を追加します。CallButton.TouchUpInside += (object sender, EventArgs e) => { var url = new NSUrl ("tel:" + translatedNumber); // Use URL handler with tel: prefix to invoke Apple's Phone app, // otherwise show an alert dialog if (!UIApplication.SharedApplication.OpenUrl (url)) { var alert = UIAlertController.Create ("Not supported", "Scheme 'tel:' is not supported on this device", UIAlertControllerStyle.Alert); alert.AddAction (UIAlertAction.Create ("Ok", UIAlertActionStyle.Default, null)); PresentViewController (alert, true, null); } };変更を保存し、ビルド ソリューションのビルドを選択するか、Ctrl + Shift + B キーを押してアプリケーションをビルド>します。アプリケーションがコンパイルされると、IDE の下部に成功メッセージが表示されます。

エラーがある場合は、アプリケーションが正常にビルドされるまで、前の手順を実行し、誤りを修正します。
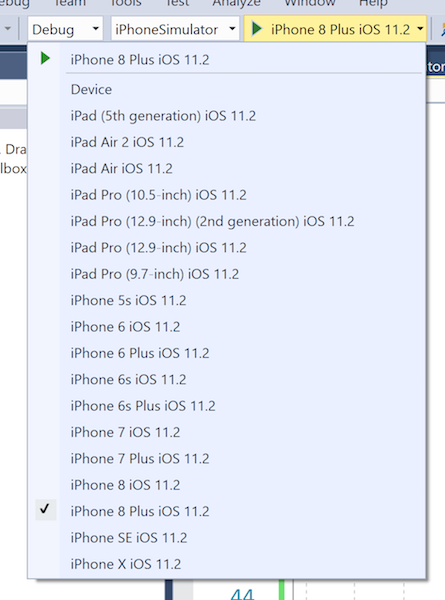
最後にリモートの iOS シミュレーターでアプリケーションをテストします。 IDE ツール バーで、ドロップダウン メニューから [デバッグ] と [iPhone 8 Plus iOS x.x] を選択し、[開始] (再生ボタンに似た緑の三角形) を押します。
これにより、iOS シミュレーター内でアプリケーションが起動します。
iOS シミュレーターでは通話に対応していません。代わりに、電話をかけようとすると警告ダイアログが表示されます。
おつかれさまでした。これで最初の Xamarin.iOS アプリケーションが完成しました。
次は、「Hello, iOS Deep Dive」で、このガイドに登場したツールやスキルを詳しく分析します。