자습서: Node.js 콘솔 디먼 앱에서 Microsoft Graph API 호출
이 자습서에서는 자체 ID를 사용하여 Microsoft Graph API를 호출하는 콘솔 디먼 앱을 빌드합니다. 빌드한 디먼 앱은 Node.js용 MSAL(Microsoft 인증 라이브러리)을 사용합니다.
다음을 수행하려면 이 자습서의 단계를 따릅니다.
- Azure Portal에 애플리케이션 등록
- Node.js 콘솔 디먼 앱 프로젝트 만들기
- 앱에 인증 논리 추가
- 앱 등록 세부 정보 추가
- 메서드를 추가하여 웹 API 호출
- 앱 테스트
필수 조건
- Node.JS
- Visual Studio Code 또는 다른 코드 편집기
응용 프로그램 등록
먼저 Microsoft ID 플랫폼에 애플리케이션 등록의 단계를 완료하여 앱을 등록합니다.
앱 등록 시 다음 설정을 사용합니다.
- 이름:
NodeDaemonApp(권장) - 지원되는 계정 유형: 이 조직 디렉터리의 계정만
- API 권한: Microsoft API>Microsoft Graph>애플리케이션 권한>
User.Read.All - 클라이언트 암호:
*********(이 값은 한 번만 표시되므로 이후 단계에서 사용할 수 있게 기록해 두세요.)
프로젝트 만들기
먼저 이 Node.js 자습서 프로젝트의 디렉터리를 만듭니다. 예를 들어, NodeDaemonApp입니다.
터미널에서 만든 디렉터리(프로젝트 루트)로 변경한 후 다음 명령을 실행합니다.
npm init -y
npm install --save dotenv yargs axios @azure/msal-node
다음으로 프로젝트 루트의 package.json 파일을 편집하고 다음과 같이
main값의 접두사로bin/을 추가합니다."main": "bin/index.js",이제 bin 디렉터리를 만들고 bin 안에서 index.js라는 새 파일에 다음 코드를 추가합니다.
#!/usr/bin/env node

// read in env settings
require('dotenv').config();

const yargs = require('yargs');

const fetch = require('./fetch');
const auth = require('./auth');

const options = yargs
    .usage('Usage: --op <operation_name>')
    .option('op', { alias: 'operation', describe: 'operation name', type: 'string', demandOption: true })
    .argv;

async function main() {
    console.log(`You have selected: ${options.op}`);

    switch (yargs.argv['op']) {
        case 'getUsers':

            try {
                // here we get an access token
                const authResponse = await auth.getToken(auth.tokenRequest);

                // call the web API with the access token
                const users = await fetch.callApi(auth.apiConfig.uri, authResponse.accessToken);

                // display result
                console.log(users);
            } catch (error) {
                console.log(error);
            }

            break;
        default:
            console.log('Select a Graph operation first');
            break;
    }
};

main();
방금 만든 index.js 파일은 다음에 만들 다른 두 노드 모듈을 참조합니다.
- auth.js - Microsoft ID 플랫폼에서 액세스 토큰을 획득하는 데 MSAL 노드를 사용합니다.
- fetch.js - Microsoft Graph API에 대한 HTTP 요청에 액세스 토큰(auth.js에서 획득)을 포함하여 Microsoft Graph API에서 데이터를 요청합니다.
자습서가 끝나면 프로젝트의 파일 및 디렉터리 구조가 다음과 같이 표시됩니다.
NodeDaemonApp/
├── bin
│   ├── auth.js
│   ├── fetch.js
│   ├── index.js
├── package.json
└── .env
인증 논리 추가
bin 디렉터리 안에서 auth.js라는 새 파일에 다음 코드를 추가합니다. auth.js의 코드는 Microsoft Graph API 요청에 포함할 액세스 토큰을 Microsoft ID 플랫폼에서 획득합니다.
const msal = require('@azure/msal-node');

/**
 * Configuration object to be passed to MSAL instance on creation.
 * For a full list of MSAL Node configuration parameters, visit:
 * https://github.com/AzureAD/microsoft-authentication-library-for-js/blob/dev/lib/msal-node/docs/configuration.md
 */
const msalConfig = {
    auth: {
        clientId: process.env.CLIENT_ID,
        authority: process.env.AAD_ENDPOINT + '/' + process.env.TENANT_ID,
        clientSecret: process.env.CLIENT_SECRET,
    }
};

/**
 * With client credentials flows permissions need to be granted in the portal by a tenant administrator.
 * The scope is always in the format '<resource>/.default'. For more, visit:
 * https://learn.microsoft.com/azure/active-directory/develop/v2-oauth2-client-creds-grant-flow
 */
const tokenRequest = {
    scopes: [process.env.GRAPH_ENDPOINT + '/.default'],
};

const apiConfig = {
    uri: process.env.GRAPH_ENDPOINT + '/v1.0/users',
};

/**
 * Initialize a confidential client application. For more info, visit:
 * https://github.com/AzureAD/microsoft-authentication-library-for-js/blob/dev/lib/msal-node/docs/initialize-confidential-client-application.md
 */
const cca = new msal.ConfidentialClientApplication(msalConfig);

/**
 * Acquires token with client credentials.
 * @param {object} tokenRequest
 */
async function getToken(tokenRequest) {
    return await cca.acquireTokenByClientCredential(tokenRequest);
}

module.exports = {
    apiConfig: apiConfig,
    tokenRequest: tokenRequest,
    getToken: getToken
};
위의 코드 조각에서는 먼저 구성 개체(msalConfig)를 만든 다음, 이를 전달하여 MSAL ConfidentialClientApplication을 초기화합니다. 그런 다음, 클라이언트 자격 증명을 통해 토큰을 가져오는 메서드를 만들고 마지막으로 main.js에서 액세스할 수 있도록 이 모듈을 노출합니다. 이 모듈의 구성 매개 변수는 다음 단계에서 만들 환경 파일에서 가져온 것입니다.
앱 등록 세부 정보 추가
토큰을 가져올 때 사용되는 앱 등록 세부 정보를 저장하는 환경 파일을 만듭니다. 이를 수행하려면 샘플(NodeDaemonApp)의 루트 폴더 안에 .env라는 파일을 만들고 다음 코드를 추가합니다.
# Credentials
TENANT_ID=Enter_the_Tenant_Id_Here
CLIENT_ID=Enter_the_Application_Id_Here
CLIENT_SECRET=Enter_the_Client_Secret_Here

# Endpoints
AAD_ENDPOINT=Enter_the_Cloud_Instance_Id_Here/
GRAPH_ENDPOINT=Enter_the_Graph_Endpoint_Here/
Azure 앱 등록 포털에서 얻은 값으로 이러한 세부 정보를 입력합니다.
Enter_the_Tenant_Id_here는 다음 중 하나여야 합니다.- 애플리케이션에서 이 조직 디렉터리의 계정을 지원하는 경우 이 값을 테넌트 ID 또는 테넌트 이름으로 바꿉니다. 예:
contoso.microsoft.com. - 애플리케이션에서 모든 조직 디렉터리의 계정을 지원하는 경우 이 값을
organizations로 바꾸세요. - 애플리케이션에서 모든 조직 디렉터리의 계정 및 개인 Microsoft 계정을 지원하는 경우 이 값을
common으로 바꿉니다. - 개인 Microsoft 계정만 지원하도록 제한하려면 이 값을
consumers로 바꿉니다.
- 애플리케이션에서 이 조직 디렉터리의 계정을 지원하는 경우 이 값을 테넌트 ID 또는 테넌트 이름으로 바꿉니다. 예:
Enter_the_Application_Id_Here: 등록한 애플리케이션의 애플리케이션(클라이언트) ID입니다.Enter_the_Cloud_Instance_Id_Here: 애플리케이션이 등록된 Azure 클라우드 인스턴스입니다.- 기본(또는 글로벌) Azure 클라우드의 경우
https://login.microsoftonline.com을 입력합니다. - 국가별 클라우드(예: 중국)의 경우 국가별 클라우드에서 적절한 값을 찾을 수 있습니다.
- 기본(또는 글로벌) Azure 클라우드의 경우
Enter_the_Graph_Endpoint_Here는 애플리케이션과 통신해야 하는 Microsoft Graph API의 인스턴스입니다.- 글로벌 Microsoft Graph API 엔드포인트의 경우 이 문자열의 두 인스턴스를 모두
https://graph.microsoft.com으로 바꿉니다. - 국가별 클라우드 배포의 엔드포인트는 Microsoft Graph 설명서의 국가별 클라우드 배포를 참조하세요.
- 글로벌 Microsoft Graph API 엔드포인트의 경우 이 문자열의 두 인스턴스를 모두
메서드를 추가하여 웹 API 호출
bin 폴더 안에 fetch.js라는 또 다른 파일을 만들고, Microsoft Graph API에 대한 REST 호출을 수행하는 다음 코드를 추가합니다.
const axios = require('axios');

/**
 * Calls the endpoint with authorization bearer token.
 * @param {string} endpoint
 * @param {string} accessToken
 */
async function callApi(endpoint, accessToken) {

    const options = {
        headers: {
            Authorization: `Bearer ${accessToken}`
        }
    };

    console.log('request made to web API at: ' + new Date().toString());

    try {
        const response = await axios.get(endpoint, options);
        return response.data;
    } catch (error) {
        console.log(error)
        return error;
    }
};

module.exports = {
    callApi: callApi
};
여기서 callApi 메서드는 액세스 토큰이 필요한 보호되는 리소스에 대한 HTTP GET 요청을 실행하는 데 사용됩니다. 그러면 요청에서 콘텐츠를 호출자에 반환합니다. 이 메서드는 HTTP 인증 헤더에 획득된 토큰을 추가합니다. 여기서 보호되는 리소스는 이 앱이 등록된 테넌트의 사용자를 표시하는 Microsoft Graph API 사용자 엔드포인트입니다.
앱 테스트
애플리케이션 만들기가 완료되었으며 이제 앱의 기능을 테스트할 준비가 되었습니다.
프로젝트 폴더의 루트 내에서 다음 명령을 실행하여 Node.js 콘솔 디먼 앱을 시작합니다.
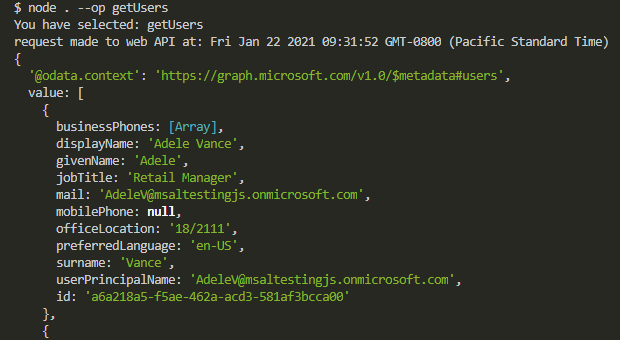
node . --op getUsers
그러면 Microsoft Graph API의 일부 JSON 응답이 발생하고 콘솔에 사용자 개체 배열이 표시됩니다.
You have selected: getUsers
request made to web API at: Fri Jan 22 2021 09:31:52 GMT-0800 (Pacific Standard Time)
{
    '@odata.context': 'https://graph.microsoft.com/v1.0/$metadata#users',
    value: [
        {
            displayName: 'Adele Vance'
            givenName: 'Adele',
            jobTitle: 'Retail Manager',
            mail: 'AdeleV@msaltestingjs.onmicrosoft.com',
            mobilePhone: null,
            officeLocation: '18/2111',
            preferredLanguage: 'en-US',
            surname: 'Vance',
            userPrincipalName: 'AdeleV@msaltestingjs.onmicrosoft.com',
            id: '00aa00aa-bb11-cc22-dd33-44ee44ee44ee'
        }
    ]
}
애플리케이션 작동 방식
이 애플리케이션은 OAuth 2.0 클라이언트 자격 증명 부여를 사용합니다. 이 유형의 권한 부여는 일반적으로 사용자의 직접적인 상호 작용 없이 백그라운드에서 실행해야 하는 서버 간 상호 작용에 사용됩니다. 자격 증명 부여 흐름은 사용자를 가장하는 대신 다른 웹 서비스를 호출할 때 웹 서비스(기밀 클라이언트)가 자체 자격 증명을 사용하여 인증하도록 허용합니다. 이 인증 모델에서 지원되는 애플리케이션 유형은 일반적으로 디먼 또는 서비스 계정입니다.
클라이언트 자격 증명 흐름에 대해 요청할 범위는 /.default 앞에 있는 리소스의 이름입니다. 이 표기법은 애플리케이션 등록 시 고정으로 선언된 애플리케이션 수준 권한을 사용하도록 Microsoft Entra ID에 지시합니다. 또한 이러한 API 권한은 테넌트 관리자가 부여해야 합니다.
다음 단계
Microsoft ID 플랫폼에서 Node.js 디먼 애플리케이션 개발에 대해 자세히 알아보려면 여러 부분으로 구성된 시나리오 시리즈를 참조하세요.