Linux에서 호스트되는 ASP.NET Core 웹앱에 대해 Profiler 사용
Profiler를 사용하면 Azure App Service의 Linux에서 호스트되는 라이브 ASP.NET Core 웹앱의 각 메서드에 소요된 시간을 추적할 수 있습니다. 이 문서에서는 Linux에서 호스트되는 웹앱에 중점을 둡니다. Linux, Windows 및 Mac 개발 환경을 사용하여 실험할 수도 있습니다.
이 문서에서는 다음 작업을 수행합니다.
- Linux에서 호스트되는 ASP.NET Core 웹 애플리케이션을 설정하고 배포합니다.
- ASP.NET Core 웹 애플리케이션에 Application Insights Profiler를 추가합니다.
필수 조건
- 최신 .NET Core SDK를 설치합니다.
- 시작: Git 설치의 지침에 따라 Git을 설치합니다.
- 컨텍스트를 확인하려면 다음 샘플을 검토하세요.
로컬로 프로젝트 설정
컴퓨터에서 명령 프롬프트 창을 엽니다.
ASP.NET Core MVC 웹 애플리케이션을 만듭니다.
dotnet new mvc -n LinuxProfilerTest작업 디렉터리를 프로젝트에 대한 루트 폴더로 변경합니다.
프로파일러 추적을 수집하도록 NuGet 패키지를 추가합니다.
dotnet add package Microsoft.ApplicationInsights.Profiler.AspNetCore선호하는 코드 편집기에서
Program.cs의 Application Insights 및 Profiler를 사용하도록 설정합니다. 해당하는 경우 사용자 지정 프로파일러 설정을 추가합니다.WebAPI의 경우:// Add services to the container. builder.Services.AddApplicationInsightsTelemetry(); builder.Services.AddServiceProfiler();Worker의 경우:IHost host = Host.CreateDefaultBuilder(args) .ConfigureServices(services => { services.AddApplicationInsightsTelemetryWorkerService(); services.AddServiceProfiler(); // Assuming Worker is your background service class. services.AddHostedService<Worker>(); }) .Build(); await host.RunAsync();변경 내용을 로컬 리포지토리에 저장하고 커밋합니다.
git init
git add .
git commit -m "first commit"
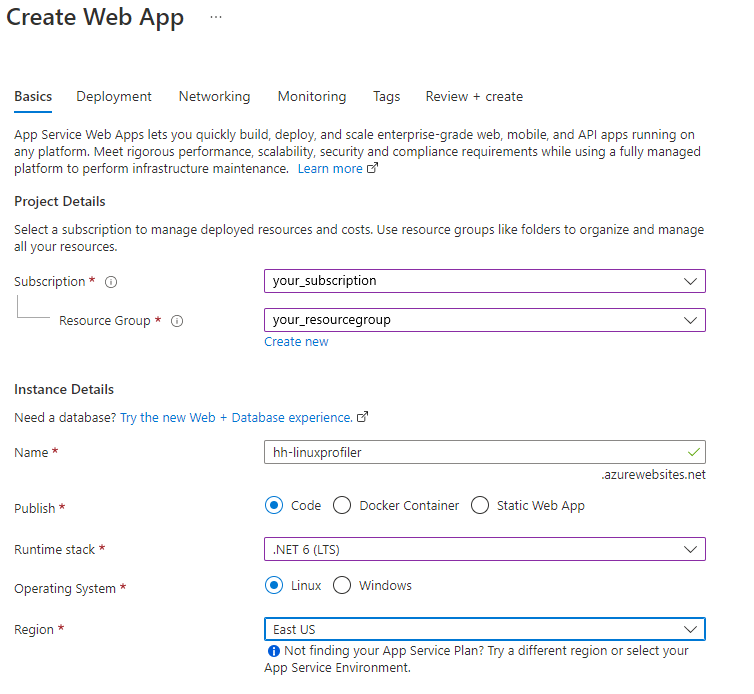
프로젝트를 호스팅하는 Linux 웹앱 만들기
Azure Portal에서 App Service on Linux를 사용하여 웹앱 환경을 만듭니다.
새 웹앱 리소스로 이동하고 배포 센터>FTPS 자격 증명을 선택하여 배포 자격 증명을 만듭니다. 나중에 사용할 자격 증명을 기록해 둡니다.
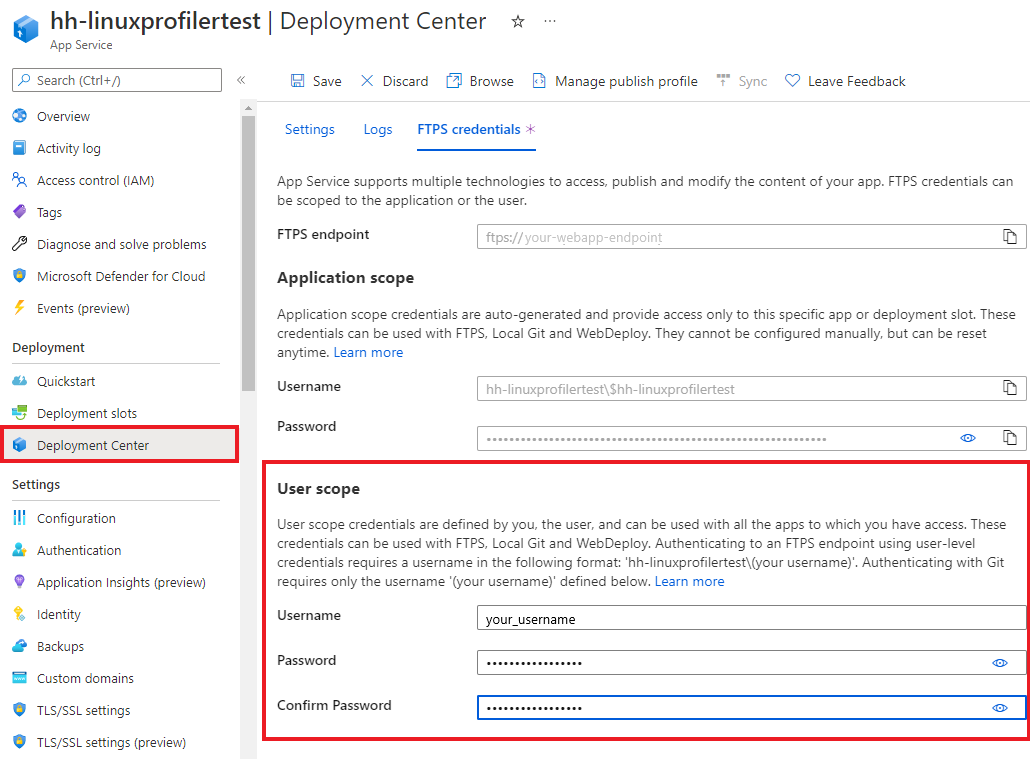
저장을 선택합니다.
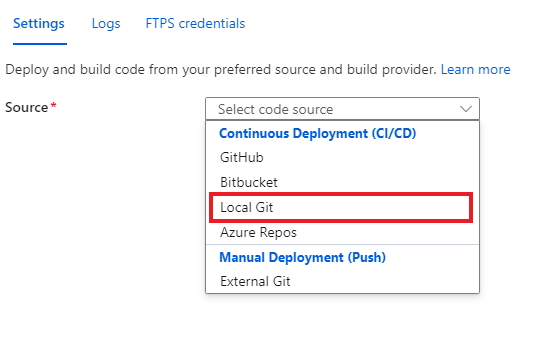
설정 탭을 선택합니다.
드롭다운에서 로컬 Git을 선택하여 웹앱에서 로컬 Git 리포지토리를 설정합니다.
저장을 선택하여 Git 복제 URI가 있는 Git 리포지토리를 만듭니다.
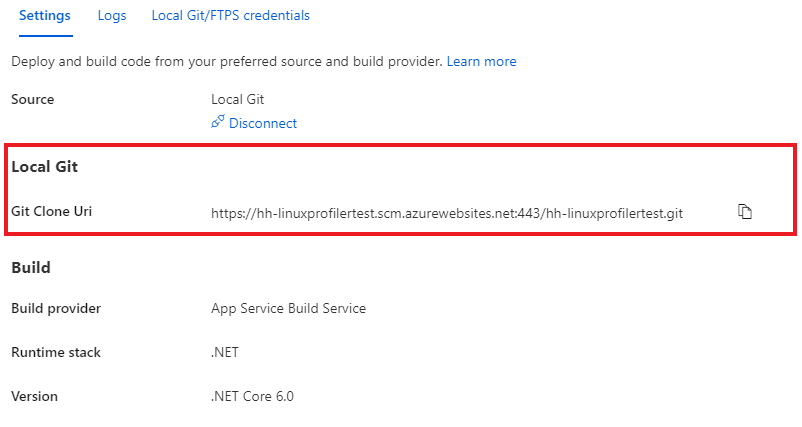
추가 배포 옵션에 대해서는 App Service 설명서를 참조하세요.
프로젝트 배포
명령 프롬프트 창에서 프로젝트에 대한 루트 폴더로 이동합니다. App Service에서 리포지토리를 가리키도록 Git 원격 리포지토리를 추가합니다.
git remote add azure https://<username>@<app_name>.scm.azurewebsites.net:443/<app_name>.git- 배포 자격 증명을 만드는 데 사용한 사용자 이름을 사용합니다.
- Linux에서 App Service를 사용하여 웹앱을 만드는 데 사용한 앱 이름을 사용합니다.
변경 내용을 Azure로 푸시하여 프로젝트를 배포합니다.
git push azure main다음 예제와 비슷한 내용이 출력됩니다.
Counting objects: 9, done.
Delta compression using up to 8 threads.
Compressing objects: 100% (8/8), done.
Writing objects: 100% (9/9), 1.78 KiB | 911.00 KiB/s, done.
Total 9 (delta 3), reused 0 (delta 0)
remote: Updating branch 'main'.
remote: Updating submodules.
remote: Preparing deployment for commit id 'd7369a99d7'.
remote: Generating deployment script.
remote: Running deployment command...
remote: Handling ASP.NET Core Web Application deployment.
remote: ......
remote:   Restoring packages for /home/site/repository/EventPipeExampleLinux.csproj...
remote: .
remote:   Installing Newtonsoft.Json 10.0.3.
remote:   Installing Microsoft.ApplicationInsights.Profiler.Core 1.1.0-LKG
...
웹앱을 모니터링하는 Application Insights 추가
웹앱에 Application Insights를 추가하는 세 가지 옵션이 있습니다.
- Azure Portal의 Application Insights 창을 사용하여
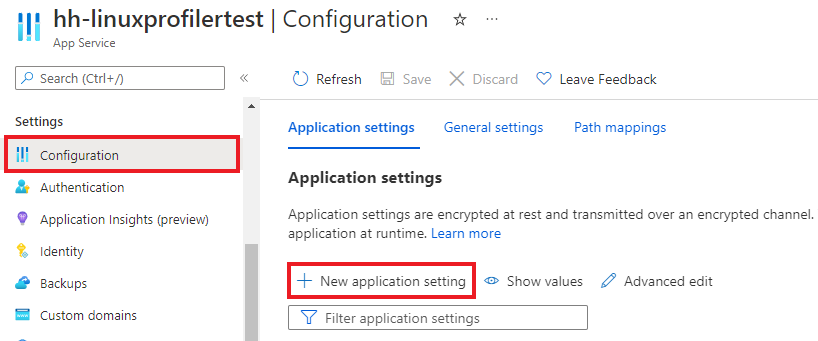
- Azure Portal의 구성 창을 사용하여
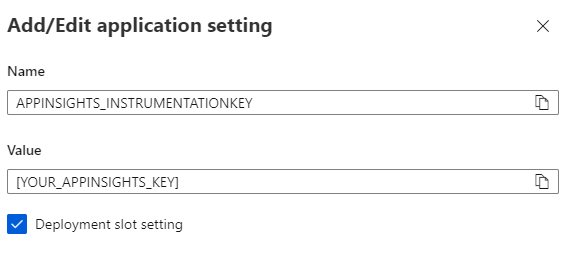
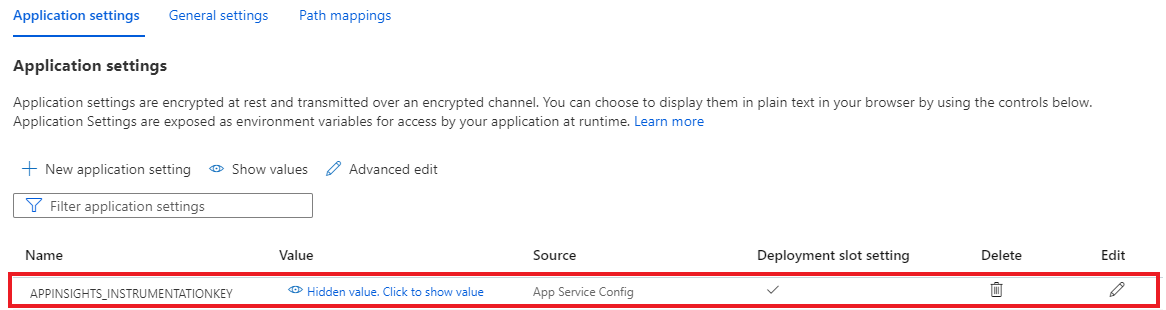
- 웹앱 설정에 수동으로 추가하여
Azure Portal의 웹앱 왼쪽 창에서 Application Insights를 선택합니다.
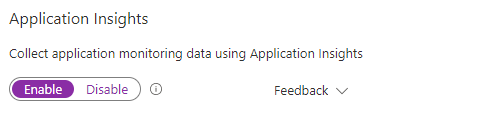
Application Insights 켜기를 선택합니다.

Application Insights에서 사용을 선택합니다.
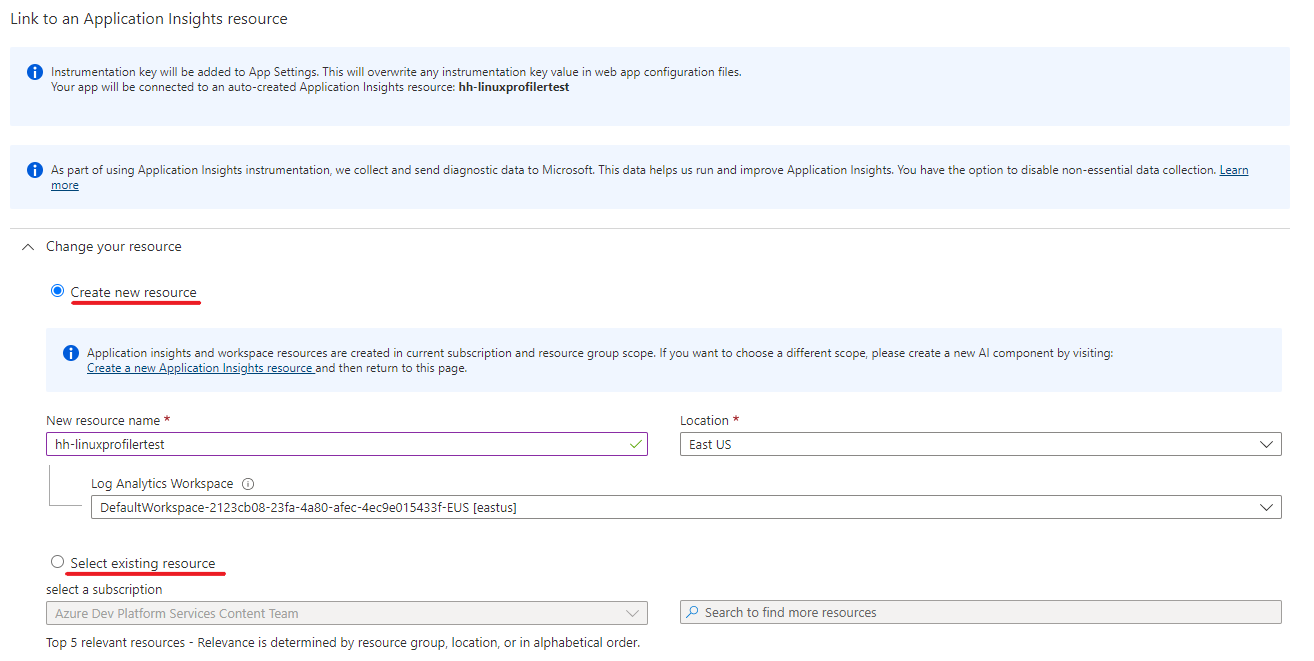
Application Insights 리소스에 연결에서 새 리소스를 만들거나 기존 리소스를 선택합니다. 이 예제에서는 새 리소스를 만듭니다.
적용>예를 선택하여 적용하고 확인합니다.