Section 1: Developer Workstation
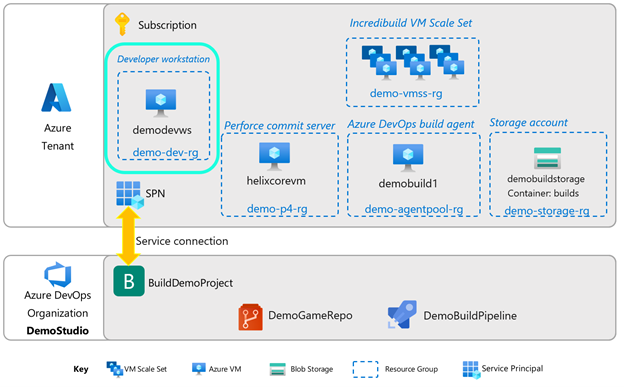
Setting up the developer workstation
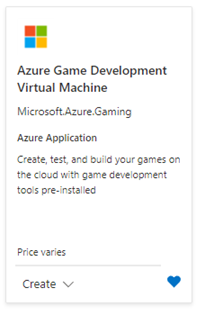
For the demo, this workstation can be a physical machine or a VM, but in either case it needs discrete graphics capability. In this guide, we will use the Azure Game Development Virtual Machine. You can find it in the Azure Marketplace:
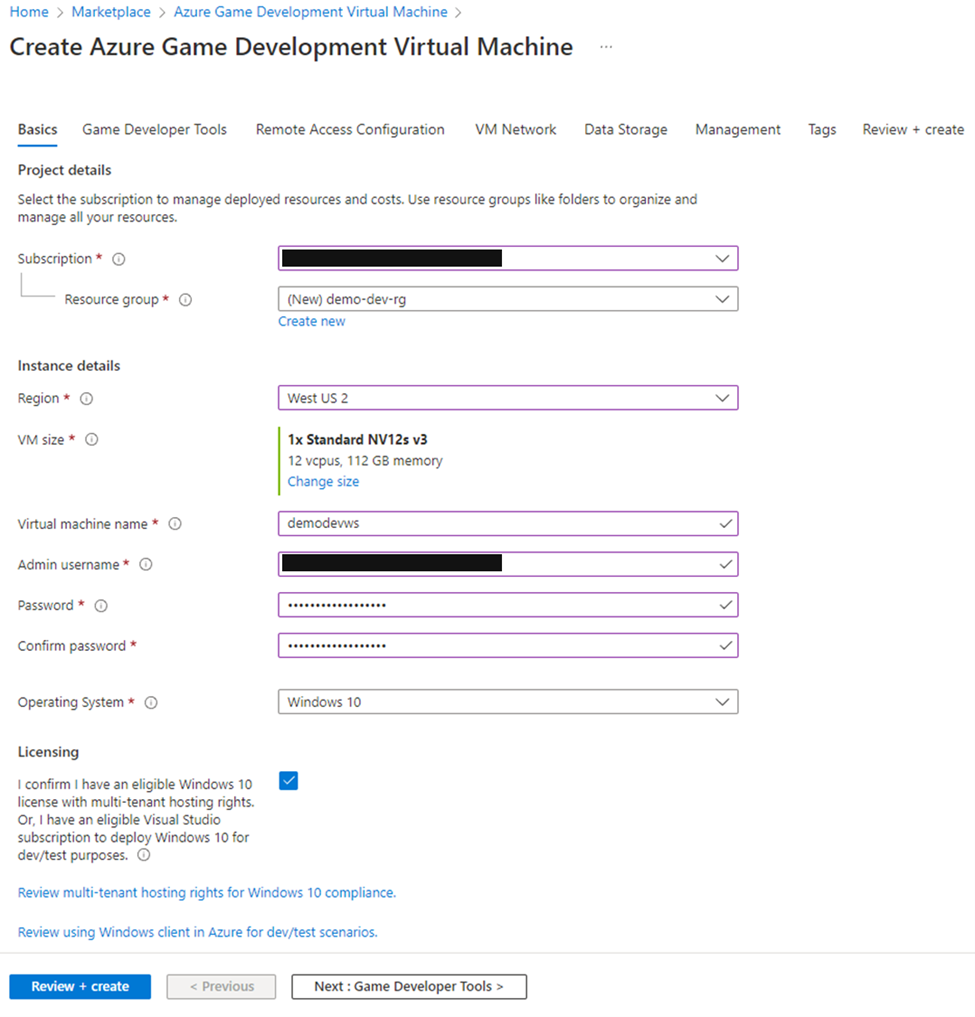
Find the Azure Game Development VM offering in the Azure Marketplace and create a VM.
- Fill in your Subscription, Resource Group, and Region.
- The Game Development VM currently ships on N-series VMs, so please ensure you have enough quota on these SKUs. For information on checking and requesting quota, please see this page.
- Select your VM size. For the demo, you can use the default VM choice.
- Fill in the VM name, admin name, and password. For operating system, either Windows 10 or Windows Server 2019 works well, and the choice depends more on what you have a license for.
- Go to the next step: Game Developer Tools.
- Next, choose the Game Engine to be installed. Select Unreal Engine 4.27.2. You can leave all other choices as the default.

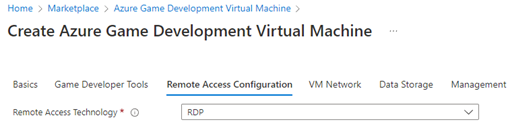
- Next, choose RDP as the Remote Access Technology.
- At this point, you can click on “Review + create” for purposes of this demo.
- Click Create once the review is done with no errors.
Using your own developer workstation
If you do not wish to use the Azure Game Development VM, please make sure you have the following software on your workstation:
- Unreal Engine 4 (version 4.27 to match the version of the demo game, ShooterGame)
- Perforce Visual Client (P4V)
- Perforce Helix Admin Tool (P4Admin)
- Azure Storage Explorer
Next steps
Next, go to Section 2: Version Control.
Or go back to the Introduction.
Find out more about the Azure Game Development VM.
Troubleshooting page is here.
피드백
출시 예정: 2024년 내내 콘텐츠에 대한 피드백 메커니즘으로 GitHub 문제를 단계적으로 폐지하고 이를 새로운 피드백 시스템으로 바꿀 예정입니다. 자세한 내용은 다음을 참조하세요. https://aka.ms/ContentUserFeedback
다음에 대한 사용자 의견 제출 및 보기