Create a lifecycle workflow
Lifecycle workflows allow for tasks associated with the lifecycle process to be run automatically for users as they move through their lifecycle in your organization. Workflows consist of:
- Tasks: Actions taken when a workflow is triggered.
- Execution conditions: The who and when of a workflow. These conditions define which users (scope) this workflow should run against, and when (trigger) the workflow should run.
You can create and customize workflows for common scenarios by using templates, or you can build a workflow from scratch without using a template. Currently, if you use the Microsoft Entra admin center, any workflow that you create must be based on a template. If you want to create a workflow without using a template, use Microsoft Graph.
Prerequisites
Using this feature requires Microsoft Entra ID Governance licenses. To find the right license for your requirements, see Microsoft Entra ID Governance licensing fundamentals.
Create a lifecycle workflow by using a template in the Microsoft Entra admin center
Tip
Steps in this article might vary slightly based on the portal you start from.
If you're using the Microsoft Entra admin center to create a workflow, you can customize existing templates to meet your organization's needs. These templates include one for pre-hire common scenarios.
To create a workflow based on a template:
Sign in to the Microsoft Entra admin center as at least a Lifecycle Workflows Administrator.
Browse to Identity governance > Lifecycle workflows > Create a workflow.
On the Choose a workflow page, select the workflow template that you want to use.

On the Basics tab, enter a unique display name and description for the workflow, and then select Next.
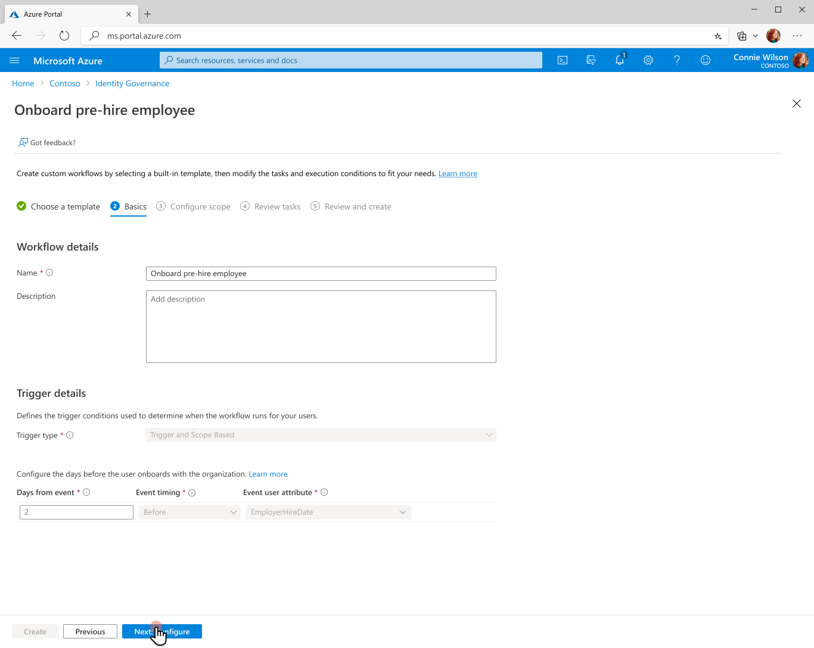
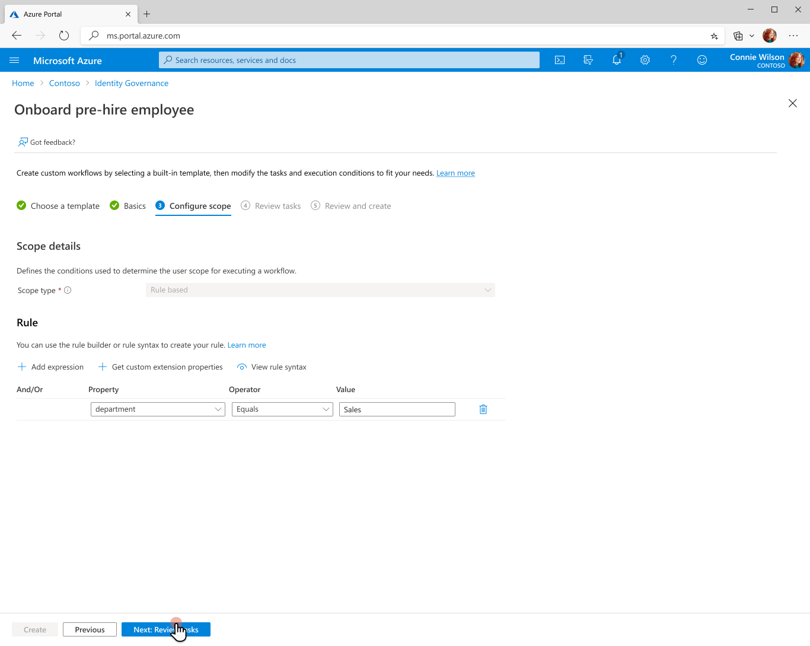
On the Configure scope tab, select the trigger type and execution conditions to be used for this workflow. For more information on what you can configure, see Execution conditions.
Under Rule, enter values for Property, Operator, and Value. The following screenshot gives an example of a rule being set up for a sales department. For a full list of user properties that lifecycle workflows support, see Supported user properties and query parameters.
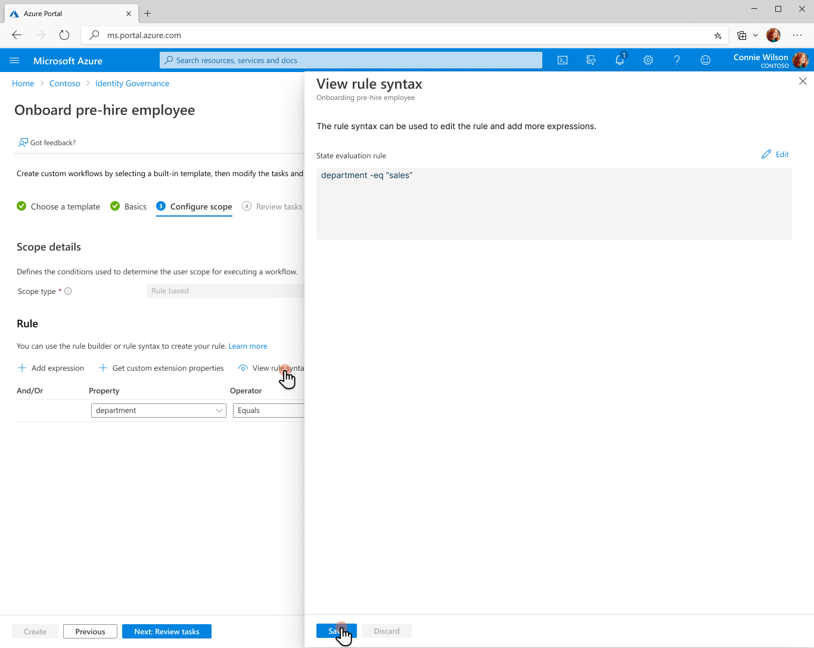
To view your rule syntax, select the View rule syntax button. You can copy and paste multiple user property rules on the panel that appears. For more information on which properties you can include, see User properties. When you finish adding rules, select Next.
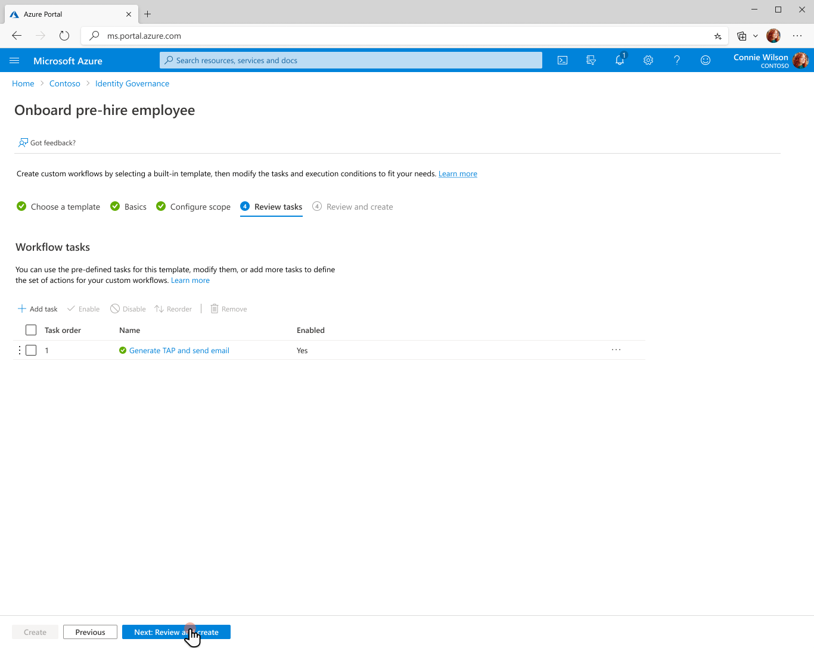
On the Review tasks tab, you can add a task to the template by selecting Add task. To enable an existing task on the list, select Enable. To disable a task, select Disable. To remove a task from the template, select Remove.
When you're finished with tasks for your workflow, select Next: Review and create.
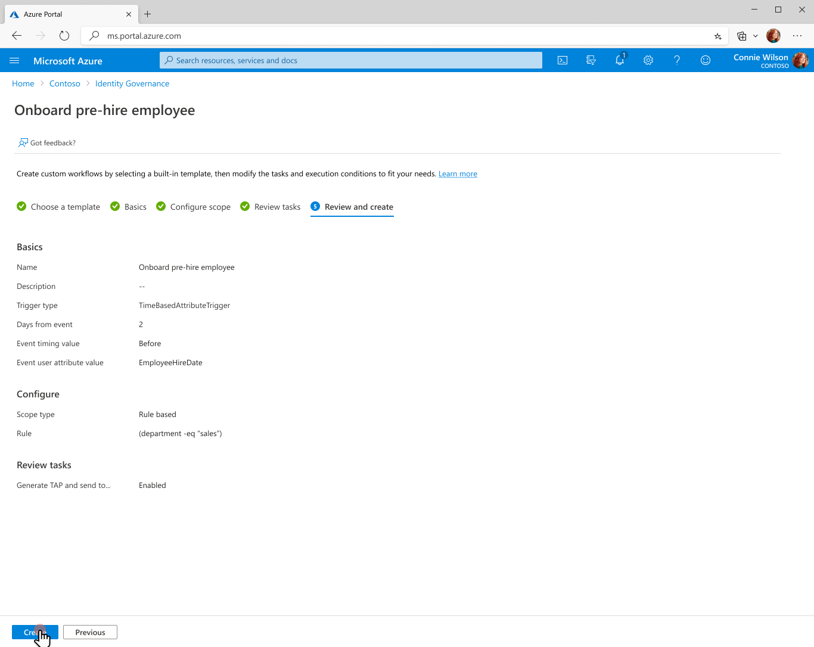
On the Review and create tab, review the workflow's settings. You can also choose whether or not to enable the schedule for the workflow. Select Create to create the workflow.

Important
By default, a newly created workflow is disabled to allow for the testing of it first on smaller audiences. For more information about testing workflows before rolling them out to many users, see Run an on-demand workflow.
Create a lifecycle workflow by using Microsoft Graph
To create a lifecycle workflow by using the Microsoft Graph API, see Create workflow.
Next steps
Tilbakemeldinger
Kommer snart: Gjennom 2024 faser vi ut GitHub Issues som tilbakemeldingsmekanisme for innhold, og erstatter det med et nytt system for tilbakemeldinger. Hvis du vil ha mer informasjon, kan du se: https://aka.ms/ContentUserFeedback.
Send inn og vis tilbakemelding for