Restore Azure Managed Disks
This article explains how to restore Azure Managed Disks from a restore point created by Azure Backup.
Currently, the Original-Location Recovery (OLR) option of restoring by replacing existing the source disk from where the backups were taken isn't supported. You can restore from a recovery point to create a new disk either in the same resource group as that of the source disk from where the backups were taken or in any other resource group. This is known as Alternate-Location Recovery (ALR) and this helps to keep both the source disk and the restored (new) disk.
In this article, you'll learn how to:
Restore to create a new disk
Track the restore operation status
Restore to create a new disk
Backup Vault uses Managed Identity to access other Azure resources. To restore from backup, Backup vault’s managed identity requires a set of permissions on the resource group where the disk is to be restored.
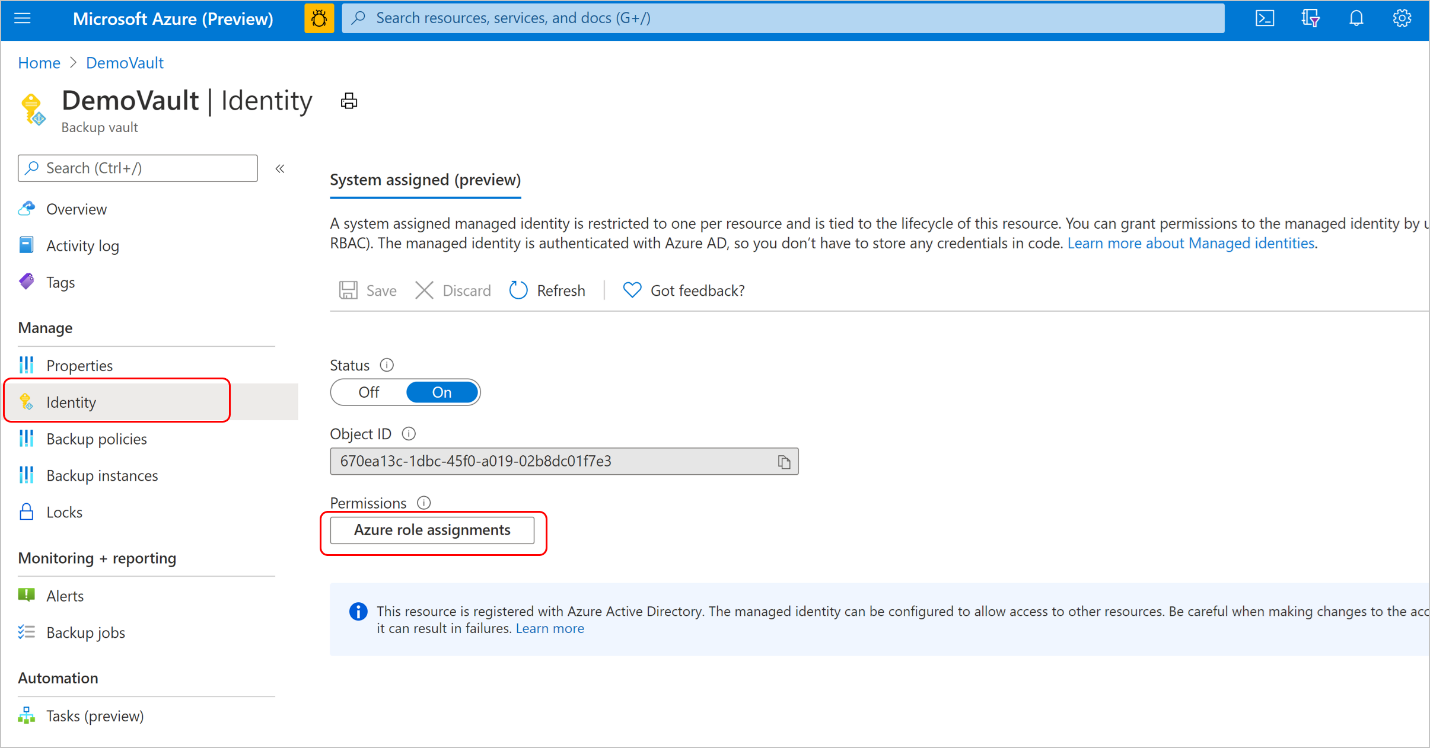
Backup vault uses a system assigned managed identity, which is restricted to one per resource and is tied to the lifecycle of this resource. You can grant permissions to the managed identity by using Azure role-based access control (Azure RBAC). Managed identity is a service principal of a special type that may only be used with Azure resources. Learn more about Managed Identities.
The following pre-requisites are required to perform a restore operation:
Assign the Disk Restore Operator role to the Backup Vault’s managed identity on the Resource group where the disk will be restored by the Azure Backup service.
Note
You can choose the same resource group as that of the source disk from where backups are taken or to any other resource group within the same or a different subscription.
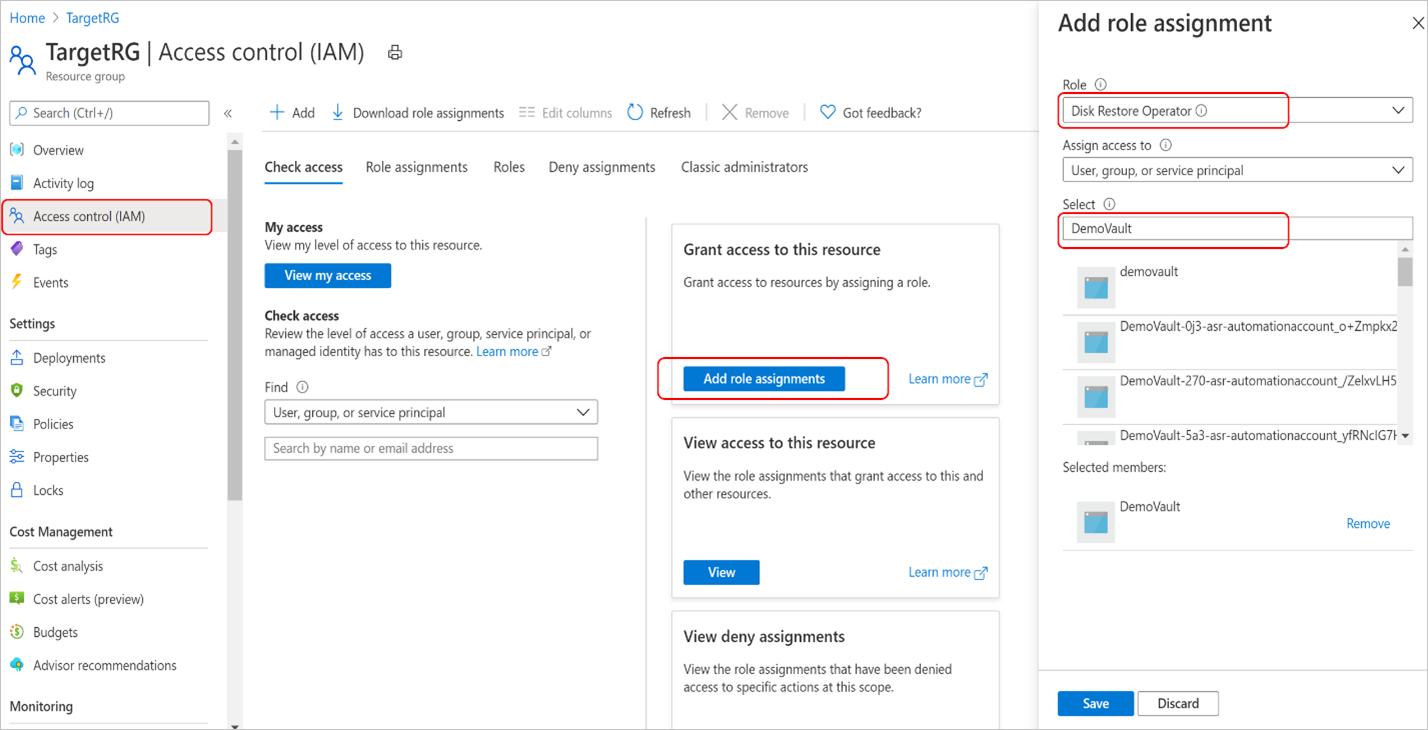
Go to the resource group where the disk is to be restored to. For example, the resource group is TargetRG.
Go to Access control (IAM) and select Add role assignments
On the right context pane, select Disk Restore Operator in the Role dropdown list. Select the backup vault’s managed identity and Save.
Tip
Type the backup vault's name to select the vault’s managed identity.
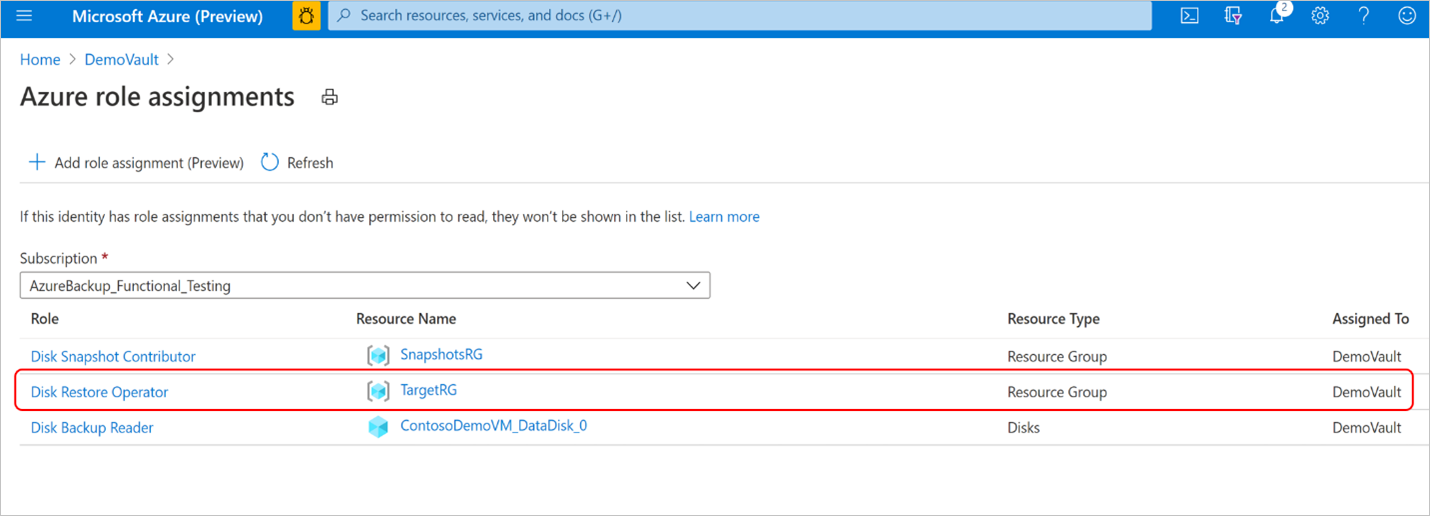
Verify that the backup vault's managed identity has the right set of role assignments on the resource group where the disk will be restored.
Go to Backup vault - > Identity and select Azure role assignments
Verify that the role, resource name, and resource type appear correctly.
Note
While the role assignments are reflected correctly on the portal, it may take approximately 15 minutes for the permission to be applied on the backup vault’s managed identity.
During scheduled backups or an on-demand backup operation, Azure Backup stores the disk incremental snapshots in the Snapshot Resource Group provided during configuring backup of the disk. Azure Backup uses these incremental snapshots during the restore operation. If the snapshots are deleted or moved from the Snapshot Resource Group or if the Backup vault role assignments are revoked on the Snapshot Resource Group, the restore operation will fail.
If the disk to be restored is encrypted with customer-managed keys (CMK) or using double encryption using platform-managed keys and customer-managed keys, then assign the Reader role permission to the Backup Vault’s managed identity on the Disk Encryption Set resource.
Once the prerequisites are met, follow these steps to perform the restore operation.
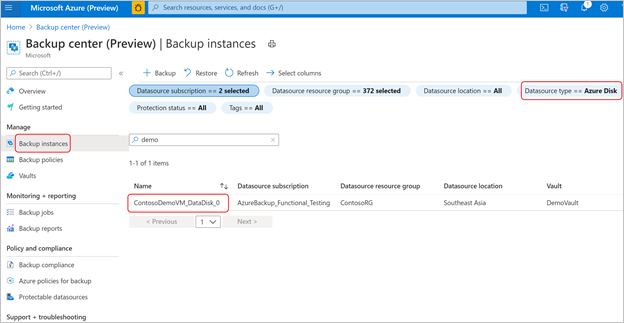
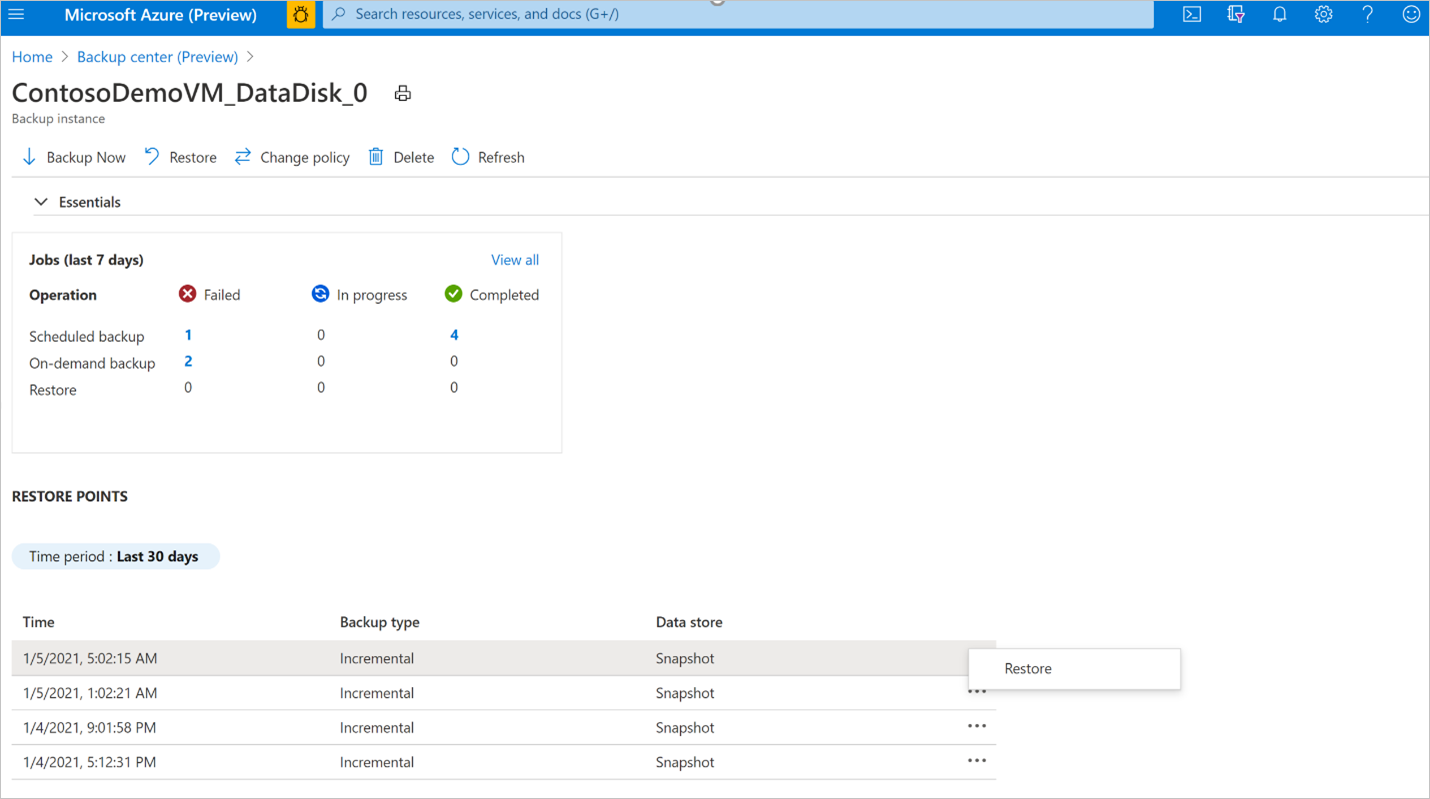
In the Azure portal, go to Backup center. Select Backup instances under the Manage section. From the list of backup instances, select the disk backup instance for which you want to perform the restore operation.
Alternately, you can perform this operation from the Backup vault you used to configure backup for the disk.
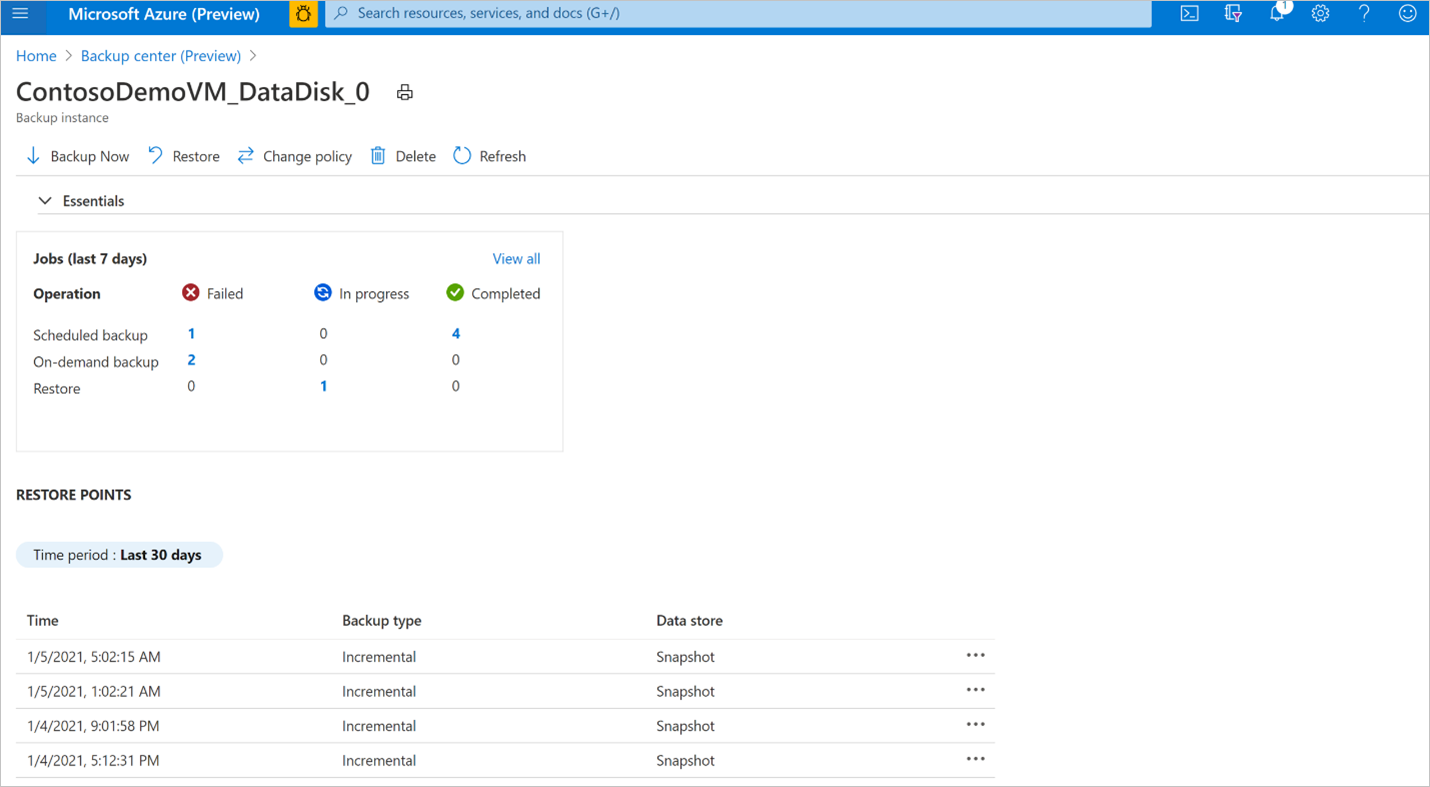
In the Backup instance screen, select the restore point that you want to use to perform the restore operation and select Restore.
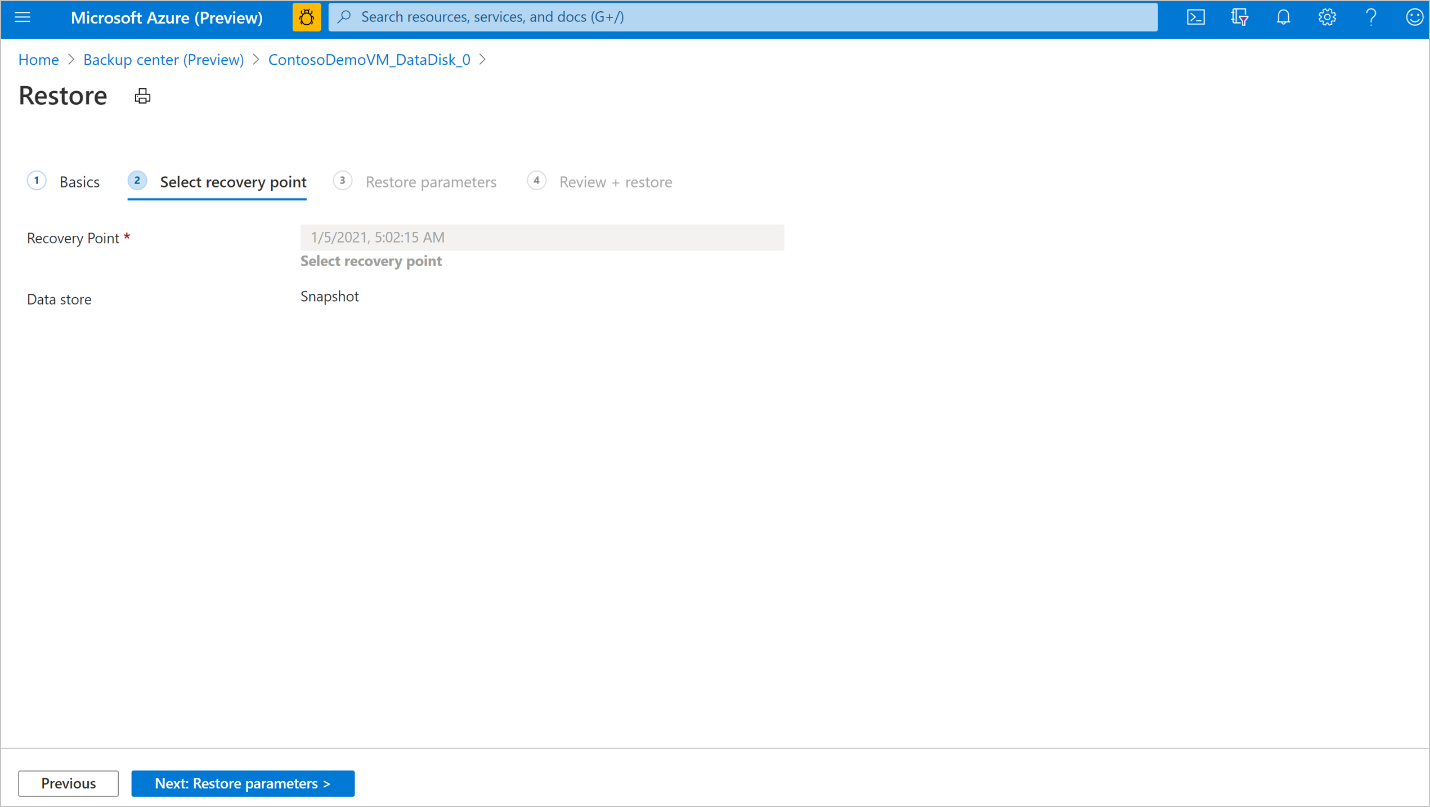
In the Restore workflow, review the Basics and Select recovery point tab information, and select Next: Restore parameters.
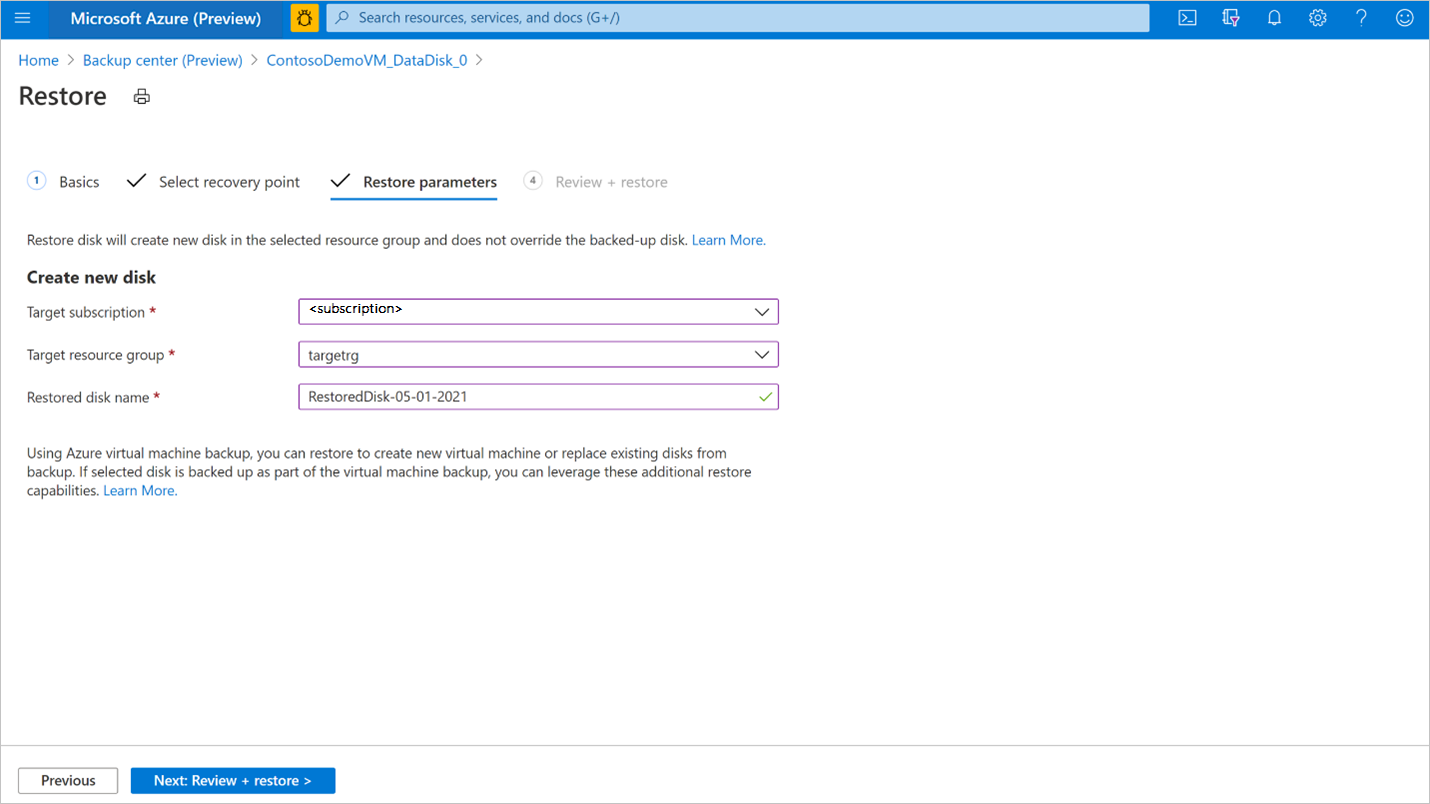
In the Restore parameters tab, select the Target subscription and Target resource group where you want to restore the backup to. Provide the name of the disk to be restored. Select Next: Review + restore.
Tip
Disks being backed up by Azure Backup using the Disk Backup solution can also be backed up by Azure Backup using the Azure VM backup solution with the Recovery Services vault. If you have configured protection of the Azure VM to which this disk is attached, you can also use the Azure VM restore operation. You can choose to restore the VM, or disks and files or folders from the recovery point of the corresponding Azure VM backup instance. For more information, see Azure VM backup.
Once the validation is successful, select Restore to start the restore operation.
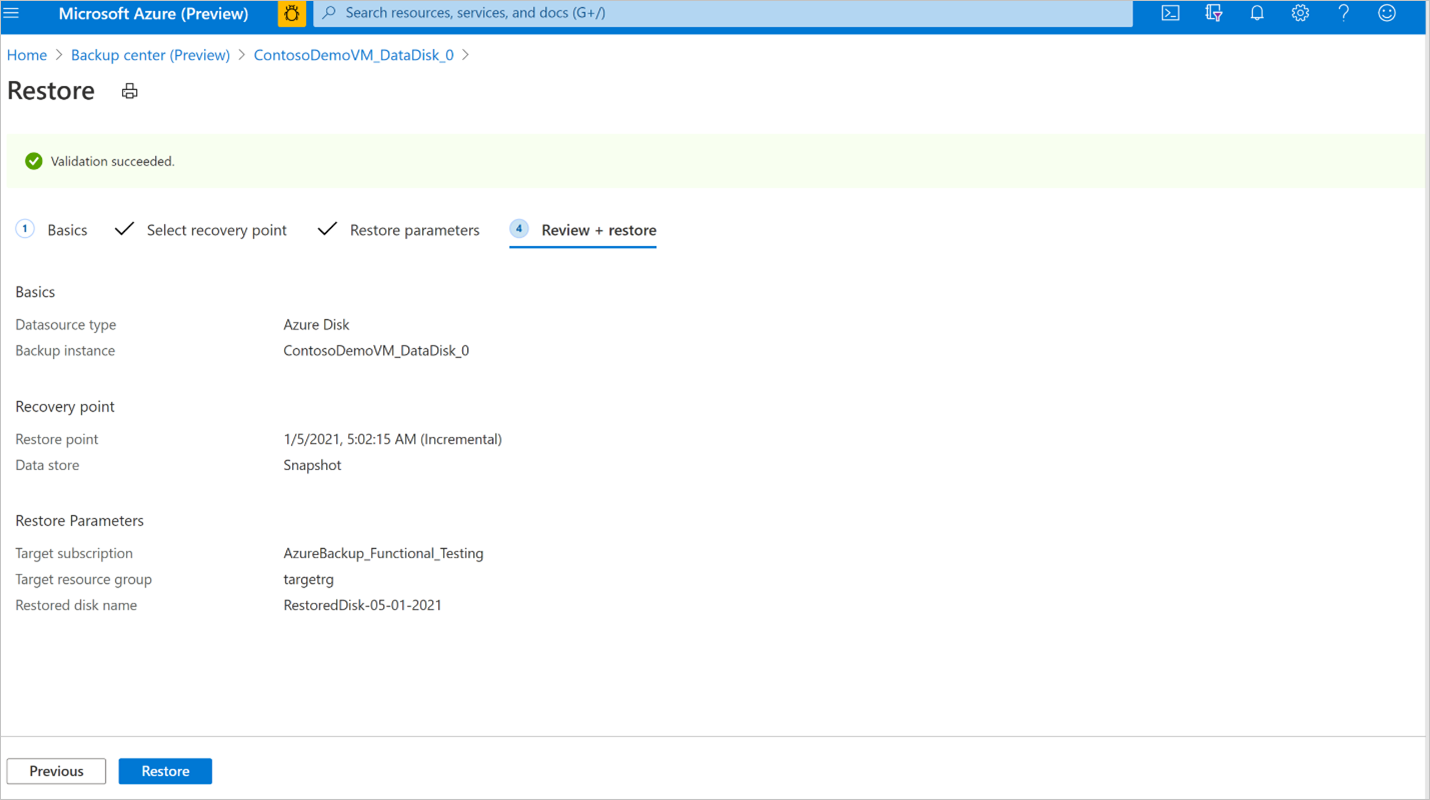
Note
Validation might take few minutes to complete before you can trigger restore operation. Validation may fail if:
- a disk with the same name provided in Restored disk name already exists in the Target resource group
- the Backup vault's managed identity doesn't have valid role assignments on the Target resource group
- the Backup vault's managed identity role assignments are revoked on the Snapshot resource group where incremental snapshots are stored
- If incremental snapshots are deleted or moved from the snapshot resource group
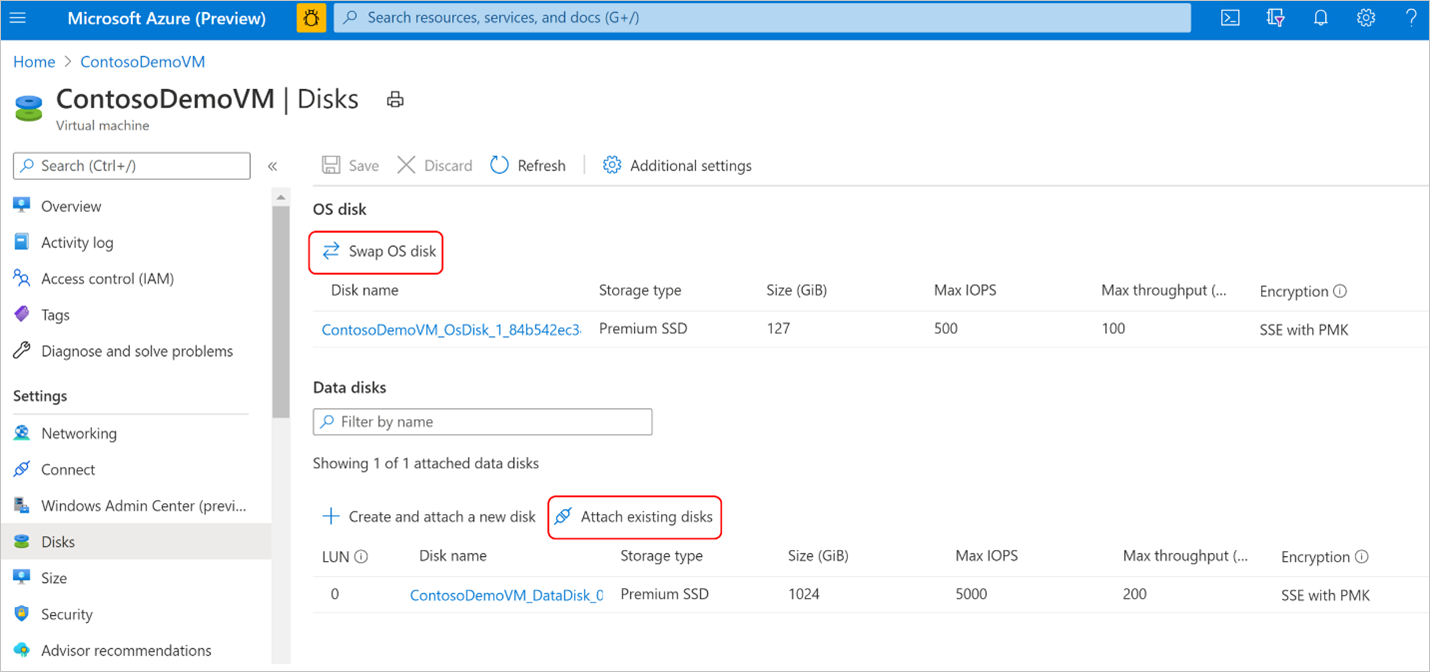
Restore will create a new disk from the selected recovery point in the target resource group that was provided during the restore operation. To use the restored disk on an existing virtual machine, you'll need to perform more steps:
If the restored disk is a data disk, you can attach an existing disk to a virtual machine. If the restored disk is OS disk, you can swap the OS disk of a virtual machine from the Azure portal under the Virtual machine pane - > Disks menu in the Settings section.
For Windows virtual machines, if the restored disk is a data disk, follow the instructions to detach the original data disk from the virtual machine. Then attach the restored disk to the virtual machine. Follow the instructions to swap the OS disk of the virtual machine with the restored disk.
For Linux virtual machines, if the restored disk is a data disk, follow the instructions to detach the original data disk from the virtual machine. Then attach the restored disk to the virtual machine. Follow the instructions to swap the OS disk of the virtual machine with the restored disk.
It's recommended that you revoke the Disk Restore Operator role assignment from the Backup vault's managed identity on the Target resource group after the successful completion of restore operation.
Track a restore operation
After you trigger the restore operation, the backup service creates a job for tracking. Azure Backup displays notifications about the job in the portal. To view the restore job progress:
Go to the Backup instance screen. It shows the jobs dashboard with operation and status for the past seven days.
To view the status of the restore operation, select View all to show ongoing and past jobs of this backup instance.
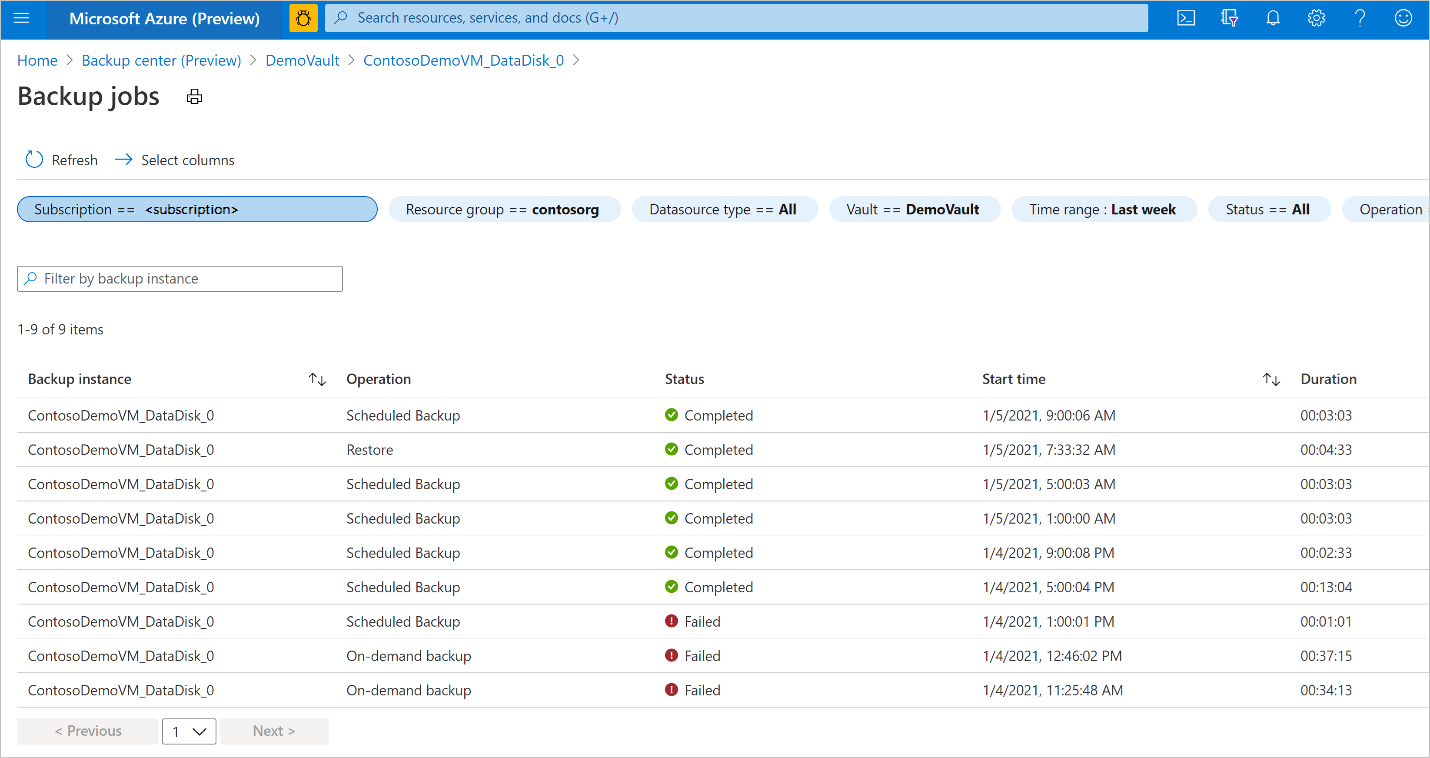
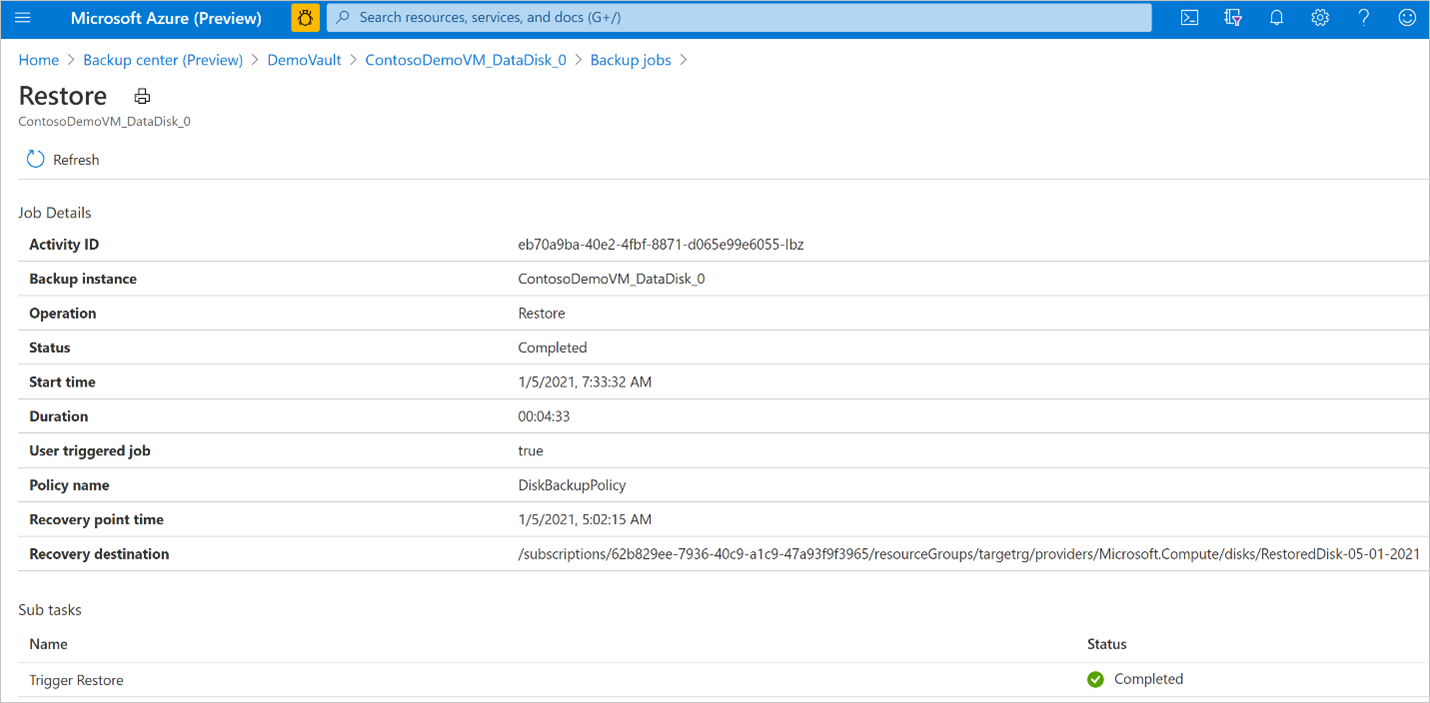
Review the list of backup and restore jobs and their status. Select a job from the list of jobs to view job details.
Next steps
Tilbakemeldinger
Kommer snart: Gjennom 2024 faser vi ut GitHub Issues som tilbakemeldingsmekanisme for innhold, og erstatter det med et nytt system for tilbakemeldinger. Hvis du vil ha mer informasjon, kan du se: https://aka.ms/ContentUserFeedback.
Send inn og vis tilbakemelding for