Load test a website by using a JMeter script in Azure Load Testing
Learn how to use an Apache JMeter script to load test a web application with Azure Load Testing from the Azure portal or by using the Azure CLI. Azure Load Testing enables you to take an existing Apache JMeter script, and use it to run a load test at cloud scale. Learn more about which JMeter functionality that Azure Load Testing supports.
Use cases for creating a load test with an existing JMeter script include:
- You want to reuse existing JMeter scripts to test your application.
- You want to test endpoints that aren't HTTP-based, such as databases or message queues. Azure Load Testing supports all communication protocols that JMeter supports.
- To use the CLI commands, Azure CLI version 2.2.0 or later. Run
az --versionto find the version that's installed on your computer. If you need to install or upgrade the Azure CLI, see How to install the Azure CLI.
Prerequisites
An Azure account with an active subscription. Create an account for free.
A JMeter test script (JMX file). If you don't have a test script, get started with the sample script by cloning or downloading the samples project from GitHub.
Create an Azure Load Testing resource
First, you create the top-level resource for Azure Load Testing. It provides a centralized place to view and manage test plans, test results, and related artifacts.
If you already have a load testing resource, skip this section and continue to Create a load test.
To create a load testing resource:
Sign in to the Azure portal by using the credentials for your Azure subscription.
From the Azure portal menu or the Home page, select Create a resource.
On the Marketplace page, search for and select Azure Load Testing.
On the Azure Load Testing pane, select Create.
On the Create a load testing resource page, enter the following information:
Field Description Subscription Select the Azure subscription that you want to use for this Azure Load Testing resource. Resource group Select an existing resource group. Or select Create new, and then enter a unique name for the new resource group. Name Enter a unique name to identify your Azure Load Testing resource.
The name can't contain special characters, such as \/""[]:|<>+=;,?*@&, or whitespace. The name can't begin with an underscore (_), and it can't end with a period (.) or a dash (-). The length must be 1 to 64 characters.Location Select a geographic location to host your Azure Load Testing resource.
This location also determines where the test engines are hosted and where the JMeter client requests originate from.Note
Optionally, you can configure more details on the Tags tab. Tags are name/value pairs that enable you to categorize resources and view consolidated billing by applying the same tag to multiple resources and resource groups.
After you're finished configuring the resource, select Review + Create.
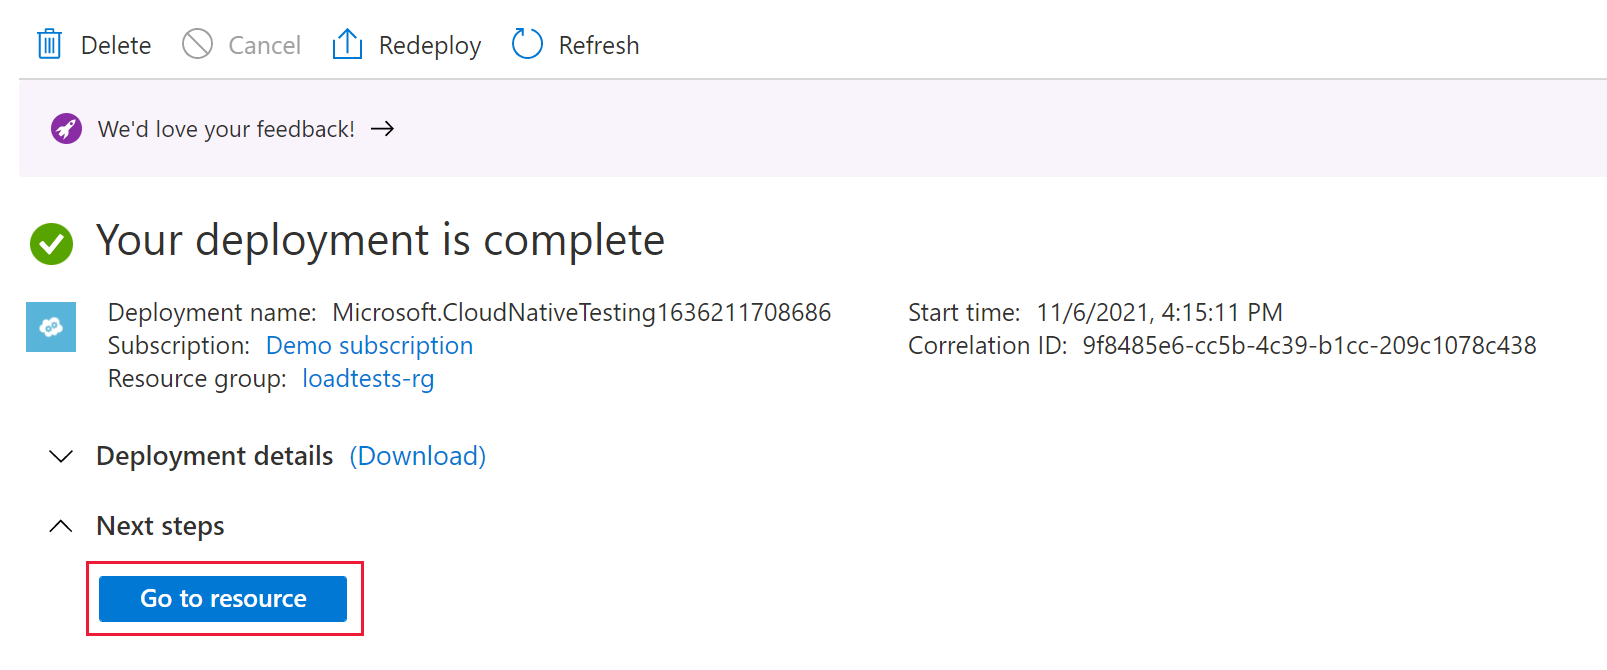
Review the settings you provide, and then select Create. It takes a few minutes to create the account. Wait for the portal page to display Your deployment is complete before moving on.
To view the new resource, select Go to resource.
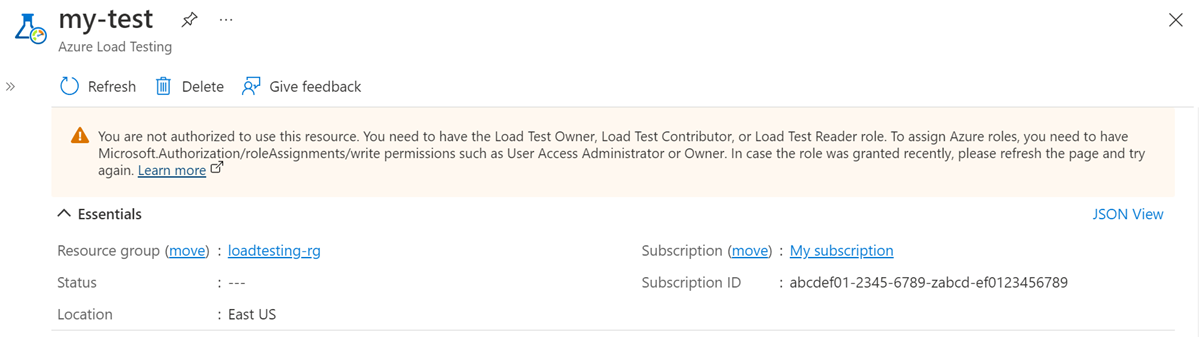
Optionally, manage access to your Azure Load Testing resource.
Azure Load Testing uses role-based access control (RBAC) to manage permissions for your resource. If you encounter this message, your account doesn't have the necessary permissions to manage tests.

Create a load test
Next, you create a load test by uploading an Apache JMeter test script (JMX file). The test script contains the application requests to simulate traffic to your application endpoints.
To create a load test using an existing JMeter script in the Azure portal:
In the Azure portal, go to your Azure Load Testing resource.
In the left navigation, select Tests to view all tests.
Select + Create, and then select Upload a JMeter script.

On the Basics tab, enter the load test details:
Field Description Test name Enter a unique test name. Test description (Optional) Enter a load test description. Run test after creation Select this setting to automatically start the load test after saving it. On the Test plan tab, select your Apache JMeter script, and then select Upload to upload the file to Azure.

Note
You can upload additional JMeter configuration files or other files that you reference in the JMX file. For example, if your test script uses CSV data sets, you can upload the corresponding .csv file(s). See also how to read data from a CSV file. For files other than JMeter scripts and user properties, if the size of the file is greater than 50 MB, zip the file. The size of the zip file should be below 50 MB. Azure Load Testing automatically unzips the file during the test run. Only five zip artifacts are allowed with a maximum of 1000 files in each zip and an uncompressed total size of 1 GB.
Select Review + create. Review all settings, and then select Create to create the load test.


You can update the test configuration at any time, for example to upload a different JMX file. Choose your test in the list of tests, and then select Edit.
Run the load test
When Azure Load Testing starts your load test, it first deploys the JMeter script, and any other files onto test engine instances, and then starts the load test.
If you selected Run test after creation, your load test will start automatically. To manually start the load test you created earlier, perform the following steps:
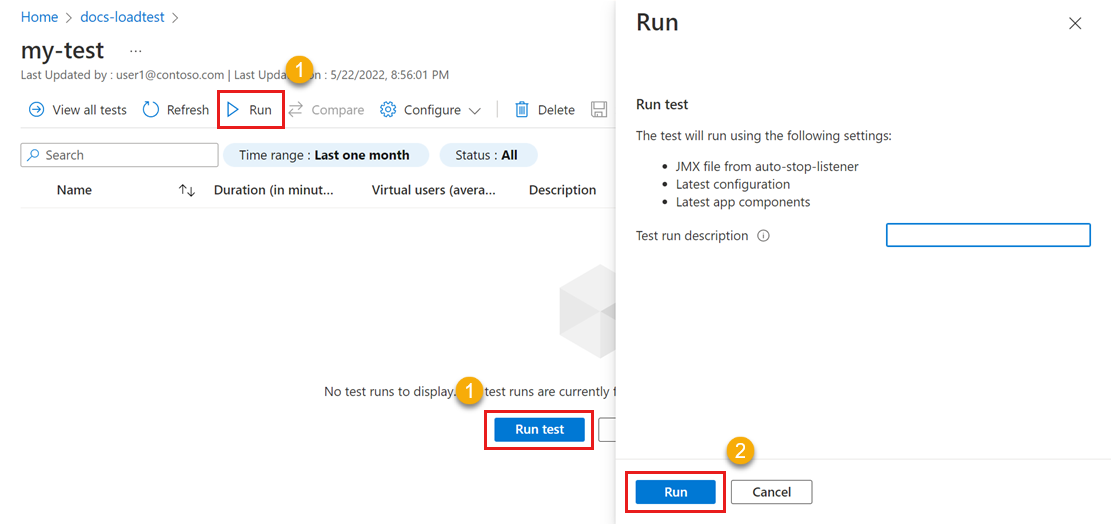
Go to your load testing resource, select Tests from the left pane, and then select the test that you created earlier.

On the test details page, select Run or Run test. Then, select Run on the confirmation pane to start the load test. Optionally, provide a test run description.
Tip
You can stop a load test at any time from the Azure portal.
Notice the test run details, statistics, and client metrics in the Azure portal.
If you have multiple requests in your test script, the charts display all requests, and you can also filter for specific requests.

Use the run statistics and error information to identify performance and stability issues for your application under load.


Convert a URL-based load test to a JMeter-based load test
If you created a URL-based load test, you can convert the test into a JMeter-based load test. Azure Load Testing automatically generates a JMeter script when you create a URL-based load test.
To convert a URL-based load test to a JMeter-based load test:
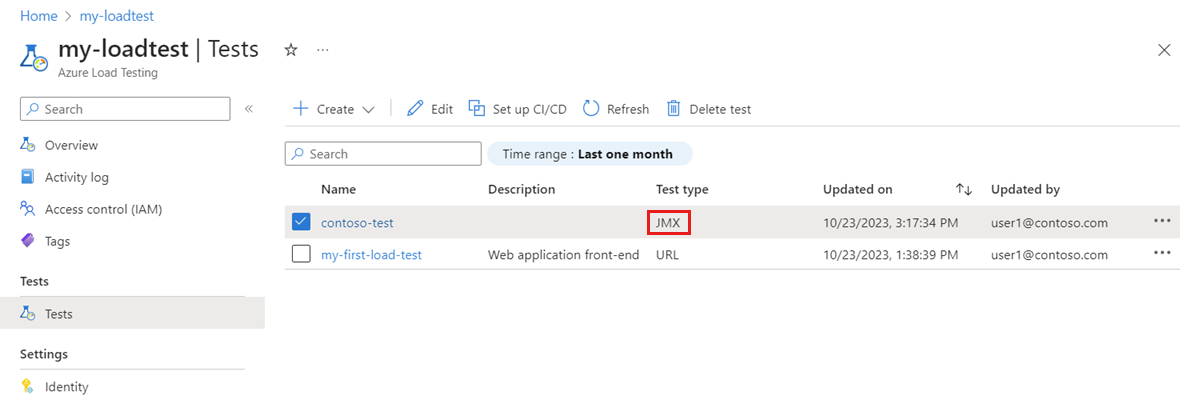
Go to your load testing resource, and select Tests to view the list of tests.
Notice the Test type column that indicates whether the test is URL-based or JMeter-based.
Select the ellipsis (...) for a URL-based load test, and then select Convert to JMeter script.

Alternately, select the test, and then select Convert to JMeter script on the test details page.
On the Convert to JMeter script page, select Convert to convert the test to a JMeter-based test.
Notice that the test type changed to JMX in the test list.


Related content
- Learn how to configure your test for high-scale load.
- Learn how to monitor server-side metrics for your application.
- Learn how to parameterize a load test with environment variables.
Tilbakemeldinger
Kommer snart: Gjennom 2024 faser vi ut GitHub Issues som tilbakemeldingsmekanisme for innhold, og erstatter det med et nytt system for tilbakemeldinger. Hvis du vil ha mer informasjon, kan du se: https://aka.ms/ContentUserFeedback.
Send inn og vis tilbakemelding for