Set up common area phones
Important
Skype for Business Online operated by 21Vianet in China will be retired on October 1, 2023. If you haven't upgraded your Skype for Business Online users yet, they will be automatically scheduled for an assisted upgrade. If you want to upgrade your organization to Teams yourself, we strongly recommend that you begin planning your upgrade path today. Remember that a successful upgrade aligns technical and user readiness, so be sure to leverage our upgrade guidance as you navigate your journey to Teams.
Skype for Business Online, excluding the service operated by 21Vianet in China, was retired on July 31, 2021.
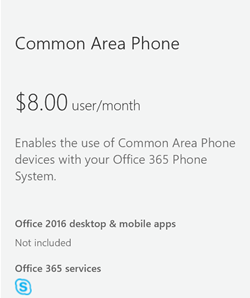
A common area phone (CAP) is typically placed in an area like a lobby or another area that is available to a lot of people. For example, a reception area phone, door phone or meeting room phone, CAPs are set up as devices rather than users and automatically sign into a network. In the steps below, we’ll help you set up an account for Teams Phone with Calling Plans so you can deploy these types of phones for your organization.
Prerequisites for common area phones
The first thing you need to do is to confirm that you have the following:
- Purchase Common Area Phone license and a Calling Plan.
- Search for and buy approved phones (view the list here).
- Update the firmware on your phones (See supported firmware in this topic). You can check the firmware on your phone by doing this:
Polycom VVX phones: Go to Settings > Status > Platform > Application > Main.
Yealink phones: Go to Status on the main phone screen.
AudioCodes phones: Go to Menu > Device Status > Firmware version from the start screen.
Lync Phone Edition (LPE) phones: Go to Menu > System Information from the start screen.
Firmware updates are managed by the Skype for Business Service. Every Skype for Business certified phone's firmware is uploaded to the Skype for Business Update server, and device update is enabled on all phones by default.
Depending on the inactivity time on the phone and polling intervals, phones will automatically download and install the latest certified builds. You can disable the device update settings by using the Set-CsIPPhonePolicy cmdlet and setting the EnableDeviceUpdate parameter to
false.
Setting up a Common Area Phone
You will need to follow these steps:
Step 1 - Buy the licenses
In the admin center, go to Billing > Purchase services, and add Other plans.
Click on Common Area Phone > Buy now > on the Checkout page click on Buy now.
Click on to expand Add-on subscriptions and then click on to buy a Calling Plan. Choose either the Domestic Calling Plan or Domestic and International Calling Plan.
Note
You don't need a Phone System license. It's included with the Common Area Phone license.
For more info on licenses, see Skype for Business and Microsoft Teams add-on licensing.
Step 2 - Create a new user account for the phone and assign the licenses
- In the admin center, go to Users > Active Users > Add a user.
- Put in a User name like “Main" for the first name and "Reception” for the second name.
- Put in a Display name if it doesn't autogenerate one like "Main Reception".
- Put in a User name like "MainReception" or "Mainlobby".
- For common area phones, you might want to set a password manually or have the same password for all of your common area phones. Also, you might think about unselecting Make this user change their password when they first sign in.
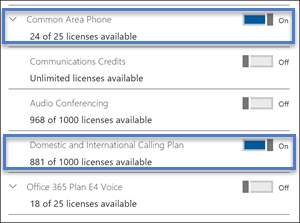
- If you are still there, assign the licenses to this user. On the same page, click to expand Product licenses. Turn on the following:
Common Area Phone
Then you need to pick either a Domestic Calling Plan or a Domestic and International Calling Plan.
Assigning the licenses will look like:
Note
Just so you know, Skype for Business Plan 2 is included with the Common Area Phone license.
For more information, see Add a user.
Step 3 - Assign a phone number to the Common Area Phone user account
![]() Assign a phone number to the user using the Skype for Business admin center
Assign a phone number to the user using the Skype for Business admin center
In the admin center > Admin centers > Skype for Business.
In the Skype for Business admin center > Voice > Phone numbers.
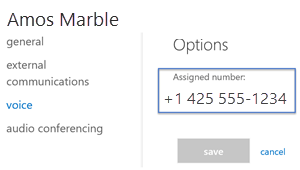
Select a number from the list of phone numbers and click Assign.
On the Assign page, in the Voice user box enter the name of the user that is used for the phone then select the user in the Select a voice user drop-down.
While you're there, you will need to add an emergency address. Once you search, look under the Select emergency address to pick the right one for you.
Click Save and your user should look like this:
Note
Users will only show up if they have a Phone System licence applied. If you just did this, then sometimes it takes a bit for the user to show up in the list.
For more stuff, see Get phone numbers for your users.
You can also take your phone number that you have with another carrier and "port" or transfer them over to Microsoft 365 or Office 365. See, Transfer phone numbers to Teams.
Step 4 - Setting up your phone
Setting the mode on a phone
The phone or phones you have must have the Common Area Phone mode turned on. You might want to check on that to make sure they do.
Here's an example for how to set up a Polycom VVX phone
Enable Common Area Phone mode for the Polycom VVX by following these steps:
- In your browser, connect to the web interface so that you can enable CAP mode.
- Then go to Setting and in the Skype for Business Setting option, select Common Area Phone.
- Click Yes to save your settings.
Now that CAP mode is enabled, set up the phone using the phone's display. The display should show CaAP is enabled. Then do the following:
- Click Settings.
- Select Advanced.
- Enter the password.
- In Administration settings, select Common Area Phone Settings.
- Enable CAP and CAP Admin Mode.
- Click Save Config.
Ok, now your phone is ready so you can sign in on the home screen.
Sign in by selecting Settings > Features > Skype for Business.
Select User Credentials, and select web sign-in (CAP) to generate a code.
Go to the provisioning portal, and sign in as admin.
Enter the display name (for example, Main Reception).
Note
If Search for Common Area Phones only is checked, clear the checkbox and search again.
In the pairing code window, enter the code displayed on the phone and click Provision.
Following this last step, the phone should sign in automatically.
Note
The CAP provisioning site states it will reset the CAP account's password to a random password. Take note that the account the CAP is referring is the Microsoft Entra account. If you created the account in Microsoft Entra-only then the process is straightforward. If you have synced an on premises Active Directory to Microsoft Entra ID and you use a third-party IDP or ADFS, CAP provisioning will fail. In this case, you need to use a Microsoft 365 or Office 365/Microsoft Entra account only (for example, an account with onmicrosoft.com domain) for CAP provisioning to work.
Related topics
- Learn more about available phones at Deploying Skype for Business Online phones.
- Getting phones for Skype for Business Online