Szybki start: tworzenie maszyny wirtualnej serwera z systemem Linux przy użyciu programu PowerShell w usłudze Azure Stack Hub
Maszynę wirtualną z systemem Ubuntu Server 20.04 LTS można utworzyć przy użyciu programu PowerShell usługi Azure Stack Hub. W tym artykule utworzysz maszynę wirtualną i użyjesz jej. W tym artykule pokazano również, jak wykonywać następujące czynności:
- Nawiązywanie połączenia z maszyną wirtualną przy użyciu klienta zdalnego.
- Zainstaluj serwer internetowy NGINX i wyświetl domyślną stronę główną.
- Wyczyść nieużywane zasoby.
Wymagania wstępne
Obraz systemu Linux w witrynie Azure Stack Hub Marketplace. Witryna Azure Stack Hub Marketplace domyślnie nie ma obrazu systemu Linux. Operator usługi Azure Stack Hub udostępnia potrzebny obraz z systemem Ubuntu Server 20.04 LTS. Operator może używać instrukcji w temacie Pobieranie elementów witryny Marketplace z platformy Azure do usługi Azure Stack Hub.
Usługa Azure Stack Hub wymaga określonej wersji interfejsu wiersza polecenia platformy Azure do tworzenia zasobów i zarządzania nimi.
- Jeśli nie masz skonfigurowanego programu PowerShell dla usługi Azure Stack Hub, zobacz Instalowanie programu PowerShell dla usługi Azure Stack Hub.
- Po skonfigurowaniu programu PowerShell w usłudze Azure Stack Hub połączysz się ze środowiskiem usługi Azure Stack Hub. Aby uzyskać instrukcje, zobacz Connect to Azure Stack Hub with PowerShell as a user (Nawiązywanie połączenia z usługą Azure Stack Hub przy użyciu programu PowerShell jako użytkownik).
Publiczny klucz protokołu Secure Shell (SSH) o nazwie id_rsa.pub zapisany w katalogu ssh profilu użytkownika systemu Windows. Aby uzyskać szczegółowe informacje na temat tworzenia kluczy SSH, zobacz Używanie pary kluczy SSH z usługą Azure Stack Hub.
Tworzenie grupy zasobów
Grupa zasobów to logiczny kontener, w którym można wdrażać zasoby usługi Azure Stack Hub i zarządzać nimi. Aby utworzyć grupę zasobów, uruchom następujący blok kodu:
Uwaga
Przypisaliśmy wartości dla wszystkich zmiennych w poniższych przykładach kodu. Można jednak przypisać własne wartości.
# Create variables to store the location and resource group names.
$location = "local"
$ResourceGroupName = "myResourceGroup"

New-AzResourceGroup `
  -Name $ResourceGroupName `
  -Location $location
Tworzenie zasobów magazynu
Utwórz konto magazynu, które będzie używane do przechowywania danych wyjściowych diagnostyki rozruchu.
# Create variables to store the storage account name and the storage account SKU information
$StorageAccountName = "mystorageaccount"
$SkuName = "Standard_LRS"

# Create a new storage account
$StorageAccount = New-AzStorageAccount `
  -Location $location `
  -ResourceGroupName $ResourceGroupName `
  -Type $SkuName `
  -Name $StorageAccountName

Set-AzCurrentStorageAccount `
  -StorageAccountName $storageAccountName `
  -ResourceGroupName $resourceGroupName
Tworzenie zasobów sieciowych
Utwórz sieć wirtualną, podsieć i publiczny adres IP. Te zasoby są używane do zapewnienia łączności sieciowej z maszyną wirtualną.
# Create a subnet configuration
$subnetConfig = New-AzVirtualNetworkSubnetConfig `
  -Name mySubnet `
  -AddressPrefix 192.168.1.0/24

# Create a virtual network
$vnet = New-AzVirtualNetwork `
  -ResourceGroupName $ResourceGroupName `
  -Location $location `
  -Name MyVnet `
  -AddressPrefix 192.168.0.0/16 `
  -Subnet $subnetConfig

# Create a public IP address and specify a DNS name
$pip = New-AzPublicIpAddress `
  -ResourceGroupName $ResourceGroupName `
  -Location $location `
  -AllocationMethod Static `
  -IdleTimeoutInMinutes 4 `
  -Name "mypublicdns$(Get-Random)"
Tworzenie sieciowej grupy zabezpieczeń i reguły sieciowej grupy zabezpieczeń
Sieciowa grupa zabezpieczeń zabezpiecza maszynę wirtualną przy użyciu reguł ruchu przychodzącego i wychodzącego. Utwórz regułę ruchu przychodzącego dla portu 3389, aby zezwolić na przychodzące połączenia pulpitu zdalnego i regułę ruchu przychodzącego dla portu 80, aby zezwolić na przychodzący ruch internetowy.
# Create variables to store the network security group and rules names.
$nsgName = "myNetworkSecurityGroup"
$nsgRuleSSHName = "myNetworkSecurityGroupRuleSSH"
$nsgRuleWebName = "myNetworkSecurityGroupRuleWeb"


# Create an inbound network security group rule for port 22
$nsgRuleSSH = New-AzNetworkSecurityRuleConfig -Name $nsgRuleSSHName -Protocol Tcp `
-Direction Inbound -Priority 1000 -SourceAddressPrefix * -SourcePortRange * -DestinationAddressPrefix * `
-DestinationPortRange 22 -Access Allow

# Create an inbound network security group rule for port 80
$nsgRuleWeb = New-AzNetworkSecurityRuleConfig -Name $nsgRuleWebName -Protocol Tcp `
-Direction Inbound -Priority 1001 -SourceAddressPrefix * -SourcePortRange * -DestinationAddressPrefix * `
-DestinationPortRange 80 -Access Allow

# Create a network security group
$nsg = New-AzNetworkSecurityGroup -ResourceGroupName $ResourceGroupName -Location $location `
-Name $nsgName -SecurityRules $nsgRuleSSH,$nsgRuleWeb
Tworzenie karty sieciowej dla maszyny wirtualnej
Karta sieciowa łączy maszynę wirtualną z podsiecią, sieciową grupą zabezpieczeń i publicznym adresem IP.
# Create a virtual network card and associate it with public IP address and NSG
$nic = New-AzNetworkInterface `
  -Name myNic `
  -ResourceGroupName $ResourceGroupName `
  -Location $location `
  -SubnetId $vnet.Subnets[0].Id `
  -PublicIpAddressId $pip.Id `
  -NetworkSecurityGroupId $nsg.Id
Tworzenie maszyny wirtualnej
Utwórz konfigurację maszyny wirtualnej. Ta konfiguracja obejmuje ustawienia do użycia podczas wdrażania maszyny wirtualnej (na przykład poświadczeń użytkownika, rozmiaru i obrazu maszyny wirtualnej).
# Define a credential object
$UserName='demouser'
$securePassword = ConvertTo-SecureString ' ' -AsPlainText -Force
$cred = New-Object System.Management.Automation.PSCredential ($UserName, $securePassword)

# Create the VM configuration object
$VmName = "VirtualMachinelatest"
$VmSize = "Standard_D1"
$VirtualMachine = New-AzVMConfig `
  -VMName $VmName `
  -VMSize $VmSize

$VirtualMachine = Set-AzVMOperatingSystem `
  -VM $VirtualMachine `
  -Linux `
  -ComputerName "MainComputer" `
  -Credential $cred

$VirtualMachine = Set-AzVMSourceImage `
  -VM $VirtualMachine `
  -PublisherName "Canonical" `
  -Offer "UbuntuServer" `
  -Skus "20.04-LTS" `
  -Version "latest"

# Set the operating system disk properties on a VM
$VirtualMachine = Set-AzVMOSDisk `
  -VM $VirtualMachine `
  -CreateOption FromImage | `
  Set-AzVMBootDiagnostic -ResourceGroupName $ResourceGroupName `
  -StorageAccountName $StorageAccountName -Enable |`
  Add-AzVMNetworkInterface -Id $nic.Id

# Configure SSH keys
$sshPublicKey = Get-Content "$env:USERPROFILE\.ssh\id_rsa.pub"

# Add the SSH key to the VM
Add-AzVMSshPublicKey -VM $VirtualMachine `
 -KeyData $sshPublicKey `
 -Path "/home/$UserName/.ssh/authorized_keys"

# Create the VM
New-AzVM `
  -ResourceGroupName $ResourceGroupName `
 -Location $location `
  -VM $VirtualMachine
Szybkie tworzenie maszyny wirtualnej: pełny skrypt
Uwaga
Ten krok jest zasadniczo poprzedni kod scalony razem, ale z hasłem, a nie kluczem SSH na potrzeby uwierzytelniania.
## Create a resource group

<#
A resource group is a logical container where you can deploy and manage Azure Stack Hub resources. From your development kit or the Azure Stack Hub integrated system, run the following code block to create a resource group. Though we've assigned values for all the variables in this article, you can use these values or assign new ones.
#>

# Edit your variables, if required

# Create variables to store the location and resource group names
$location = "local"
$ResourceGroupName = "myResourceGroup"

# Create variables to store the storage account name and the storage account SKU information
$StorageAccountName = "mystorageaccount"
$SkuName = "Standard_LRS"

# Create variables to store the network security group and rules names
$nsgName = "myNetworkSecurityGroup"
$nsgRuleSSHName = "myNetworkSecurityGroupRuleSSH"
$nsgRuleWebName = "myNetworkSecurityGroupRuleWeb"

# Create variable for VM password
$VMPassword = 'Password123!'

# End of variables - no need to edit anything past that point to deploy a single VM

# Create a resource group
New-AzResourceGroup `
  -Name $ResourceGroupName `
  -Location $location

## Create storage resources

# Create a storage account, and then create a storage container for the Ubuntu Server 20.04 LTS image

# Create a new storage account
$StorageAccount = New-AzStorageAccount `
  -Location $location `
  -ResourceGroupName $ResourceGroupName `
  -Type $SkuName `
  -Name $StorageAccountName

Set-AzCurrentStorageAccount `
  -StorageAccountName $storageAccountName `
  -ResourceGroupName $resourceGroupName

# Create a storage container to store the VM image
$containerName = 'osdisks'
$container = New-AzureStorageContainer `
  -Name $containerName `
  -Permission Blob


## Create networking resources

# Create a virtual network, a subnet, and a public IP address, resources that are used provide network connectivity to the VM

# Create a subnet configuration
$subnetConfig = New-AzVirtualNetworkSubnetConfig `
  -Name mySubnet `
  -AddressPrefix 192.168.1.0/24

# Create a virtual network
$vnet = New-AzVirtualNetwork `
  -ResourceGroupName $ResourceGroupName `
  -Location $location `
  -Name MyVnet `
  -AddressPrefix 192.168.0.0/16 `
  -Subnet $subnetConfig

# Create a public IP address and specify a DNS name
$pip = New-AzPublicIpAddress `
  -ResourceGroupName $ResourceGroupName `
  -Location $location `
  -AllocationMethod Static `
  -IdleTimeoutInMinutes 4 `
  -Name "mypublicdns$(Get-Random)"


### Create a network security group and a network security group rule

<#
The network security group secures the VM by using inbound and outbound rules. Create an inbound rule for port 3389 to allow incoming Remote Desktop connections and an inbound rule for port 80 to allow incoming web traffic.
#>

# Create an inbound network security group rule for port 22
$nsgRuleSSH = New-AzNetworkSecurityRuleConfig -Name $nsgRuleSSHName -Protocol Tcp `
-Direction Inbound -Priority 1000 -SourceAddressPrefix * -SourcePortRange * -DestinationAddressPrefix * `
-DestinationPortRange 22 -Access Allow

# Create an inbound network security group rule for port 80
$nsgRuleWeb = New-AzNetworkSecurityRuleConfig -Name $nsgRuleWebName -Protocol Tcp `
-Direction Inbound -Priority 1001 -SourceAddressPrefix * -SourcePortRange * -DestinationAddressPrefix * `
-DestinationPortRange 80 -Access Allow

# Create a network security group
$nsg = New-AzNetworkSecurityGroup -ResourceGroupName $ResourceGroupName -Location $location `
-Name $nsgName -SecurityRules $nsgRuleSSH,$nsgRuleWeb

### Create a network card for the VM

# The network card connects the VM to a subnet, network security group, and public IP address.

# Create a virtual network card and associate it with public IP address and NSG
$nic = New-AzNetworkInterface `
  -Name myNic `
  -ResourceGroupName $ResourceGroupName `
  -Location $location `
  -SubnetId $vnet.Subnets[0].Id `
  -PublicIpAddressId $pip.Id `
  -NetworkSecurityGroupId $nsg.Id

## Create a VM
<#
Create a VM configuration. This configuration includes the settings used when deploying the VM. For example: user credentials, size, and the VM image.
#>

# Define a credential object
$UserName='demouser'
$securePassword = ConvertTo-SecureString $VMPassword -AsPlainText -Force
$cred = New-Object System.Management.Automation.PSCredential ($UserName, $securePassword)

# Create the VM configuration object
$VmName = "VirtualMachinelatest"
$VmSize = "Standard_D1"
$VirtualMachine = New-AzVMConfig `
  -VMName $VmName `
  -VMSize $VmSize

$VirtualMachine = Set-AzVMOperatingSystem `
  -VM $VirtualMachine `
  -Linux `
  -ComputerName "MainComputer" `
  -Credential $cred

$VirtualMachine = Set-AzVMSourceImage `
  -VM $VirtualMachine `
  -PublisherName "Canonical" `
  -Offer "UbuntuServer" `
  -Skus "20.04-LTS" `
  -Version "latest"

$osDiskName = "OsDisk"
$osDiskUri = '{0}vhds/{1}-{2}.vhd' -f `
  $StorageAccount.PrimaryEndpoints.Blob.ToString(),`
  $vmName.ToLower(), `
  $osDiskName

# Set the operating system disk properties on a VM
$VirtualMachine = Set-AzVMOSDisk `
  -VM $VirtualMachine `
  -Name $osDiskName `
  -VhdUri $OsDiskUri `
  -CreateOption FromImage | `
  Add-AzVMNetworkInterface -Id $nic.Id

# Create the VM
New-AzVM `
  -ResourceGroupName $ResourceGroupName `
 -Location $location `
  -VM $VirtualMachine
Łączenie z maszyną wirtualną
Po wdrożeniu maszyny wirtualnej skonfiguruj dla niej połączenie SSH. Aby uzyskać publiczny adres IP maszyny wirtualnej, użyj polecenia Get-AzPublicIpAddress :
Get-AzPublicIpAddress -ResourceGroupName myResourceGroup | Select IpAddress
W systemie klienckim z zainstalowanym protokołem SSH użyj następującego polecenia, aby nawiązać połączenie z maszyną wirtualną. Jeśli pracujesz w systemie Windows, możesz użyć narzędzia PuTTY do utworzenia połączenia.
ssh <Public IP Address>
Po wyświetleniu monitu zaloguj się jako azureuser. Jeśli podczas tworzenia kluczy SSH użyto hasła, musisz podać hasło.
Instalowanie serwera internetowego NGINX
Aby zaktualizować zasoby pakietu i zainstalować najnowszy pakiet NGINX, uruchom następujący skrypt:
#!/bin/bash

# update package source
apt-get -y update

# install NGINX
apt-get -y install nginx
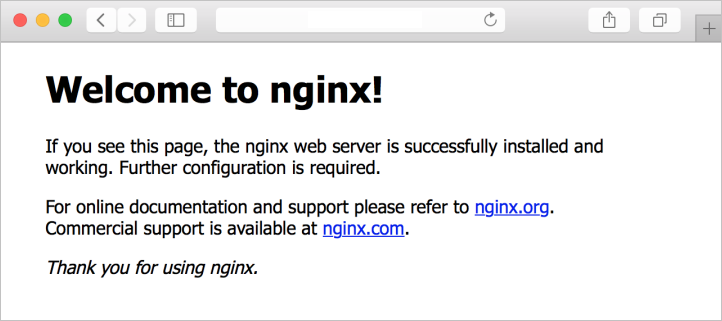
Wyświetlanie strony powitalnej serwera NGINX
Po zainstalowaniu serwera internetowego NGINX i otwarciu portu 80 na maszynie wirtualnej można uzyskać dostęp do serwera internetowego przy użyciu publicznego adresu IP maszyny wirtualnej. Otwórz przeglądarkę internetową i przejdź do http://<public IP address>strony .
Czyszczenie zasobów
Zasoby, które nie są już potrzebne, można wyczyścić za pomocą polecenia Remove-AzResourceGroup . Aby usunąć grupę zasobów i wszystkie jej zasoby, uruchom następujące polecenie:
Remove-AzResourceGroup -Name myResourceGroup
Następne kroki
W tym przewodniku Szybki start wdrożono podstawową maszynę wirtualną serwera z systemem Linux. Aby dowiedzieć się więcej na temat maszyn wirtualnych usługi Azure Stack Hub, zobacz Zagadnienia dotyczące maszyn wirtualnych w usłudze Azure Stack Hub.
Opinia
Dostępne już wkrótce: W 2024 r. będziemy stopniowo wycofywać zgłoszenia z serwisu GitHub jako mechanizm przesyłania opinii na temat zawartości i zastępować go nowym systemem opinii. Aby uzyskać więcej informacji, sprawdź: https://aka.ms/ContentUserFeedback.
Prześlij i wyświetl opinię dla