Szybki start: tworzenie aplikacji Czytnik immersyjny
Czytnik immersyjny to inkluzywnie zaprojektowane narzędzie, które implementuje sprawdzone techniki w celu poprawy zrozumienia czytania dla nowych czytelników, uczniów języka i osób z różnicami w uczeniu się, takimi jak dysleksja. Możesz użyć Czytnik immersyjny w aplikacjach, aby odizolować tekst, aby poprawić fokus, wyświetlać obrazy dla często używanych słów, wyróżniać części mowy, odczytywać zaznaczony tekst głośno, tłumaczyć wyrazy i frazy w czasie rzeczywistym i nie tylko.
W tym przewodniku Szybki start utworzysz aplikację internetową od podstaw przy użyciu języka C#i zintegrujesz Czytnik immersyjny przy użyciu biblioteki klienta. Pełny przykład roboczy tego przewodnika Szybki start jest dostępny w witrynie GitHub.
Wymagania wstępne
- Subskrypcja platformy Azure. Możesz utworzyć go bezpłatnie.
- Zasób Czytnik immersyjny skonfigurowany na potrzeby uwierzytelniania entra firmy Microsoft. Postępuj zgodnie z tymi instrukcjami , aby skonfigurować. Zapisz dane wyjściowe sesji w pliku tekstowym, aby można było skonfigurować właściwości środowiska.
- Visual Studio 2022.
Tworzenie projektu aplikacji internetowej
Utwórz nowy projekt w programie Visual Studio przy użyciu szablonu aplikacji internetowej platformy ASP.NET Core z wbudowanym kontrolerem widoku modelu i ASP.NET Core 6. Nadaj projektowi nazwę QuickstartSampleWebApp.


Konfigurowanie uwierzytelniania
Kliknij prawym przyciskiem myszy projekt w Eksplorator rozwiązań i wybierz polecenie Zarządzaj wpisami tajnymi użytkownika. Spowoduje to otwarcie pliku o nazwie secrets.json. Ten plik nie jest zaewidencjonowany w kontroli źródła. Aby dowiedzieć się więcej, zobacz Sejf przechowywanie wpisów tajnych aplikacji. Zastąp zawartość secrets.json następującymi wartościami podanymi podczas tworzenia zasobu Czytnik immersyjny.
Ważne
Pamiętaj, aby nigdy nie publikować wpisów tajnych publicznie. W przypadku środowiska produkcyjnego użyj bezpiecznego sposobu przechowywania i uzyskiwania dostępu do poświadczeń, takich jak usługa Azure Key Vault.
{
  "TenantId": "YOUR_TENANT_ID",
  "ClientId": "YOUR_CLIENT_ID",
  "ClientSecret": "YOUR_CLIENT_SECRET",
  "Subdomain": "YOUR_SUBDOMAIN"
}
Instalowanie pakietu NuGet klienta tożsamości
Poniższy kod używa obiektów z Microsoft.Identity.Client pakietu NuGet, dlatego należy dodać odwołanie do tego pakietu w projekcie.
Ważne
Pakiet NuGet Microsoft.IdentityModel.Clients.ActiveDirectory i biblioteka ADAL (Azure AD Authentication Library) zostały wycofane. Od 30 czerwca 2020 r. nie dodano żadnych nowych funkcji. Zdecydowanie zachęcamy do uaktualnienia. Aby uzyskać więcej informacji, zobacz przewodnik migracji.
Otwórz konsolę Menedżer pakietów NuGet z menu Narzędzia ->NuGet Menedżer pakietów ->Menedżer pakietów Console i uruchom następujące polecenie:
Install-Package Microsoft.Identity.Client -Version 4.59.0
Aktualizowanie kontrolera w celu uzyskania tokenu
Otwórz plik Controllers\HomeController.cs i dodaj następujący kod po using instrukcjach w górnej części pliku.
using Microsoft.Identity.Client;
Skonfiguruj kontroler, aby uzyskać wartości identyfikatora Entra firmy Microsoft z secrets.json. W górnej HomeController części klasy po public class HomeController : Controller {dodaj następujący kod.
private readonly string TenantId;     // Azure subscription TenantId
private readonly string ClientId;     // Microsoft Entra ApplicationId
private readonly string ClientSecret; // Microsoft Entra Application Service Principal password
private readonly string Subdomain;    // Immersive Reader resource subdomain (resource 'Name' if the resource was created in the Azure portal, or 'CustomSubDomain' option if the resource was created with Azure CLI PowerShell. Check the Azure portal for the subdomain on the Endpoint in the resource Overview page, for example, 'https://[SUBDOMAIN].cognitiveservices.azure.com/')

private IConfidentialClientApplication _confidentialClientApplication;
private IConfidentialClientApplication ConfidentialClientApplication
{
    get {
        if (_confidentialClientApplication == null) {
            _confidentialClientApplication = ConfidentialClientApplicationBuilder.Create(ClientId)
            .WithClientSecret(ClientSecret)
            .WithAuthority($"https://login.windows.net/{TenantId}")
            .Build();
        }

        return _confidentialClientApplication;
    }
}

public HomeController(Microsoft.Extensions.Configuration.IConfiguration configuration)
{
    TenantId = configuration["TenantId"];
    ClientId = configuration["ClientId"];
    ClientSecret = configuration["ClientSecret"];
    Subdomain = configuration["Subdomain"];

    if (string.IsNullOrWhiteSpace(TenantId))
    {
        throw new ArgumentNullException("TenantId is null! Did you add that info to secrets.json?");
    }

    if (string.IsNullOrWhiteSpace(ClientId))
    {
        throw new ArgumentNullException("ClientId is null! Did you add that info to secrets.json?");
    }

    if (string.IsNullOrWhiteSpace(ClientSecret))
    {
        throw new ArgumentNullException("ClientSecret is null! Did you add that info to secrets.json?");
    }

    if (string.IsNullOrWhiteSpace(Subdomain))
    {
        throw new ArgumentNullException("Subdomain is null! Did you add that info to secrets.json?");
    }
}

/// <summary>
/// Get a Microsoft Entra ID authentication token
/// </summary>
public async Task<string> GetTokenAsync()
{
    const string resource = "https://cognitiveservices.azure.com/";

    var authResult = await ConfidentialClientApplication.AcquireTokenForClient(
        new[] { $"{resource}/.default" })
        .ExecuteAsync()
        .ConfigureAwait(false);

    return authResult.AccessToken;
}

[HttpGet]
public async Task<JsonResult> GetTokenAndSubdomain()
{
    try
    {
        string tokenResult = await GetTokenAsync();

        return new JsonResult(new { token = tokenResult, subdomain = Subdomain });
    }
    catch (Exception e)
    {
        string message = "Unable to acquire Microsoft Entra token. Check the console for more information.";
        Debug.WriteLine(message, e);
        return new JsonResult(new { error = message });
    }
}
Dodawanie przykładowej zawartości
Najpierw otwórz plik Views\Shared\Layout.cshtml. Przed wierszem </head>dodaj następujący kod:
@RenderSection("Styles", required: false)
Teraz dodaj przykładową zawartość do tej aplikacji internetowej. Otwórz plik Views\Home\Index.cshtml i zastąp cały wygenerowany automatycznie kod następującym przykładem:
@{
    ViewData["Title"] = "Immersive Reader C# Quickstart";
}

@section Styles {
    <style type="text/css">
        .immersive-reader-button {
            background-color: white;
            margin-top: 5px;
            border: 1px solid black;
            float: right;
        }
    </style>
}

<div class="container">
    <button class="immersive-reader-button" data-button-style="iconAndText" data-locale="en"></button>

    <h1 id="ir-title">About Immersive Reader</h1>
    <div id="ir-content" lang="en-us">
        <p>
            Immersive Reader is a tool that implements proven techniques to improve reading comprehension for emerging readers, language learners, and people with learning differences.
            The Immersive Reader is designed to make reading more accessible for everyone. The Immersive Reader
            <ul>
                <li>
                    Shows content in a minimal reading view
                </li>
                <li>
                    Displays pictures of commonly used words
                </li>
                <li>
                    Highlights nouns, verbs, adjectives, and adverbs
                </li>
                <li>
                    Reads your content out loud to you
                </li>
                <li>
                    Translates your content into another language
                </li>
                <li>
                    Breaks down words into syllables
                </li>
            </ul>
        </p>
        <h3>
            The Immersive Reader is available in many languages.
        </h3>
        <p lang="es-es">
            El Lector inmersivo está disponible en varios idiomas.
        </p>
        <p lang="zh-cn">
            沉浸式阅读器支持许多语言
        </p>
        <p lang="de-de">
            Der plastische Reader ist in vielen Sprachen verfügbar.
        </p>
        <p lang="ar-eg" dir="rtl" style="text-align:right">
            يتوفر \"القارئ الشامل\" في العديد من اللغات.
        </p>
    </div>
</div>
Zwróć uwagę, że cały tekst ma lang atrybut, który opisuje języki tekstu. Ten atrybut pomaga Czytnik immersyjny zapewnić odpowiedni język i funkcje gramatyczne.
Dodawanie kodu JavaScript do obsługi uruchamiania Czytnik immersyjny
Biblioteka Czytnik immersyjny udostępnia funkcje, takie jak uruchamianie Czytnik immersyjny i renderowanie przycisków Czytnik immersyjny. Aby dowiedzieć się więcej, zobacz dokumentację zestawu SDK języka JavaScript.
W dolnej części pliku Views\Home\Index.cshtml dodaj następujący kod:
@section Scripts
{
    <script src="https://ircdname.azureedge.net/immersivereadersdk/immersive-reader-sdk.1.4.0.js"></script>
    <script>
        function getTokenAndSubdomainAsync() {
            return new Promise(function (resolve, reject) {
                $.ajax({
                    url: "@Url.Action("GetTokenAndSubdomain", "Home")",
                    type: "GET",
                    success: function (data) {
                        if (data.error) {
                            reject(data.error);
                        } else {
                            resolve(data);
                        }
                    },
                    error: function (err) {
                        reject(err);
                    }
                });
            });
        }

        $(".immersive-reader-button").click(function () {
            handleLaunchImmersiveReader();
        });

        function handleLaunchImmersiveReader() {
            getTokenAndSubdomainAsync()
                .then(function (response) {
                    const token = response["token"];
                    const subdomain = response["subdomain"];

                    // Learn more about chunk usage and supported MIME types https://learn.microsoft.com/azure/ai-services/immersive-reader/reference#chunk
                    const data = {
                        title: $("#ir-title").text(),
                        chunks: [{
                            content: $("#ir-content").html(),
                            mimeType: "text/html"
                        }]
                    };

                    // Learn more about options https://learn.microsoft.com/azure/ai-services/immersive-reader/reference#options
                    const options = {
                        "onExit": exitCallback,
                        "uiZIndex": 2000
                    };

                    ImmersiveReader.launchAsync(token, subdomain, data, options)
                        .catch(function (error) {
                            alert("Error in launching the Immersive Reader. Check the console.");
                            console.log(error);
                        });
                })
                .catch(function (error) {
                    alert("Error in getting the Immersive Reader token and subdomain. Check the console.");
                    console.log(error);
                });
        }

        function exitCallback() {
            console.log("This is the callback function. It is executed when the Immersive Reader closes.");
        }
    </script>
}
Skompiluj i uruchom aplikację
Na pasku menu wybierz pozycję Debuguj > rozpocznij debugowanie lub naciśnij klawisz F5 , aby uruchomić aplikację.
W przeglądarce powinny zostać wyświetlone następujące elementy:

Uruchamianie Czytnik immersyjny
Po wybraniu przycisku Czytnik immersyjny Czytnik immersyjny zostanie uruchomiona z zawartością na stronie.

Następny krok
W tym przewodniku Szybki start utworzysz aplikację internetową od podstaw i zintegrujesz Czytnik immersyjny przy użyciu biblioteki klienta Czytnik immersyjny. Pełny przykład roboczy tego przewodnika Szybki start jest dostępny w witrynie GitHub.
Wymagania wstępne
- Subskrypcja platformy Azure. Możesz utworzyć go bezpłatnie.
- Zasób Czytnik immersyjny skonfigurowany na potrzeby uwierzytelniania entra firmy Microsoft. Postępuj zgodnie z tymi instrukcjami , aby skonfigurować. Zapisz dane wyjściowe sesji w pliku tekstowym, aby można było skonfigurować właściwości środowiska.
- Środowisko IDE, takie jak Visual Studio Code.
Tworzenie aplikacji internetowej Node.js za pomocą usługi Express
Utwórz aplikację internetową Node.js przy użyciu express-generator narzędzia .
npm install express-generator -g
express --view=pug quickstart-nodejs
cd quickstart-nodejs
Zainstaluj zależności usługi yarn i dodaj zależności request i dotenv.
yarn
yarn add request
yarn add dotenv
Zainstaluj biblioteki axios i qs .
npm install axios qs
Konfigurowanie uwierzytelniania
Utwórz nowy plik o nazwie env w katalogu głównym projektu. Wklej do niego następujący kod, podając wartości podane podczas tworzenia zasobu Czytnik immersyjny. Nie dołączaj znaków cudzysłowu { ani znaków i } .
Ważne
Pamiętaj, aby nigdy nie publikować wpisów tajnych publicznie. W przypadku środowiska produkcyjnego użyj bezpiecznego sposobu przechowywania i uzyskiwania dostępu do poświadczeń, takich jak usługa Azure Key Vault.
TENANT_ID={YOUR_TENANT_ID}
CLIENT_ID={YOUR_CLIENT_ID}
CLIENT_SECRET={YOUR_CLIENT_SECRET}
SUBDOMAIN={YOUR_SUBDOMAIN}
Pamiętaj, aby nie zatwierdzać tego pliku w kontroli źródła, ponieważ zawiera wpisy tajne, które nie powinny być upublicznione.
Następnie otwórz app.js i dodaj następujący kod na początku pliku. Spowoduje to załadowanie właściwości zdefiniowanych w pliku env jako zmiennych środowiskowych do węzła.
require('dotenv').config();
Aktualizowanie routera w celu uzyskania tokenu
Otwórz plik routes\index.js i zastąp automatycznie wygenerowany kod poniższym kodem.
Ten kod tworzy punkt końcowy interfejsu API, który uzyskuje token uwierzytelniania identyfikatora Entra firmy Microsoft przy użyciu hasła jednostki usługi. Pobiera również poddomenę. Następnie zwraca obiekt zawierający token i poddomenę.
var axios = require('axios');
var express = require('express');
var router = express.Router();
var qs = require('qs');

/* GET home page. */
router.get('/', function(req, res, next) {
  res.render('index', { title: 'Express' });
});

router.get('/GetTokenAndSubdomain', function(req, res) {
    try {
        var config ={
            headers: {
                'content-type': 'application/x-www-form-urlencoded'
            }
        }
        var data = {
            grant_type: 'client_credentials',
            client_id: process.env.CLIENT_ID,
            client_secret: process.env.CLIENT_SECRET,
            resource: 'https://cognitiveservices.azure.com/'
        };
        var url = `https://login.windows.net/${process.env.TENANT_ID}/oauth2/token`
        console.log(qs.stringify(data));
        axios.post(url, qs.stringify(data), config)
        .then(function (response) {
            var token = response.data.access_token;
            var subdomain = process.env.SUBDOMAIN;
            return res.send({token, subdomain});
        })
        .catch(function (response) {
            if (response.status !== 200) {
                return res.send({error :  "Unable to acquire Microsoft Entra token. Check the debugger for more information."})
            }
        });
    } catch (error) {
        console.log(error);
        return res.status(500).send('CogSvcs IssueToken error');
    }
});

module.exports = router;
Punkt końcowy interfejsu API GetTokenAndSubdomain powinien być zabezpieczony za jakąś formą uwierzytelniania, na przykład OAuth, aby uniemożliwić nieautoryzowanym użytkownikom uzyskiwanie tokenów do użycia w usłudze Czytnik immersyjny i rozliczeniach; praca ta wykracza poza zakres tego przewodnika Szybki start.
Dodawanie przykładowej zawartości
Teraz dodaj przykładową zawartość do tej aplikacji internetowej. Otwórz plik views\index.pug i zastąp automatycznie wygenerowany kod następującym przykładem:
doctype html
html
   head
      title Immersive Reader Quickstart Node.js

      link(rel='icon', href='data:;base64,iVBORw0KGgo=')

      link(rel='stylesheet', href='https://stackpath.bootstrapcdn.com/bootstrap/3.4.1/css/bootstrap.min.css')

      // A polyfill for Promise is needed for IE11 support.
      script(src='https://cdn.jsdelivr.net/npm/promise-polyfill@8/dist/polyfill.min.js')

      script(src='https://ircdname.azureedge.net/immersivereadersdk/immersive-reader-sdk.1.4.0.js')
      script(src='https://code.jquery.com/jquery-3.3.1.min.js')

      style(type="text/css").
        .immersive-reader-button {
          background-color: white;
          margin-top: 5px;
          border: 1px solid black;
          float: right;
        }
   body
      div(class="container")
        button(class="immersive-reader-button" data-button-style="iconAndText" data-locale="en")

        h1(id="ir-title") About Immersive Reader
        div(id="ir-content" lang="en-us")
          p Immersive Reader is a tool that implements proven techniques to improve reading comprehension for emerging readers, language learners, and people with learning differences. The Immersive Reader is designed to make reading more accessible for everyone. The Immersive Reader

            ul
                li Shows content in a minimal reading view
                li Displays pictures of commonly used words
                li Highlights nouns, verbs, adjectives, and adverbs
                li Reads your content out loud to you
                li Translates your content into another language
                li Breaks down words into syllables

          h3 The Immersive Reader is available in many languages.

          p(lang="es-es") El Lector inmersivo está disponible en varios idiomas.
          p(lang="zh-cn") 沉浸式阅读器支持许多语言
          p(lang="de-de") Der plastische Reader ist in vielen Sprachen verfügbar.
          p(lang="ar-eg" dir="rtl" style="text-align:right") يتوفر \"القارئ الشامل\" في العديد من اللغات.

script(type="text/javascript").
  function getTokenAndSubdomainAsync() {
        return new Promise(function (resolve, reject) {
            $.ajax({
                url: "/GetTokenAndSubdomain",
                type: "GET",
                success: function (data) {
                    if (data.error) {
                        reject(data.error);
                    } else {
                        resolve(data);
                    }
                },
                error: function (err) {
                    reject(err);
                }
            });
        });
    }

    $(".immersive-reader-button").click(function () {
        handleLaunchImmersiveReader();
    });

    function handleLaunchImmersiveReader() {
        getTokenAndSubdomainAsync()
            .then(function (response) {
                const token = response["token"];
                const subdomain = response["subdomain"];
                // Learn more about chunk usage and supported MIME types https://learn.microsoft.com/azure/ai-services/immersive-reader/reference#chunk
                const data = {
                    title: $("#ir-title").text(),
                    chunks: [{
                        content: $("#ir-content").html(),
                        mimeType: "text/html"
                    }]
                };
                // Learn more about options https://learn.microsoft.com/azure/ai-services/immersive-reader/reference#options
                const options = {
                    "onExit": exitCallback,
                    "uiZIndex": 2000
                };
                ImmersiveReader.launchAsync(token, subdomain, data, options)
                    .catch(function (error) {
                        alert("Error in launching the Immersive Reader. Check the console.");
                        console.log(error);
                    });
            })
            .catch(function (error) {
                alert("Error in getting the Immersive Reader token and subdomain. Check the console.");
                console.log(error);
            });
    }

    function exitCallback() {
        console.log("This is the callback function. It is executed when the Immersive Reader closes.");
    }
Zwróć uwagę, że cały tekst ma lang atrybut, który opisuje języki tekstu. Ten atrybut pomaga Czytnik immersyjny zapewnić odpowiedni język i funkcje gramatyczne.
Skompiluj i uruchom aplikację
Nasza aplikacja internetowa jest teraz gotowa. Uruchom aplikację, uruchamiając polecenie:
npm start
Otwórz przeglądarkę i przejdź do http://localhost:3000adresu . Powinien zostać wyświetlony następujący ekran:

Uruchamianie Czytnik immersyjny
Po wybraniu przycisku Czytnik immersyjny Czytnik immersyjny zostanie uruchomiona z zawartością na stronie.

Następny krok
W tym przewodniku Szybki start utworzysz od podstaw aplikację dla systemu Android i zintegrujesz Czytnik immersyjny. Pełny przykład roboczy tego przewodnika Szybki start jest dostępny w witrynie GitHub.
Wymagania wstępne
- Subskrypcja platformy Azure. Możesz utworzyć go bezpłatnie.
- Zasób Czytnik immersyjny skonfigurowany na potrzeby uwierzytelniania entra firmy Microsoft. Postępuj zgodnie z tymi instrukcjami , aby skonfigurować. Zapisz dane wyjściowe sesji w pliku tekstowym, aby można było skonfigurować właściwości środowiska.
- Git.
- Android Studio.
Tworzenie projektu systemu Android
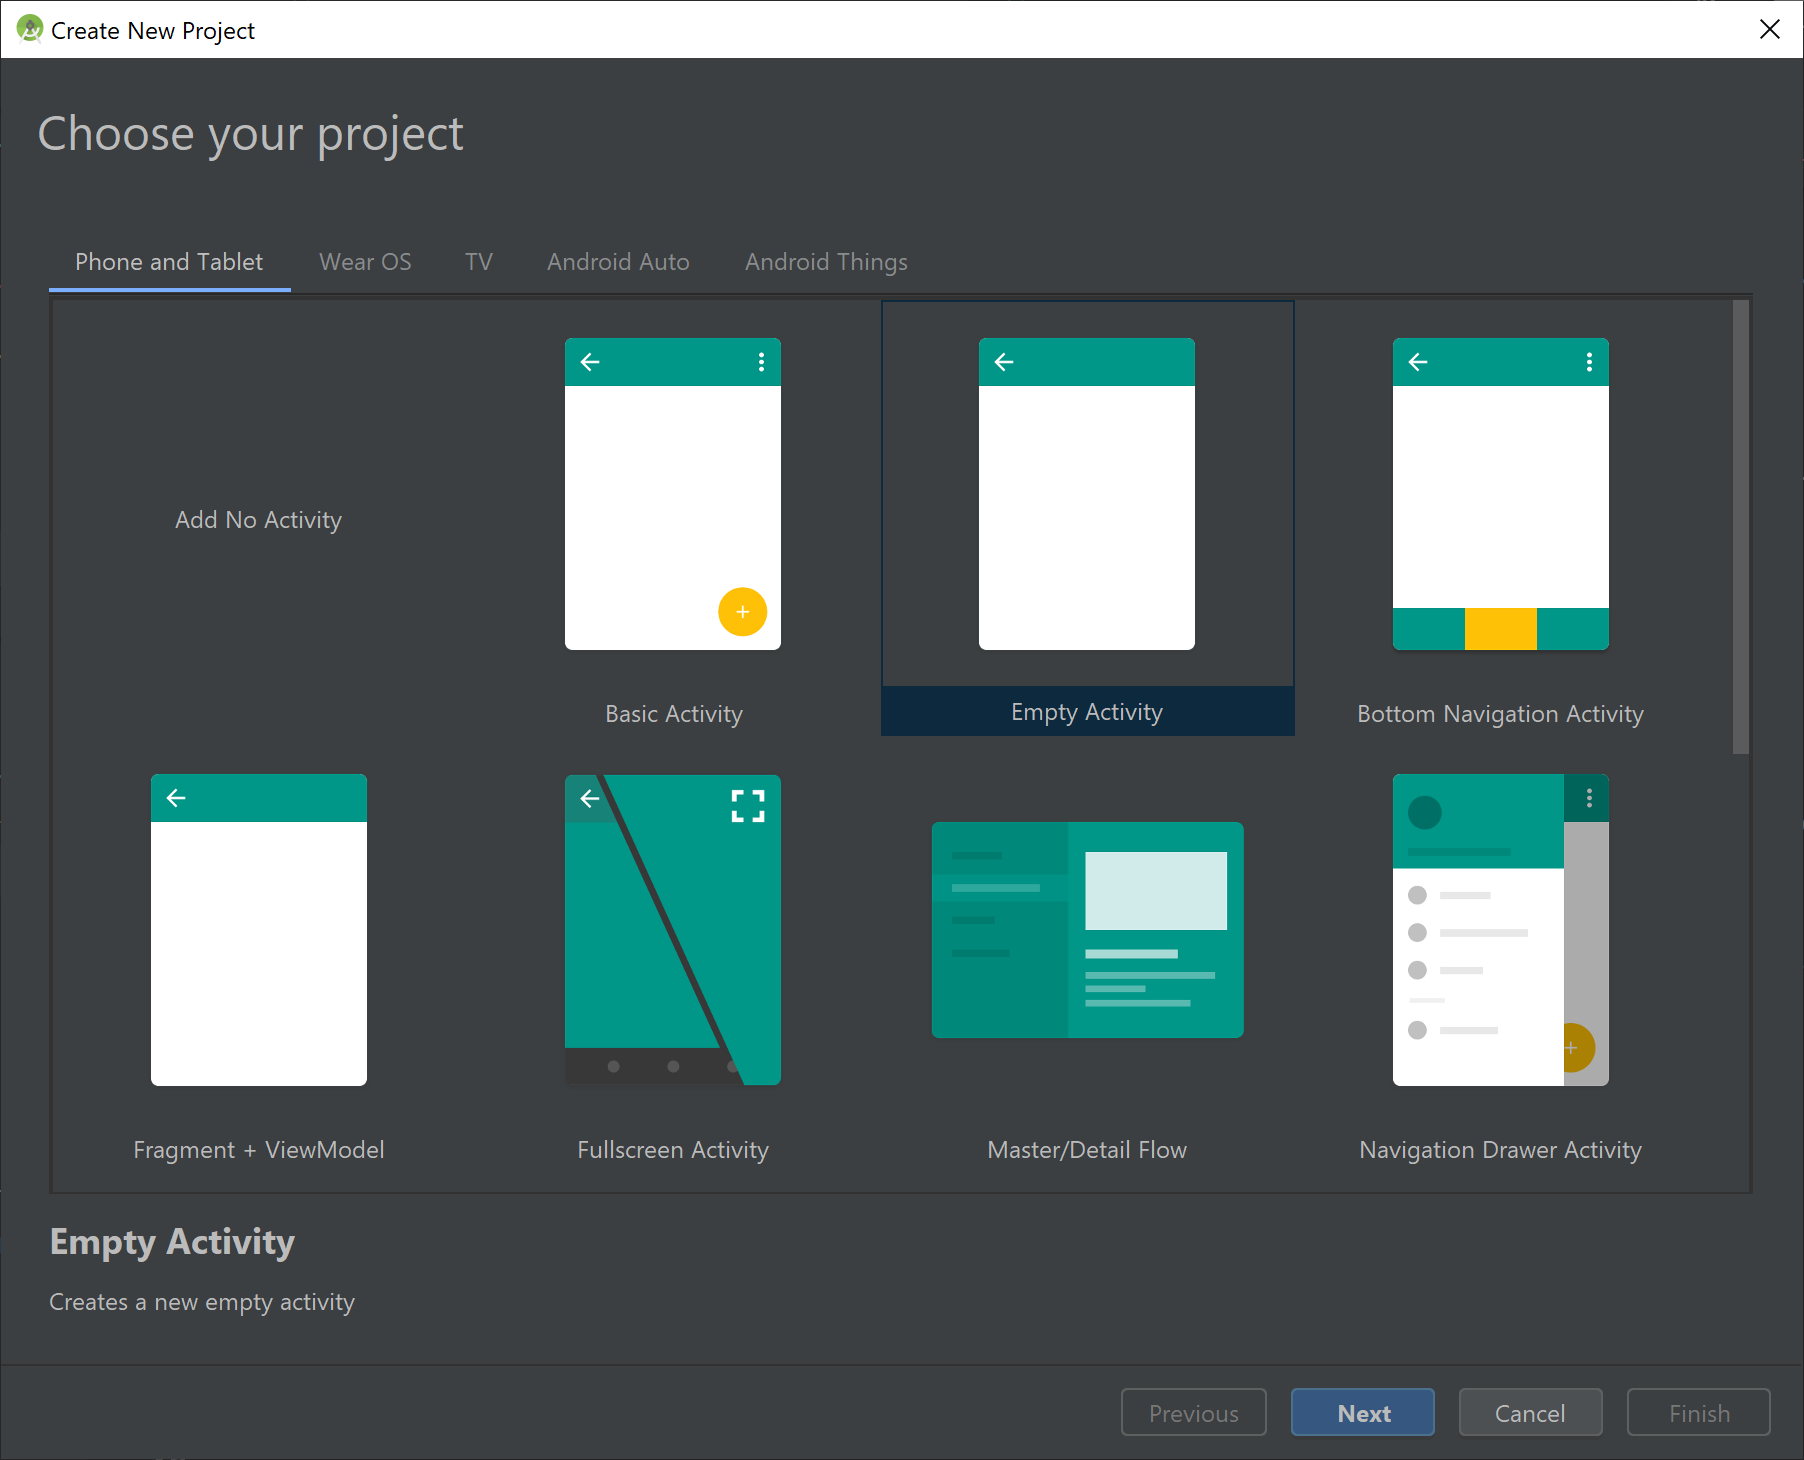
Uruchom nowy projekt w programie Android Studio.

W oknie Szablony wybierz pozycję Puste widoki Działanie, a następnie wybierz pozycję Dalej.
Konfigurowanie projektu
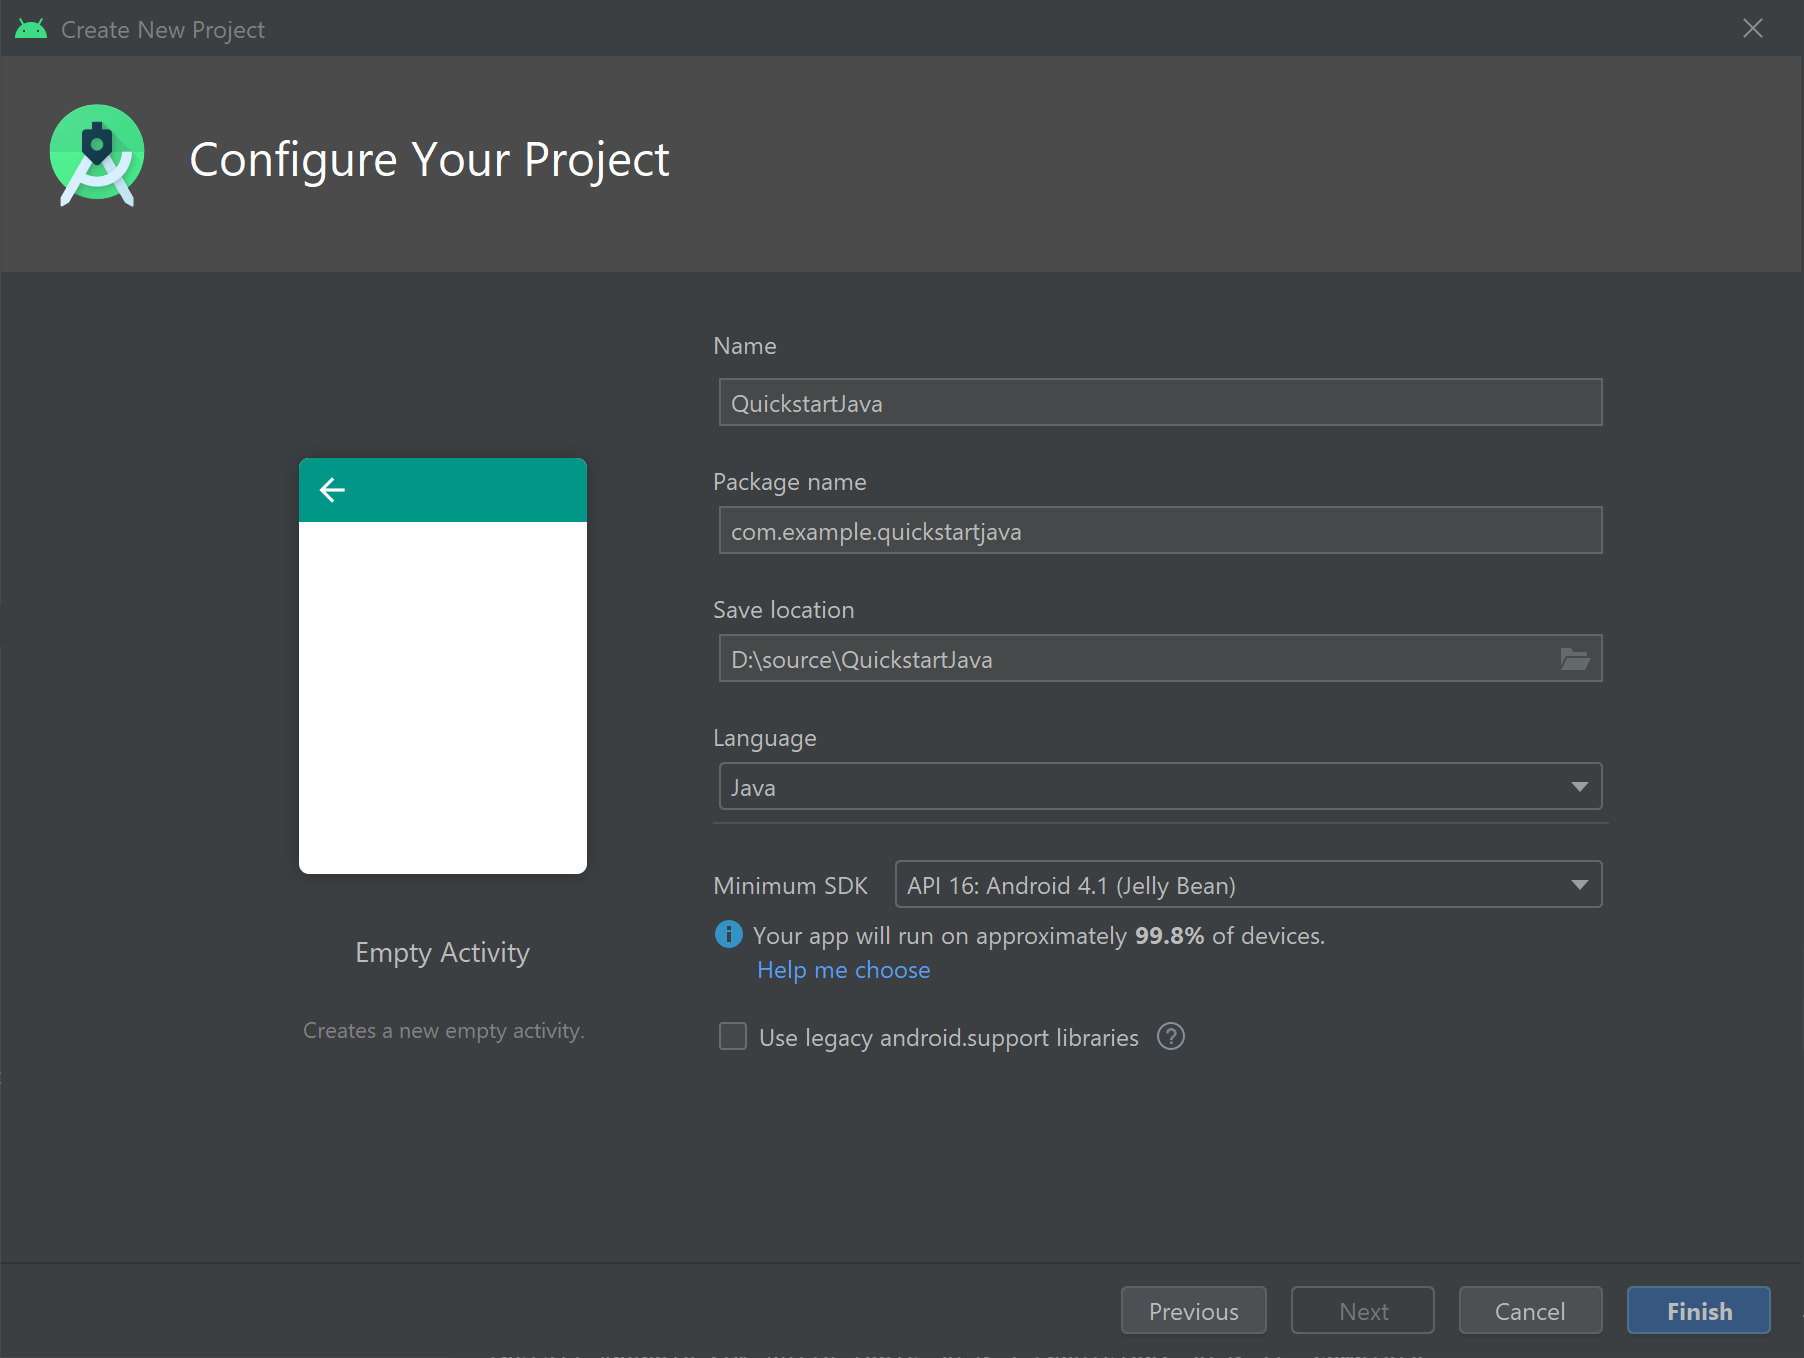
Nadaj projektowi nazwę Szybki startJava i wybierz lokalizację, w ramach których chcesz ją zapisać. Wybierz pozycję Java jako język programowania, a następnie wybierz pozycję Zakończ.
Konfigurowanie zasobów i uwierzytelniania
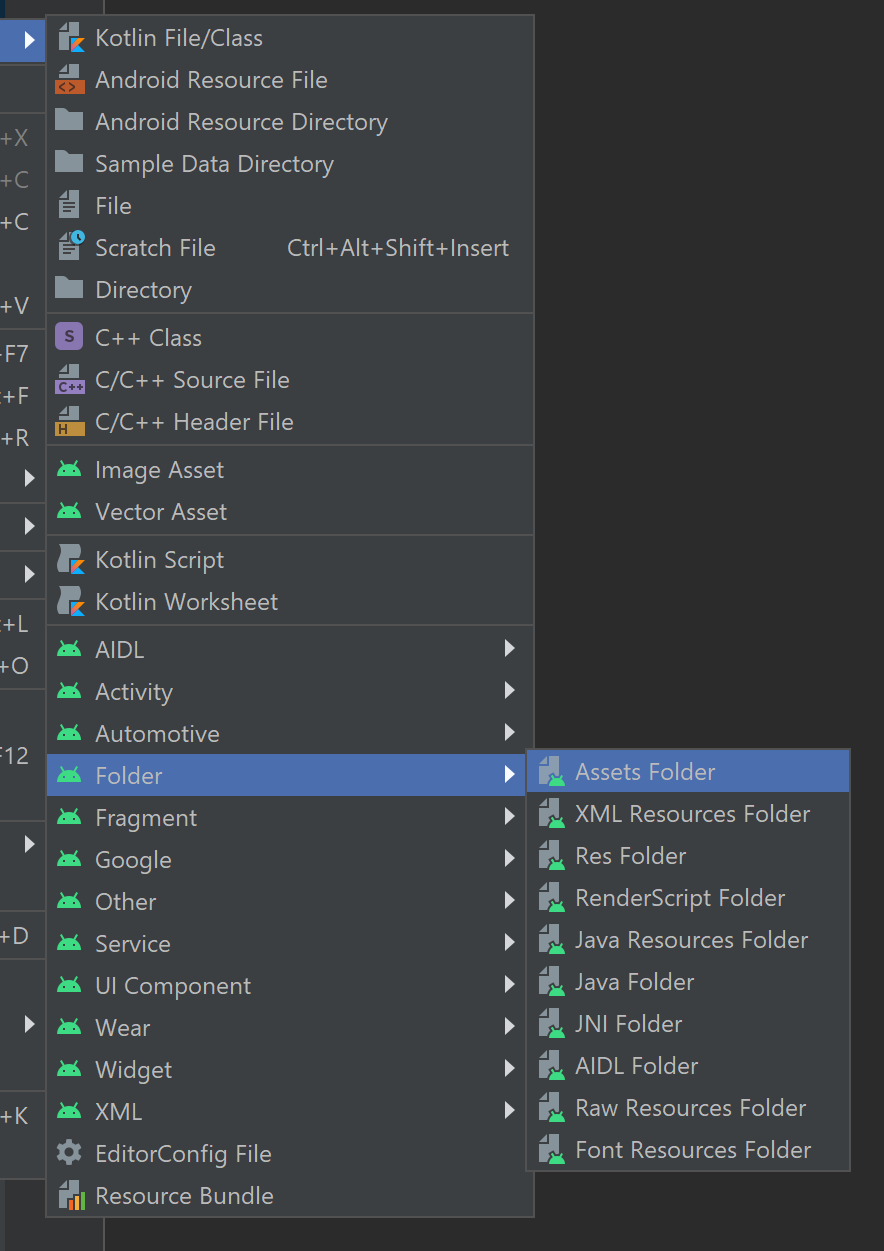
Aby utworzyć nowy folder zasobów, kliknij prawym przyciskiem myszy aplikację i wybierz pozycję Folder ->Assets Folder z listy rozwijanej.
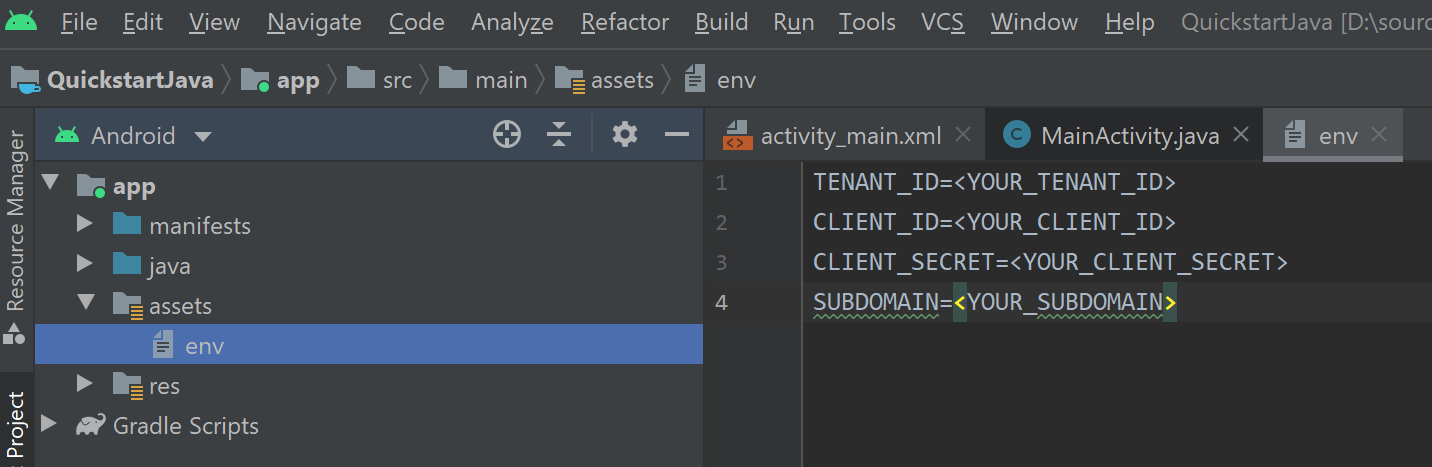
Kliknij prawym przyciskiem myszy zasoby i wybierz pozycję Nowy -> Plik. Nadaj plikowi nazwę env.

Dodaj następujące nazwy i wartości oraz podaj odpowiednie wartości. Nie zatwierdzaj tego pliku env do kontroli źródła, ponieważ zawiera wpisy tajne, które nie powinny być upublicznione.
TENANT_ID=<YOUR_TENANT_ID>
CLIENT_ID=<YOUR_CLIENT_ID>
CLIENT_SECRET=<YOUR_CLIENT_SECRET>
SUBDOMAIN=<YOUR_SUBDOMAIN>
Ważne
Pamiętaj, aby nigdy nie publikować wpisów tajnych publicznie. W przypadku środowiska produkcyjnego użyj bezpiecznego sposobu przechowywania i uzyskiwania dostępu do poświadczeń, takich jak usługa Azure Key Vault.
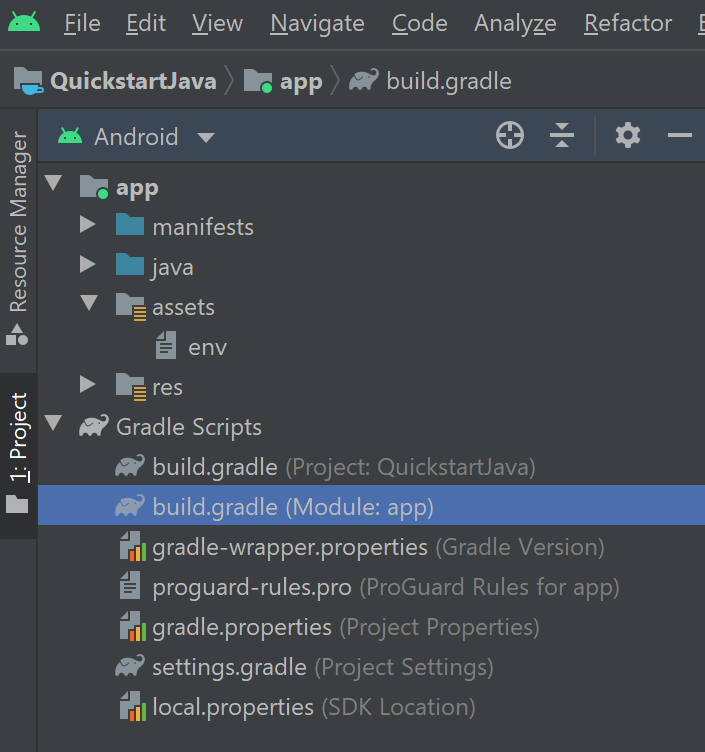
Dodawanie zależności
Zastąp istniejące zależności w pliku build.gradle następującymi implementacjami, aby włączyć kod gson (analizowanie i serializacji w formacie JSON) i dotenv, aby odwołać się do zmiennych zdefiniowanych w pliku env. Po zaimplementowaniu działań w dalszej części tego przewodnika Szybki start może być konieczne ponowne zsynchronizowanie projektu.
dependencies {
    implementation fileTree(dir: 'libs', include: ['*.jar'])
    implementation 'androidx.appcompat:appcompat:1.0.2'
    implementation 'androidx.constraintlayout:constraintlayout:1.1.3'
    implementation 'com.google.code.gson:gson:2.8.6'
    implementation 'io.github.cdimascio:java-dotenv:5.1.3'
    testImplementation 'junit:junit:4.12'
    androidTestImplementation 'androidx.test.ext:junit:1.1.0'
    androidTestImplementation 'androidx.test.espresso:espresso-core:3.1.1'
}
Aktualizowanie ciągów aplikacji i zasobów układu
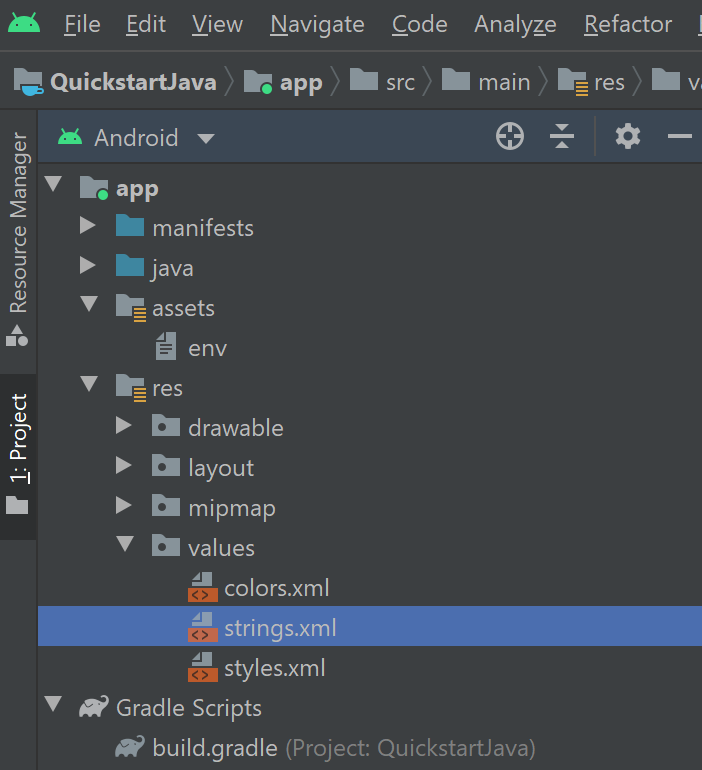
Zastąp zawartość w pliku res/values/strings.xml następującymi ciągami, które mają być używane w aplikacji.
<resources>
<!-- Copyright (c) Microsoft Corporation. All rights reserved. -->
<!-- Licensed under the MIT License. -->
<string name="app_name">ImmersiveReaderSDK</string>
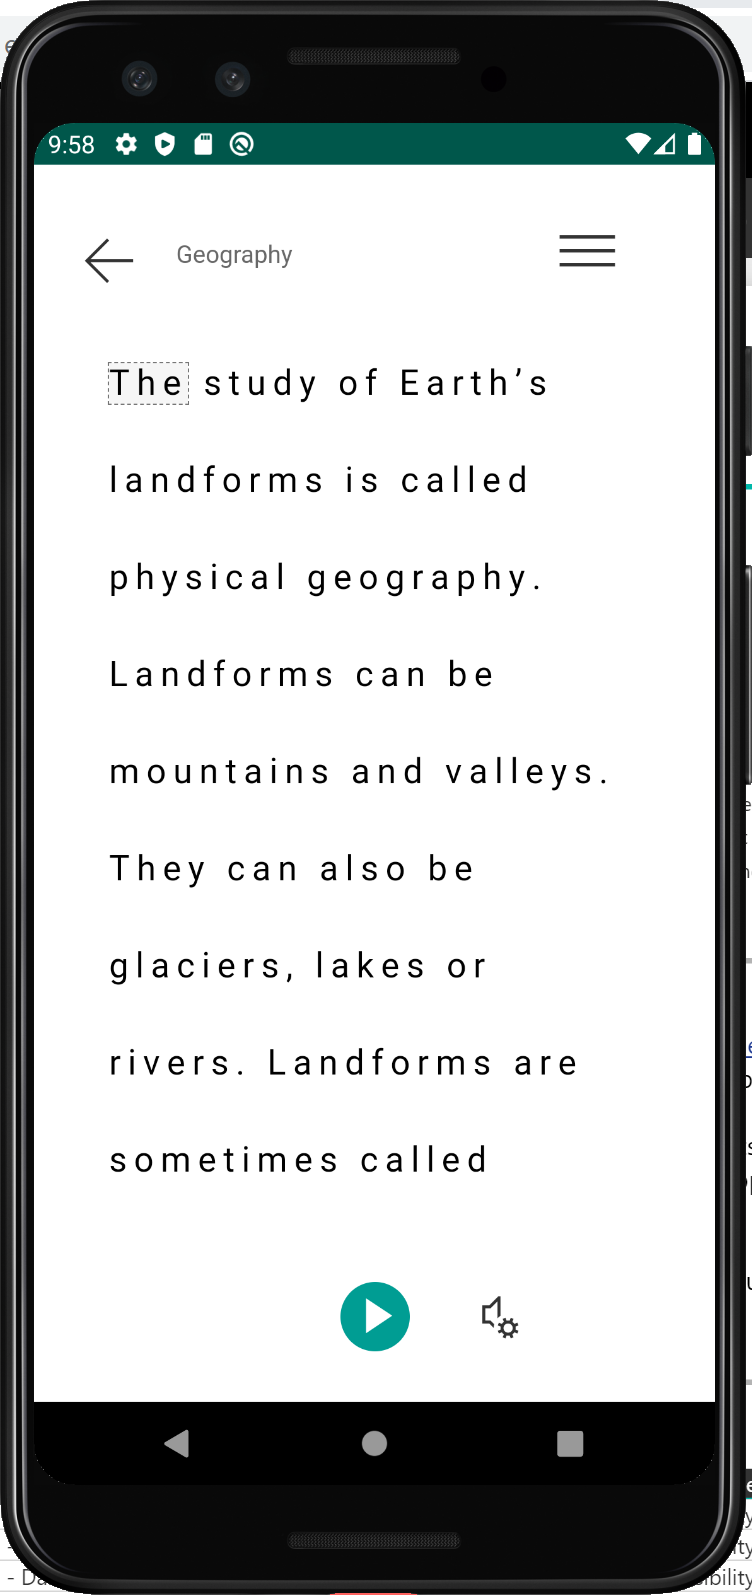
<string name="geographyTitle">Geography</string>
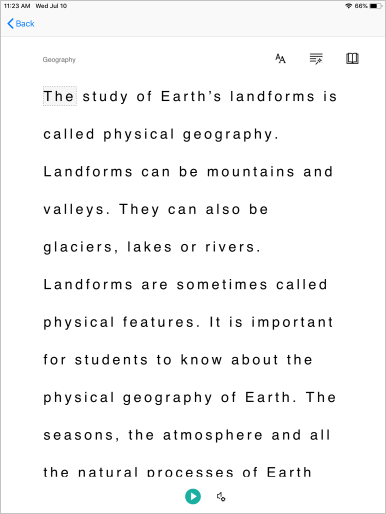
<string name="geographyTextEn">The study of Earth's landforms is called physical geography. Landforms can be mountains and valleys. They can also be glaciers, lakes or rivers. Landforms are sometimes called physical features. It is important for students to know about the physical geography of Earth. The seasons, the atmosphere and all the natural processes of Earth affect where people are able to live. Geography is one of a combination of factors that people use to decide where they want to live. The physical features of a region are often rich in resources. Within a nation, mountain ranges become natural borders for settlement areas. In the U.S., major mountain ranges are the Sierra Nevada, the Rocky Mountains, and the Appalachians. Fresh water sources also influence where people settle. People need water to drink. They also need it for washing. Throughout history, people have settled near fresh water. Living near a water source helps ensure that people have the water they need. There was an added bonus, too. Water could be used as a travel route for people and goods. Many Americans live near popular water sources, such as the Mississippi River, the Colorado River and the Great Lakes.Mountains and deserts have been settled by fewer people than the plains areas. However, they have valuable resources of their own.</string>
<string name="geographyTextFr">L\'étude des reliefs de la Terre est appelée géographie physique. Les reliefs peuvent être des montagnes et des vallées. Il peut aussi s\'agira de glaciers, delacs ou de rivières. Les reliefs sont parfois appelés caractéristiques physiques. Il est important que les élèves connaissent la géographie physique de laTerre. Les saisons, l\'atmosphère et tous les processus naturels de la Terre affectent l\'endroit où les gens sont capables de vivre. La géographie est l\'un desfacteurs que les gens utilisent pour décider où ils veulent vivre. Les caractéristiques physiques d\'une région sont souvent riches en ressources. Àl\'intérieur d\'une nation, les chaînes de montagnes deviennent des frontières naturelles pour les zones de peuplement. Aux États-Unis, les principaleschaînes de montagnes sont la Sierra Nevada, les montagnes Rocheuses et les Appalaches.Les sources d\'eau douce influencent également l\'endroit où lesgens s\'installent. Les gens ont besoin d\'eau pour boire. Ils en ont aussi besoin pour se laver. Tout au long de l\'histoire, les gens se sont installés près del\'eau douce. Vivre près d\'une source d\'eau permet de s\'assurer que les gens ont l\'eau dont ils ont besoin. Il y avait un bonus supplémentaire, aussi. L\'eaupourrait être utilisée comme voie de voyage pour les personnes et les marchandises. Beaucoup d\'Américains vivent près des sources d\'eau populaires,telles que le fleuve Mississippi, le fleuve Colorado et les Grands Lacs.Mountains et les déserts ont été installés par moins de gens que les zones desplaines. Cependant, ils disposent de ressources précieuses.Les gens ont une réponse.</string>
<string name="immersiveReaderButtonText">Immersive Reader</string>
</resources>
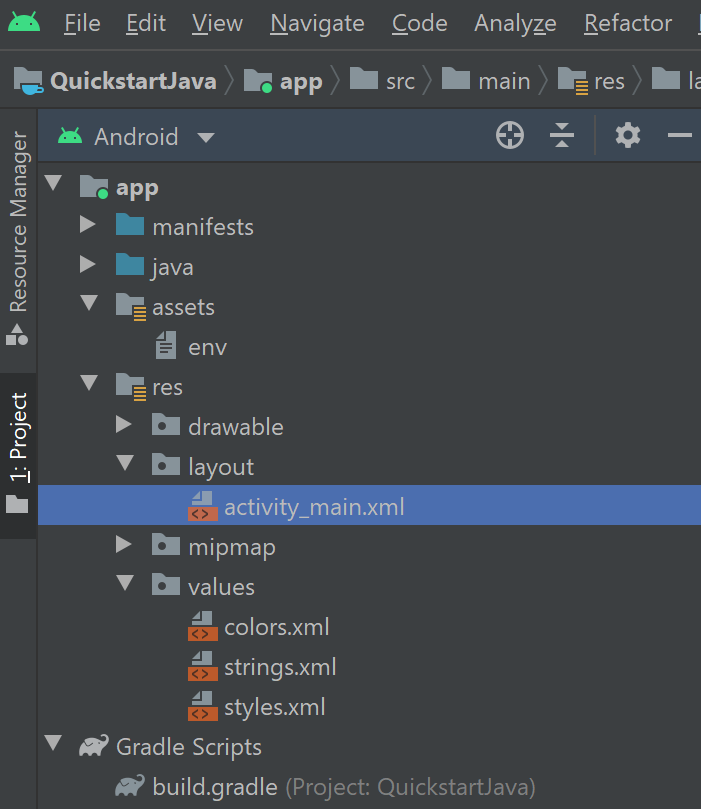
Zastąp zawartość pliku res/layout/activity_main.xml następującym kodem XML, który ma być używany w aplikacji. Ten kod XML jest układem interfejsu użytkownika aplikacji. Jeśli nie widzisz kodu w pliku activity_main.xml , kliknij prawym przyciskiem myszy kanwę i wybierz polecenie Przejdź do kodu XML.
<?xml version="1.0" encoding="utf-8"?>

<!-- Copyright (c) Microsoft Corporation. All rights reserved. -->
<!-- Licensed under the MIT License. -->

<androidx.constraintlayout.widget.ConstraintLayout xmlns:android="http://schemas.android.com/apk/res/android"
    xmlns:app="http://schemas.android.com/apk/res-auto"
    xmlns:tools="http://schemas.android.com/tools"
    android:layout_width="match_parent"
    android:layout_height="match_parent"
    android:background="#FFFFFF"
    tools:context=".MainActivity">

    <LinearLayout
        android:id="@+id/linearLayout"
        android:layout_width="match_parent"
        android:layout_height="0dp"
        android:background="#FFFFFF"
        android:orientation="vertical"
        app:layout_constraintBottom_toBottomOf="parent"
        app:layout_constraintEnd_toEndOf="parent"
        app:layout_constraintHorizontal_bias="0.0"
        app:layout_constraintStart_toStartOf="parent"
        app:layout_constraintTop_toTopOf="parent"
        app:layout_constraintVertical_bias="0.0">

        <TextView
            android:id="@+id/Title"
            android:layout_width="match_parent"
            android:layout_height="wrap_content"
            android:layout_marginLeft="48dp"
            android:layout_marginTop="24dp"
            android:layout_marginRight="48dp"
            android:layout_marginBottom="24dp"
            android:text="@string/geographyTitle"
            android:textSize="24sp"
            android:textStyle="bold" />

        <ScrollView
            android:id="@+id/ContentPane"
            android:layout_width="match_parent"
            android:layout_height="480dp"
            android:layout_marginBottom="48dp"
            android:clipToPadding="false"
            android:fillViewport="false"
            android:paddingLeft="48dp"
            android:paddingRight="48dp"
            android:scrollbarStyle="outsideInset"
            android:visibility="visible"
            tools:visibility="visible">

        <LinearLayout
            android:layout_width="match_parent"
            android:layout_height="match_parent"
            android:orientation="vertical">

            <TextView
                android:id="@+id/Content1"
                android:layout_width="match_parent"
                android:layout_height="wrap_content"
                android:background="#00FFFFFF"
                android:text="@string/geographyTextEn"
                android:textSize="18sp" />

            <TextView
                android:id="@+id/Content2"
                android:layout_width="match_parent"
                android:layout_height="wrap_content"
                android:background="#00FFFFFF"
                android:text="@string/geographyTextFr"
                android:textSize="18sp" />

            </LinearLayout>

        </ScrollView>

        <Button
            android:id="@+id/LaunchImmersiveReaderButton"
            android:layout_width="match_parent"
            android:layout_height="60dp"
            android:layout_marginLeft="40dp"
            android:layout_marginRight="40dp"
            android:layout_marginBottom="80dp"
            android:text="@string/immersiveReaderButtonText"
            android:textAllCaps="false"
            android:textSize="24sp"
            android:visibility="visible"
            tools:visibility="visible" />

    </LinearLayout>

</androidx.constraintlayout.widget.ConstraintLayout>
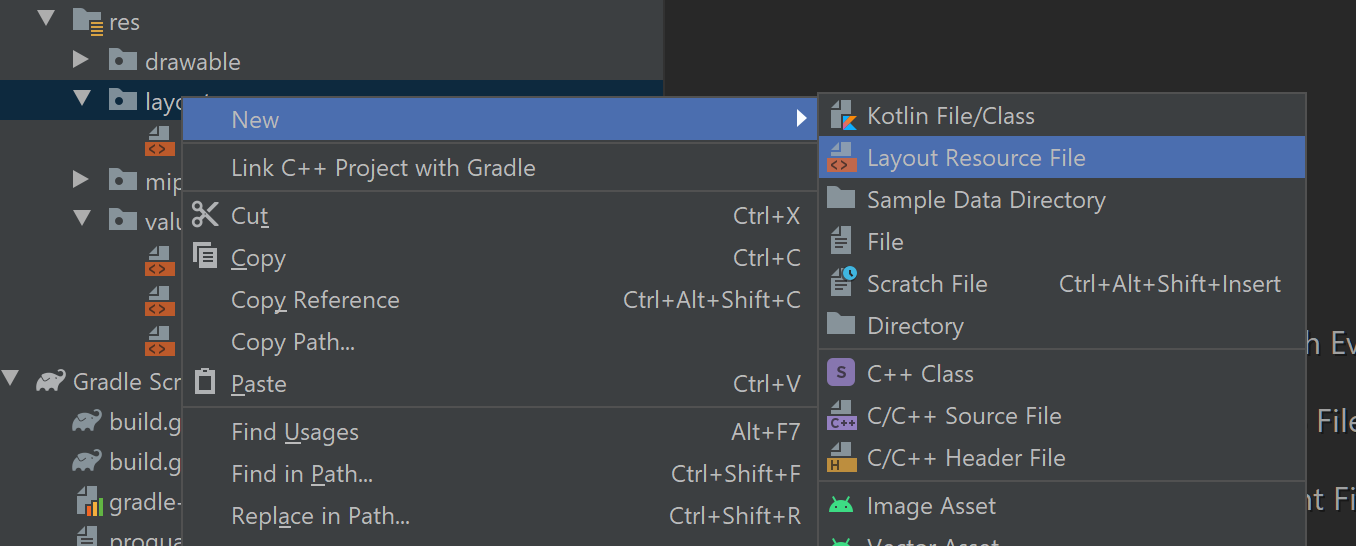
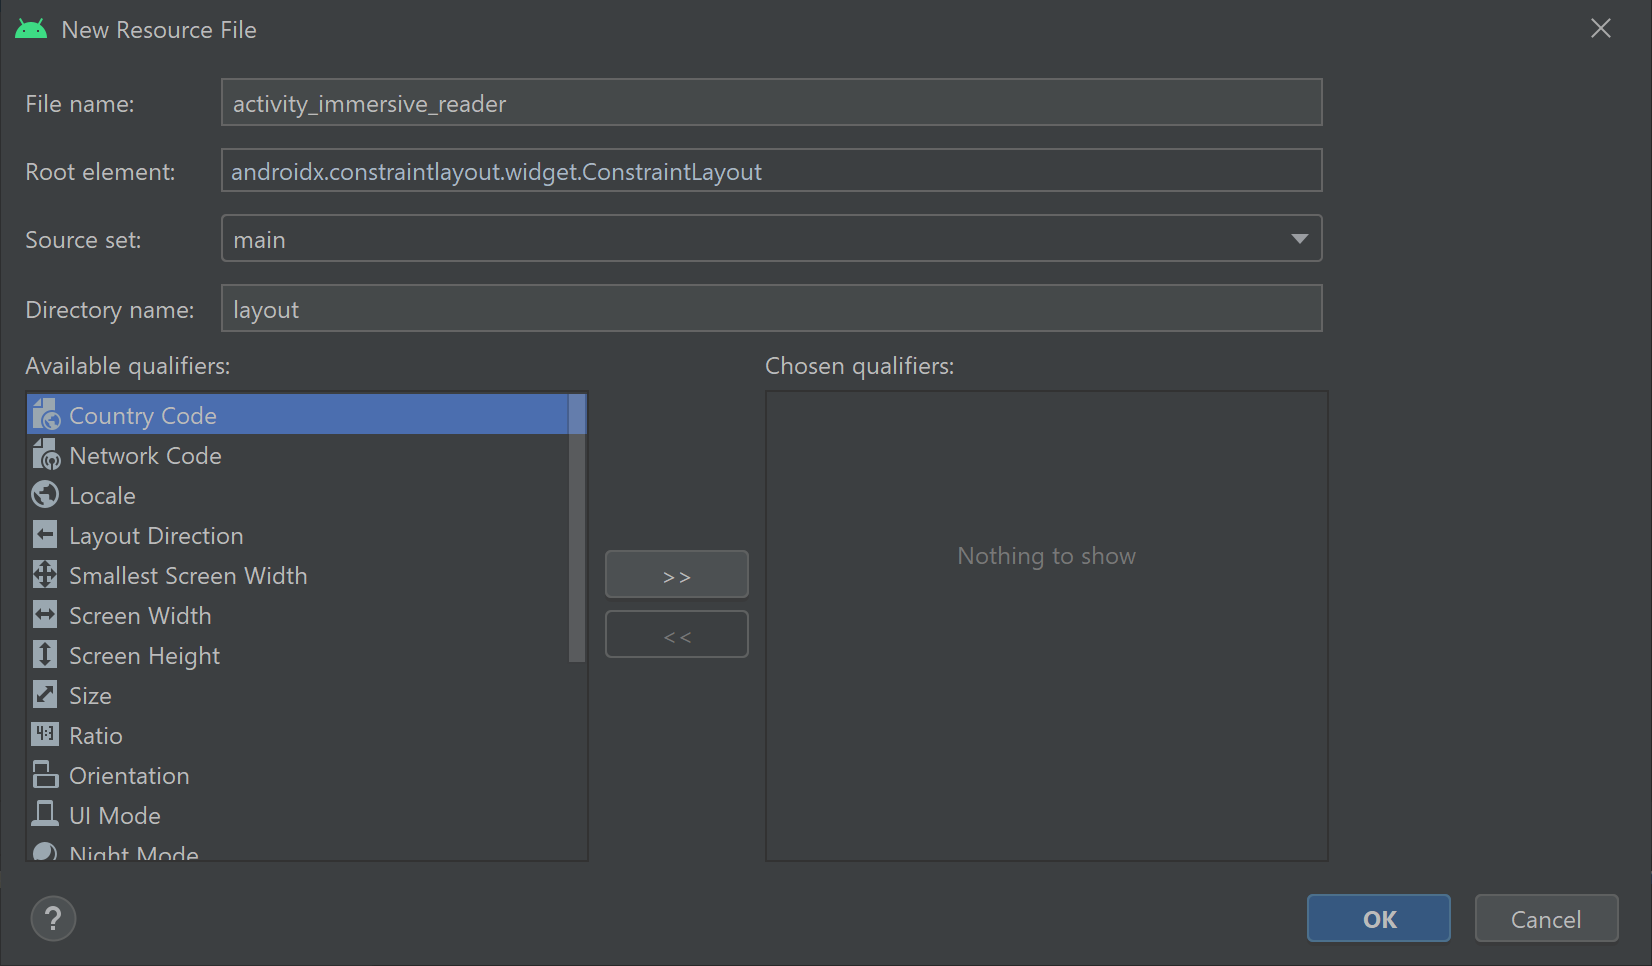
Dodawanie układu widoku internetowego
W folderze res/layout/ utwórz nowy plik zasobu Układu i nadaj mu activity_immersive_readernazwę . Następnie zastąp jego zawartość następującym kodem XML. Ten kod XML dodaje składnik WebView do użycia przez kod JAVA IRActivity w późniejszym kroku. Na razie jest on niezdefiniowany i powoduje błędy.
<?xml version="1.0" encoding="utf-8"?>

<!-- Copyright (c) Microsoft Corporation. All rights reserved. -->
<!-- Licensed under the MIT License. -->

<androidx.constraintlayout.widget.ConstraintLayout xmlns:android="http://schemas.android.com/apk/res/android"
    xmlns:tools="http://schemas.android.com/tools"
    android:layout_width="match_parent"
    android:layout_height="match_parent"
    android:background="#FFFFFF"
    tools:context=".IRActivity">

    <WebView
        android:id="@+id/webView"
        android:layout_width="match_parent"
        android:layout_height="match_parent" />

</androidx.constraintlayout.widget.ConstraintLayout>
Konfigurowanie kodu Java aplikacji
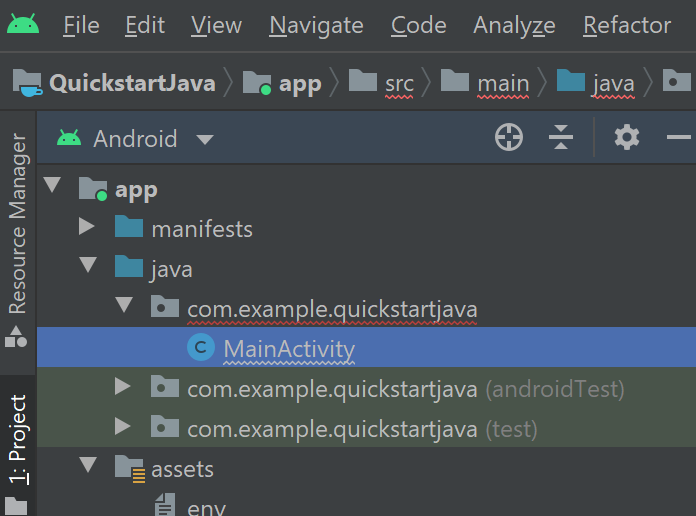
W folderze java/com.example.quickstartjava/ istnieje istniejący plik klasy java MainActivity.java. W tym folderze jest tworzony logika aplikacji.
Zastąp zawartość MainActivity.java następującym kodem. Istnieje kilka klas, do których odwołuje się kod, które jeszcze nie istnieją i zostaną utworzone później.
/**
 * Copyright (c) Microsoft Corporation. All rights reserved.
 * Licensed under the MIT License.
 */

package com.example.quickstartjava;

import android.app.Activity;
import android.os.Bundle;
import android.view.View;
import android.widget.Button;
import android.widget.TextView;

import java.util.ArrayList;
import java.util.List;

/**
 * Creates a new activity, finds its content and the Immersive Reader button.
 * When clicked, the app sends the content to the Immersive Reader SDK and
 * launches the Immersive Reader.
 */
public class MainActivity extends Activity {

    @Override
    public void onCreate(Bundle savedInstanceState) {
        super.onCreate(savedInstanceState);
        setContentView(R.layout.activity_main);
        final TextView irTitle = findViewById(R.id.Title);
        final TextView irText1 = findViewById(R.id.Content1);
        final TextView irText2 = findViewById(R.id.Content2);

        final Button immersiveReaderButton = findViewById(R.id.LaunchImmersiveReaderButton);
        immersiveReaderButton.setOnClickListener(new View.OnClickListener() {
            @Override
            public void onClick(View view) {
                List<ReadableTextChunk> readableTextChunks = new ArrayList<>();
                readableTextChunks.add(new ReadableTextChunk(irText1.getText().toString(), "en"));
                readableTextChunks.add(new ReadableTextChunk(irText2.getText().toString(), "fr"));
                ReadableContent readableContent = new ReadableContent(irTitle.getText().toString(), readableTextChunks);

                ImmersiveReader immersiveReader = new ImmersiveReader(MainActivity.this, new IRAuthenticator());
                immersiveReader.read(readableContent);
            }
        });
    }
}
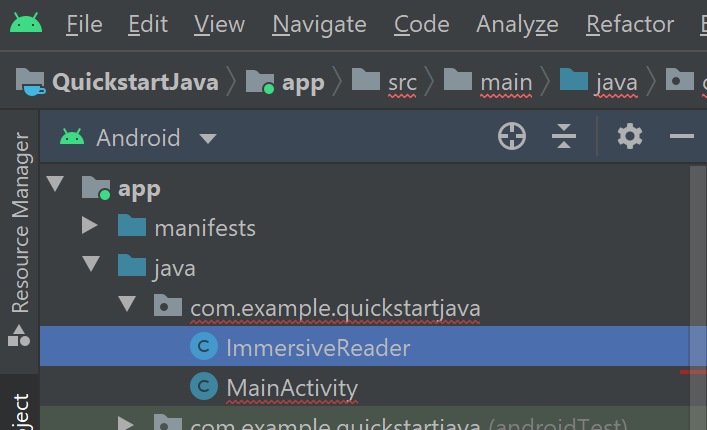
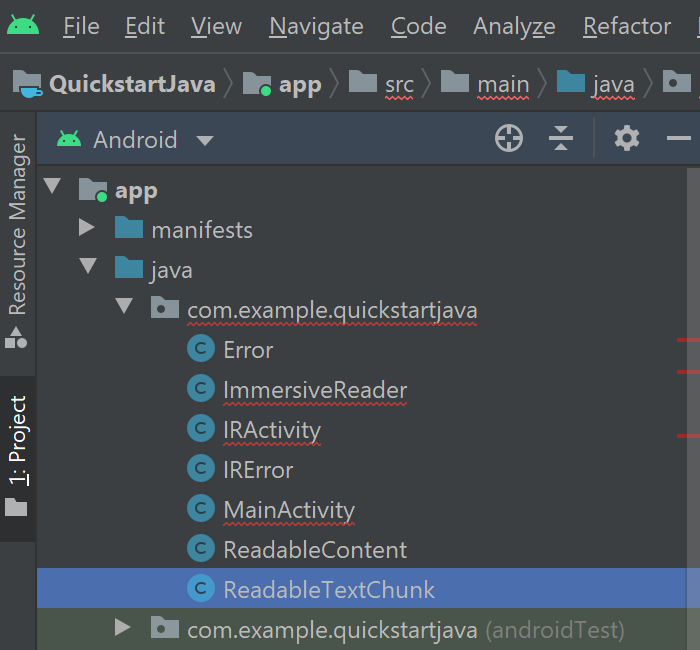
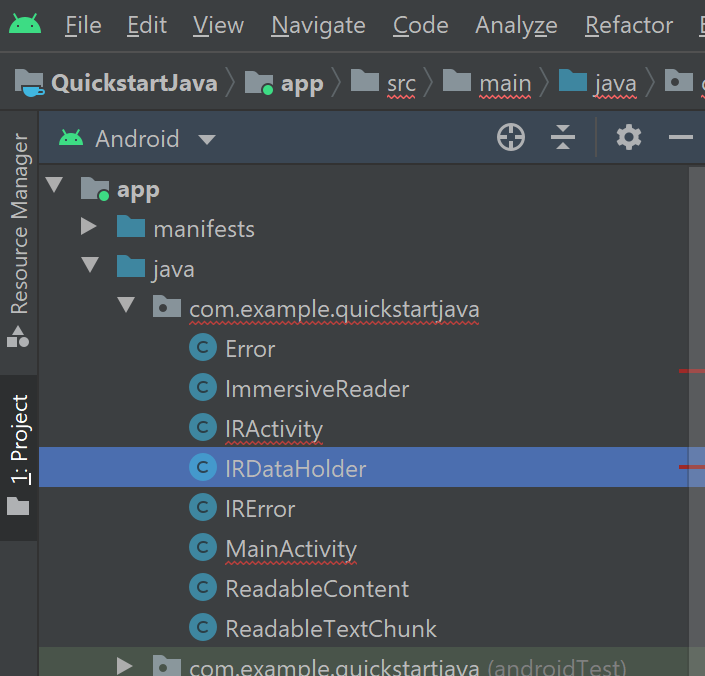
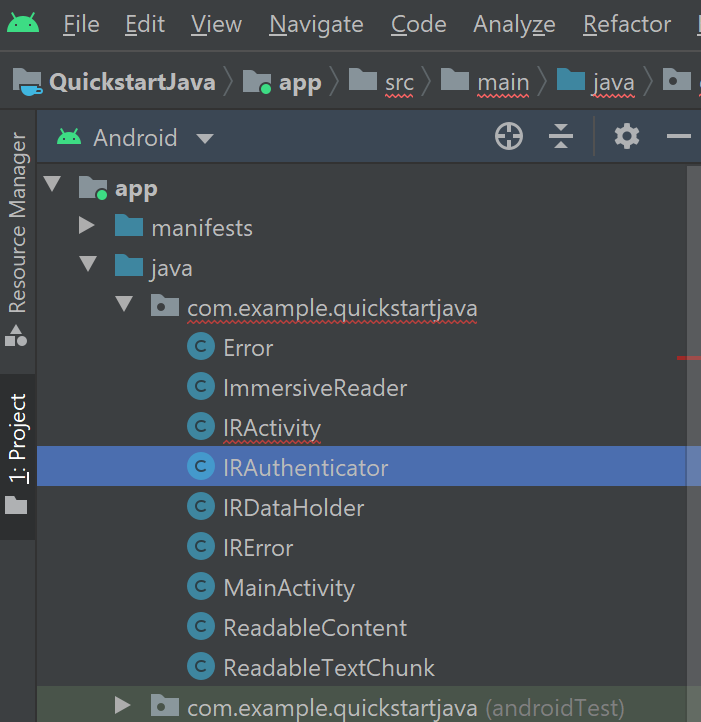
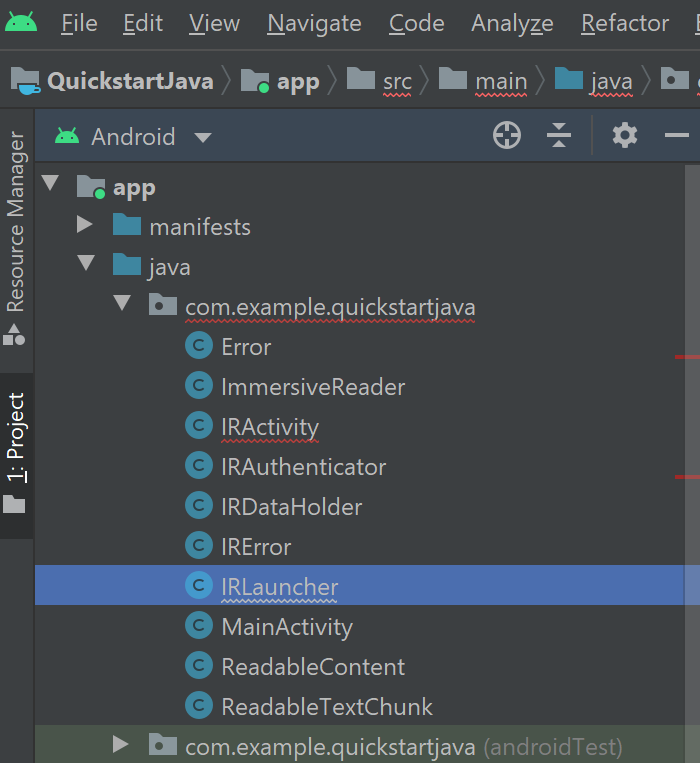
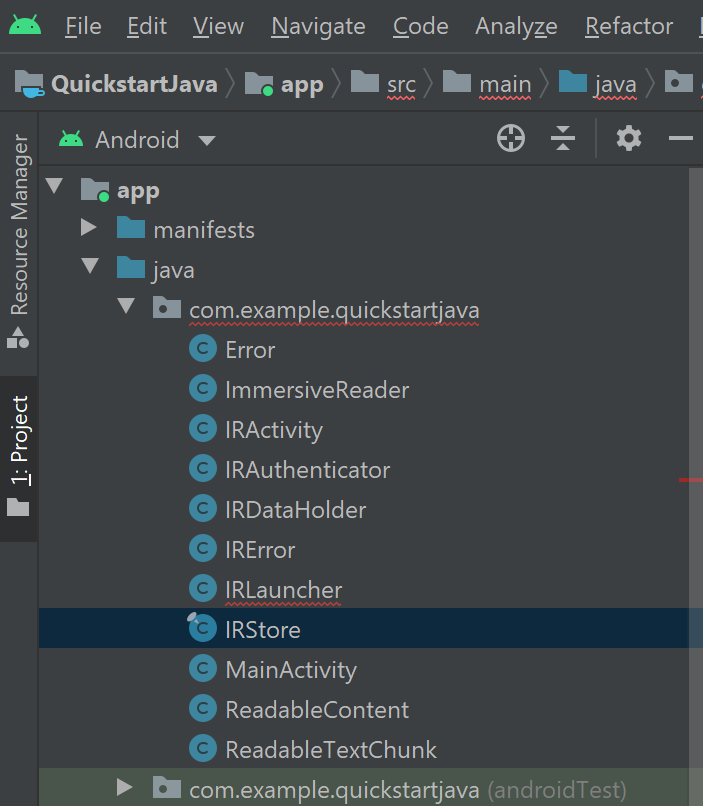
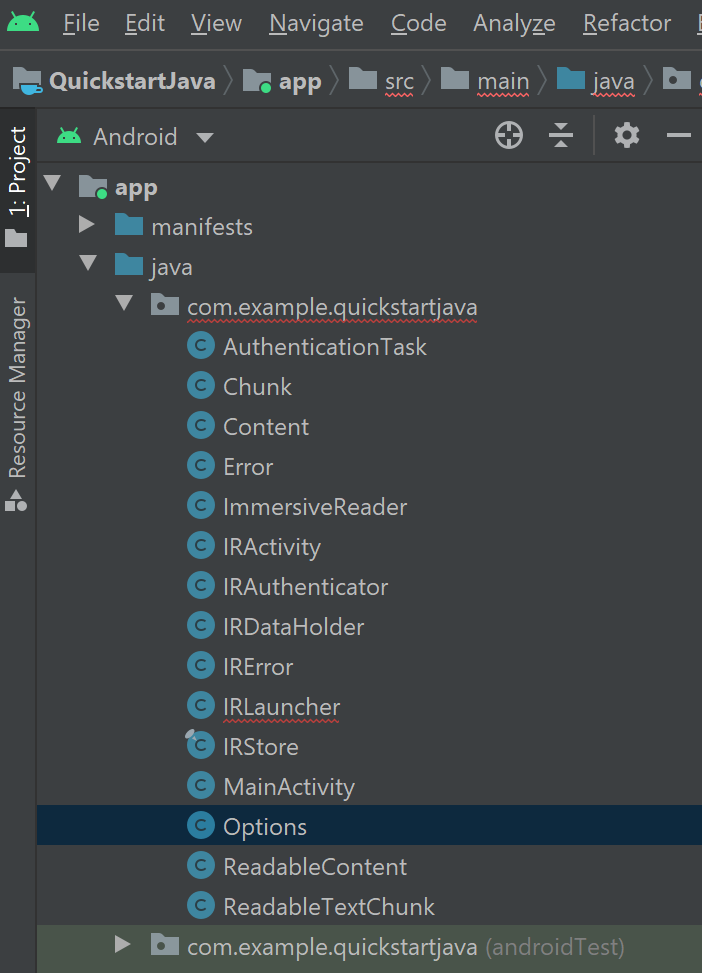
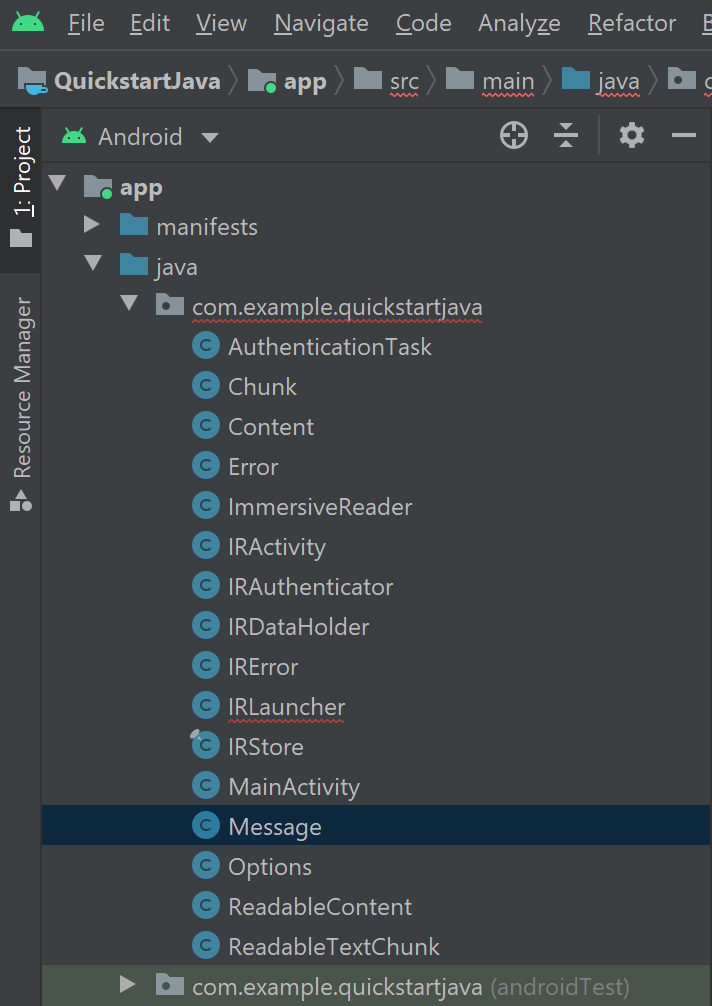
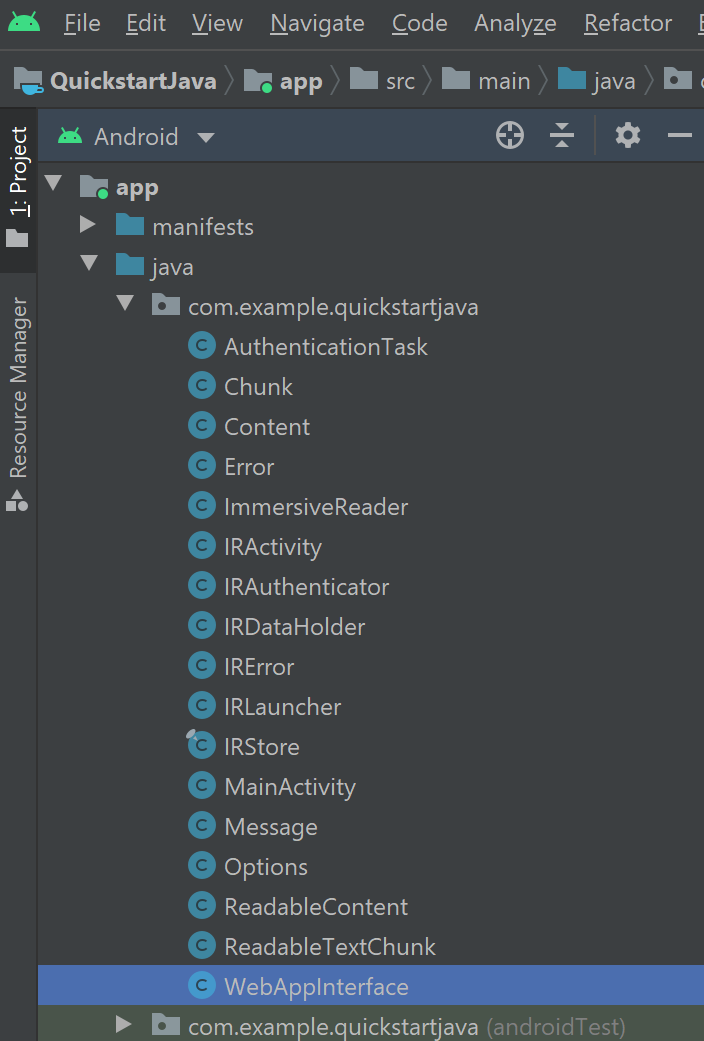
Utworzymy 16 kolejnych plików klas Java w folderze java/com.example.quickstartjava/ . Każda z tych klas jest używana przez aplikację do integracji zestawu SDK Czytnik immersyjny. W przypadku każdego nowego pliku istnieje kilka klas, do których odwołuje się kod, które jeszcze nie istnieją i zostaną utworzone później. Po utworzeniu wszystkich klas nie powinny występować żadne błędy odwołania o wartości null.
Aby utworzyć nowy plik klasy ImmersiveReader.java Java, kliknij prawym przyciskiem myszy folder java/com.example.quickstartjava/, wybierz pozycję Nowy, a następnie wybierz pozycję Klasa Java. Wprowadź wartość immersyjne.
Użyj tej samej metody, aby utworzyć pliki klas Java dla każdego nowo utworzonego pliku klasy Java.
Zastąp zawartość ImmersiveReader.java następującym kodem:
/**
 * Copyright (c) Microsoft Corporation. All rights reserved.
 * Licensed under the MIT License.
 */

package com.example.quickstartjava;

import android.app.Activity;
import android.content.Intent;
import androidx.annotation.Keep;

import java.lang.ref.WeakReference;

/**
 * This is the client facing class for invoking the new Immersive Reader functionality.
 * Usage:
 * ImmersiveReader immersiveReader = new ImmersiveReader(Activity, IRAuthenticator);
 * immersiveReader.read(ReadableTextChunk);
 */

@Keep
public class ImmersiveReader {

    WeakReference<Activity> mActivityWR;

    /**
     * Interface to accept access token from client app.
     * Note that it is client's responsibility to give a valid Access Token whenever getAccessToken() is requested.
     * In favor of latency perf, there would be no further validation by Immersive Reader module except to ensure that the provided access token is non-empty string
     */
    @Keep
    public interface IAuthenticator {
        String getAccessToken();
    }

    public ImmersiveReader(Activity activity, IAuthenticator authenticator) {
        mActivityWR = new WeakReference<>(activity);
        IRDataHolder.getInstance().setAuthenticator(authenticator);
    }

    public ImmersiveReader(Activity activity) {
        this(activity, null);
    }

    /**
     * Launches a new activity to speak the content as described by ReadableContent object.
     *
     * @param dataToRead - Content to be read
     * @return IRError - IRError, with following error codes:
     * a) Error.NONE in case of successful launch of Immersive Reader
     * b) Error.INVALID_ACCESS_TOKEN in case of empty access token
     * c) Error.INVALID_STATE in case of empty activity
     * d) Error.INVALID_CONTENT in case of empty list of text chunks
     */

    public IRError read(ReadableContent dataToRead) {

        Activity activity = mActivityWR.get();
        if (activity == null) {
            return new IRError(Error.INVALID_STATE, "Client activity is null");
        }

        if (dataToRead == null || dataToRead.getTextChunks().size() == 0) {
            return new IRError(Error.INVALID_CONTENT, "Readable Text Chunks not passed to Immersive Reader");
        }

        IRDataHolder.getInstance().setContentToRead(dataToRead);
        Intent intent = new Intent(mActivityWR.get(), IRActivity.class);
        activity.startActivity(intent);

        return new IRError(Error.NONE, "Immersive Reader launched");
    }

}
Utwórz nowy plik klasy IRActivity.java Java.
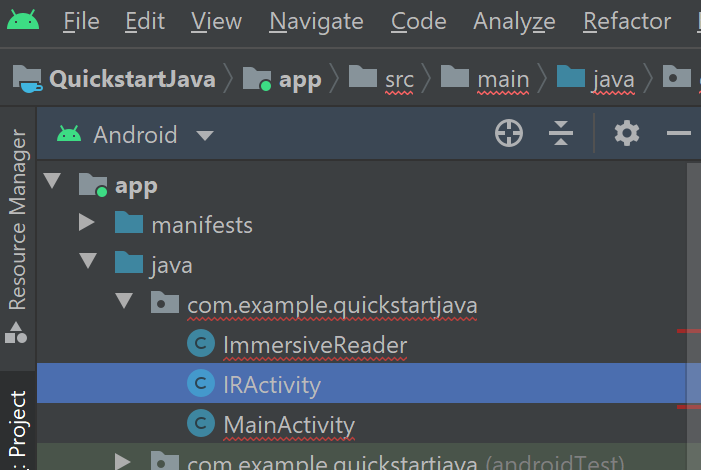
Zastąp zawartość IRActivity.java następującym kodem:
/**
 * Copyright (c) Microsoft Corporation. All rights reserved.
 * Licensed under the MIT License.
 */

package com.example.quickstartjava;

import android.app.Activity;
import android.content.Intent;
import androidx.annotation.Keep;

import java.lang.ref.WeakReference;

/**
 * This is the client facing class for invoking the new Immersive Reader functionality.
 * Usage:
 * ImmersiveReader immersiveReader = new ImmersiveReader(Activity, IRAuthenticator);
 * immersiveReader.read(ReadableTextChunk);
 */

@Keep
public class ImmersiveReader {

    WeakReference<Activity> mActivityWR;

    /**
     * Interface to accept access token from client app.
     * Note that it is the client's responsibility to give a valid Access Token whenever getAccessToken() is requested.
     * In favor of latency perf, there would be no further validation by Immersive Reader module except to ensure that the provided access token is non-empty string.
     */
    @Keep
    public interface IAuthenticator {
        String getAccessToken();
    }

    public ImmersiveReader(Activity activity, IAuthenticator authenticator) {
        mActivityWR = new WeakReference<>(activity);
        IRDataHolder.getInstance().setAuthenticator(authenticator);
    }

    public ImmersiveReader(Activity activity) {
        this(activity, null);
    }

    /**
     * Launches a new activity to speak the content as described by ReadableContent object.
     *
     * @param dataToRead - Content to be read
     * @return IRError - IRError, with following error codes:
     * a) Error.NONE in case of successful launch of Immersive Reader
     * b) Error.INVALID_ACCESS_TOKEN in case of empty access token.
     * c) Error.INVALID_STATE in case of empty activity
     * d) Error.INVALID_CONTENT in case of empty list of text chunks
     */

    public IRError read(ReadableContent dataToRead) {

        Activity activity = mActivityWR.get();
        if (activity == null) {
            return new IRError(Error.INVALID_STATE, "Client activity is null");
        }

        if (dataToRead == null || dataToRead.getTextChunks().size() == 0) {
            return new IRError(Error.INVALID_CONTENT, "Readable Text Chunks not passed to Immersive Reader");
        }

        IRDataHolder.getInstance().setContentToRead(dataToRead);
        Intent intent = new Intent(mActivityWR.get(), IRActivity.class);
        activity.startActivity(intent);

        return new IRError(Error.NONE, "Immersive Reader launched");
    }

}
Utwórz nowy plik klasy IRError.java Java.
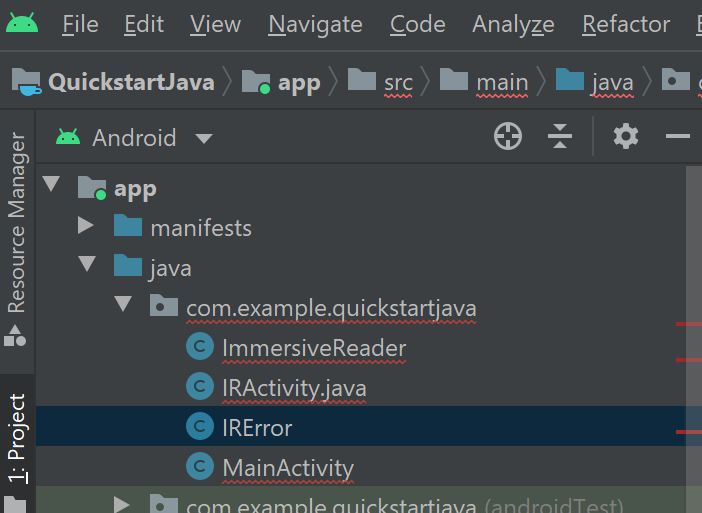
Zastąp zawartość IRError.java następującym kodem:
/**
 * Copyright (c) Microsoft Corporation. All rights reserved.
 * Licensed under the MIT License.
 */

package com.example.quickstartjava;

import android.os.Parcel;
import android.os.Parcelable;
import androidx.annotation.Keep;

/**
 * Shared error handling of the app.
 */

@Keep
public class IRError implements Parcelable {

    private int errorId;
    private String errorMessage = "";

    public String getErrorMessage() {
        return errorMessage;
    }

    public void setErrorMessage(String errorMessage) {
        this.errorMessage = errorMessage;
    }

    public int getErrorId() {
        return errorId;
    }

    public void setErrorId(int errorId) {
        this.errorId = errorId;
    }

    public IRError(int errorId, String errorMessage) {
        this.errorId = errorId;
        this.errorMessage = errorMessage;
    }

    // parcelable
    @Override
    public int describeContents() {
        return 0;
    }

    @Override
    public void writeToParcel(Parcel out, int flags) {
        out.writeInt(this.errorId);
        out.writeString(this.errorMessage);
    }

    public static final Creator<IRError> CREATOR
            = new Creator<IRError>() {
        public IRError createFromParcel(Parcel in) {
            return new IRError(in);
        }

        public IRError[] newArray(int size) {
            return new IRError[size];
        }
    };

    private IRError(Parcel in) {
        this.errorId = in.readInt();
        this.errorMessage = in.readString();
    }
}
Utwórz nowy plik klasy Error.java Java.
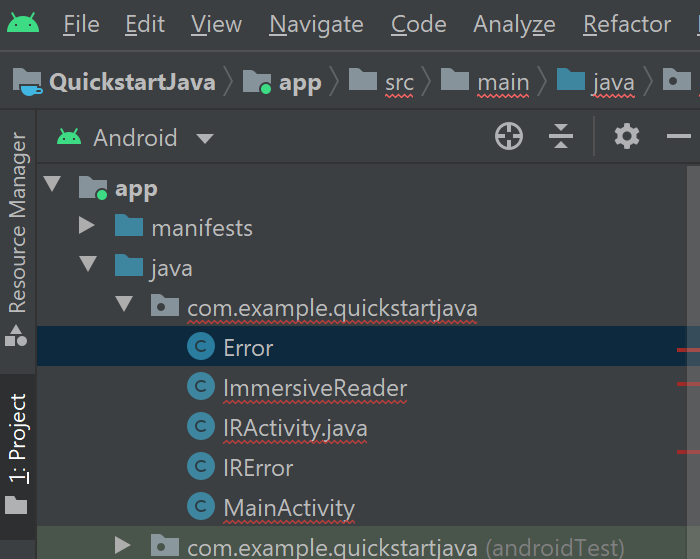
Zastąp zawartość Error.java następującym kodem:
/**
 * Copyright (c) Microsoft Corporation. All rights reserved.
 * Licensed under the MIT License.
 */

package com.example.quickstartjava;

import androidx.annotation.Keep;

/**
 * Adds some default error status codes.
 */

@Keep
public class Error {

    public static final int NONE = 1000;
    public static final int INVALID_ACCESS_TOKEN = 8001;
    public static final int INVALID_STATE = 8002;
    public static final int INVALID_CONTENT = 8003;

}
Utwórz nowy plik klasy ReadableContent.java Java.
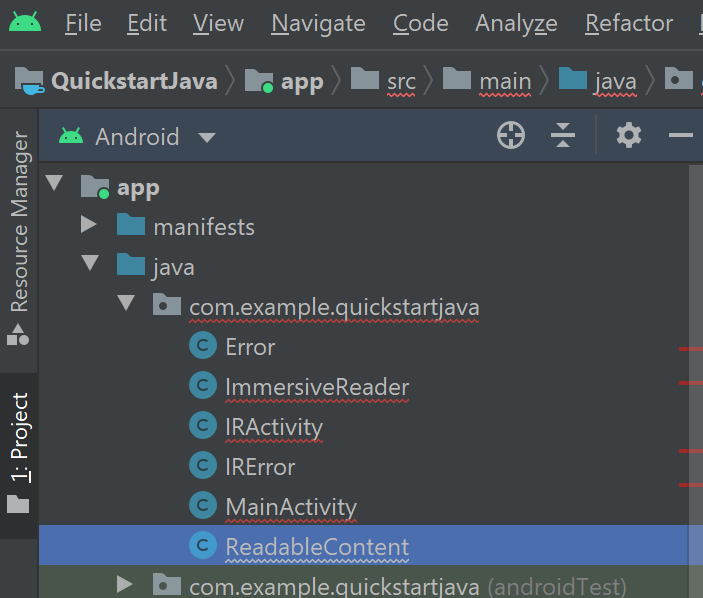
Zastąp zawartość ReadableContent.java następującym kodem:
/**
 * Copyright (c) Microsoft Corporation. All rights reserved.
 * Licensed under the MIT License.
 */

package com.example.quickstartjava;

import androidx.annotation.Keep;

import java.util.List;

/**
 * Content data to be sent to the Immersive Reader SDK
 */

@Keep
public class ReadableContent {

    private String mTitle;
    private List<ReadableTextChunk> mTextChunks;

    public ReadableContent(String title, List<ReadableTextChunk> textChunks) {
        this.mTitle = title;
        this.mTextChunks = textChunks;
    }

    public String getTitle() {
        return mTitle;
    }

    public List<ReadableTextChunk> getTextChunks() {
        return mTextChunks;
    }

}
Utwórz nowy plik klasy ReadableTextChunk.java Java.
Zastąp zawartość ReadableTextChunk.java następującym kodem:
/**
 * Copyright (c) Microsoft Corporation. All rights reserved.
 * Licensed under the MIT License.
 */

import androidx.annotation.Keep;

/**
 * Content sent to the Immersive Reader SDK may be separated into chunks so that there may be
 * different types of content sent in the same document. This includes content of different
 * languages, math content, et cetera.
 */

@Keep
public class ReadableTextChunk {
    public String mText;
    public String mLocale;

    public ReadableTextChunk(String text, String locale) {
        this.mText = text;
        this.mLocale = locale;
    }
}
Utwórz nowy plik klasy IRDataHolder.java Java.
Zastąp zawartość IRDataHolder.java następującym kodem:
/**
 * Copyright (c) Microsoft Corporation. All rights reserved.
 * Licensed under the MIT License.
 */

package com.example.quickstartjava;

import androidx.annotation.Keep;

/**
 * A thin singleton class that is used to hold the Client's IAuthenticator's implementation and the Content to be read.
 * This is required for two reasons:
 * 1) As per Android guidelines, data being passed via intent should be limited to a few KBs. Alternative is to use Singleton holder classes like this one.
 * 2) We need a way to make callbacks survive app configuration changes and killed in background scenarios.
 */

@Keep
public class IRDataHolder {

    private static IRDataHolder mInstance = null;
    private ReadableContent mActiveContent = null;
    private ImmersiveReader.IAuthenticator mAuthenticator = null;

    public static IRDataHolder getInstance() {

        if (mInstance == null) {
            synchronized (IRDataHolder.class) {
                if (mInstance == null) {
                    mInstance = new IRDataHolder();
                }
            }
        }
        return mInstance;
    }

    public void setContentToRead(ReadableContent content) {
        mActiveContent = content;
    }

    public ReadableContent getContentToRead() {
        return mActiveContent;
    }

    public ImmersiveReader.IAuthenticator getAuthenticator() {
        return mAuthenticator;
    }

    public void setAuthenticator(ImmersiveReader.IAuthenticator accessTokenProvider) {
        this.mAuthenticator = accessTokenProvider;
    }

    public void clearContent() {
        mActiveContent = null;
    }

}
Utwórz nowy plik klasy IRAuthenticator.java Java.
Zastąp zawartość IRAuthenticator.java następującym kodem:
/**
 * Copyright (c) Microsoft Corporation. All rights reserved.
 * Licensed under the MIT License.
 */

package com.example.quickstartjava;

import android.text.TextUtils;
import android.util.Log;

import org.json.JSONException;
import org.json.JSONObject;

import io.github.cdimascio.dotenv.Dotenv;
import java.io.BufferedReader;
import java.io.DataOutputStream;
import java.io.IOException;
import java.io.InputStreamReader;
import java.net.HttpURLConnection;
import java.net.MalformedURLException;
import java.net.URL;

import static java.net.HttpURLConnection.HTTP_OK;

// This sample app uses the Dotenv. It's a module that loads environment variables from a .env file to better manage secrets.
// https://github.com/cdimascio/java-dotenv
// Be sure to add a "env" file to the /assets folder.
// Instead of '.env', use 'env'.

public class IRAuthenticator implements ImmersiveReader.IAuthenticator {
    private static final String LOG_TAG = "IRAuthenticator";
    Dotenv dotEnv = Dotenv.configure()
            .directory("/assets")
            .filename("env")
            .ignoreIfMalformed()
            .ignoreIfMissing()
            .load();

    @Override
    public String getAccessToken() {
        String clientId = dotEnv.get("CLIENT_ID");
        String clientSecret = dotEnv.get("CLIENT_SECRET");
        String tenantId = dotEnv.get("TENANT_ID");
        String accessToken = null;

        try {
            StringBuilder urlStringBuilder = new StringBuilder();
            urlStringBuilder.append("https://login.windows.net/");
            urlStringBuilder.append(tenantId);
            urlStringBuilder.append("/oauth2/token");
            URL tokenUrl = new URL(urlStringBuilder.toString());

            StringBuilder formStringBuilder = new StringBuilder();
            formStringBuilder.append("grant_type=client_credentials&resource=https://cognitiveservices.azure.com/&client_id=");
            formStringBuilder.append(clientId);
            formStringBuilder.append("&client_secret=");
            formStringBuilder.append(clientSecret);
            String form = formStringBuilder.toString();

            HttpURLConnection httpURLConnection = (HttpURLConnection) tokenUrl.openConnection();
            httpURLConnection.setRequestMethod("POST");
            httpURLConnection.setRequestProperty("content-type", "application/x-www-form-urlencoded");
            httpURLConnection.setDoOutput(true);

            DataOutputStream dataOutputStream = new DataOutputStream(httpURLConnection.getOutputStream());
            dataOutputStream.writeBytes(form);
            dataOutputStream.flush();
            dataOutputStream.close();

            int responseCode = httpURLConnection.getResponseCode();

            if (responseCode == HTTP_OK) {
                BufferedReader bufferedReader = new BufferedReader(new InputStreamReader(httpURLConnection.getInputStream()));
                StringBuffer response = new StringBuffer();

                String line = bufferedReader.readLine();
                while (!TextUtils.isEmpty(line)) {
                    response.append(line);
                    line = bufferedReader.readLine();
                }

                bufferedReader.close();

                JSONObject accessTokenJson = new JSONObject(response.toString());
                accessToken = accessTokenJson.getString("access_token");
            }

        } catch (MalformedURLException e) {
            e.printStackTrace();
        } catch (IOException e) {
            e.printStackTrace();
        } catch (JSONException e) {
            e.printStackTrace();
        }

        //  accessToken = Constants.ACCESS_TOKEN;
        Log.i(LOG_TAG, "Accesstoken: " + accessToken);
        return accessToken;
    }
}
Utwórz nowy plik klasy IRLauncher.java Java.
Zastąp zawartość IRLauncher.java następującym kodem:
/**
 * Copyright (c) Microsoft Corporation. All rights reserved.
 * Licensed under the MIT License.
 */

package com.example.quickstartjava;

import android.content.Context;
import android.os.Build;
import android.text.TextUtils;
import android.view.View;
import android.webkit.CookieManager;
import android.webkit.WebView;
import android.webkit.WebViewClient;
import android.widget.Toast;

import com.google.gson.Gson;
import com.google.gson.GsonBuilder;

import java.util.ArrayList;
import java.util.Date;
import java.util.List;
import java.util.concurrent.Callable;

import io.github.cdimascio.dotenv.Dotenv;

/**
 * Responsible for setting up the web view with appropriate bridging between JavaScript and Java to launch the Immersive Reader url for reading the content.
 */

public class IRLauncher {
    Dotenv dotEnv = Dotenv.configure()
            .directory("/assets")
            .filename("env")
            .ignoreIfMalformed()
            .ignoreIfMissing()
            .load();

    private WebView mWebView;
    private Context mContext;
    public final String SUBDOMAIN = dotEnv.get("SUBDOMAIN");

    interface IRLaunchListener {

        // Invoked in case of successful launch of Immersive Reader Activity. Note that content reading can still fail due to multiple reasons including expired access token.
        void onSuccess();

        // Invoked in case of empty access token or empty content request to be read
        void onFailure(IRError error);

        // Invoked when Immersive Reader is exiting (e.g.) user pressed back in the Immersive Reader experience
        void onExit();
    }

    public IRLauncher(Context context, WebView webView) {
        this.mContext = context;
        this.mWebView = webView;
    }

    public void launch(final IRLaunchListener launchListener) {

        AuthenticationTask authenticationTask = new AuthenticationTask();
        AuthenticationTask.TaskParams params = authenticationTask.new TaskParams(IRDataHolder.getInstance().getAuthenticator(), new AuthenticationTask.ITaskListener() {
            @Override
            public void onAccessTokenObtained(String accessToken) {

                // Basic validation for access token
                if (TextUtils.isEmpty(accessToken)) {
                    launchListener.onFailure(new IRError(Error.INVALID_ACCESS_TOKEN, "Access token is empty"));
                }

                // Create list of chunks from data that was passed originally by the client and stored in the data holder
                List<Chunk> chunkList = new ArrayList<>();
                for (ReadableTextChunk textChunk : IRDataHolder.getInstance().getContentToRead().getTextChunks()) {
                    chunkList.add(new Chunk(textChunk.mText, textChunk.mLocale, "text/plain"));
                }
                Content content = new Content(IRDataHolder.getInstance().getContentToRead().getTitle(), chunkList);
                Options options = new Options(new Callable<Void>() {
                    public Void call() {
                        launchListener.onExit();
                        return null;
                    }
                }, "en", 0);

                // Prepare the webview
                prepareWebView(accessToken, content, options, launchListener);
                mWebView.loadUrl("file:///android_asset/immersiveReader.html");
                launchListener.onSuccess();
            }
        });

        authenticationTask.setParams(params);
        authenticationTask.execute();
    }

    private void prepareWebView(String accessToken, Content content, Options options, final IRLaunchListener launchListener) {
        mWebView.getSettings().setAllowContentAccess(true);
        mWebView.getSettings().setJavaScriptEnabled(true);
        mWebView.getSettings().setLoadsImagesAutomatically(true);
        mWebView.getSettings().setLoadWithOverviewMode(true);
        mWebView.getSettings().setUseWideViewPort(true);
        mWebView.getSettings().setUserAgentString("Android");
        mWebView.getSettings().setDomStorageEnabled(true);
        mWebView.getSettings().setAppCacheEnabled(false);
        mWebView.getSettings().setSupportZoom(true);
        mWebView.setInitialScale(1);

        // Enable web view cookies
        if (android.os.Build.VERSION.SDK_INT >= android.os.Build.VERSION_CODES.LOLLIPOP) {
            CookieManager.getInstance().setAcceptThirdPartyCookies(mWebView, true);
        } else {
            CookieManager.getInstance().setAcceptCookie(true);
        }

        final Date startPostMessageSentDurationInMs = new Date();

        // Create the Message
        final Message messageData = new Message(accessToken, SUBDOMAIN, content, 0, options);

        // Set WebView Client
        mWebView.setWebViewClient(new WebViewClient() {

            @Override
            public boolean shouldOverrideUrlLoading(WebView view, String url) {
                mWebView.loadUrl(url);
                return true;
            }

            @Override
            public void onPageFinished(WebView view, String url) {
                Date endPostMessageSentDurationInMs = new Date();
                long postMessageSentDurationInMs = endPostMessageSentDurationInMs.getTime() - startPostMessageSentDurationInMs.getTime();

                // Updates launchToPostMessageSentDurationInMs
                if (Build.VERSION.SDK_INT >= Build.VERSION_CODES.N) {
                    messageData.launchToPostMessageSentDurationInMs = Math.toIntExact(postMessageSentDurationInMs);
                } else {
                    messageData.launchToPostMessageSentDurationInMs = 0;
                }

                GsonBuilder gsonBuilder = new GsonBuilder();
                Gson gson = gsonBuilder.create();
                String messageJson = gson.toJson(messageData);

                if (Build.VERSION.SDK_INT >= Build.VERSION_CODES.KITKAT) {
                    StringBuilder scriptStringBuilder = new StringBuilder().append("handleLaunchImmersiveReader(").append(messageJson).append(")");
                    view.evaluateJavascript(scriptStringBuilder.toString(), null);
                } else {
                    StringBuilder urlStringBuilder = new StringBuilder().append("javascript:handleLaunchImmersiveReader(").append(messageJson).append(")");
                    view.loadUrl(urlStringBuilder.toString());
                }
                mWebView.setVisibility(View.VISIBLE);
            }
        });

        // Prepare and set the WebAppInterface to hear back from the JavaScript
        WebAppInterface jsInterface = new WebAppInterface(new WebAppInterface.WebAppListener() {
            @Override
            public void onShowToast(String toast) {
                Toast.makeText(mContext, toast, Toast.LENGTH_SHORT).show();
            }

            @Override
            public void onImmersiveReaderExit() {
                IRDataHolder.getInstance().clearContent();
                mWebView.post(new Runnable() {
                    @Override
                    public void run() {
                        mWebView.clearHistory();
                        mWebView.clearCache(true);
                        mWebView.loadUrl("about:blank");
                        mWebView.onPause();
                        mWebView.removeAllViews();
                        mWebView.pauseTimers();
                        mWebView.destroy();
                    }
                });
                launchListener.onExit();
            }
        });

        mWebView.addJavascriptInterface(jsInterface, "Android");
    }
}
Utwórz nowy plik klasy IRStore.java Java.
Zastąp zawartość IRStore.java następującym kodem:
/**
 * Copyright (c) Microsoft Corporation. All rights reserved.
 * Licensed under the MIT License.
 */

package com.example.quickstartjava;

import androidx.annotation.Keep;

@Keep
public final class IRStore {
    @Keep
    public final static class Output {
        public final static String ERROR = "Error";
    }
}
Utwórz nowy plik klasy AuthenticationTask.java Java.
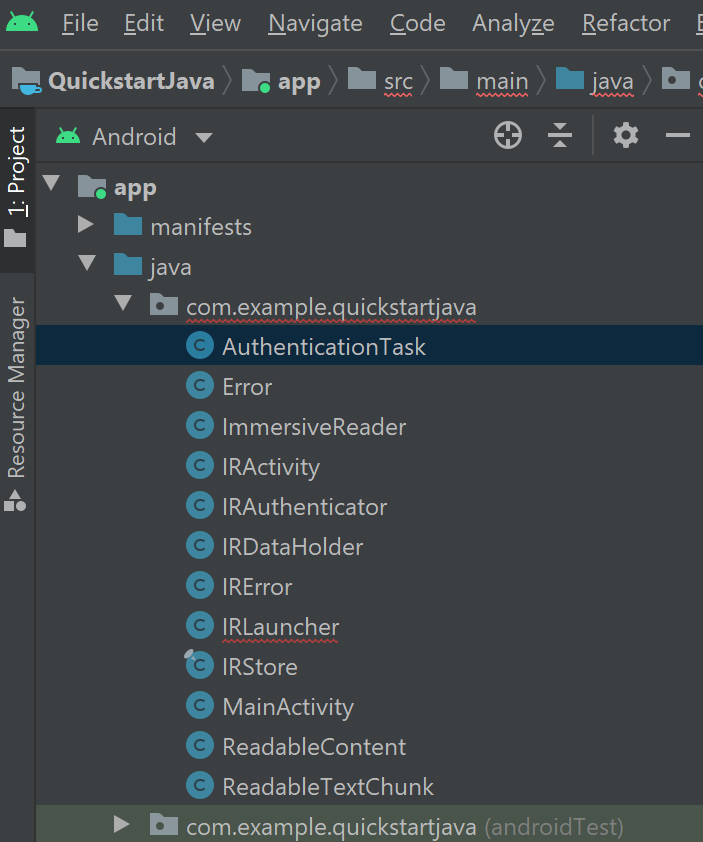
Zastąp zawartość AuthenticationTask.java następującym kodem:
/**
 * Copyright (c) Microsoft Corporation. All rights reserved.
 * Licensed under the MIT License.
 */

package com.example.quickstartjava;

import android.os.AsyncTask;

/**
 * Async task to request the client for the access token in background thread.
 */

public class AuthenticationTask extends AsyncTask<Void, Void, String> {

    private TaskParams mParams;

    public interface ITaskListener {
        void onAccessTokenObtained(String accessToken);
    }

    public class TaskParams {
        ImmersiveReader.IAuthenticator mAccessTokenProvider;
        ITaskListener mTaskListener;

        public TaskParams(ImmersiveReader.IAuthenticator accessTokenProvider, ITaskListener taskListener) {
            this.mAccessTokenProvider = accessTokenProvider;
            this.mTaskListener = taskListener;
        }
    }

    public void setParams(TaskParams mParams) {
        this.mParams = mParams;
    }

    @Override
    protected String doInBackground(Void... voids) {
        return mParams.mAccessTokenProvider.getAccessToken();
    }

    @Override
    protected void onPostExecute(String accessToken) {
        super.onPostExecute(accessToken);
        if (mParams.mTaskListener != null) {
            mParams.mTaskListener.onAccessTokenObtained(accessToken);
        }
    }
}
Utwórz nowy plik klasy Chunk.java Java.
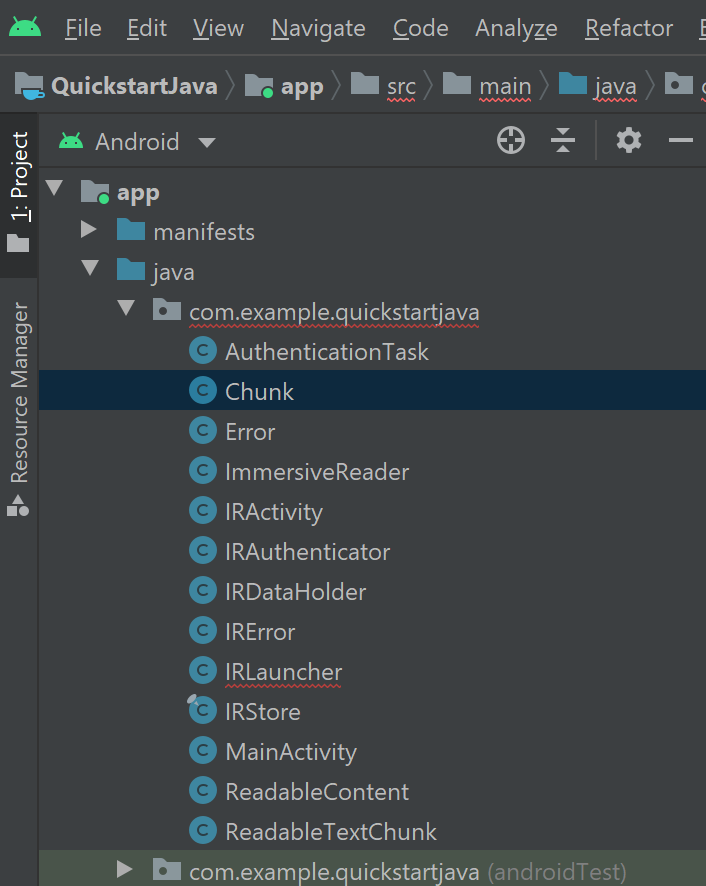
Zastąp zawartość Chunk.java następującym kodem:
/**
 * Copyright (c) Microsoft Corporation. All rights reserved.
 * Licensed under the MIT License.
 */

package com.example.quickstartjava;

import androidx.annotation.Keep;

/**
 * The chunk object that will be sent to the Immersive Reader SDK.
 * The content is a string of text, the lang is a string, e.g. 'll-cc',
 * and the mimeType is also a string, e.g. 'text/plain'.
 */

@Keep
public class Chunk {

    public String content;
    public String lang;
    public String mimeType;

    public Chunk(String content, String lang, String mimeType) {
        this.content = content;
        this.lang = lang;
        this.mimeType = mimeType;
    }
}
Utwórz nowy plik klasy Content.java Java.
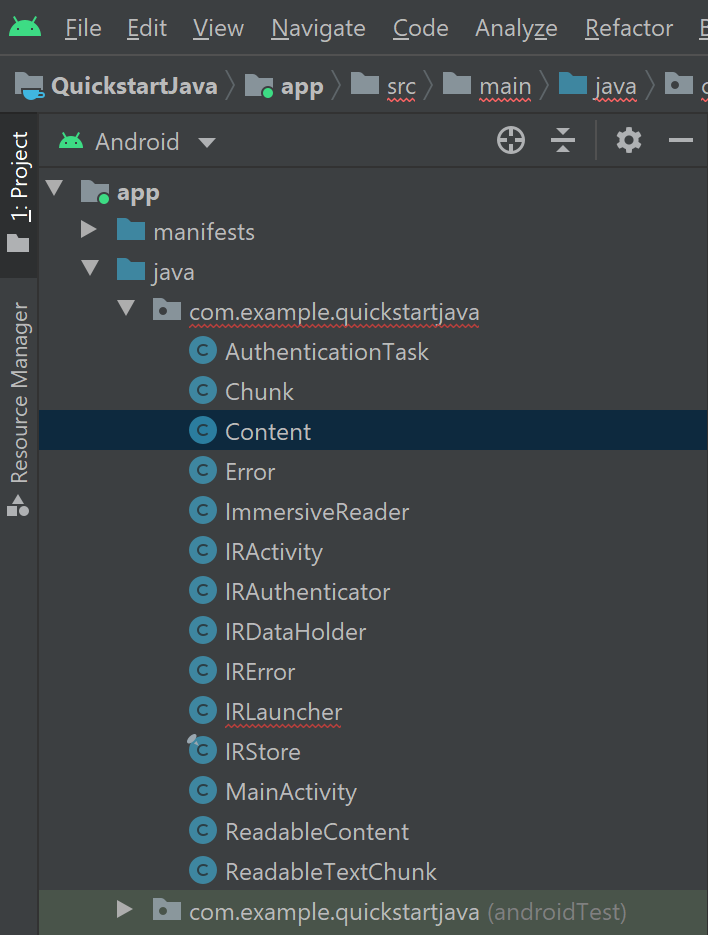
Zastąp zawartość Content.java następującym kodem:
/**
 * Copyright (c) Microsoft Corporation. All rights reserved.
 * Licensed under the MIT License.
 */

package com.example.quickstartjava;

import androidx.annotation.Keep;
import java.util.List;

/**
 * The content object that will be sent to the Immersive Reader SDK.
 * This object contains the title and a list of Chunk objects.
 */

@Keep
public class Content {

    public String title;
    public List<Chunk> chunks;

    public Content(String title, List<Chunk> chunks) {
        this.title = title;
        this.chunks = chunks;
    }

}
Utwórz nowy plik klasy Options.java Java.
Zastąp zawartość Options.java następującym kodem:
/**
 * Copyright (c) Microsoft Corporation. All rights reserved.
 * Licensed under the MIT License.
 */

import java.util.concurrent.Callable;
import androidx.annotation.Keep;

/**
 * The options object that will be sent to the Immersive Reader SDK.
 */

@Keep
public class Options {

    public Callable<Void> onExit;
    public String uiLang;
    public Integer timeout;

    public Options(Callable<Void> exitCallback, String uiLang, Integer timeout) {
        this.onExit = exitCallback;
        this.uiLang = uiLang;
        this.timeout = timeout;
    }
}
Utwórz nowy plik klasy Message.java Java.
Zastąp zawartość Message.java następującym kodem:
/**
 * Copyright (c) Microsoft Corporation. All rights reserved.
 * Licensed under the MIT License.
 */

import androidx.annotation.Keep;

/**
 * The message object that will be sent to the Immersive Reader SDK.
 * This object contains the access token, sub domain, Content, and Options.
 */

@Keep
public class Message {

    public String cogSvcsAccessToken;
    public String cogSvcsSubdomain;
    public Content request;
    public Integer launchToPostMessageSentDurationInMs;
    public Options options;

    public Message(String cogSvcsAccessToken, String cogSvcsSubdomain, Content request, Integer launchToPostMessageSentDurationInMs, Options options) {
        this.cogSvcsAccessToken = cogSvcsAccessToken;
        this.cogSvcsSubdomain = cogSvcsSubdomain;
        this.request = request;
        this.launchToPostMessageSentDurationInMs = launchToPostMessageSentDurationInMs;
        this.options = options;
    }
}
Utwórz nowy plik klasy WebAppInterface.java Java.
Zastąp zawartość WebAppInterface.java następującym kodem:
/**
 * Copyright (c) Microsoft Corporation. All rights reserved.
 * Licensed under the MIT License.
 */

package com.example.quickstartjava;

import androidx.annotation.Keep;
import android.webkit.JavascriptInterface;

/**
 * JavaScript interface implementation passed to the WebView to enable talking between JavaScript and Java.
 */

@Keep
public class WebAppInterface {

    public static WebAppListener mListener;

    interface WebAppListener {
        void onShowToast(String toast);

        void onImmersiveReaderExit();
    }

    public WebAppInterface(WebAppListener listener) {
        this.mListener = listener;
    }

    @JavascriptInterface
    public void showToast(String toast) {
        mListener.onShowToast(toast);
    }

    @JavascriptInterface
    public void immersiveReaderExit() {
        mListener.onImmersiveReaderExit();
    }

}
Dodawanie kodu HTML aplikacji do widoku internetowego
Implementacja widoku internetowego wymaga kodu HTML do działania. Kliknij prawym przyciskiem myszy folder /assets , utwórz nowy plik i nadaj mu nazwę immersiveReader.html.

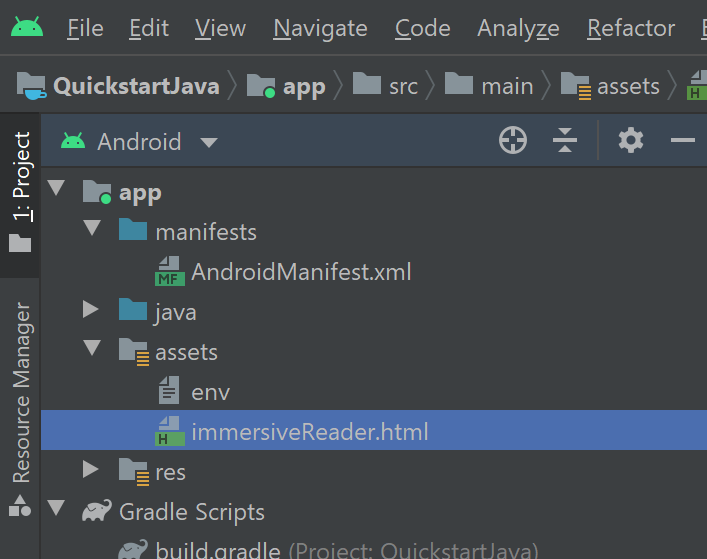
Dodaj następujący kod HTML i JavaScript. Ten kod dodaje zestaw SDK Czytnik immersyjny do aplikacji i używa go do otwierania Czytnik immersyjny przy użyciu kodu aplikacji, który napisaliśmy.
<!-- Copyright (c) Microsoft Corporation. All rights reserved.
Licensed under the MIT License. -->

<!DOCTYPE html>
<html>
<head>
    <meta charset="utf-8">
    <meta name="viewport" content="width=device-width, initial-scale=1, shrink-to-fit=no">
    <script type="text/javascript" src="https://ircdname.azureedge.net/immersivereadersdk/immersive-reader-sdk.1.4.0.js"></script>
</head>
<body>
    <script type="text/javascript">
        function handleLaunchImmersiveReader(message) {
            if (!message) {
                Android.showToast('Message is null or undefined!');
            } else {
                // Learn more about chunk usage and supported MIME types https://learn.microsoft.com/azure/ai-services/immersive-reader/reference#chunk
                var data = {
                    title: message.request.title,
                    chunks: []
                };

                for (var chunkIndex = 0; chunkIndex < message.request.chunks.length; chunkIndex++) {
                    data.chunks.push({
                        content: message.request.chunks[chunkIndex].content,
                        lang: message.request.chunks[chunkIndex].lang,
                        mimeType: message.request.chunks[chunkIndex].mimeType
                    });
                }

                // Learn more about options https://learn.microsoft.com/azure/ai-services/immersive-reader/reference#options
                var options = {
                    onExit: exitCallback,
                    uiZIndex: 2000
                };

                // Use the JavaScript SDK to launch the Immersive Reader.
                ImmersiveReader.launchAsync(message.cogSvcsAccessToken, message.cogSvcsSubdomain, data, options);

                // A simple declarative function used to close the Immersive Reader WebView via @JavaScriptInterface
                function exitCallback() {
                    Android.immersiveReaderExit();
                }
            }
        }
    </script>
</body>
</html>
Konfigurowanie uprawnień aplikacji
Ponieważ aplikacja musi wykonywać wywołania sieciowe do zestawu SDK Czytnik immersyjny do działania, musimy upewnić się, że uprawnienia aplikacji są skonfigurowane do zezwalania na dostęp do sieci. Zastąp zawartość pliku /manifests/AndroidManifest.xml następującym kodem XML:
<?xml version="1.0" encoding="utf-8"?>
<manifest xmlns:android="http://schemas.android.com/apk/res/android"
    package="com.example.quickstartjava">

    <uses-permission android:name="android.permission.INTERNET" />

    <application
        android:allowBackup="true"
        android:icon="@mipmap/ic_launcher"
        android:label="@string/app_name"
        android:roundIcon="@mipmap/ic_launcher_round"
        android:supportsRtl="true"
        android:theme="@style/AppTheme">
        <activity android:name=".MainActivity">
            <intent-filter>
                <action android:name="android.intent.action.MAIN" />

                <category android:name="android.intent.category.LAUNCHER" />
            </intent-filter>
        </activity>
        <activity
            android:name=".IRActivity"
            android:multiprocess="true" />
    </application>

</manifest>
Uruchom aplikację
Użyj programu Android Studio, aby uruchomić aplikację w emulatorze urządzenia. Po wybraniu Czytnik immersyjny zostanie otwarta Czytnik immersyjny z zawartością w aplikacji.
Następny krok
W tym przewodniku Szybki start utworzysz od podstaw aplikację dla systemu Android i zintegrujesz Czytnik immersyjny. Pełny przykład roboczy tego przewodnika Szybki start jest dostępny w witrynie GitHub.
Wymagania wstępne
- Subskrypcja platformy Azure. Możesz utworzyć go bezpłatnie.
- Zasób Czytnik immersyjny skonfigurowany na potrzeby uwierzytelniania entra firmy Microsoft. Postępuj zgodnie z tymi instrukcjami , aby skonfigurować. Zapisz dane wyjściowe sesji w pliku tekstowym, aby można było skonfigurować właściwości środowiska.
- Git.
- Android Studio.
Tworzenie projektu systemu Android
Uruchom nowy projekt w programie Android Studio.
W oknie Szablony wybierz pozycję Puste widoki Działanie, a następnie wybierz pozycję Dalej.

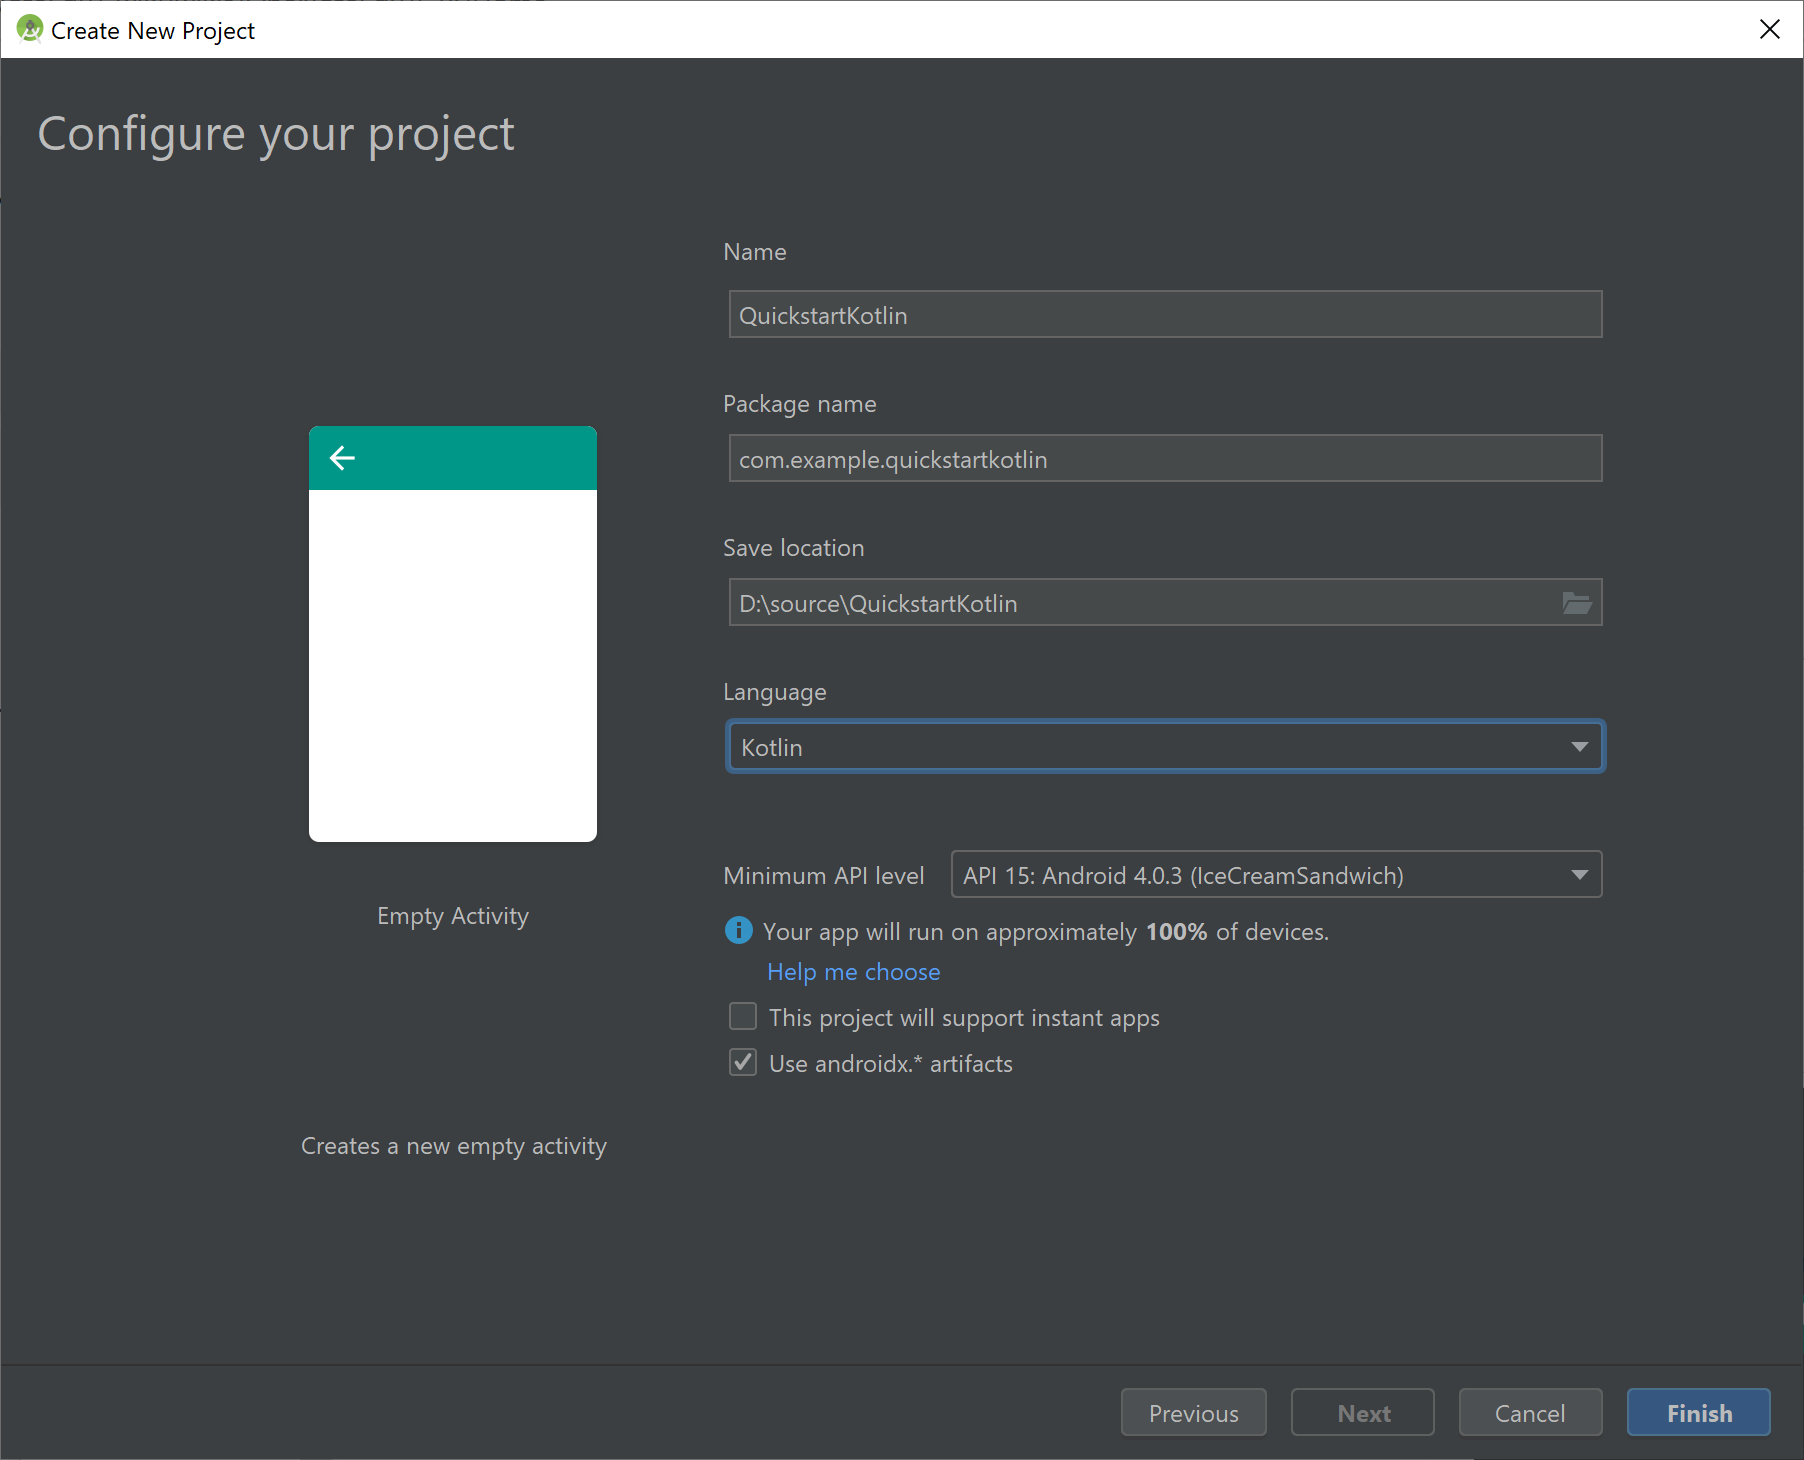
Konfigurowanie projektu
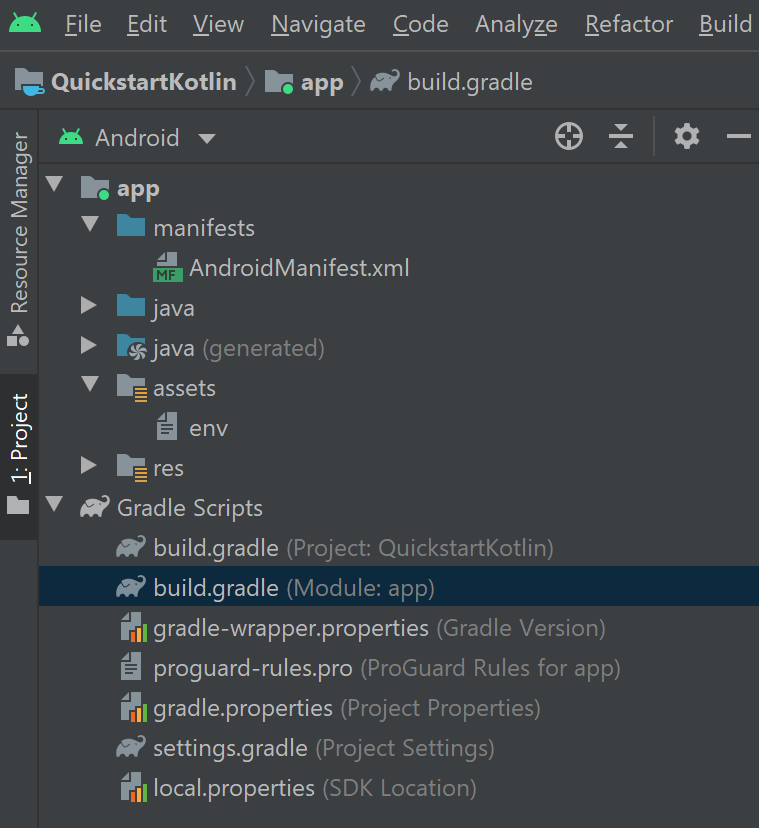
Nadaj projektowi nazwę QuickstartKotlin i wybierz lokalizację do zapisania. Wybierz pozycję Kotlin jako język programowania, a następnie wybierz pozycję Zakończ.
Konfigurowanie zasobów i uwierzytelniania
Aby utworzyć nowy folder zasobów, kliknij prawym przyciskiem myszy aplikację i wybierz pozycję Folder ->Assets Folder z listy rozwijanej.

Kliknij prawym przyciskiem myszy zasoby i wybierz pozycję Nowy -> Plik. Nadaj plikowi nazwę env.

Dodaj następujące nazwy i wartości oraz podaj odpowiednie wartości. Nie zatwierdzaj tego pliku env do kontroli źródła, ponieważ zawiera wpisy tajne, które nie powinny być upublicznione.
TENANT_ID=<YOUR_TENANT_ID>
CLIENT_ID=<YOUR_CLIENT_ID>
CLIENT_SECRET=<YOUR_CLIENT_SECRET>
SUBDOMAIN=<YOUR_SUBDOMAIN>

Ważne
Pamiętaj, aby nigdy nie publikować wpisów tajnych publicznie. W przypadku środowiska produkcyjnego użyj bezpiecznego sposobu przechowywania i uzyskiwania dostępu do poświadczeń, takich jak usługa Azure Key Vault.
Dodawanie zależności
Zastąp istniejące zależności w pliku build.gradle następującymi implementacjami, aby włączyć kohroutines (programowanie asynchroniczne), gson (analizowanie i serializacja w formacie JSON) oraz dotenv, aby odwołać się do zmiennych zdefiniowanych w pliku env. Może być konieczne ponowne zsynchronizowanie projektu podczas implementowania pliku MainActivity.kt w późniejszym kroku w tym przewodniku Szybki start.
dependencies {
    implementation fileTree(dir: 'libs', include: ['*.jar'])
    implementation"org.jetbrains.kotlin:kotlin-stdlib-jdk7:$kotlin_version"
    implementation 'androidx.appcompat:appcompat:1.0.2'
    implementation 'androidx.core:core-ktx:1.0.2'
    implementation 'androidx.constraintlayout:constraintlayout:1.1.3'
    implementation "org.jetbrains.kotlinx:kotlinx-coroutines-core:1.1.1"
    implementation "org.jetbrains.kotlinx:kotlinx-coroutines-android:1.1.1"
    implementation 'com.google.code.gson:gson:2.8.6'
    implementation 'io.github.cdimascio:java-dotenv:5.1.3'
    testImplementation 'junit:junit:4.12'
    androidTestImplementation 'androidx.test.ext:junit:1.1.0'
    androidTestImplementation 'androidx.test.espresso:espresso-core:3.1.1'
}
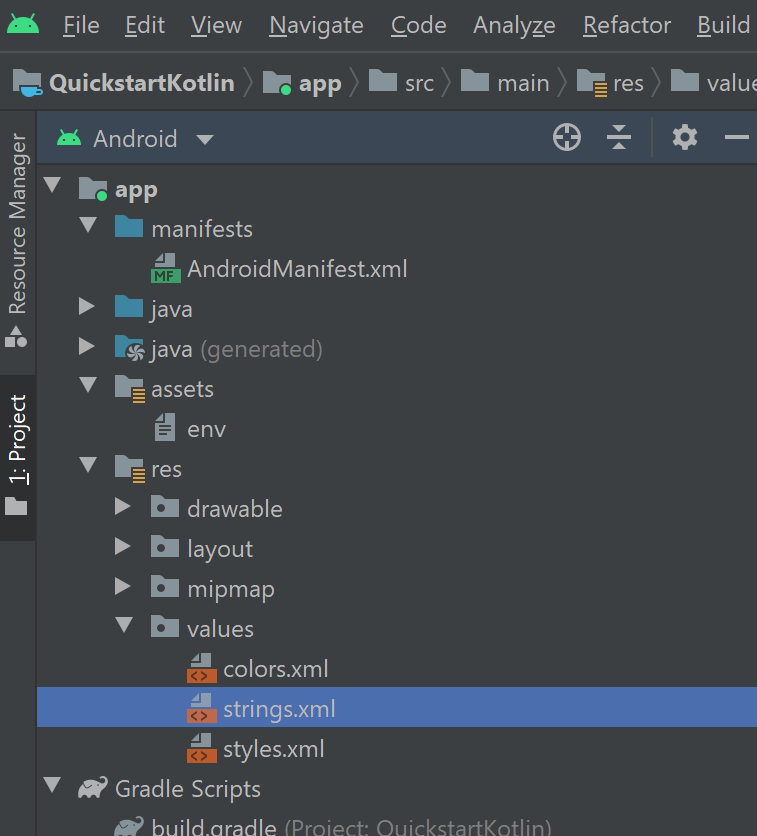
Aktualizowanie ciągów aplikacji i zasobów układu
Zastąp zawartość w pliku res/values/strings.xml następującymi ciągami, które mają być używane w aplikacji.
<resources>

    <!-- Copyright (c) Microsoft Corporation. All rights reserved. -->
    <!-- Licensed under the MIT License. -->

    <string name="app_name">ImmersiveReaderSDK</string>
    <string name="geographyTitle">Geography</string>
    <string name="geographyTextEn">The study of Earth's landforms is called physical geography. Landforms can be mountains and valleys. They can also be glaciers, lakes or rivers. Landforms are sometimes called physical features. It is important for students to know about the physical geography of Earth. The seasons, the atmosphere and all the natural processes of Earth affect where people are able to live. Geography is one of a combination of factors that people use to decide where they want to live.The physical features of a region are often rich in resources. Within a nation, mountain ranges become natural borders for settlement areas. In the U.S., major mountain ranges are the Sierra Nevada, the Rocky Mountains, and the Appalachians. Fresh water sources also influence where people settle. People need water to drink. They also need it for washing. Throughout history, people have settled near fresh water. Living near a water source helps ensure that people have the water they need. There was an added bonus, too. Water could be used as a travel route for people and goods. Many Americans live near popular water sources, such as the Mississippi River, the Colorado River and the Great Lakes.Mountains and deserts have been settled by fewer people than the plains areas. However, they have valuable resources of their own.</string>
    <string name="geographyTextFr">L\'étude des reliefs de la Terre est appelée géographie physique. Les reliefs peuvent être des montagnes et des vallées. Il peut aussi s\'agira de glaciers, delacs ou de rivières. Les reliefs sont parfois appelés caractéristiques physiques. Il est important que les élèves connaissent la géographie physique de laTerre. Les saisons, l\'atmosphère et tous les processus naturels de la Terre affectent l\'endroit où les gens sont capables de vivre. La géographie est l\'un desfacteurs que les gens utilisent pour décider où ils veulent vivre. Les caractéristiques physiques d\'une région sont souvent riches en ressources. Àl\'intérieur d\'une nation, les chaînes de montagnes deviennent des frontières naturelles pour les zones de peuplement. Aux États-Unis, les principaleschaînes de montagnes sont la Sierra Nevada, les montagnes Rocheuses et les Appalaches.Les sources d\'eau douce influencent également l\'endroit où lesgens s\'installent. Les gens ont besoin d\'eau pour boire. Ils en ont aussi besoin pour se laver. Tout au long de l\'histoire, les gens se sont installés près del\'eau douce. Vivre près d\'une source d\'eau permet de s\'assurer que les gens ont l\'eau dont ils ont besoin. Il y avait un bonus supplémentaire, aussi. L\'eaupourrait être utilisée comme voie de voyage pour les personnes et les marchandises. Beaucoup d\'Américains vivent près des sources d\'eau populaires,telles que le fleuve Mississippi, le fleuve Colorado et les Grands Lacs.Mountains et les déserts ont été installés par moins de gens que les zones desplaines. Cependant, ils disposent de ressources précieuses.Les gens ont une réponse.</string>
    <string name="immersiveReaderButtonText">Immersive Reader</string>
</resources>
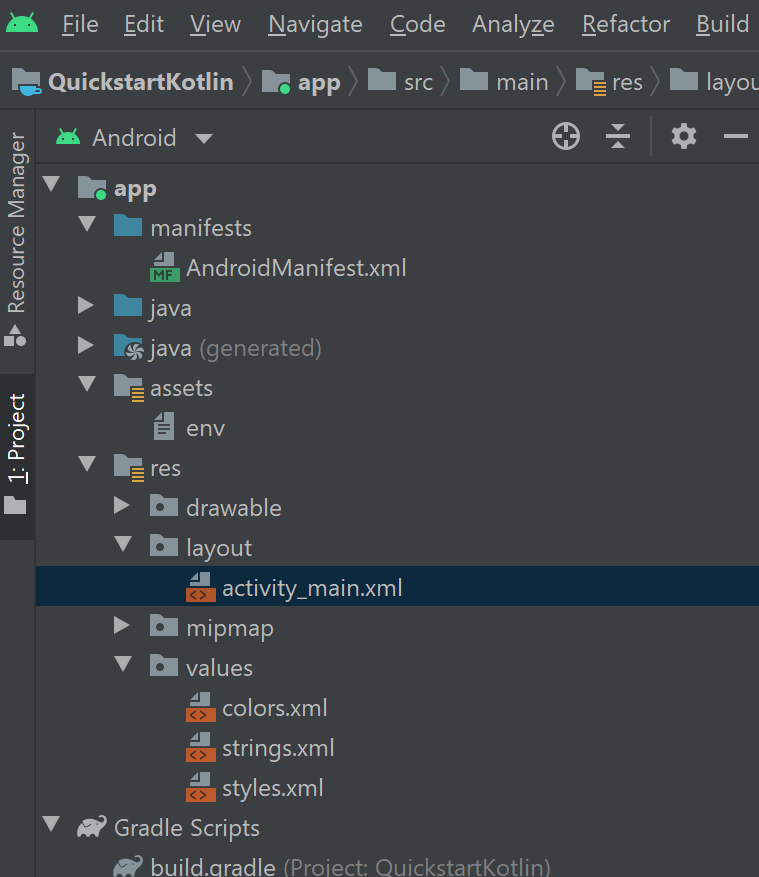
Zastąp zawartość pliku res/layout/activity_main.xml następującym kodem XML, który ma być używany w aplikacji. Ten kod XML jest układem interfejsu użytkownika aplikacji. Jeśli nie widzisz kodu w pliku activity_main.xml , kliknij prawym przyciskiem myszy kanwę i wybierz polecenie Przejdź do kodu XML.
<?xml version="1.0" encoding="utf-8"?>

<!-- Copyright (c) Microsoft Corporation. All rights reserved. -->
<!-- Licensed under the MIT License. -->

<androidx.constraintlayout.widget.ConstraintLayout xmlns:android="http://schemas.android.com/apk/res/android"
    xmlns:app="http://schemas.android.com/apk/res-auto"
    xmlns:tools="http://schemas.android.com/tools"
    android:layout_width="match_parent"
    android:layout_height="match_parent"
    android:background="#FFFFFF"
    tools:context=".MainActivity">

    <LinearLayout
        android:id="@+id/linearLayout"
        android:layout_width="match_parent"
        android:layout_height="0dp"
        android:background="#FFFFFF"
        android:orientation="vertical"
        app:layout_constraintBottom_toBottomOf="parent"
        app:layout_constraintEnd_toEndOf="parent"
        app:layout_constraintHorizontal_bias="0.0"
        app:layout_constraintStart_toStartOf="parent"
        app:layout_constraintTop_toTopOf="parent"
        app:layout_constraintVertical_bias="0.0">

        <TextView
            android:id="@+id/Title"
            android:layout_width="match_parent"
            android:layout_height="wrap_content"
            android:layout_marginLeft="48dp"
            android:layout_marginTop="24dp"
            android:layout_marginRight="48dp"
            android:layout_marginBottom="24dp"
            android:text="@string/geographyTitle"
            android:textSize="24sp"
            android:textStyle="bold" />

        <ScrollView
            android:id="@+id/ContentPane"
            android:layout_width="match_parent"
            android:layout_height="480dp"
            android:layout_marginBottom="48dp"
            android:clipToPadding="false"
            android:fillViewport="false"
            android:paddingLeft="48dp"
            android:paddingRight="48dp"
            android:scrollbarStyle="outsideInset"
            android:visibility="visible"
            tools:visibility="visible">

            <LinearLayout
                android:layout_width="match_parent"
                android:layout_height="match_parent"
                android:orientation="vertical">

                <TextView
                    android:id="@+id/Content1"
                    android:layout_width="match_parent"
                    android:layout_height="wrap_content"
                    android:background="#00FFFFFF"
                    android:text="@string/geographyTextEn"
                    android:textSize="18sp" />

                <TextView
                    android:id="@+id/Content2"
                    android:layout_width="match_parent"
                    android:layout_height="wrap_content"
                    android:background="#00FFFFFF"
                    android:text="@string/geographyTextFr"
                    android:textSize="18sp" />

            </LinearLayout>

        </ScrollView>

        <Button
            android:id="@+id/LaunchImmersiveReaderButton"
            android:layout_width="match_parent"
            android:layout_height="60dp"
            android:layout_marginLeft="40dp"
            android:layout_marginRight="40dp"
            android:layout_marginBottom="80dp"
            android:text="@string/immersiveReaderButtonText"
            android:textAllCaps="false"
            android:textSize="24sp"
            android:visibility="visible"
            tools:visibility="visible" />

    </LinearLayout>

</androidx.constraintlayout.widget.ConstraintLayout>
Konfigurowanie interfejsu JavaScript kodu Kotlin aplikacji
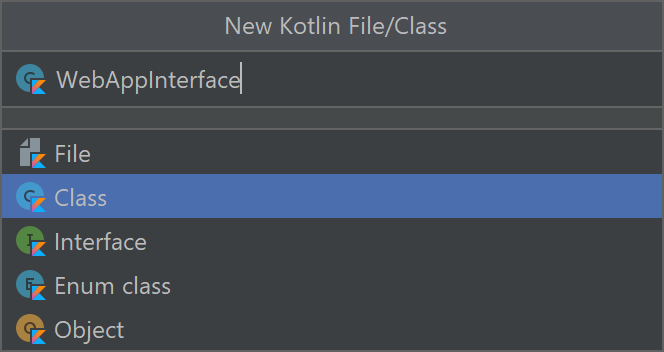
W folderze kotlin+java/com.example.quickstartkotlin/ utwórz nową klasę Kotlin i nadaj jej WebAppInterfacenazwę . Następnie dodaj do niego następujący kod. Ten kod umożliwia aplikacji interfejs z funkcjami JavaScript w kodzie HTML, które zostaną dodane w późniejszym kroku.
// Copyright (c) Microsoft Corporation. All rights reserved.
// Licensed under the MIT License.

package com.example.quickstartkotlin

import android.content.Context
import android.webkit.JavascriptInterface
import android.webkit.WebView
import android.widget.LinearLayout
import android.widget.Toast

class WebAppInterface(private val mContext: Context, var parentLayout: LinearLayout, var webView: WebView) {

    // Show a toast from html.
    @JavascriptInterface
    fun showToast(toast: String) {
        Toast.makeText(mContext, toast, Toast.LENGTH_SHORT).show()
    }

    // Exit the Immersive Reader.
    @JavascriptInterface
    fun immersiveReaderExit() {
        webView.post(Runnable { destroyWebView(parentLayout, webView) })

        // Any additional functionality may be added here.
        Toast.makeText(mContext, "The Immersive Reader has been closed!", Toast.LENGTH_SHORT).show()
    }

    // Disposes of the WebView when the back arrow is tapped.
    private fun destroyWebView(parentLayout: LinearLayout, webView: WebView) {

        // Removes the WebView from its parent view before doing anything.
        parentLayout.removeView(webView)

        // Cleans things up before destroying the WebView.
        webView.clearHistory()
        webView.clearCache(true)
        webView.loadUrl("about:blank")
        webView.onPause()
        webView.removeAllViews()
        webView.pauseTimers()
        webView.destroy()
    }
}
Konfigurowanie działania głównego kodu Kotlin aplikacji
W folderze kotlin+java/com.example.quickstartkotlin/ istnieje istniejący plik klasy MainActivity.kt Kotlin. Ten plik to miejsce, w którym jest utworzona logika aplikacji. Zastąp jego zawartość poniższym kodem.
// Copyright (c) Microsoft Corporation. All rights reserved.
// Licensed under the MIT License.

package com.example.quickstartkotlin

import android.app.Activity
import androidx.appcompat.app.AppCompatActivity
import android.os.Bundle
import android.webkit.CookieManager
import android.webkit.WebView
import android.widget.Button
import android.webkit.WebViewClient
import android.widget.LinearLayout
import android.widget.TextView
import com.google.gson.*
import io.github.cdimascio.dotenv.dotenv
import java.io.IOException
import java.io.*
import java.net.HttpURLConnection
import java.net.HttpURLConnection.HTTP_OK
import java.net.URL
import kotlinx.coroutines.*
import org.json.JSONObject
import java.util.*

// This sample app uses the Dotenv. It's a module that loads environment variables from a .env file to better manage secrets.
// https://github.com/cdimascio/java-dotenv
// Be sure to add a "env" file to the /assets folder.
// Instead of '.env', use 'env'.

class MainActivity : AppCompatActivity() {
    private val dotEnv = dotenv {
        directory = "/assets"
        filename = "env"
        ignoreIfMalformed = true
        ignoreIfMissing = true
    }

    private lateinit var contextualWebView: WebView

    override fun onCreate(savedInstanceState: Bundle?) {
        super.onCreate(savedInstanceState)
        this.supportActionBar!!.hide()
        setContentView(R.layout.activity_main)
        val immersiveReaderButton = findViewById<Button>(R.id.LaunchImmersiveReaderButton)
        immersiveReaderButton.setOnClickListener { GlobalScope.launch { handleLoadImmersiveReaderWebView() } }
    }

    // Assigns values to the objects sent to the Immersive Reader SDK,
    // acquires the token and authorizes the app, then launches
    // the Web View to get the response and load the Immersive Reader
    // when the button is clicked in HTML.
    private suspend fun handleLoadImmersiveReaderWebView() {
        val exampleActivity = this
        val subdomain = dotEnv["SUBDOMAIN"]
        val irTitle = findViewById<TextView>(R.id.Title)
        val irText1 = findViewById<TextView>(R.id.Content1)
        val irText2 = findViewById<TextView>(R.id.Content2)

        // The content of the request that's shown in the Immersive Reader.
        // This basic example contains chunks of two different languages.
        val chunk1 = Chunk()
        chunk1.content = irText1.text.toString()
        chunk1.lang = "en"
        chunk1.mimeType = "text/plain"

        val chunk2 = Chunk()
        chunk2.content = irText2.text.toString()
        chunk2.lang = "fr"
        chunk2.mimeType = "text/plain"

        val chunks = ArrayList<Chunk>()
        chunks.add(chunk1)
        chunks.add(chunk2)

        val content = Content()
        content.title = irTitle.text.toString()
        content.chunks = chunks

        // Options may be assigned values here (e.g. options.uiLang = "en").
        val options = Options()

        var token: String

        runBlocking{
            val resp = async { getImmersiveReaderTokenAsync() }
            token = resp.await()
            val jsonResp = JSONObject(token)
            loadImmersiveReaderWebView(exampleActivity, jsonResp.getString("access_token"), subdomain, content, options)
        }
    }

    // The next two functions get the token from the Immersive Reader SDK
    // and authorize the app.
    private suspend fun getImmersiveReaderTokenAsync(): String {
        return getToken()
    }

    @Throws(IOException::class)
    fun getToken(): String {
        val clientId = dotEnv["CLIENT_ID"]
        val clientSecret = dotEnv["CLIENT_SECRET"]
        val tenantId = dotEnv["TENANT_ID"]
        val tokenUrl = URL("https://login.windows.net/$tenantId/oauth2/token")
        val form = "grant_type=client_credentials&resource=https://cognitiveservices.azure.com/&client_id=$clientId&client_secret=$clientSecret"

        val connection = tokenUrl.openConnection() as HttpURLConnection
        connection.requestMethod = "POST"
        connection.setRequestProperty("content-type", "application/x-www-form-urlencoded")
        connection.doOutput = true

        val writer = DataOutputStream(connection.outputStream)
        writer.writeBytes(form)
        writer.flush()
        writer.close()

        val responseCode = connection.responseCode

        if (responseCode == HTTP_OK) {
            val readerIn = BufferedReader(InputStreamReader(connection.inputStream))
            var inputLine = readerIn.readLine()
            val response = StringBuffer()

            do {
                response.append(inputLine)
            } while (inputLine.length < 0)
            readerIn.close()

            // Return token
            return response.toString()
        } else {
            val responseError = Error(code = "BadRequest", message = "There was an error getting the token.")
            throw IOException(responseError.toString())
        }
    }

    // To be assigned values and sent to the Immersive Reader SDK
    class Chunk(var content: String? = null,
                var lang: String? = null,
                var mimeType: String? = null)

    class Content(var title: String? = null,
                  var chunks: List<Chunk>? = null)

    class Message(var cogSvcsAccessToken: String? = null,
                  var cogSvcsSubdomain: String? = null,
                  var content: Content? = null,
                  var launchToPostMessageSentDurationInMs: Int? = null,
                  var options: Options? = null)

    // Only includes Immersive Reader options relevant to Android apps.
    // For a complete list, visit https://learn.microsoft.com/azure/ai-services/immersive-reader/reference
    class Options(var uiLang: String? = null, // Language of the UI, e.g. en, es-ES (optional). Defaults to browser language if not specified.
                  var timeout: Int? = null, // Duration (in milliseconds) before launchAsync fails with a timeout error (default is 15000 ms).
                  var uiZIndex: Int? = null, // Z-index of the iframe that will be created (default is 1000)
                  var onExit: (() -> Any)? = null, // Executes a callback function when the Immersive Reader exits
                  var customDomain: String? = null, // Reserved for internal use. Custom domain where the Immersive Reader webapp is hosted (default is null).
                  var allowFullscreen: Boolean? = null, // The ability to toggle fullscreen (default is true).
                  var hideExitButton: Boolean? = null // Whether or not to hide the Immersive Reader's exit button arrow (default is false). This should only be true if there is an alternative mechanism provided to exit the Immersive Reader (e.g a mobile toolbar's back arrow).
    )

    class Error(var code: String? = null,
                var message: String? = null)

    // A custom Web View component that launches inside the app
    @Throws(IOException::class)
    fun loadImmersiveReaderWebView(
        exampleActivity: Activity,
        token: String,
        subdomain: String?,
        content: Content,
        options: Options
    ) {
        val startPostMessageSentDurationInMs = Date()

        // Populate the message
        val messageData = Message()
        messageData.cogSvcsAccessToken = token
        messageData.cogSvcsSubdomain = subdomain
        messageData.content = content
        messageData.options = options

        GlobalScope.launch {
            withContext(Dispatchers.Main) {
                contextualWebView = WebView(exampleActivity)
                val parentLayout = findViewById<LinearLayout>(R.id.linearLayout)
                val contextualWebViewSettings = contextualWebView.settings

                contextualWebViewSettings.allowContentAccess = true
                contextualWebViewSettings.builtInZoomControls = true
                contextualWebViewSettings.javaScriptEnabled = true
                contextualWebViewSettings.loadsImagesAutomatically = true
                contextualWebViewSettings.loadWithOverviewMode = true
                contextualWebViewSettings.useWideViewPort = true
                contextualWebViewSettings.userAgentString = "Android"
                contextualWebViewSettings.domStorageEnabled = true

                contextualWebViewSettings.setAppCacheEnabled(false)
                contextualWebViewSettings.setSupportZoom(true)
                contextualWebView.setInitialScale(1)

                // Enables WebView Cookies
                if (android.os.Build.VERSION.SDK_INT >= android.os.Build.VERSION_CODES.LOLLIPOP) {
                    CookieManager.getInstance().setAcceptThirdPartyCookies(contextualWebView, true)
                } else {
                    CookieManager.getInstance().setAcceptCookie(true)
                }

                val contextualWebViewLayout = LinearLayout.LayoutParams(LinearLayout.LayoutParams.MATCH_PARENT, LinearLayout.LayoutParams.MATCH_PARENT)
                parentLayout.addView(contextualWebView, 0, contextualWebViewLayout)

                // This is required to launch the WebView *inside* the host application.
                contextualWebView.webViewClient = object : WebViewClient() {
                    override fun shouldOverrideUrlLoading(view: WebView, url: String): Boolean {
                        view.loadUrl(url)
                        return true
                    }

                    // Send message JSON object to Immersive Reader html
                    override fun onPageFinished(view: WebView, url: String) {
                        val endPostMessageSentDurationInMs = Date()
                        val postMessageSentDurationInMs = (endPostMessageSentDurationInMs.time - startPostMessageSentDurationInMs.time).toInt()

                        // Updates launchToPostMessageSentDurationInMs
                        messageData.launchToPostMessageSentDurationInMs = postMessageSentDurationInMs

                        // Serializes message data class to JSON
                        val gson = Gson()
                        val message = gson.toJson(messageData)

                        // Calls the handleLaunchImmersiveReader function in HTML
                        if (android.os.Build.VERSION.SDK_INT >= android.os.Build.VERSION_CODES.KITKAT) {
                            view.evaluateJavascript("handleLaunchImmersiveReader($message)", null)
                        } else {
                            view.loadUrl("javascript:handleLaunchImmersiveReader($message)")
                        }

                        // Sets the visibility of the WebView after the function has been called.
                        view.visibility = WebView.VISIBLE
                    }
                }

                // This is where the WebAppInterface Class is used.
                // Affords a way for JavaScript to work with the app directly from
                // the Web View's HTML.
                val jsInterface = WebAppInterface(exampleActivity, parentLayout, contextualWebView)
                contextualWebView.addJavascriptInterface(jsInterface, "Android")
                contextualWebView.loadUrl("file:///android_asset/immersiveReader.html")
            }
        }
    }
}
Może być konieczne ponowne zsynchronizowanie projektu.
Dodawanie kodu HTML aplikacji do widoku internetowego
Implementacja widoku internetowego wymaga kodu HTML do działania. Kliknij prawym przyciskiem myszy folder /assets , utwórz nowy plik i nadaj mu nazwę immersiveReader.html.

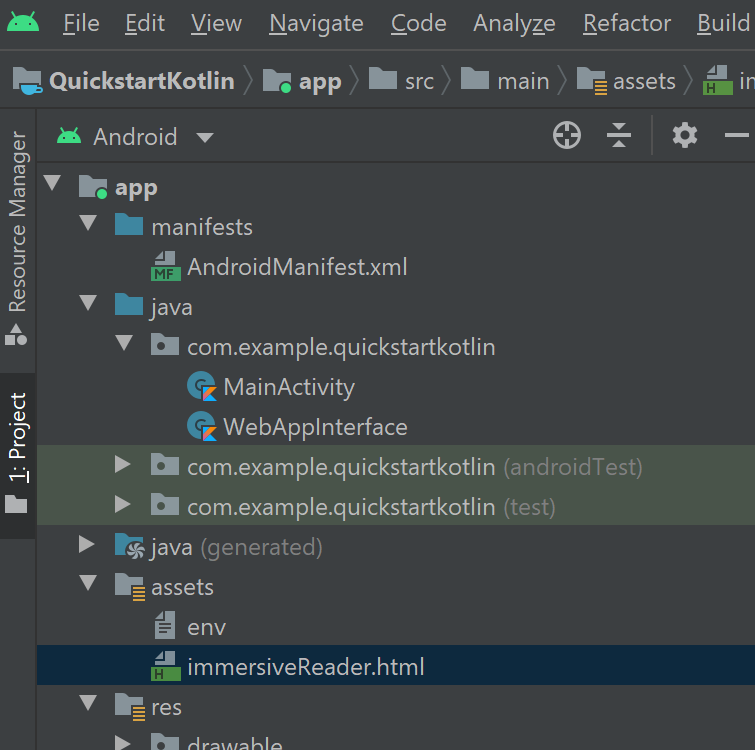
Dodaj następujący kod HTML i JavaScript. Ten kod dodaje zestaw SDK Czytnik immersyjny do aplikacji i używa go do otwierania Czytnik immersyjny przy użyciu kodu aplikacji, który napisaliśmy.
<!-- Copyright (c) Microsoft Corporation. All rights reserved.
Licensed under the MIT License. -->

<!DOCTYPE html>
<html>
<head>
    <meta charset="utf-8">
    <meta name="viewport" content="width=device-width, initial-scale=1, shrink-to-fit=no">
    <script type="text/javascript" src="https://ircdname.azureedge.net/immersivereadersdk/immersive-reader-sdk.1.4.0.js"></script>
</head>
<body>
<script type="text/javascript">
        function handleLaunchImmersiveReader(message) {
            if (!message) {
                Android.showToast('Message is null or undefined!');
            } else {
                // Learn more about chunk usage and supported MIME types https://learn.microsoft.com/azure/ai-services/immersive-reader/reference#chunk
                var data = {
                    title: message.content.title,
                    chunks: message.content.chunks
                };

                // A simple declarative function used to close the Immersive Reader WebView via @JavaScriptInterface
                var exitCallback = function() {
                    Android.immersiveReaderExit();
                }

                // Learn more about options https://learn.microsoft.com/azure/ai-services/immersive-reader/reference#options
                var options = {
                    onExit: exitCallback,
                    uiZIndex: 2000
                };

                // Use the JavaScript SDK to launch the Immersive Reader.
                ImmersiveReader.launchAsync(message.cogSvcsAccessToken, message.cogSvcsSubdomain, data, options);
            }
        }
    </script>
</body>
</html>
Konfigurowanie uprawnień aplikacji
Ponieważ aplikacja musi wykonywać wywołania sieciowe do zestawu SDK Czytnik immersyjny do działania, musimy upewnić się, że uprawnienia aplikacji są skonfigurowane do zezwalania na dostęp do sieci. Zastąp zawartość pliku /manifests/AndroidManifest.xml następującym kodem XML.
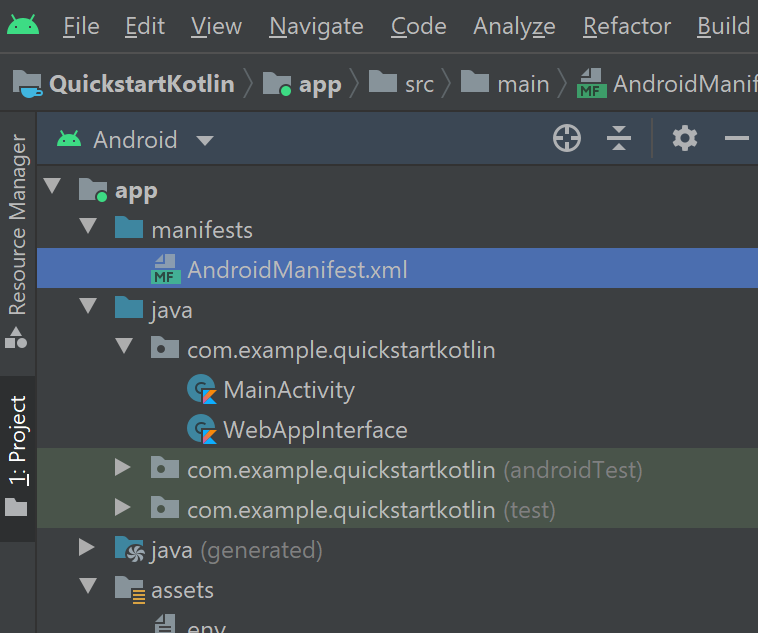
<?xml version="1.0" encoding="utf-8"?>
<manifest xmlns:android="http://schemas.android.com/apk/res/android"
    package="com.example.quickstartkotlin">

    <uses-permission android:name="android.permission.INTERNET" />

    <application
        android:allowBackup="true"
        android:icon="@mipmap/ic_launcher"
        android:label="@string/app_name"
        android:roundIcon="@mipmap/ic_launcher_round"
        android:supportsRtl="true"
        android:theme="@style/AppTheme">
        <activity android:name=".MainActivity">
            <intent-filter>
                <action android:name="android.intent.action.MAIN" />

                <category android:name="android.intent.category.LAUNCHER" />
            </intent-filter>
        </activity>
    </application>

</manifest>
Uruchom aplikację
Użyj programu Android Studio, aby uruchomić aplikację w emulatorze urządzenia. Po wybraniu Czytnik immersyjny zostanie otwarta Czytnik immersyjny z zawartością w aplikacji.

Następny krok
W tym przewodniku Szybki start utworzysz aplikację systemu iOS od podstaw i zintegrujesz Czytnik immersyjny. Pełny przykład roboczy tego przewodnika Szybki start jest dostępny w witrynie GitHub.
Wymagania wstępne
- Subskrypcja platformy Azure. Możesz utworzyć go bezpłatnie.
- Zasób Czytnik immersyjny skonfigurowany na potrzeby uwierzytelniania entra firmy Microsoft. Postępuj zgodnie z tymi instrukcjami , aby skonfigurować. Zapisz dane wyjściowe sesji w pliku tekstowym, aby można było skonfigurować właściwości środowiska.
- macOS i Xcode.
Tworzenie projektu Xcode
Utwórz nowy projekt w środowisku Xcode.
Wybierz pozycję Aplikacja z pojedynczym widokiem.
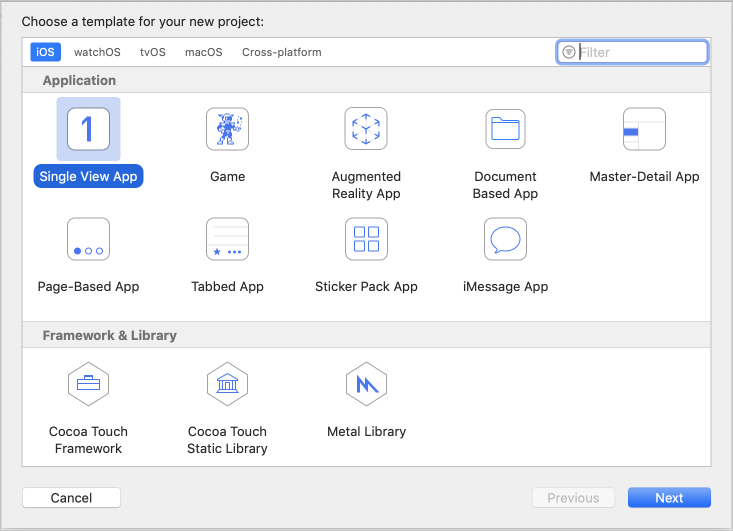
Konfigurowanie uwierzytelniania
W górnym menu wybierz pozycję Schemat produktów > Edytuj schemat > ....
W widoku Uruchom wybierz kartę Argumenty.
W sekcji Zmienne środowiskowe dodaj następujące nazwy i wartości, podając wartości podane podczas tworzenia zasobu Czytnik immersyjny.
Ważne
Pamiętaj, aby nigdy nie publikować wpisów tajnych publicznie. W przypadku środowiska produkcyjnego użyj bezpiecznego sposobu przechowywania i uzyskiwania dostępu do poświadczeń, takich jak usługa Azure Key Vault.
TENANT_ID=<YOUR_TENANT_ID>
CLIENT_ID=<YOUR_CLIENT_ID>
CLIENT_SECRET<YOUR_CLIENT_SECRET>
SUBDOMAIN=<YOUR_SUBDOMAIN>
Konfigurowanie aplikacji do uruchamiania bez scenorysu
Otwórz plik AppDelegate.swift i zastąp plik następującym kodem.
import UIKit

@UIApplicationMain
class AppDelegate: UIResponder, UIApplicationDelegate {
    var window: UIWindow?

    var navigationController: UINavigationController?

    func application(_ application: UIApplication, didFinishLaunchingWithOptions launchOptions: [UIApplication.LaunchOptionsKey: Any]?) -> Bool {
        // Override point for customization after application launch.

        window = UIWindow(frame: UIScreen.main.bounds)

        if let window = window {
            let mainViewController = LaunchViewController()
            navigationController = UINavigationController(rootViewController: mainViewController)
            window.rootViewController = navigationController
            window.makeKeyAndVisible()
        }
        return true
    }

    func applicationWillResignActive(_ application: UIApplication) {
        // Sent when the application is about to move from active to inactive state. This can occur for certain types of temporary interruptions (such as an incoming phone call or SMS message) or when the user quits the application and it begins the transition to the background state.
        // Use this method to pause ongoing tasks, disable timers, and invalidate graphics rendering callbacks. Games should use this method to pause the game.
    }

    func applicationDidEnterBackground(_ application: UIApplication) {
        // Use this method to release shared resources, save user data, invalidate timers, and store enough application state information to restore your application to its current state in case it is terminated later.
        // If your application supports background execution, this method is called instead of applicationWillTerminate: when the user quits.
    }

    func applicationWillEnterForeground(_ application: UIApplication) {
        // Called as part of the transition from the background to the active state; here you can undo many of the changes made on entering the background.
    }

    func applicationDidBecomeActive(_ application: UIApplication) {
        // Restart any tasks that were paused (or not yet started) while the application was inactive. If the application was previously in the background, optionally refresh the user interface.
    }

    func applicationWillTerminate(_ application: UIApplication) {
        // Called when the application is about to terminate. Save data if appropriate. See also applicationDidEnterBackground:.
    }
}
Tworzenie kontrolerów widoku i dodawanie przykładowej zawartości
Zmień nazwę ViewController.swift na LaunchViewController.swift i zastąp plik następującym kodem.
import UIKit

class LaunchViewController: UIViewController {
    private var tenantId = ProcessInfo.processInfo.environment["TENANT_ID"]
    private var clientId = ProcessInfo.processInfo.environment["CLIENT_ID"]
    private var clientSecret = ProcessInfo.processInfo.environment["CLIENT_SECRET"]
    private var subdomain = ProcessInfo.processInfo.environment["SUBDOMAIN"]

    private var launchButton: UIButton!
    private var titleText: UILabel!
    private var bodyText: UILabel!
    private var sampleContent: Content!
    private var sampleChunk: Chunk!
    private var sampleOptions: Options!

    override func viewDidLoad() {
        super.viewDidLoad()

        view.backgroundColor = .white

        titleText = UILabel()
        titleText.text = "Geography"
        titleText.font = UIFont.boldSystemFont(ofSize: 30)
        titleText.lineBreakMode = .byWordWrapping
        titleText.numberOfLines = 0
        view.addSubview(titleText)

        bodyText = UILabel()
        bodyText.text = "The study of Earth's landforms is called physical geography. Landforms can be mountains and valleys. They can also be glaciers, lakes or rivers. Landforms are sometimes called physical features. It is important for students to know about the physical geography of Earth. The seasons, the atmosphere and all the natural processes of Earth affect where people are able to live. Geography is one of a combination of factors that people use to decide where they want to live.The physical features of a region are often rich in resources. Within a nation, mountain ranges become natural borders for settlement areas. In the U.S., major mountain ranges are the Sierra Nevada, the Rocky Mountains, and the Appalachians.Fresh water sources also influence where people settle. People need water to drink. They also need it for washing. Throughout history, people have settled near fresh water. Living near a water source helps ensure that people have the water they need. There was an added bonus, too. Water could be used as a travel route for people and goods. Many Americans live near popular water sources, such as the Mississippi River, the Colorado River and the Great Lakes.Mountains and deserts have been settled by fewer people than the plains areas. However, they have valuable resources of their own."
        bodyText.lineBreakMode = .byWordWrapping
        bodyText.numberOfLines = 0
        let screenSize = self.view.frame.height
        if screenSize <= 667 {
            // Font size for smaller iPhones.
            bodyText.font = bodyText.font.withSize(14)

         } else if screenSize <= 812 {
            // Font size for medium iPhones.
            bodyText.font = bodyText.font.withSize(15)

         } else if screenSize <= 896 {
            // Font size for larger iPhones.
            bodyText.font = bodyText.font.withSize(17)

         } else if screenSize <= 1024 {
            // Font size for iPads.
            bodyText.font = bodyText.font.withSize(25)
        } else {
            // Font size for large iPads.
            bodyText.font = bodyText.font.withSize(28)
        }
        view.addSubview(bodyText)

        launchButton = UIButton()
        launchButton.backgroundColor = .darkGray
        launchButton.contentEdgeInsets = UIEdgeInsets(top: 10, left: 10, bottom: 10, right: 10)
        launchButton.setTitleColor(.white, for: .normal)
        launchButton.setTitle("Immersive Reader", for: .normal)
        launchButton.addTarget(self, action: #selector(launchImmersiveReaderButton(sender:)), for: .touchUpInside)
        view.addSubview(launchButton)

        let layoutGuide = view.safeAreaLayoutGuide

        titleText.translatesAutoresizingMaskIntoConstraints = false
        titleText.topAnchor.constraint(equalTo: layoutGuide.topAnchor, constant: 20).isActive = true
        titleText.leadingAnchor.constraint(equalTo: layoutGuide.leadingAnchor, constant: 20).isActive = true
        titleText.trailingAnchor.constraint(equalTo: layoutGuide.trailingAnchor, constant: -20).isActive = true

        bodyText.translatesAutoresizingMaskIntoConstraints = false
        bodyText.topAnchor.constraint(equalTo: titleText.bottomAnchor, constant: 15).isActive = true
        bodyText.leadingAnchor.constraint(equalTo: layoutGuide.leadingAnchor, constant: 20).isActive = true
        bodyText.trailingAnchor.constraint(equalTo: layoutGuide.trailingAnchor, constant: -20).isActive = true

        launchButton.translatesAutoresizingMaskIntoConstraints = false
        launchButton.widthAnchor.constraint(equalToConstant: 200).isActive = true
        launchButton.heightAnchor.constraint(equalToConstant: 50).isActive = true
        launchButton.centerXAnchor.constraint(equalTo: layoutGuide.centerXAnchor).isActive = true
        launchButton.bottomAnchor.constraint(equalTo: layoutGuide.bottomAnchor, constant: -10).isActive = true

        // Create content and options.
        sampleChunk = Chunk(content: bodyText.text!, lang: nil, mimeType: nil)
        sampleContent = Content(title: titleText.text!, chunks: [sampleChunk])
        sampleOptions = Options(uiLang: nil, timeout: nil, uiZIndex: nil)
    }

    @IBAction func launchImmersiveReaderButton(sender: AnyObject) {
        launchButton.isEnabled = false

        // Callback to get token.
        getToken(onSuccess: {cognitiveToken in
            DispatchQueue.main.async {
                launchImmersiveReader(navController: self.navigationController!, token: cognitiveToken, subdomain: self.subdomain!, content: self.sampleContent, options: self.sampleOptions, onSuccess: {
                    self.launchButton.isEnabled = true
                }, onFailure: { error in
                    self.launchButton.isEnabled = true
                })
            }
        }, onFailure: { error in
            print("an error occurred: \(error)")
        })
    }

    func getToken(onSuccess: @escaping (_ theToken: String) -> Void, onFailure: @escaping ( _ theError: String) -> Void) {
        let tokenForm = "grant_type=client_credentials&resource=https://cognitiveservices.azure.com/&client_id=" + self.clientId! + "&client_secret=" + self.clientSecret!
        let tokenUrl = "https://login.windows.net/" + self.tenantId! + "/oauth2/token"

        var responseTokenString: String = "0"

        let url = URL(string: tokenUrl)!
        var request = URLRequest(url: url)
        request.httpBody = tokenForm.data(using: .utf8)
        request.httpMethod = "POST"

        let task = URLSession.shared.dataTask(with: request) { data, response, error in
            guard let data = data,
                let response = response as? HTTPURLResponse,
                error == nil else {
                    onFailure("Error")
                    return
                }

            guard (200 ... 299) ~= response.statusCode else {
                onFailure(String(response.statusCode))
                return
            }

            let responseString = String(data: data, encoding: .utf8)

            let jsonResponse = try? JSONSerialization.jsonObject(with: data, options: [])
            guard let jsonDictonary = jsonResponse as? [String: Any] else {
                onFailure("Error parsing JSON response.")
                return
            }
            guard let responseToken = jsonDictonary["access_token"] as? String else {
                onFailure("Error retrieving token from JSON response.")
                return
            }
            responseTokenString = responseToken
            onSuccess(responseTokenString)
        }

        task.resume()
    }
}
Dodaj nowy plik do folderu głównego projektu o nazwie ImmersiveReaderViewController.swift i dodaj następujący kod.
import UIKit
import Foundation
import WebKit

@available(iOS 11.0, *)
public class ImmersiveReaderWebView: WKWebView {

    init(frame: CGRect, contentController: WKUserContentController) {
        let conf = WKWebViewConfiguration()
        conf.userContentController = contentController
        super.init(frame: frame, configuration: conf)
    }

    required init?(coder: NSCoder) {
        fatalError("init(coder:) has not been implemented")
    }
}

public class ImmersiveReaderViewController: UIViewController, WKUIDelegate, WKNavigationDelegate {
    let tokenToSend: String
    let subdomainToSend: String
    let contentToSend: Content
    let optionsToSend: Options?
    let onSuccessImmersiveReader: (() -> Void)?
    let onFailureImmersiveReader: ((_ error: Error) -> Void)?
    let onTimeout: ((_ timeoutValue: TimeInterval) -> Void)?
    let onError: ((_ error: String) -> Void)?

    let startTime = Date().timeIntervalSince1970*1000
    var src: String
    var webView: WKWebView!
    var timer: Timer!
    var timeoutValue: TimeInterval!

    public init(tokenToPass: String, subdomainToPass: String, contentToPass: Content, optionsToPass: Options?, onSuccessImmersiveReader: @escaping () -> Void, onFailureImmersiveReader: @escaping (_ status: Error) -> Void, onTimeout: @escaping (_ timeoutValue: TimeInterval) -> Void, onError: @escaping (_ error: String) -> Void) {
        self.tokenToSend = tokenToPass
        self.subdomainToSend = subdomainToPass
        self.contentToSend = contentToPass
        self.optionsToSend = optionsToPass
        self.onSuccessImmersiveReader = onSuccessImmersiveReader
        self.onFailureImmersiveReader = onFailureImmersiveReader
        self.onTimeout = onTimeout
        self.onError = onError
        self.src = "https://" + subdomainToPass + ".cognitiveservices.azure.com/immersivereader/webapp/v1.0/reader"
        super.init(nibName: nil, bundle: nil)
    }

    required init?(coder aDecoder: NSCoder) {
        fatalError("init(coder:) has not been implemented")
    }

    override public func viewDidLoad() {
        super.viewDidLoad()

        // If uiLang options are set update src to reflect this.
        switch optionsToSend?.uiLang {
        case .none: break
        case .some(let value):
            src = src + "?omkt=" + value
        }

        // Set timeout to default or value user specifies.
        switch optionsToSend?.timeout {
        case .none:
            timeoutValue = 15
        case .some(let value):
            timeoutValue = value
        }

        view.backgroundColor = .white
        webView = WKWebView()

        let contentController = WKUserContentController()
        if #available(iOS 11.0, *) {
            webView = ImmersiveReaderWebView(frame: .zero, contentController: contentController)
        } else {
            // Fallback on earlier versions
            webView = WKWebView()
            let config = WKWebViewConfiguration()
            config.userContentController = contentController
            webView = WKWebView(frame: .zero, configuration: config)
        }
        webView.navigationDelegate = self
        webView.uiDelegate = self

        contentController.add(self, name: "readyForContent")
        contentController.add(self, name: "launchSuccessful")
        contentController.add(self, name: "tokenExpired")
        contentController.add(self, name: "throttled")

        view.addSubview(webView)
        webView.translatesAutoresizingMaskIntoConstraints = false

        if #available(iOS 11.0, *) {
            let layoutGuide = view.safeAreaLayoutGuide
            webView.leadingAnchor.constraint(equalTo: layoutGuide.leadingAnchor).isActive = true
            webView.trailingAnchor.constraint(equalTo: layoutGuide.trailingAnchor).isActive = true
            webView.topAnchor.constraint(equalTo: layoutGuide.topAnchor).isActive = true
            webView.bottomAnchor.constraint(equalTo: layoutGuide.bottomAnchor).isActive = true

        } else {
            webView.leadingAnchor.constraint(equalTo: view.leadingAnchor).isActive = true
            webView.trailingAnchor.constraint(equalTo: view.trailingAnchor).isActive = true
            webView.topAnchor.constraint(equalTo: view.topAnchor).isActive = true
            webView.bottomAnchor.constraint(equalTo: view.bottomAnchor).isActive = true
        }
        // Get path to JavaScript file.
        guard let scriptPath = Bundle.main.path(forResource: "iFrameMessaging", ofType: "js") else {
            onError!("Could not create script path from resource.")
            return
        }
        do {
            let scriptSource = try String(contentsOfFile: scriptPath)
            let userScript = WKUserScript(source: scriptSource, injectionTime: .atDocumentStart, forMainFrameOnly: true)
            contentController.addUserScript(userScript)
        } catch {
            onError!("Could not parse JavaScript file.")
            return
        }

        // Start the timer.
        timer = Timer.scheduledTimer(timeInterval: timeoutValue, target: self, selector: #selector(self.timedOut), userInfo: nil, repeats: false)

        // Load the iframe from HTML.
        webView.loadHTMLString("<!DOCTYPE html><html style='width: 100%; height: 100%; margin: 0; padding: 0;'><head><meta name='viewport' content='width=device-width, initial-scale=1, shrink-to-fit=no'></head><body style='width: 100%; height: 100%; margin: 0; padding: 0;'><iframe id='immersiveReaderIframe' src = '\(src)' width='100%' height='100%' style='border: 0'></iframe></body></html>", baseURL: URL(string: "test://learningtools.onenote.com/learningtoolsapp/cognitive/reader"))
    }

    @objc func timedOut(_ timer: AnyObject) {
        onTimeout!(timeoutValue)
    }

    public func webView(_ webView: WKWebView, decidePolicyFor navigationAction: WKNavigationAction, decisionHandler: @escaping (WKNavigationActionPolicy) -> Void) {
        decisionHandler(.allow)
    }

    public func webView(_ webView: WKWebView, decidePolicyFor navigationResponse: WKNavigationResponse, decisionHandler: @escaping (WKNavigationResponsePolicy) -> Void ) {
        decisionHandler(.allow)
    }
}

extension ImmersiveReaderViewController: WKScriptMessageHandler {
    public func userContentController(_ userContentController: WKUserContentController, didReceive message: WKScriptMessage) {
        if message.name == "readyForContent" {
            // Stop the timer.
            timer.invalidate()

            // Create the message variable
            let message = Message(cogSvcsAccessToken: tokenToSend, cogSvcsSubdomain: subdomainToSend, resourceName: nil, request: contentToSend, launchToPostMessageSentDurationInMs: Int(Date().timeIntervalSince1970*1000 - startTime))
            do {
                let jsonData = try JSONEncoder().encode(message)
                let jsonString = String(data: jsonData, encoding: .utf8)
                self.webView.evaluateJavaScript("sendContentToReader(\(jsonString!))") { (result, error) in
                    if error != nil {
                        self.onError!("Error evaluating JavaScript \(String(describing: error))")
                    }
                }
            } catch { print(error)}
        }

        if message.name == "launchSuccessful" {
            onSuccessImmersiveReader!()
        }

        if message.name == "tokenExpired" {
            let tokenExpiredError = Error(code: "TokenExpired", message: "The access token supplied is expired.")
            onFailureImmersiveReader!(tokenExpiredError)
        }

        if message.name == "throttled" {
            let throttledError = Error(code: "Throttled", message: "You have exceeded the call rate limit.")
            onFailureImmersiveReader!(throttledError)
        }
    }
}
Dodaj kolejny nowy plik do folderu głównego projektu o nazwie LaunchImmersiveReader.swift i dodaj następujący kod.
import UIKit
import Foundation

var navigationController: UINavigationController?

public struct Content: Encodable {
    var title: String
    var chunks: [Chunk]

    public init(title: String, chunks: [Chunk]) {
        self.title = title
        self.chunks = chunks
    }
}

public struct Chunk: Encodable {
    var content: String
    var lang: String?
    var mimeType: String?

    public init(content: String, lang: String?, mimeType: String?) {
        self.content = content
        self.lang = lang
        self.mimeType = mimeType
    }
}

public struct Options {
    var uiLang: String?
    var timeout: TimeInterval?

    public init(uiLang: String?, timeout: TimeInterval?, uiZIndex: NSNumber?) {
        self.uiLang = uiLang
        self.timeout = timeout
    }
}

public struct Error {
    public var code: String
    public var message: String

    public init(code: String, message: String) {
        self.code = code
        self.message = message
    }
}

struct Message: Encodable {
    let cogSvcsAccessToken: String
    let cogSvcsSubdomain: String
    let resourceName: String?
    let request: Content
    let launchToPostMessageSentDurationInMs: Int

    init(cogSvcsAccessToken: String, cogSvcsSubdomain: String, resourceName: String?, request: Content, launchToPostMessageSentDurationInMs: Int) {
        self.cogSvcsAccessToken = cogSvcsAccessToken
        self.cogSvcsSubdomain = cogSvcsSubdomain
        self.resourceName = resourceName
        self.request = request
        self.launchToPostMessageSentDurationInMs = launchToPostMessageSentDurationInMs
    }
}

public func launchImmersiveReader(navController: UINavigationController, token: String, subdomain: String, content: Content, options: Options?, onSuccess: @escaping () -> Void, onFailure: @escaping (_ error: Error) -> Void) {
    if (content.chunks.count == 0) {
        let badArgumentError = Error(code: "BadArgument", message: "Chunks must not be empty.")
        onFailure(badArgumentError)
    }

    navigationController = navController
    let immersiveReaderViewController = ImmersiveReaderViewController(tokenToPass: token, subdomainToPass: subdomain, contentToPass: content, optionsToPass: options, onSuccessImmersiveReader: {
        onSuccess()
    }, onFailureImmersiveReader: { error in
        onFailure(error)
    }, onTimeout: { timeout in
        navigationController?.popViewController(animated: true)
        let timeoutError = Error(code: "Timeout", message: "Page failed to load after timeout \(timeout) ms.")
        onFailure(timeoutError)
    }, onError: { error in
        navigationController?.popViewController(animated: true)
        let errorMessage = Error(code: "Internal Error", message: error)
        onFailure(errorMessage)
    })
    navigationController!.pushViewController(immersiveReaderViewController, animated: true)
}
Dodaj plik do folderu Resources o nazwie iFrameMessaging.js i dodaj następujący kod.
window.addEventListener("message", function(message) {
    if(message.data == "ImmersiveReader-ReadyForContent") {
        window.webkit.messageHandlers.readyForContent.postMessage(null);
    }

    if(message.data == "ImmersiveReader-LaunchSuccessful") {
        window.webkit.messageHandlers.launchSuccessful.postMessage(null);
    }

    if(message.data == "ImmersiveReader-TokenExpired") {
        window.webkit.messageHandlers.tokenExpired.postMessage(null);
    }

    if(message.data == "ImmersiveReader-Throttled") {
        window.webkit.messageHandlers.throttled.postMessage(null);
    }
});

function sendContentToReader(message) {
    document.getElementById('immersiveReaderIframe').contentWindow.postMessage(JSON.stringify({messageType:'Content', messageValue: message}), '*');
}
Skompiluj i uruchom aplikację
Ustaw schemat archiwum w programie Xcode, wybierając symulator lub element docelowy urządzenia.

W programie Xcode naciśnij klawisze Ctrl+R lub wybierz przycisk odtwarzania, aby uruchomić projekt. Aplikacja powinna zostać uruchomiona na określonym symulatorze lub urządzeniu.
W aplikacji powinny zostać wyświetlone następujące elementy:
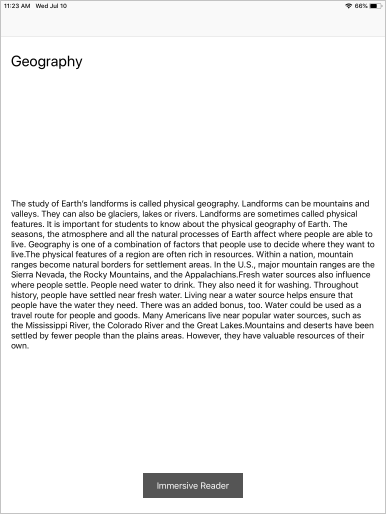
Po wybraniu przycisku Czytnik immersyjny zobaczysz Czytnik immersyjny uruchomioną z zawartością w aplikacji.