Use audience targeting in Viva Connections to personalize the experience
Audience targeting can help you target content to specific Microsoft 365 Groups within your organization so your content is seen by the right people. Audience targeting can be applied to cards on the dashboard, SharePoint news posts in the Feed, and links in the Resource section. For example, if a regional finance department has many specialized dashboard cards needed for their daily tasks, audience targeting ensures that only members of that group see the cards.
You can also create separate Viva Connections experiences for different audiences. For more information, see the article on the difference between audience targeting and different experiences.
Note
- Audience targeting filters content and is not a security measure. It is not meant to manage permissions, access, or secure confidential content.
- Microsoft Entra Groups (including ecurity groups, Microsoft 365 Groups, and Microsoft Entra Dynamic Groups) are supported.
- The author will be able to view all content in Edit mode. In read-mode, the content will be filtered based on the audiences selected.
- Publish (or republish) to save changes made to existing page content, page metadata, and audience targeting settings for audience targeting features to take effect.
Apply audience targeting to cards in the dashboard
Create a personalized experience by targeting dashboard cards to specific audiences to ensure only the most relevant cards are seen. Use audience targeting:
To create custom views for distinct roles and regions,
To generate as many different views as needed to create unique experiences, and
To ensure the most important content is seen by the intended audience.
Follow these instructions if you're setting up the Viva Connections dashboard for the first time.
Note
- You must be a site owner of the SharePoint home site to edit the Viva Connections dashboard.
- If you are setting up the Connections dashboard for the first time, see the article on creating a Viva Connections dashboard and adding cards for more information.
To apply audience targeting to a dashboard card:
Note
See the article on how to edit the dashboard from SharePoint if you are accessing Viva Connections from your SharePoint home site.
From the dashboard, select Edit.
Select Edit on the card you want to apply audience targeting to.
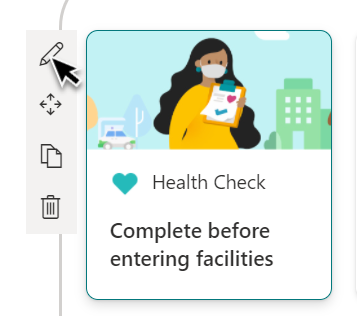
At the bottom of the edit pane, enter the Groups to the Audience to target field. Exit the edit pane when you're done.
Preview the viewing experience for different audiences and devices by selecting Preview from the command bar.
Select audiences to preview as. Be sure to preview the experience for each audience on desktop and mobile devices.
Note
If you've selected an audience group that you recently created or changed, it may take some time to see targeting applied for that group.
While in preview-mode, make sure:
No physical gaps appear between cards while previewing different audiences and devices. If you see gaps, rearrange cards so that every audience and device has a high-quality viewing experience.
Icons, graphics, and images are easy to identify and understand.
Buttons and links are active and go to their intended destinations.
Labels and description text are helpful, easy to read, and make sense for the intended audience.
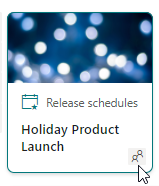
Publish the dashboard when you're done for the audience targeting to take effect. An icon appears on the card indicating audience targeting is applied.
Apply audience targeting to news posts that will display in the feed
Audience targeting is useful when you want to present information that is relevant only to a particular group of people. For example, you can target news stories about a specific project to only team members and stakeholders of the project.
To use audience targeting, you must first enable audience targeting for each pages library that contains the news stories you wish to target. For more information, see the article on enabling audience targeting for your pages library.
Note
Starting September 1, 2024, the feed for Viva Connection web part and the video news link will be removed and unavailable for SharePoint site editors to add to their sites. On November 5, 2024, support for the feed for Viva Connections web part and video news links will end and no longer display content.
Site owners are encouraged to use the News, Viva Engage, File and Media, and Highlighted content web parts, and Video pages as alternatives to using the feed for Viva Connections web part and the video news link. For more information, refer to the Viva Connections Feed web part retirement support guidance documentation.
Apply Audience Targeting to news posts from SharePoint
To apply audience targeting to news posts (site pages) from your SharePoint site:
Access Settings from the SharePoint site where the news is published and select Site contents.
Navigate to the news post you want to apply audiences to and select Properties from the command bar.
Under Audience, enter the Groups you wish to target the news post to. Close the Properties panel when done.
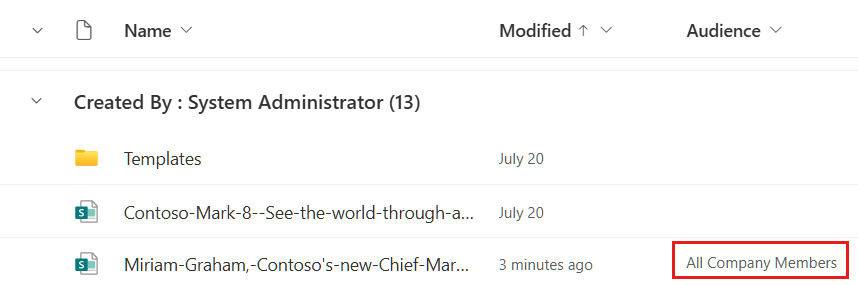
Republish the news post for the audience targeting to take effect. News posts that are targeted to specific audiences will list the groups in the Audience column.
Apply Audience Targeting to news posts from Viva Connections
To apply audience targeting to news posts from Viva Connections:
Navigate to the news post you want to apply audiences to and select Edit.
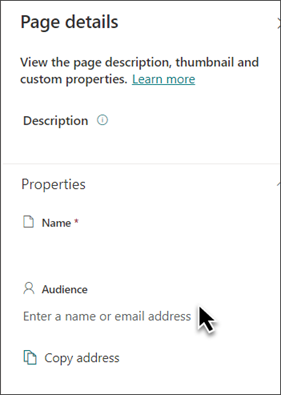
Select Page details from the command bar.
Under Audience, enter the Groups you wish to target the news post to. Close the Properties panel when done.
Select Update news for the audience targeting to take effect.
Apply audience targeting to links in resources
Resources are the navigation links that display beneath the dashboard. You can provide another level of customization to your Resource links by applying audience targeting. Resource links that have audience targeting applied only appear to users who are part of the selected audience.
For example, an organization could use audience targeting to provide a set of resource links for employees working in Human Resources that would only be seen by those users.
Start by selecting Edit in the Resources section of your Connections experience.
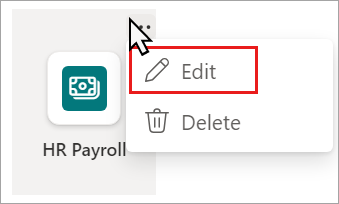
Hover over the resource link and select the ellipsis.
Select Edit.
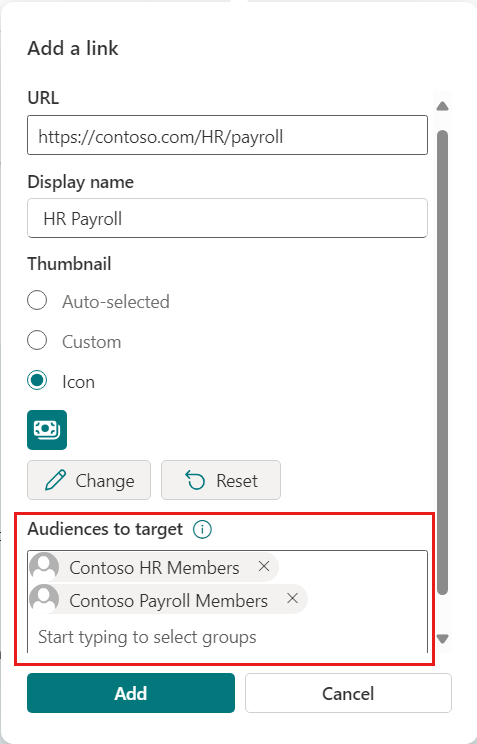
Under Audiences to target, enter the Groups that you want to see the resource link. Up to 10 audiences can be targeted.
Select Save.
Links targeted to specific audiences display an audience targeting icon in the upper left of the resource link.

For more information, see the article on customizing resources.
More resources
Create the Viva Connections dashboard
Frequently asked questions about the Feed for Viva Connections