Guia de início rápido: crie um aplicativo Immersive Reader
O Immersive Reader é uma ferramenta projetada de forma inclusiva que implementa técnicas comprovadas para melhorar a compreensão da leitura para novos leitores, estudantes de idiomas e pessoas com diferenças de aprendizagem, como dislexia. Você pode usar o Immersive Reader em seus aplicativos para isolar o texto para melhorar o foco, exibir imagens para palavras comumente usadas, destacar partes da fala, ler o texto selecionado em voz alta, traduzir palavras e frases em tempo real e muito mais.
Neste guia de início rápido, você cria um aplicativo Web do zero usando C# e integra o Immersive Reader usando a biblioteca do cliente. Uma amostra de trabalho completa deste início rápido está disponível no GitHub.
Pré-requisitos
- Uma subscrição do Azure. Você pode criar um gratuitamente.
- Um recurso do Immersive Reader configurado para autenticação do Microsoft Entra. Siga estas instruções para se configurar. Salve a saída da sessão em um arquivo de texto para que você possa configurar as propriedades do ambiente.
- Visual Studio 2022.
Criar um projeto de aplicação Web
Crie um novo projeto no Visual Studio, usando o modelo ASP.NET Core Web Application com Model-View-Controller interno e ASP.NET Core 6. Nomeie o projeto QuickstartSampleWebApp.


Configurar a autenticação
Clique com o botão direito do mouse no projeto no Gerenciador de Soluções e escolha Gerenciar Segredos do Usuário. Isso abre um arquivo chamado secrets.json. Este arquivo não é verificado no controle do código-fonte. Para saber mais, consulte Armazenamento seguro de segredos de aplicativos. Substitua o conteúdo do secrets.json pelo seguinte, fornecendo os valores fornecidos quando você criou seu recurso Leitor Imersivo.
Importante
Lembre-se de nunca postar segredos publicamente. Para produção, use uma maneira segura de armazenar e acessar suas credenciais, como o Azure Key Vault.
{
  "TenantId": "YOUR_TENANT_ID",
  "ClientId": "YOUR_CLIENT_ID",
  "ClientSecret": "YOUR_CLIENT_SECRET",
  "Subdomain": "YOUR_SUBDOMAIN"
}
Instalar o pacote NuGet do Cliente de Identidade
O código a seguir usa objetos do Microsoft.Identity.Client pacote NuGet, portanto, você precisa adicionar uma referência a esse pacote em seu projeto.
Importante
O pacote NuGet Microsoft.IdentityModel.Clients.ActiveDirectory e a Biblioteca de Autenticação do Azure AD (ADAL) foram preteridos. Nenhum novo recurso foi adicionado desde 30 de junho de 2020. Recomendamos vivamente que atualize. Para obter mais informações, consulte o guia de migração.
Abra o Console do Gerenciador de Pacotes NuGet em Ferramentas -Gerenciador de Pacotes NuGet ->Console do Gerenciador de Pacotes e execute o seguinte comando:>
Install-Package Microsoft.Identity.Client -Version 4.59.0
Atualize o controlador para adquirir o token
Abra Controllers\HomeController.cs e adicione o seguinte código após as using instruções na parte superior do arquivo.
using Microsoft.Identity.Client;
Configure o controlador para obter os valores de ID do Microsoft Entra de secrets.json. Na parte superior da HomeController classe, depois public class HomeController : Controller {de , adicione o seguinte código.
private readonly string TenantId;     // Azure subscription TenantId
private readonly string ClientId;     // Microsoft Entra ApplicationId
private readonly string ClientSecret; // Microsoft Entra Application Service Principal password
private readonly string Subdomain;    // Immersive Reader resource subdomain (resource 'Name' if the resource was created in the Azure portal, or 'CustomSubDomain' option if the resource was created with Azure CLI PowerShell. Check the Azure portal for the subdomain on the Endpoint in the resource Overview page, for example, 'https://[SUBDOMAIN].cognitiveservices.azure.com/')

private IConfidentialClientApplication _confidentialClientApplication;
private IConfidentialClientApplication ConfidentialClientApplication
{
    get {
        if (_confidentialClientApplication == null) {
            _confidentialClientApplication = ConfidentialClientApplicationBuilder.Create(ClientId)
            .WithClientSecret(ClientSecret)
            .WithAuthority($"https://login.windows.net/{TenantId}")
            .Build();
        }

        return _confidentialClientApplication;
    }
}

public HomeController(Microsoft.Extensions.Configuration.IConfiguration configuration)
{
    TenantId = configuration["TenantId"];
    ClientId = configuration["ClientId"];
    ClientSecret = configuration["ClientSecret"];
    Subdomain = configuration["Subdomain"];

    if (string.IsNullOrWhiteSpace(TenantId))
    {
        throw new ArgumentNullException("TenantId is null! Did you add that info to secrets.json?");
    }

    if (string.IsNullOrWhiteSpace(ClientId))
    {
        throw new ArgumentNullException("ClientId is null! Did you add that info to secrets.json?");
    }

    if (string.IsNullOrWhiteSpace(ClientSecret))
    {
        throw new ArgumentNullException("ClientSecret is null! Did you add that info to secrets.json?");
    }

    if (string.IsNullOrWhiteSpace(Subdomain))
    {
        throw new ArgumentNullException("Subdomain is null! Did you add that info to secrets.json?");
    }
}

/// <summary>
/// Get a Microsoft Entra ID authentication token
/// </summary>
public async Task<string> GetTokenAsync()
{
    const string resource = "https://cognitiveservices.azure.com/";

    var authResult = await ConfidentialClientApplication.AcquireTokenForClient(
        new[] { $"{resource}/.default" })
        .ExecuteAsync()
        .ConfigureAwait(false);

    return authResult.AccessToken;
}

[HttpGet]
public async Task<JsonResult> GetTokenAndSubdomain()
{
    try
    {
        string tokenResult = await GetTokenAsync();

        return new JsonResult(new { token = tokenResult, subdomain = Subdomain });
    }
    catch (Exception e)
    {
        string message = "Unable to acquire Microsoft Entra token. Check the console for more information.";
        Debug.WriteLine(message, e);
        return new JsonResult(new { error = message });
    }
}
Adicionar conteúdo de exemplo
Primeiro, abra Views\Shared\Layout.cshtml. Antes da linha </head>, adicione o seguinte código:
@RenderSection("Styles", required: false)
Agora, adicione conteúdo de exemplo a este aplicativo Web. Abra Views\Home\Index.cshtml e substitua todo o código gerado automaticamente por este exemplo:
@{
    ViewData["Title"] = "Immersive Reader C# Quickstart";
}

@section Styles {
    <style type="text/css">
        .immersive-reader-button {
            background-color: white;
            margin-top: 5px;
            border: 1px solid black;
            float: right;
        }
    </style>
}

<div class="container">
    <button class="immersive-reader-button" data-button-style="iconAndText" data-locale="en"></button>

    <h1 id="ir-title">About Immersive Reader</h1>
    <div id="ir-content" lang="en-us">
        <p>
            Immersive Reader is a tool that implements proven techniques to improve reading comprehension for emerging readers, language learners, and people with learning differences.
            The Immersive Reader is designed to make reading more accessible for everyone. The Immersive Reader
            <ul>
                <li>
                    Shows content in a minimal reading view
                </li>
                <li>
                    Displays pictures of commonly used words
                </li>
                <li>
                    Highlights nouns, verbs, adjectives, and adverbs
                </li>
                <li>
                    Reads your content out loud to you
                </li>
                <li>
                    Translates your content into another language
                </li>
                <li>
                    Breaks down words into syllables
                </li>
            </ul>
        </p>
        <h3>
            The Immersive Reader is available in many languages.
        </h3>
        <p lang="es-es">
            El Lector inmersivo está disponible en varios idiomas.
        </p>
        <p lang="zh-cn">
            沉浸式阅读器支持许多语言
        </p>
        <p lang="de-de">
            Der plastische Reader ist in vielen Sprachen verfügbar.
        </p>
        <p lang="ar-eg" dir="rtl" style="text-align:right">
            يتوفر \"القارئ الشامل\" في العديد من اللغات.
        </p>
    </div>
</div>
Observe que todo o texto tem um lang atributo, que descreve os idiomas do texto. Esse atributo ajuda o Immersive Reader a fornecer recursos gramaticais e de linguagem relevantes.
Adicionar JavaScript para lidar com a inicialização do Immersive Reader
A biblioteca do Leitor Imersivo fornece funcionalidades como iniciar o Leitor Imersivo e renderizar botões do Leitor Imersivo. Para saber mais, consulte a referência do SDK do JavaScript.
Na parte inferior de Views\Home\Index.cshtml, adicione o seguinte código:
@section Scripts
{
    <script src="https://ircdname.azureedge.net/immersivereadersdk/immersive-reader-sdk.1.4.0.js"></script>
    <script>
        function getTokenAndSubdomainAsync() {
            return new Promise(function (resolve, reject) {
                $.ajax({
                    url: "@Url.Action("GetTokenAndSubdomain", "Home")",
                    type: "GET",
                    success: function (data) {
                        if (data.error) {
                            reject(data.error);
                        } else {
                            resolve(data);
                        }
                    },
                    error: function (err) {
                        reject(err);
                    }
                });
            });
        }

        $(".immersive-reader-button").click(function () {
            handleLaunchImmersiveReader();
        });

        function handleLaunchImmersiveReader() {
            getTokenAndSubdomainAsync()
                .then(function (response) {
                    const token = response["token"];
                    const subdomain = response["subdomain"];

                    // Learn more about chunk usage and supported MIME types https://learn.microsoft.com/azure/ai-services/immersive-reader/reference#chunk
                    const data = {
                        title: $("#ir-title").text(),
                        chunks: [{
                            content: $("#ir-content").html(),
                            mimeType: "text/html"
                        }]
                    };

                    // Learn more about options https://learn.microsoft.com/azure/ai-services/immersive-reader/reference#options
                    const options = {
                        "onExit": exitCallback,
                        "uiZIndex": 2000
                    };

                    ImmersiveReader.launchAsync(token, subdomain, data, options)
                        .catch(function (error) {
                            alert("Error in launching the Immersive Reader. Check the console.");
                            console.log(error);
                        });
                })
                .catch(function (error) {
                    alert("Error in getting the Immersive Reader token and subdomain. Check the console.");
                    console.log(error);
                });
        }

        function exitCallback() {
            console.log("This is the callback function. It is executed when the Immersive Reader closes.");
        }
    </script>
}
Compilar e executar a aplicação
Na barra de menus, selecione Depurar > Iniciar Depuração ou pressione F5 para iniciar o aplicativo.
No seu navegador, você deve ver:

Inicie o leitor imersivo
Quando você seleciona o botão Leitor Imersivo , o Leitor Imersivo é iniciado com o conteúdo na página.

Próximo passo
Neste início rápido, você cria um aplicativo Web do zero e integra o Immersive Reader usando a biblioteca de cliente do Immersive Reader. Uma amostra de trabalho completa deste início rápido está disponível no GitHub.
Pré-requisitos
- Uma subscrição do Azure. Você pode criar um gratuitamente.
- Um recurso do Immersive Reader configurado para autenticação do Microsoft Entra. Siga estas instruções para se configurar. Salve a saída da sessão em um arquivo de texto para que você possa configurar as propriedades do ambiente.
- Um IDE como o Visual Studio Code.
Criar um aplicativo Web Node.js com o Express
Crie um aplicativo Web Node.js usando a express-generator ferramenta.
npm install express-generator -g
express --view=pug quickstart-nodejs
cd quickstart-nodejs
Instale dependências de fio e adicione dependências request e dotenv.
yarn
yarn add request
yarn add dotenv
Instale o axios e qs bibliotecas.
npm install axios qs
Configurar a autenticação
Crie um novo arquivo chamado .env na raiz do seu projeto. Cole o código a seguir nele, fornecendo os valores fornecidos quando você criou seu recurso Immersive Reader. Não inclua aspas ou os { caracteres e } .
Importante
Lembre-se de nunca postar segredos publicamente. Para produção, use uma maneira segura de armazenar e acessar suas credenciais, como o Azure Key Vault.
TENANT_ID={YOUR_TENANT_ID}
CLIENT_ID={YOUR_CLIENT_ID}
CLIENT_SECRET={YOUR_CLIENT_SECRET}
SUBDOMAIN={YOUR_SUBDOMAIN}
Certifique-se de não comprometer esse arquivo no controle do código-fonte, pois ele contém segredos que não devem ser tornados públicos.
Em seguida, abra app.js e adicione o seguinte código à parte superior do arquivo. Isso carrega as propriedades definidas no arquivo .env como variáveis de ambiente no Node.
require('dotenv').config();
Atualize o roteador para adquirir o token
Abra o arquivo routes\index.js e substitua o código gerado automaticamente pelo código a seguir.
Esse código cria um ponto de extremidade de API que adquire um token de autenticação do Microsoft Entra ID usando sua senha da entidade de serviço. Ele também recupera o subdomínio. Em seguida, ele retorna um objeto que contém o token e o subdomínio.
var axios = require('axios');
var express = require('express');
var router = express.Router();
var qs = require('qs');

/* GET home page. */
router.get('/', function(req, res, next) {
  res.render('index', { title: 'Express' });
});

router.get('/GetTokenAndSubdomain', function(req, res) {
    try {
        var config ={
            headers: {
                'content-type': 'application/x-www-form-urlencoded'
            }
        }
        var data = {
            grant_type: 'client_credentials',
            client_id: process.env.CLIENT_ID,
            client_secret: process.env.CLIENT_SECRET,
            resource: 'https://cognitiveservices.azure.com/'
        };
        var url = `https://login.windows.net/${process.env.TENANT_ID}/oauth2/token`
        console.log(qs.stringify(data));
        axios.post(url, qs.stringify(data), config)
        .then(function (response) {
            var token = response.data.access_token;
            var subdomain = process.env.SUBDOMAIN;
            return res.send({token, subdomain});
        })
        .catch(function (response) {
            if (response.status !== 200) {
                return res.send({error :  "Unable to acquire Microsoft Entra token. Check the debugger for more information."})
            }
        });
    } catch (error) {
        console.log(error);
        return res.status(500).send('CogSvcs IssueToken error');
    }
});

module.exports = router;
O ponto de extremidade da API GetTokenAndSubdomain deve ser protegido por trás de alguma forma de autenticação, como OAuth, para impedir que usuários não autorizados obtenham tokens para usar em seu serviço e cobrança do Immersive Reader, esse trabalho está além do escopo deste início rápido.
Adicionar conteúdo de exemplo
Agora, adicione conteúdo de exemplo a este aplicativo Web. Abra views\index.pug e substitua o código gerado automaticamente por este exemplo:
doctype html
html
   head
      title Immersive Reader Quickstart Node.js

      link(rel='icon', href='data:;base64,iVBORw0KGgo=')

      link(rel='stylesheet', href='https://stackpath.bootstrapcdn.com/bootstrap/3.4.1/css/bootstrap.min.css')

      // A polyfill for Promise is needed for IE11 support.
      script(src='https://cdn.jsdelivr.net/npm/promise-polyfill@8/dist/polyfill.min.js')

      script(src='https://ircdname.azureedge.net/immersivereadersdk/immersive-reader-sdk.1.4.0.js')
      script(src='https://code.jquery.com/jquery-3.3.1.min.js')

      style(type="text/css").
        .immersive-reader-button {
          background-color: white;
          margin-top: 5px;
          border: 1px solid black;
          float: right;
        }
   body
      div(class="container")
        button(class="immersive-reader-button" data-button-style="iconAndText" data-locale="en")

        h1(id="ir-title") About Immersive Reader
        div(id="ir-content" lang="en-us")
          p Immersive Reader is a tool that implements proven techniques to improve reading comprehension for emerging readers, language learners, and people with learning differences. The Immersive Reader is designed to make reading more accessible for everyone. The Immersive Reader

            ul
                li Shows content in a minimal reading view
                li Displays pictures of commonly used words
                li Highlights nouns, verbs, adjectives, and adverbs
                li Reads your content out loud to you
                li Translates your content into another language
                li Breaks down words into syllables

          h3 The Immersive Reader is available in many languages.

          p(lang="es-es") El Lector inmersivo está disponible en varios idiomas.
          p(lang="zh-cn") 沉浸式阅读器支持许多语言
          p(lang="de-de") Der plastische Reader ist in vielen Sprachen verfügbar.
          p(lang="ar-eg" dir="rtl" style="text-align:right") يتوفر \"القارئ الشامل\" في العديد من اللغات.

script(type="text/javascript").
  function getTokenAndSubdomainAsync() {
        return new Promise(function (resolve, reject) {
            $.ajax({
                url: "/GetTokenAndSubdomain",
                type: "GET",
                success: function (data) {
                    if (data.error) {
                        reject(data.error);
                    } else {
                        resolve(data);
                    }
                },
                error: function (err) {
                    reject(err);
                }
            });
        });
    }

    $(".immersive-reader-button").click(function () {
        handleLaunchImmersiveReader();
    });

    function handleLaunchImmersiveReader() {
        getTokenAndSubdomainAsync()
            .then(function (response) {
                const token = response["token"];
                const subdomain = response["subdomain"];
                // Learn more about chunk usage and supported MIME types https://learn.microsoft.com/azure/ai-services/immersive-reader/reference#chunk
                const data = {
                    title: $("#ir-title").text(),
                    chunks: [{
                        content: $("#ir-content").html(),
                        mimeType: "text/html"
                    }]
                };
                // Learn more about options https://learn.microsoft.com/azure/ai-services/immersive-reader/reference#options
                const options = {
                    "onExit": exitCallback,
                    "uiZIndex": 2000
                };
                ImmersiveReader.launchAsync(token, subdomain, data, options)
                    .catch(function (error) {
                        alert("Error in launching the Immersive Reader. Check the console.");
                        console.log(error);
                    });
            })
            .catch(function (error) {
                alert("Error in getting the Immersive Reader token and subdomain. Check the console.");
                console.log(error);
            });
    }

    function exitCallback() {
        console.log("This is the callback function. It is executed when the Immersive Reader closes.");
    }
Observe que todo o texto tem um lang atributo, que descreve os idiomas do texto. Esse atributo ajuda o Immersive Reader a fornecer recursos gramaticais e de linguagem relevantes.
Compilar e executar a aplicação
A nossa aplicação Web está agora pronta. Inicie o aplicativo executando:
npm start
Abra o navegador e navegue até http://localhost:3000. Deverá ver:

Inicie o leitor imersivo
Quando você seleciona o botão Leitor Imersivo , o Leitor Imersivo é iniciado com o conteúdo na página.

Próximo passo
Neste início rápido, você cria um aplicativo Android do zero e integra o Immersive Reader. Uma amostra de trabalho completa deste início rápido está disponível no GitHub.
Pré-requisitos
- Uma subscrição do Azure. Você pode criar um gratuitamente.
- Um recurso do Immersive Reader configurado para autenticação do Microsoft Entra. Siga estas instruções para se configurar. Salve a saída da sessão em um arquivo de texto para que você possa configurar as propriedades do ambiente.
- Git.
- Android Studio.
Criar um projeto Android
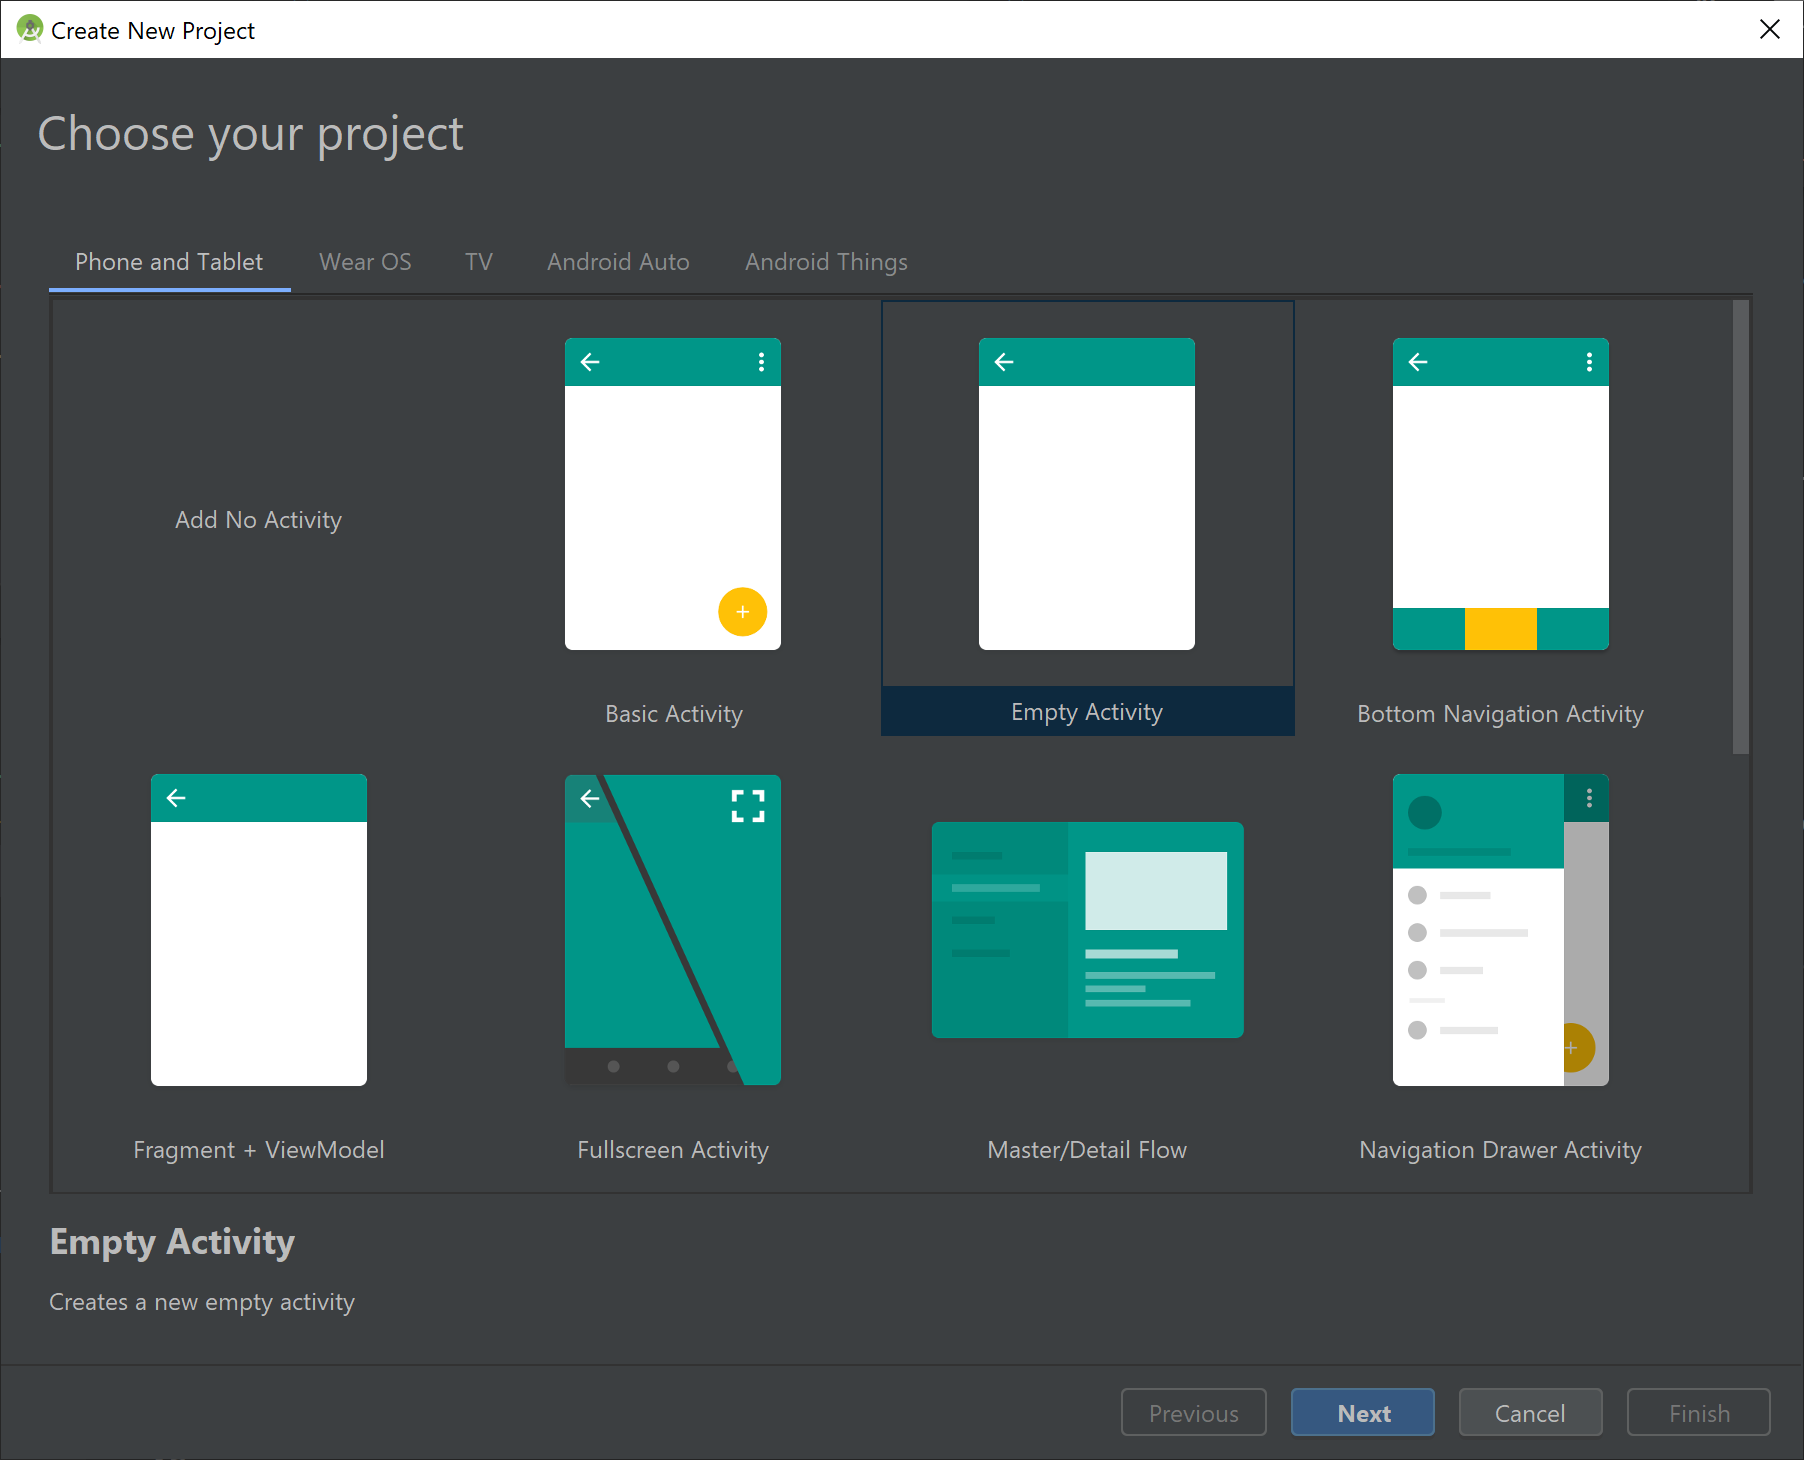
Inicie um novo projeto no Android Studio.

Na janela Modelos, selecione Atividade de Vistas Vazias e, em seguida, selecione Seguinte.
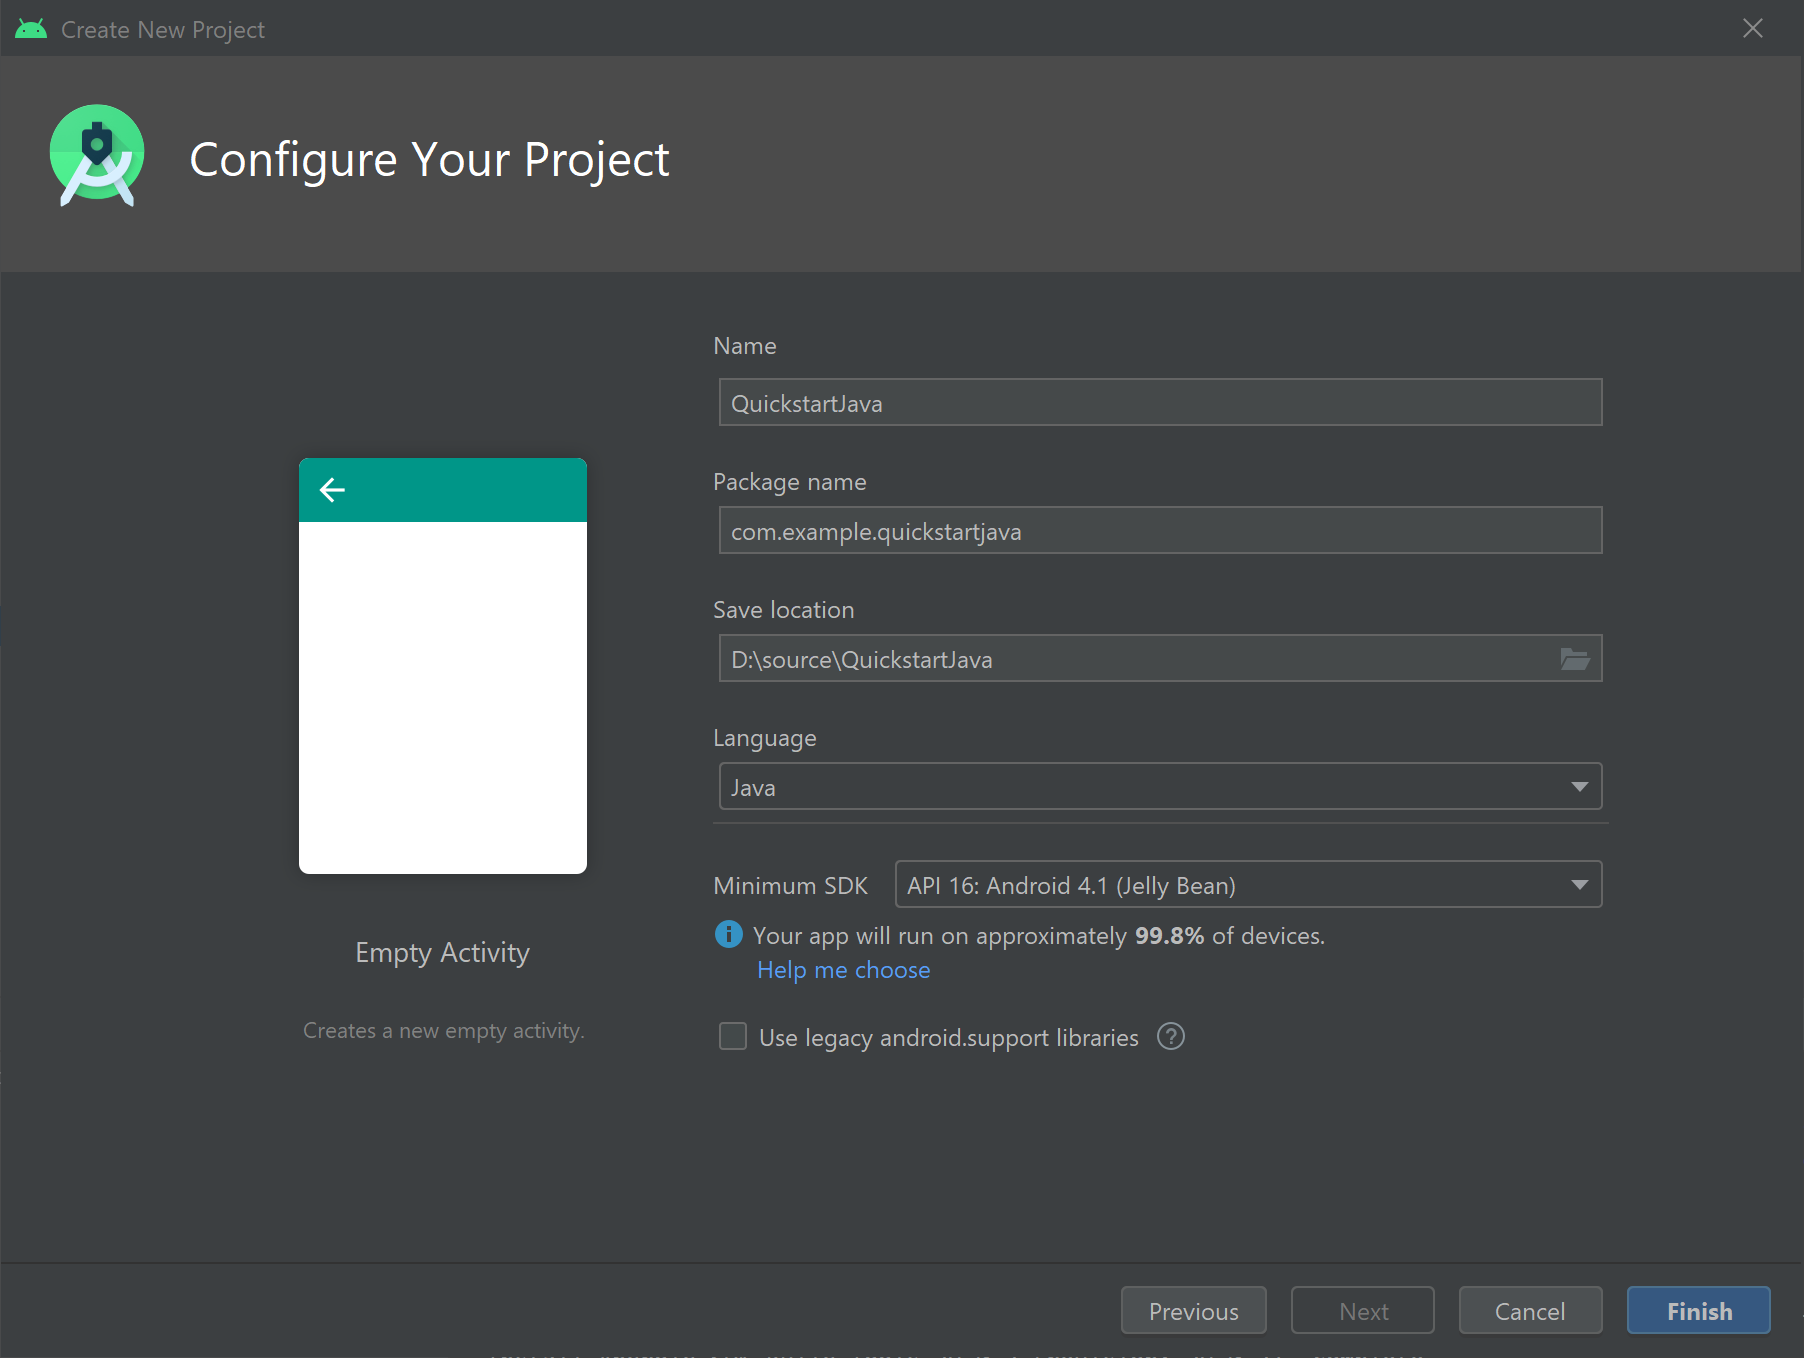
Configurar o projeto
Nomeie o projeto QuickstartJava e selecione um local para salvá-lo. Selecione Java como a linguagem de programação e, em seguida, selecione Concluir.
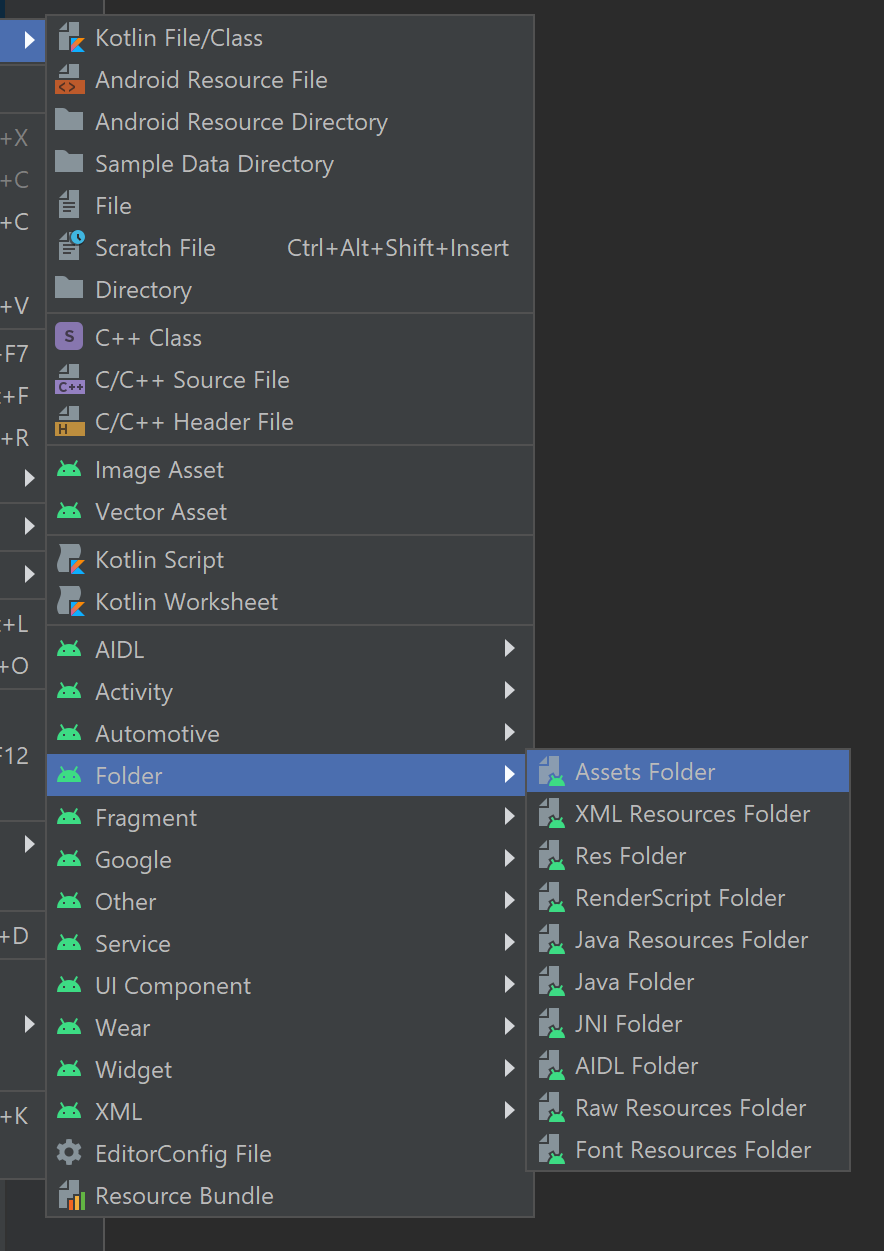
Configurar ativos e autenticação
Para criar uma nova pasta de ativos , clique com o botão direito do mouse no aplicativo e selecione Pasta ->Pasta de ativos na lista suspensa.
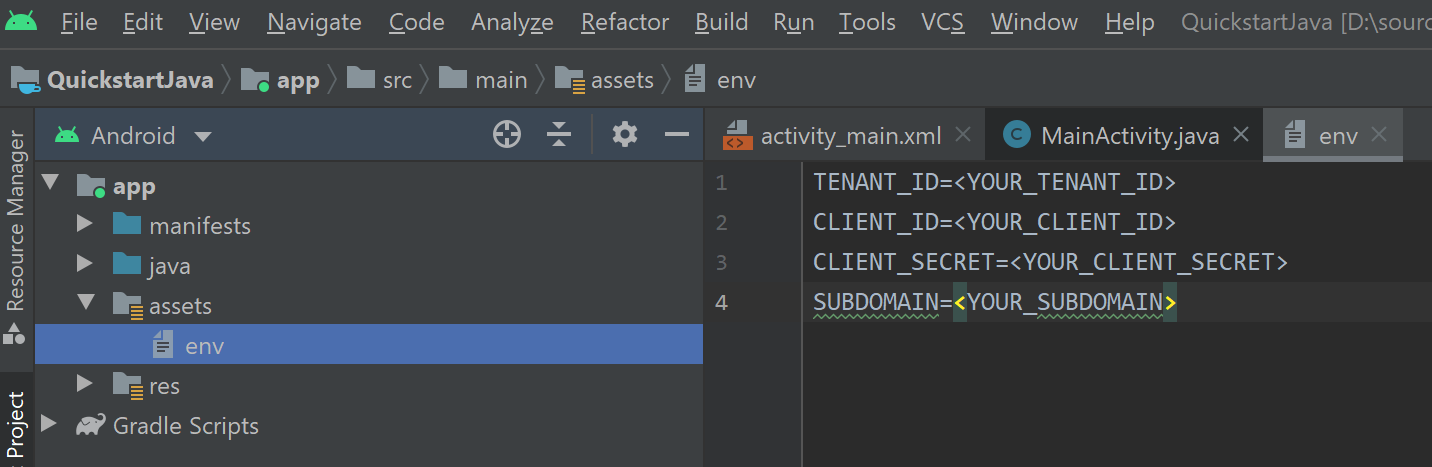
Clique com o botão direito do mouse em ativos e selecione Novo ->Arquivo. Nomeie o arquivo env.

Adicione os seguintes nomes e valores e forneça valores conforme apropriado. Não confirme este arquivo env no controle do código-fonte porque ele contém segredos que não devem ser tornados públicos.
TENANT_ID=<YOUR_TENANT_ID>
CLIENT_ID=<YOUR_CLIENT_ID>
CLIENT_SECRET=<YOUR_CLIENT_SECRET>
SUBDOMAIN=<YOUR_SUBDOMAIN>
Importante
Lembre-se de nunca postar segredos publicamente. Para produção, use uma maneira segura de armazenar e acessar suas credenciais, como o Azure Key Vault.
Adicionar dependências
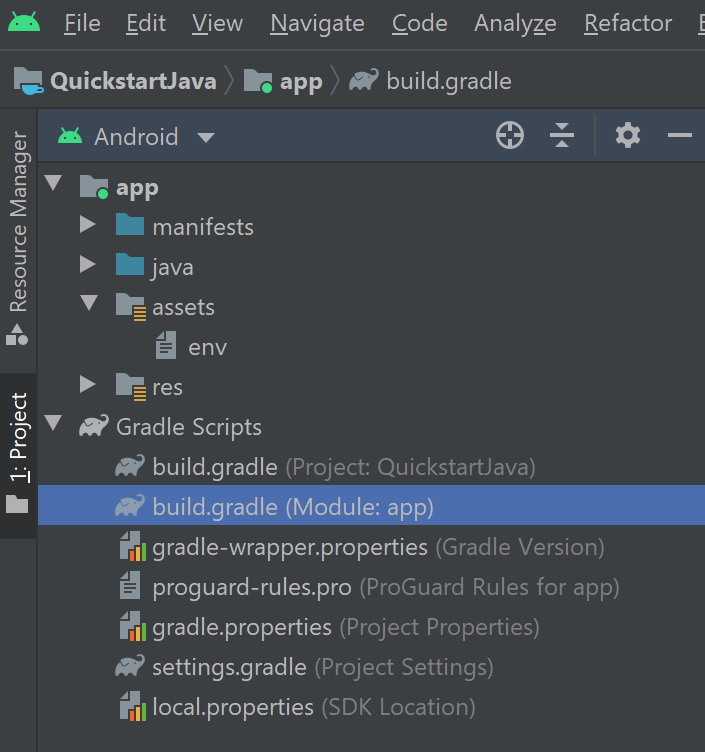
Substitua as dependências existentes no arquivo build.gradle pelas seguintes implementações para habilitar gson (análise JSON e serialização) e dotenv para fazer referência às variáveis definidas no arquivo env. Talvez seja necessário sincronizar o projeto novamente quando implementar atividades posteriormente neste início rápido.
dependencies {
    implementation fileTree(dir: 'libs', include: ['*.jar'])
    implementation 'androidx.appcompat:appcompat:1.0.2'
    implementation 'androidx.constraintlayout:constraintlayout:1.1.3'
    implementation 'com.google.code.gson:gson:2.8.6'
    implementation 'io.github.cdimascio:java-dotenv:5.1.3'
    testImplementation 'junit:junit:4.12'
    androidTestImplementation 'androidx.test.ext:junit:1.1.0'
    androidTestImplementation 'androidx.test.espresso:espresso-core:3.1.1'
}
Atualizar cadeias de caracteres e recursos de layout do aplicativo
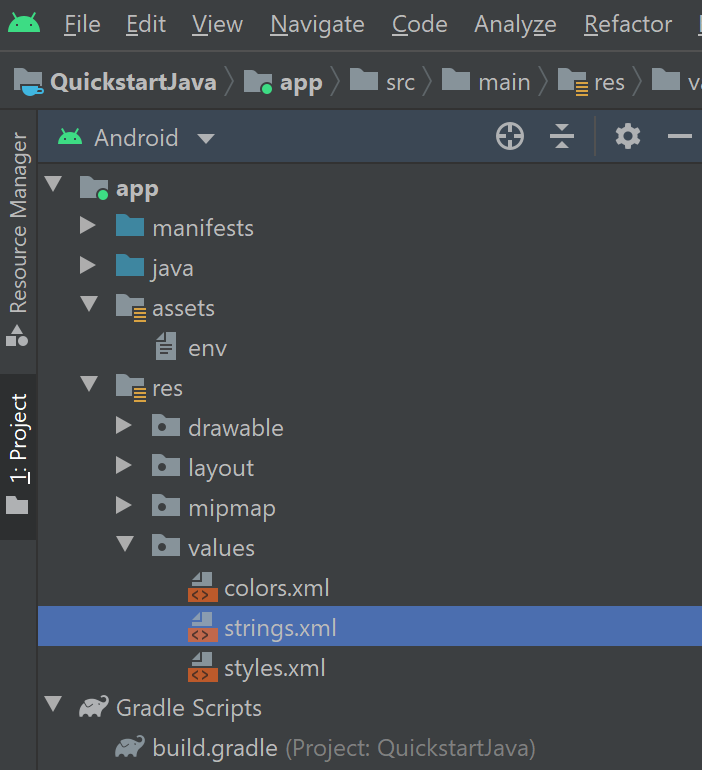
Substitua o conteúdo em res/values/strings.xml pelas seguintes cadeias de caracteres a serem usadas no aplicativo.
<resources>
<!-- Copyright (c) Microsoft Corporation. All rights reserved. -->
<!-- Licensed under the MIT License. -->
<string name="app_name">ImmersiveReaderSDK</string>
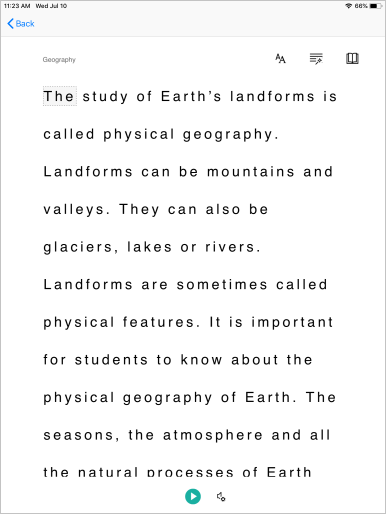
<string name="geographyTitle">Geography</string>
<string name="geographyTextEn">The study of Earth's landforms is called physical geography. Landforms can be mountains and valleys. They can also be glaciers, lakes or rivers. Landforms are sometimes called physical features. It is important for students to know about the physical geography of Earth. The seasons, the atmosphere and all the natural processes of Earth affect where people are able to live. Geography is one of a combination of factors that people use to decide where they want to live. The physical features of a region are often rich in resources. Within a nation, mountain ranges become natural borders for settlement areas. In the U.S., major mountain ranges are the Sierra Nevada, the Rocky Mountains, and the Appalachians. Fresh water sources also influence where people settle. People need water to drink. They also need it for washing. Throughout history, people have settled near fresh water. Living near a water source helps ensure that people have the water they need. There was an added bonus, too. Water could be used as a travel route for people and goods. Many Americans live near popular water sources, such as the Mississippi River, the Colorado River and the Great Lakes.Mountains and deserts have been settled by fewer people than the plains areas. However, they have valuable resources of their own.</string>
<string name="geographyTextFr">L\'étude des reliefs de la Terre est appelée géographie physique. Les reliefs peuvent être des montagnes et des vallées. Il peut aussi s\'agira de glaciers, delacs ou de rivières. Les reliefs sont parfois appelés caractéristiques physiques. Il est important que les élèves connaissent la géographie physique de laTerre. Les saisons, l\'atmosphère et tous les processus naturels de la Terre affectent l\'endroit où les gens sont capables de vivre. La géographie est l\'un desfacteurs que les gens utilisent pour décider où ils veulent vivre. Les caractéristiques physiques d\'une région sont souvent riches en ressources. Àl\'intérieur d\'une nation, les chaînes de montagnes deviennent des frontières naturelles pour les zones de peuplement. Aux États-Unis, les principaleschaînes de montagnes sont la Sierra Nevada, les montagnes Rocheuses et les Appalaches.Les sources d\'eau douce influencent également l\'endroit où lesgens s\'installent. Les gens ont besoin d\'eau pour boire. Ils en ont aussi besoin pour se laver. Tout au long de l\'histoire, les gens se sont installés près del\'eau douce. Vivre près d\'une source d\'eau permet de s\'assurer que les gens ont l\'eau dont ils ont besoin. Il y avait un bonus supplémentaire, aussi. L\'eaupourrait être utilisée comme voie de voyage pour les personnes et les marchandises. Beaucoup d\'Américains vivent près des sources d\'eau populaires,telles que le fleuve Mississippi, le fleuve Colorado et les Grands Lacs.Mountains et les déserts ont été installés par moins de gens que les zones desplaines. Cependant, ils disposent de ressources précieuses.Les gens ont une réponse.</string>
<string name="immersiveReaderButtonText">Immersive Reader</string>
</resources>
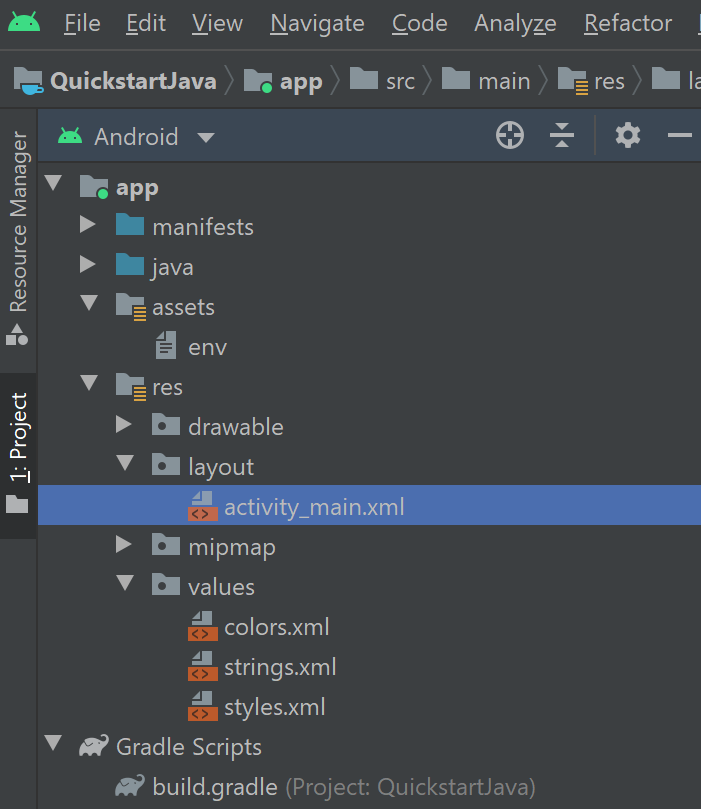
Substitua o conteúdo em res/layout/activity_main.xml pelo seguinte XML a ser usado no aplicativo. Este XML é o layout da interface do usuário do aplicativo. Se você não vir o código no arquivo activity_main.xml, clique com o botão direito do mouse na tela e selecione Ir para XML.
<?xml version="1.0" encoding="utf-8"?>

<!-- Copyright (c) Microsoft Corporation. All rights reserved. -->
<!-- Licensed under the MIT License. -->

<androidx.constraintlayout.widget.ConstraintLayout xmlns:android="http://schemas.android.com/apk/res/android"
    xmlns:app="http://schemas.android.com/apk/res-auto"
    xmlns:tools="http://schemas.android.com/tools"
    android:layout_width="match_parent"
    android:layout_height="match_parent"
    android:background="#FFFFFF"
    tools:context=".MainActivity">

    <LinearLayout
        android:id="@+id/linearLayout"
        android:layout_width="match_parent"
        android:layout_height="0dp"
        android:background="#FFFFFF"
        android:orientation="vertical"
        app:layout_constraintBottom_toBottomOf="parent"
        app:layout_constraintEnd_toEndOf="parent"
        app:layout_constraintHorizontal_bias="0.0"
        app:layout_constraintStart_toStartOf="parent"
        app:layout_constraintTop_toTopOf="parent"
        app:layout_constraintVertical_bias="0.0">

        <TextView
            android:id="@+id/Title"
            android:layout_width="match_parent"
            android:layout_height="wrap_content"
            android:layout_marginLeft="48dp"
            android:layout_marginTop="24dp"
            android:layout_marginRight="48dp"
            android:layout_marginBottom="24dp"
            android:text="@string/geographyTitle"
            android:textSize="24sp"
            android:textStyle="bold" />

        <ScrollView
            android:id="@+id/ContentPane"
            android:layout_width="match_parent"
            android:layout_height="480dp"
            android:layout_marginBottom="48dp"
            android:clipToPadding="false"
            android:fillViewport="false"
            android:paddingLeft="48dp"
            android:paddingRight="48dp"
            android:scrollbarStyle="outsideInset"
            android:visibility="visible"
            tools:visibility="visible">

        <LinearLayout
            android:layout_width="match_parent"
            android:layout_height="match_parent"
            android:orientation="vertical">

            <TextView
                android:id="@+id/Content1"
                android:layout_width="match_parent"
                android:layout_height="wrap_content"
                android:background="#00FFFFFF"
                android:text="@string/geographyTextEn"
                android:textSize="18sp" />

            <TextView
                android:id="@+id/Content2"
                android:layout_width="match_parent"
                android:layout_height="wrap_content"
                android:background="#00FFFFFF"
                android:text="@string/geographyTextFr"
                android:textSize="18sp" />

            </LinearLayout>

        </ScrollView>

        <Button
            android:id="@+id/LaunchImmersiveReaderButton"
            android:layout_width="match_parent"
            android:layout_height="60dp"
            android:layout_marginLeft="40dp"
            android:layout_marginRight="40dp"
            android:layout_marginBottom="80dp"
            android:text="@string/immersiveReaderButtonText"
            android:textAllCaps="false"
            android:textSize="24sp"
            android:visibility="visible"
            tools:visibility="visible" />

    </LinearLayout>

</androidx.constraintlayout.widget.ConstraintLayout>
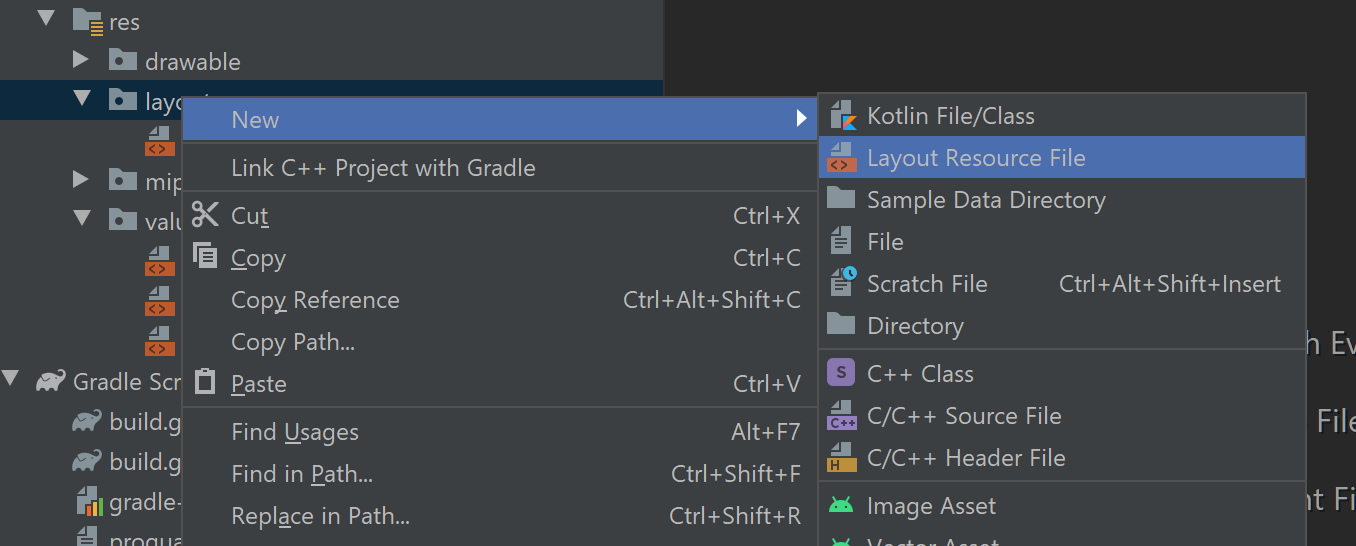
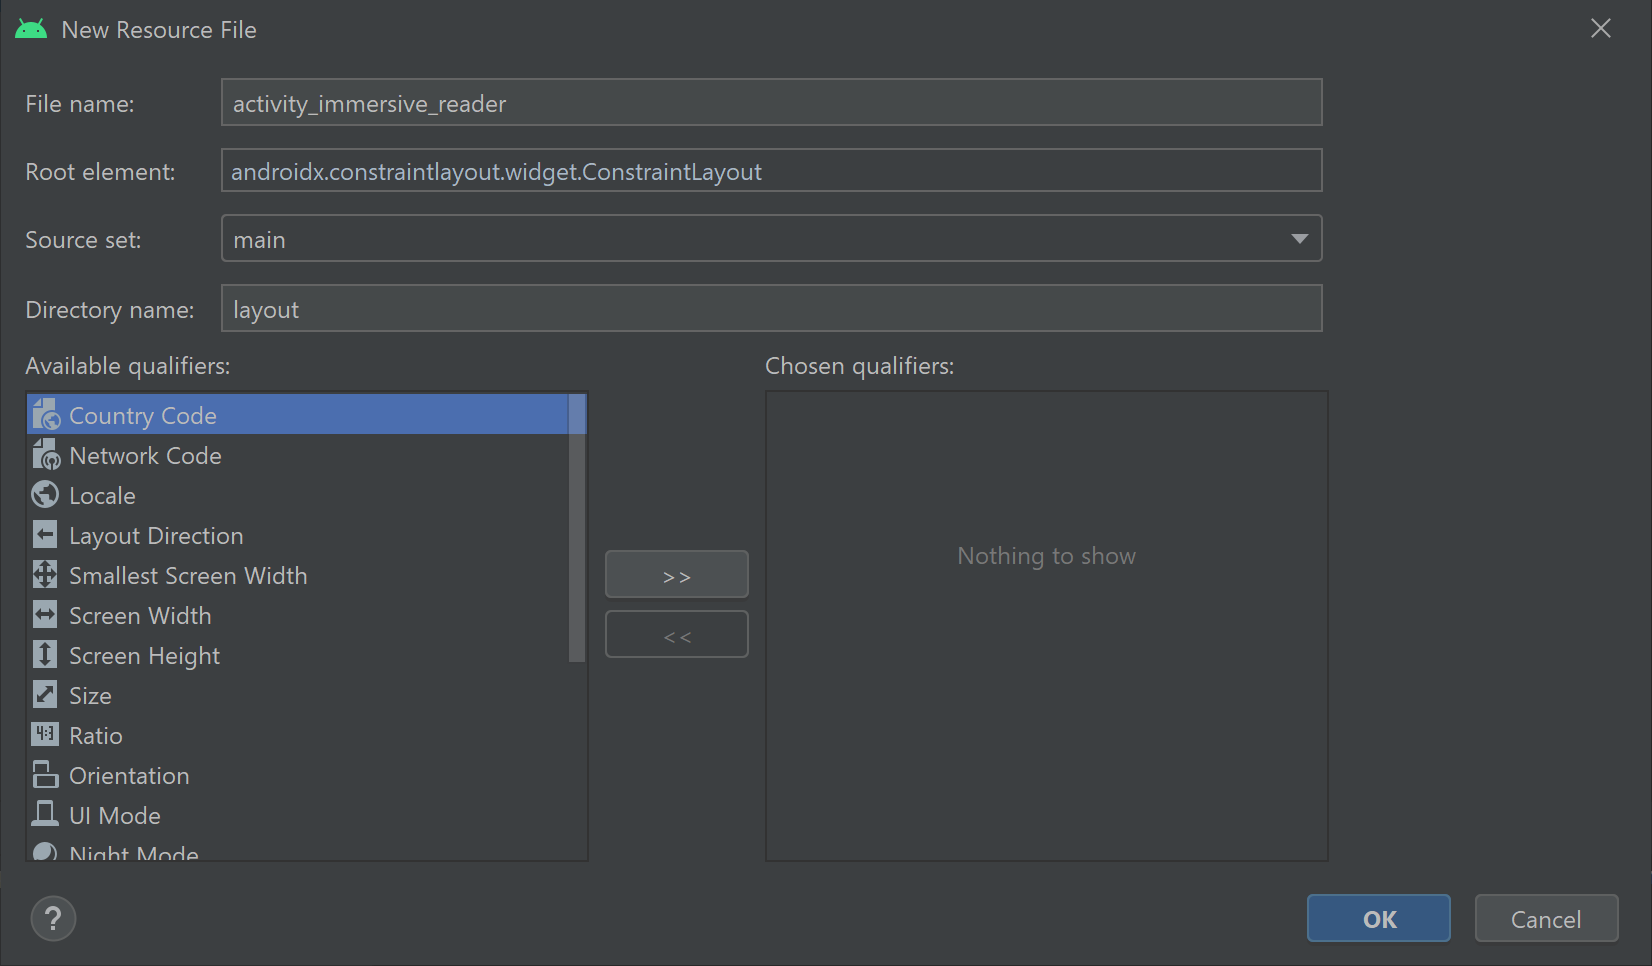
Adicionar o layout do modo de exibição da Web
Na pasta res/layout/, crie um novo arquivo de recurso Layout e nomeie-o activity_immersive_reader. Em seguida, substitua seu conteúdo pelo XML a seguir. Este XML adiciona o componente WebView a ser usado pelo código Java IRActivity em uma etapa posterior. Por enquanto, está indefinido e causa erros.
<?xml version="1.0" encoding="utf-8"?>

<!-- Copyright (c) Microsoft Corporation. All rights reserved. -->
<!-- Licensed under the MIT License. -->

<androidx.constraintlayout.widget.ConstraintLayout xmlns:android="http://schemas.android.com/apk/res/android"
    xmlns:tools="http://schemas.android.com/tools"
    android:layout_width="match_parent"
    android:layout_height="match_parent"
    android:background="#FFFFFF"
    tools:context=".IRActivity">

    <WebView
        android:id="@+id/webView"
        android:layout_width="match_parent"
        android:layout_height="match_parent" />

</androidx.constraintlayout.widget.ConstraintLayout>
Configurar o código Java do aplicativo
Na pasta java/com.example.quickstartjava/, existe um arquivo de classe MainActivity.java Java. Esta pasta é onde a lógica do aplicativo é criada.
Substitua MainActivity.java conteúdo pelo código a seguir. Existem algumas classes referenciadas no código que ainda não existem e serão criadas posteriormente.
/**
 * Copyright (c) Microsoft Corporation. All rights reserved.
 * Licensed under the MIT License.
 */

package com.example.quickstartjava;

import android.app.Activity;
import android.os.Bundle;
import android.view.View;
import android.widget.Button;
import android.widget.TextView;

import java.util.ArrayList;
import java.util.List;

/**
 * Creates a new activity, finds its content and the Immersive Reader button.
 * When clicked, the app sends the content to the Immersive Reader SDK and
 * launches the Immersive Reader.
 */
public class MainActivity extends Activity {

    @Override
    public void onCreate(Bundle savedInstanceState) {
        super.onCreate(savedInstanceState);
        setContentView(R.layout.activity_main);
        final TextView irTitle = findViewById(R.id.Title);
        final TextView irText1 = findViewById(R.id.Content1);
        final TextView irText2 = findViewById(R.id.Content2);

        final Button immersiveReaderButton = findViewById(R.id.LaunchImmersiveReaderButton);
        immersiveReaderButton.setOnClickListener(new View.OnClickListener() {
            @Override
            public void onClick(View view) {
                List<ReadableTextChunk> readableTextChunks = new ArrayList<>();
                readableTextChunks.add(new ReadableTextChunk(irText1.getText().toString(), "en"));
                readableTextChunks.add(new ReadableTextChunk(irText2.getText().toString(), "fr"));
                ReadableContent readableContent = new ReadableContent(irTitle.getText().toString(), readableTextChunks);

                ImmersiveReader immersiveReader = new ImmersiveReader(MainActivity.this, new IRAuthenticator());
                immersiveReader.read(readableContent);
            }
        });
    }
}
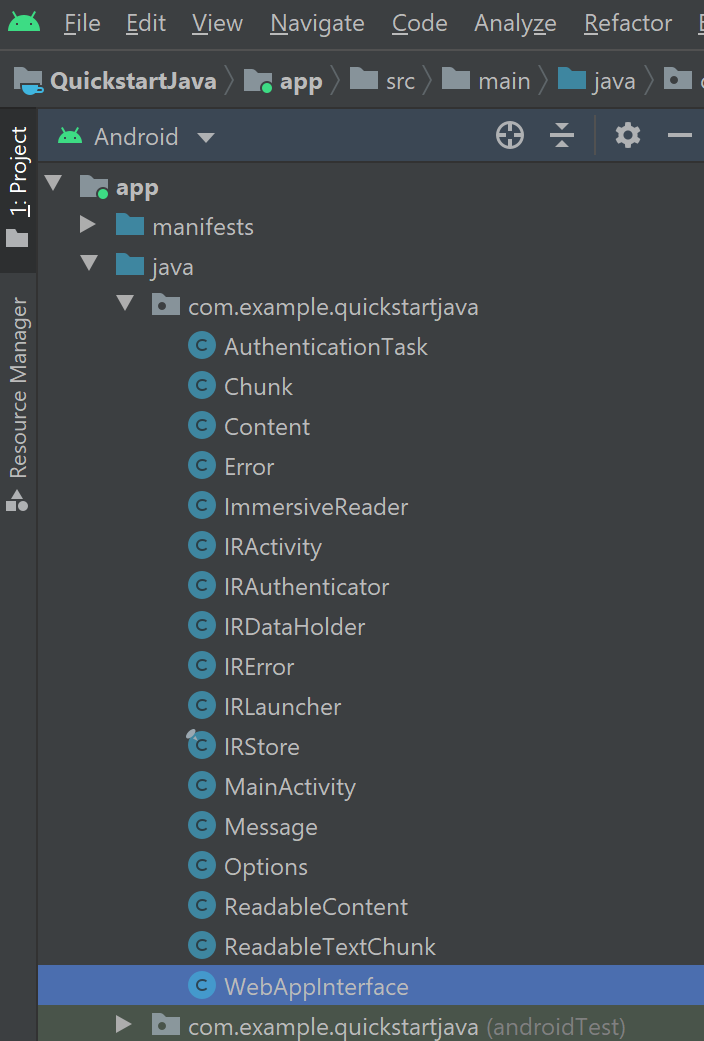
Criaremos mais 16 arquivos de classe Java na pasta java/com.example.quickstartjava/ . Cada uma dessas classes é usada pelo aplicativo para integrar o Immersive Reader SDK. Com cada novo arquivo, há algumas classes referenciadas no código que ainda não existem e serão criadas posteriormente. Depois que todas as classes são criadas, não deve haver erros de referência nulos.
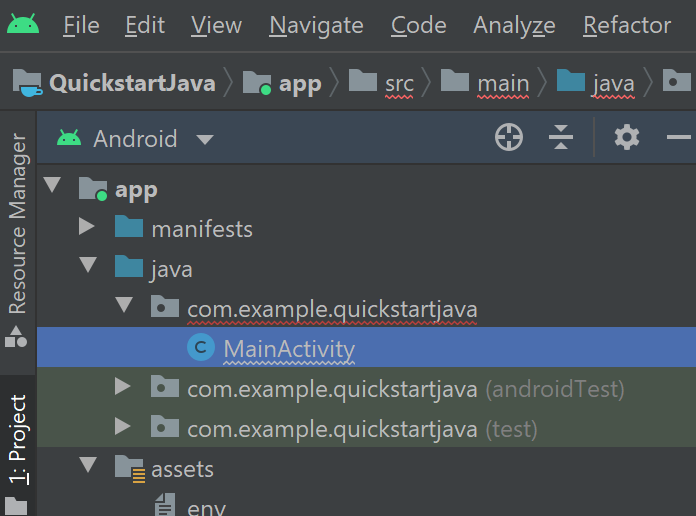
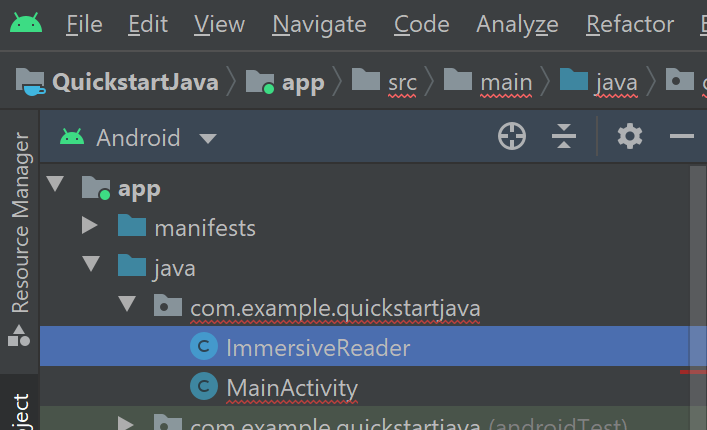
Para criar um novo arquivo de classe Java ImmersiveReader.java , clique com o botão direito do mouse na pasta java/com.example.quickstartjava/ , selecione Novo e, em seguida, selecione Classe Java. Entre em ImmersiveReader.
Use esse mesmo método para criar arquivos de classe Java para cada novo arquivo de classe Java criado.
Substitua ImmersiveReader.java conteúdo pelo seguinte código:
/**
 * Copyright (c) Microsoft Corporation. All rights reserved.
 * Licensed under the MIT License.
 */

package com.example.quickstartjava;

import android.app.Activity;
import android.content.Intent;
import androidx.annotation.Keep;

import java.lang.ref.WeakReference;

/**
 * This is the client facing class for invoking the new Immersive Reader functionality.
 * Usage:
 * ImmersiveReader immersiveReader = new ImmersiveReader(Activity, IRAuthenticator);
 * immersiveReader.read(ReadableTextChunk);
 */

@Keep
public class ImmersiveReader {

    WeakReference<Activity> mActivityWR;

    /**
     * Interface to accept access token from client app.
     * Note that it is client's responsibility to give a valid Access Token whenever getAccessToken() is requested.
     * In favor of latency perf, there would be no further validation by Immersive Reader module except to ensure that the provided access token is non-empty string
     */
    @Keep
    public interface IAuthenticator {
        String getAccessToken();
    }

    public ImmersiveReader(Activity activity, IAuthenticator authenticator) {
        mActivityWR = new WeakReference<>(activity);
        IRDataHolder.getInstance().setAuthenticator(authenticator);
    }

    public ImmersiveReader(Activity activity) {
        this(activity, null);
    }

    /**
     * Launches a new activity to speak the content as described by ReadableContent object.
     *
     * @param dataToRead - Content to be read
     * @return IRError - IRError, with following error codes:
     * a) Error.NONE in case of successful launch of Immersive Reader
     * b) Error.INVALID_ACCESS_TOKEN in case of empty access token
     * c) Error.INVALID_STATE in case of empty activity
     * d) Error.INVALID_CONTENT in case of empty list of text chunks
     */

    public IRError read(ReadableContent dataToRead) {

        Activity activity = mActivityWR.get();
        if (activity == null) {
            return new IRError(Error.INVALID_STATE, "Client activity is null");
        }

        if (dataToRead == null || dataToRead.getTextChunks().size() == 0) {
            return new IRError(Error.INVALID_CONTENT, "Readable Text Chunks not passed to Immersive Reader");
        }

        IRDataHolder.getInstance().setContentToRead(dataToRead);
        Intent intent = new Intent(mActivityWR.get(), IRActivity.class);
        activity.startActivity(intent);

        return new IRError(Error.NONE, "Immersive Reader launched");
    }

}
Crie um novo arquivo de classe IRActivity.java Java.
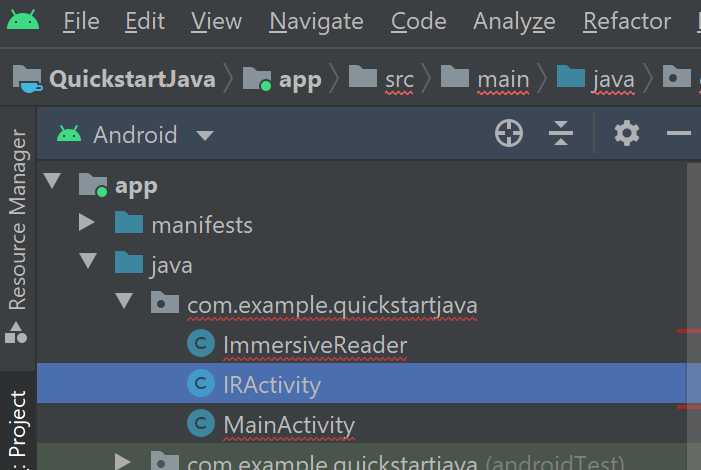
Substitua IRActivity.java conteúdo pelo seguinte código:
/**
 * Copyright (c) Microsoft Corporation. All rights reserved.
 * Licensed under the MIT License.
 */

package com.example.quickstartjava;

import android.app.Activity;
import android.content.Intent;
import androidx.annotation.Keep;

import java.lang.ref.WeakReference;

/**
 * This is the client facing class for invoking the new Immersive Reader functionality.
 * Usage:
 * ImmersiveReader immersiveReader = new ImmersiveReader(Activity, IRAuthenticator);
 * immersiveReader.read(ReadableTextChunk);
 */

@Keep
public class ImmersiveReader {

    WeakReference<Activity> mActivityWR;

    /**
     * Interface to accept access token from client app.
     * Note that it is the client's responsibility to give a valid Access Token whenever getAccessToken() is requested.
     * In favor of latency perf, there would be no further validation by Immersive Reader module except to ensure that the provided access token is non-empty string.
     */
    @Keep
    public interface IAuthenticator {
        String getAccessToken();
    }

    public ImmersiveReader(Activity activity, IAuthenticator authenticator) {
        mActivityWR = new WeakReference<>(activity);
        IRDataHolder.getInstance().setAuthenticator(authenticator);
    }

    public ImmersiveReader(Activity activity) {
        this(activity, null);
    }

    /**
     * Launches a new activity to speak the content as described by ReadableContent object.
     *
     * @param dataToRead - Content to be read
     * @return IRError - IRError, with following error codes:
     * a) Error.NONE in case of successful launch of Immersive Reader
     * b) Error.INVALID_ACCESS_TOKEN in case of empty access token.
     * c) Error.INVALID_STATE in case of empty activity
     * d) Error.INVALID_CONTENT in case of empty list of text chunks
     */

    public IRError read(ReadableContent dataToRead) {

        Activity activity = mActivityWR.get();
        if (activity == null) {
            return new IRError(Error.INVALID_STATE, "Client activity is null");
        }

        if (dataToRead == null || dataToRead.getTextChunks().size() == 0) {
            return new IRError(Error.INVALID_CONTENT, "Readable Text Chunks not passed to Immersive Reader");
        }

        IRDataHolder.getInstance().setContentToRead(dataToRead);
        Intent intent = new Intent(mActivityWR.get(), IRActivity.class);
        activity.startActivity(intent);

        return new IRError(Error.NONE, "Immersive Reader launched");
    }

}
Crie um novo arquivo de classe IRError.java Java.

Substitua IRError.java conteúdo pelo seguinte código:
/**
 * Copyright (c) Microsoft Corporation. All rights reserved.
 * Licensed under the MIT License.
 */

package com.example.quickstartjava;

import android.os.Parcel;
import android.os.Parcelable;
import androidx.annotation.Keep;

/**
 * Shared error handling of the app.
 */

@Keep
public class IRError implements Parcelable {

    private int errorId;
    private String errorMessage = "";

    public String getErrorMessage() {
        return errorMessage;
    }

    public void setErrorMessage(String errorMessage) {
        this.errorMessage = errorMessage;
    }

    public int getErrorId() {
        return errorId;
    }

    public void setErrorId(int errorId) {
        this.errorId = errorId;
    }

    public IRError(int errorId, String errorMessage) {
        this.errorId = errorId;
        this.errorMessage = errorMessage;
    }

    // parcelable
    @Override
    public int describeContents() {
        return 0;
    }

    @Override
    public void writeToParcel(Parcel out, int flags) {
        out.writeInt(this.errorId);
        out.writeString(this.errorMessage);
    }

    public static final Creator<IRError> CREATOR
            = new Creator<IRError>() {
        public IRError createFromParcel(Parcel in) {
            return new IRError(in);
        }

        public IRError[] newArray(int size) {
            return new IRError[size];
        }
    };

    private IRError(Parcel in) {
        this.errorId = in.readInt();
        this.errorMessage = in.readString();
    }
}
Crie um novo arquivo de classe Error.java Java.

Substitua Error.java conteúdo pelo seguinte código:
/**
 * Copyright (c) Microsoft Corporation. All rights reserved.
 * Licensed under the MIT License.
 */

package com.example.quickstartjava;

import androidx.annotation.Keep;

/**
 * Adds some default error status codes.
 */

@Keep
public class Error {

    public static final int NONE = 1000;
    public static final int INVALID_ACCESS_TOKEN = 8001;
    public static final int INVALID_STATE = 8002;
    public static final int INVALID_CONTENT = 8003;

}
Crie um novo arquivo de classe ReadableContent.java Java.
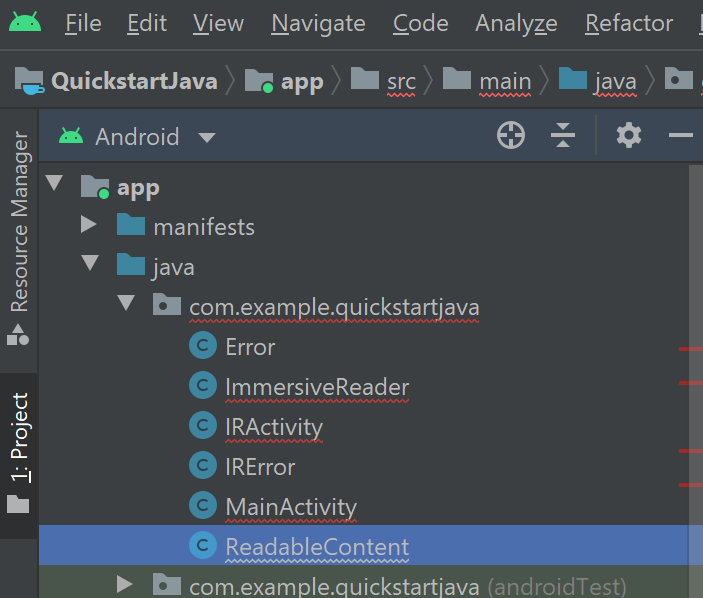
Substitua ReadableContent.java conteúdo pelo seguinte código:
/**
 * Copyright (c) Microsoft Corporation. All rights reserved.
 * Licensed under the MIT License.
 */

package com.example.quickstartjava;

import androidx.annotation.Keep;

import java.util.List;

/**
 * Content data to be sent to the Immersive Reader SDK
 */

@Keep
public class ReadableContent {

    private String mTitle;
    private List<ReadableTextChunk> mTextChunks;

    public ReadableContent(String title, List<ReadableTextChunk> textChunks) {
        this.mTitle = title;
        this.mTextChunks = textChunks;
    }

    public String getTitle() {
        return mTitle;
    }

    public List<ReadableTextChunk> getTextChunks() {
        return mTextChunks;
    }

}
Crie um novo arquivo de classe ReadableTextChunk.java Java.
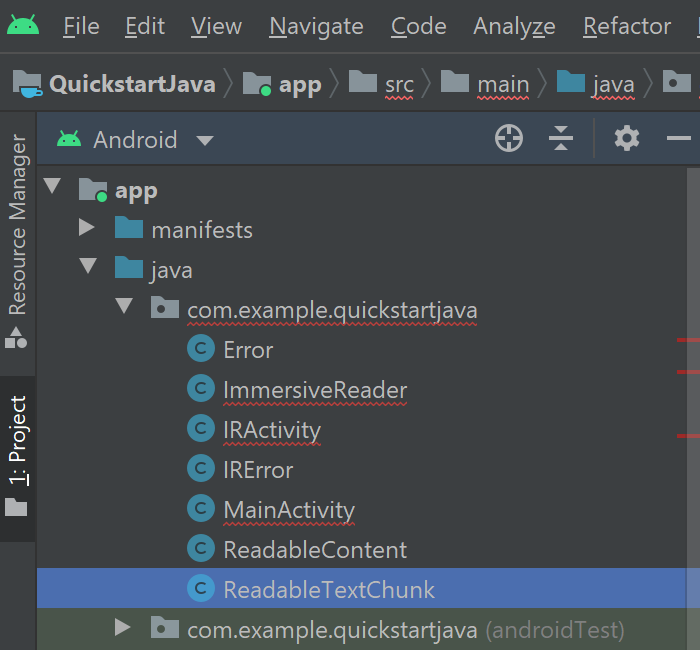
Substitua ReadableTextChunk.java conteúdo pelo seguinte código:
/**
 * Copyright (c) Microsoft Corporation. All rights reserved.
 * Licensed under the MIT License.
 */

import androidx.annotation.Keep;

/**
 * Content sent to the Immersive Reader SDK may be separated into chunks so that there may be
 * different types of content sent in the same document. This includes content of different
 * languages, math content, et cetera.
 */

@Keep
public class ReadableTextChunk {
    public String mText;
    public String mLocale;

    public ReadableTextChunk(String text, String locale) {
        this.mText = text;
        this.mLocale = locale;
    }
}
Crie um novo arquivo de classe IRDataHolder.java Java.
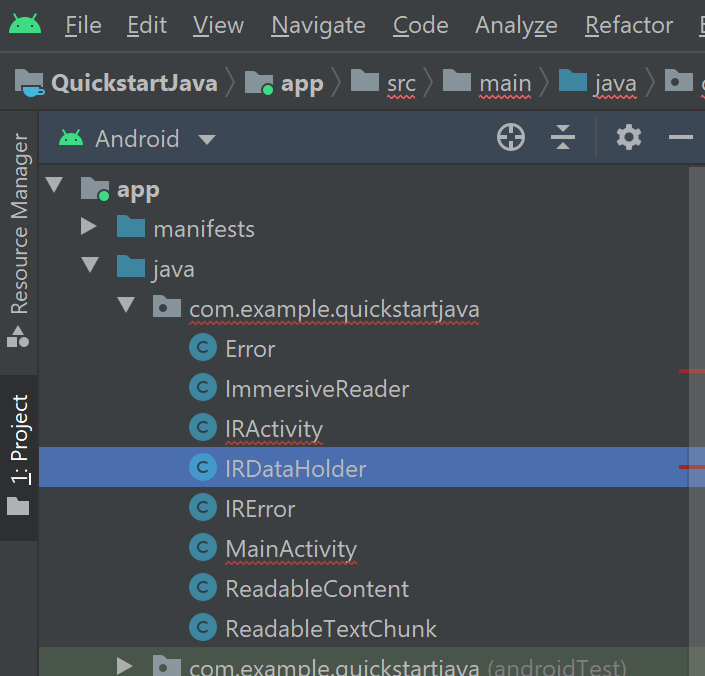
Substitua IRDataHolder.java conteúdo pelo seguinte código:
/**
 * Copyright (c) Microsoft Corporation. All rights reserved.
 * Licensed under the MIT License.
 */

package com.example.quickstartjava;

import androidx.annotation.Keep;

/**
 * A thin singleton class that is used to hold the Client's IAuthenticator's implementation and the Content to be read.
 * This is required for two reasons:
 * 1) As per Android guidelines, data being passed via intent should be limited to a few KBs. Alternative is to use Singleton holder classes like this one.
 * 2) We need a way to make callbacks survive app configuration changes and killed in background scenarios.
 */

@Keep
public class IRDataHolder {

    private static IRDataHolder mInstance = null;
    private ReadableContent mActiveContent = null;
    private ImmersiveReader.IAuthenticator mAuthenticator = null;

    public static IRDataHolder getInstance() {

        if (mInstance == null) {
            synchronized (IRDataHolder.class) {
                if (mInstance == null) {
                    mInstance = new IRDataHolder();
                }
            }
        }
        return mInstance;
    }

    public void setContentToRead(ReadableContent content) {
        mActiveContent = content;
    }

    public ReadableContent getContentToRead() {
        return mActiveContent;
    }

    public ImmersiveReader.IAuthenticator getAuthenticator() {
        return mAuthenticator;
    }

    public void setAuthenticator(ImmersiveReader.IAuthenticator accessTokenProvider) {
        this.mAuthenticator = accessTokenProvider;
    }

    public void clearContent() {
        mActiveContent = null;
    }

}
Crie um novo arquivo de classe IRAuthenticator.java Java.
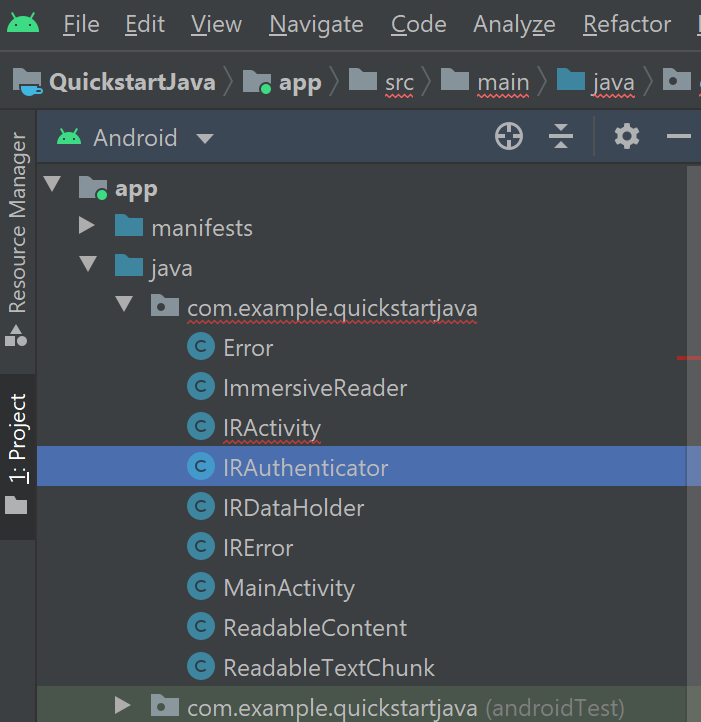
Substitua IRAuthenticator.java conteúdo pelo seguinte código:
/**
 * Copyright (c) Microsoft Corporation. All rights reserved.
 * Licensed under the MIT License.
 */

package com.example.quickstartjava;

import android.text.TextUtils;
import android.util.Log;

import org.json.JSONException;
import org.json.JSONObject;

import io.github.cdimascio.dotenv.Dotenv;
import java.io.BufferedReader;
import java.io.DataOutputStream;
import java.io.IOException;
import java.io.InputStreamReader;
import java.net.HttpURLConnection;
import java.net.MalformedURLException;
import java.net.URL;

import static java.net.HttpURLConnection.HTTP_OK;

// This sample app uses the Dotenv. It's a module that loads environment variables from a .env file to better manage secrets.
// https://github.com/cdimascio/java-dotenv
// Be sure to add a "env" file to the /assets folder.
// Instead of '.env', use 'env'.

public class IRAuthenticator implements ImmersiveReader.IAuthenticator {
    private static final String LOG_TAG = "IRAuthenticator";
    Dotenv dotEnv = Dotenv.configure()
            .directory("/assets")
            .filename("env")
            .ignoreIfMalformed()
            .ignoreIfMissing()
            .load();

    @Override
    public String getAccessToken() {
        String clientId = dotEnv.get("CLIENT_ID");
        String clientSecret = dotEnv.get("CLIENT_SECRET");
        String tenantId = dotEnv.get("TENANT_ID");
        String accessToken = null;

        try {
            StringBuilder urlStringBuilder = new StringBuilder();
            urlStringBuilder.append("https://login.windows.net/");
            urlStringBuilder.append(tenantId);
            urlStringBuilder.append("/oauth2/token");
            URL tokenUrl = new URL(urlStringBuilder.toString());

            StringBuilder formStringBuilder = new StringBuilder();
            formStringBuilder.append("grant_type=client_credentials&resource=https://cognitiveservices.azure.com/&client_id=");
            formStringBuilder.append(clientId);
            formStringBuilder.append("&client_secret=");
            formStringBuilder.append(clientSecret);
            String form = formStringBuilder.toString();

            HttpURLConnection httpURLConnection = (HttpURLConnection) tokenUrl.openConnection();
            httpURLConnection.setRequestMethod("POST");
            httpURLConnection.setRequestProperty("content-type", "application/x-www-form-urlencoded");
            httpURLConnection.setDoOutput(true);

            DataOutputStream dataOutputStream = new DataOutputStream(httpURLConnection.getOutputStream());
            dataOutputStream.writeBytes(form);
            dataOutputStream.flush();
            dataOutputStream.close();

            int responseCode = httpURLConnection.getResponseCode();

            if (responseCode == HTTP_OK) {
                BufferedReader bufferedReader = new BufferedReader(new InputStreamReader(httpURLConnection.getInputStream()));
                StringBuffer response = new StringBuffer();

                String line = bufferedReader.readLine();
                while (!TextUtils.isEmpty(line)) {
                    response.append(line);
                    line = bufferedReader.readLine();
                }

                bufferedReader.close();

                JSONObject accessTokenJson = new JSONObject(response.toString());
                accessToken = accessTokenJson.getString("access_token");
            }

        } catch (MalformedURLException e) {
            e.printStackTrace();
        } catch (IOException e) {
            e.printStackTrace();
        } catch (JSONException e) {
            e.printStackTrace();
        }

        //  accessToken = Constants.ACCESS_TOKEN;
        Log.i(LOG_TAG, "Accesstoken: " + accessToken);
        return accessToken;
    }
}
Crie um novo arquivo de classe IRLauncher.java Java.
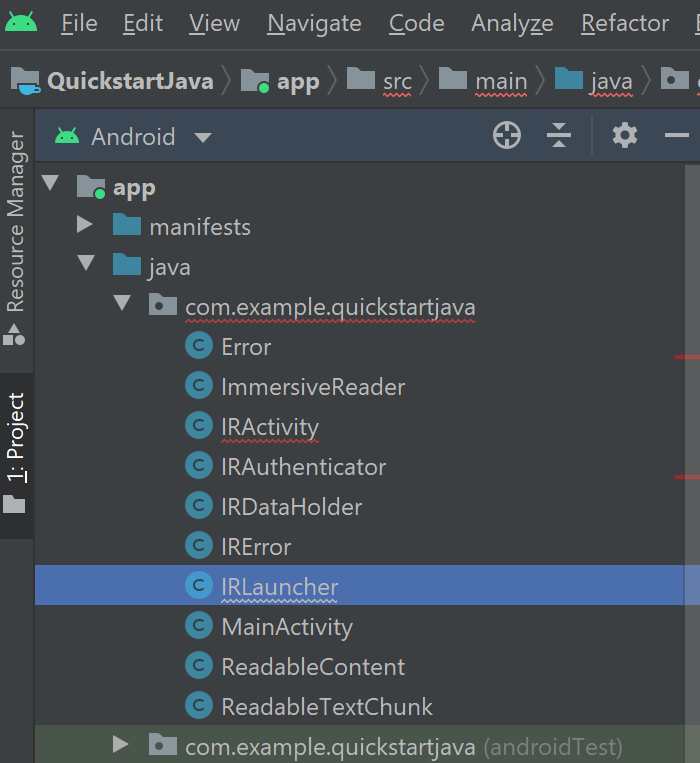
Substitua IRLauncher.java conteúdo pelo seguinte código:
/**
 * Copyright (c) Microsoft Corporation. All rights reserved.
 * Licensed under the MIT License.
 */

package com.example.quickstartjava;

import android.content.Context;
import android.os.Build;
import android.text.TextUtils;
import android.view.View;
import android.webkit.CookieManager;
import android.webkit.WebView;
import android.webkit.WebViewClient;
import android.widget.Toast;

import com.google.gson.Gson;
import com.google.gson.GsonBuilder;

import java.util.ArrayList;
import java.util.Date;
import java.util.List;
import java.util.concurrent.Callable;

import io.github.cdimascio.dotenv.Dotenv;

/**
 * Responsible for setting up the web view with appropriate bridging between JavaScript and Java to launch the Immersive Reader url for reading the content.
 */

public class IRLauncher {
    Dotenv dotEnv = Dotenv.configure()
            .directory("/assets")
            .filename("env")
            .ignoreIfMalformed()
            .ignoreIfMissing()
            .load();

    private WebView mWebView;
    private Context mContext;
    public final String SUBDOMAIN = dotEnv.get("SUBDOMAIN");

    interface IRLaunchListener {

        // Invoked in case of successful launch of Immersive Reader Activity. Note that content reading can still fail due to multiple reasons including expired access token.
        void onSuccess();

        // Invoked in case of empty access token or empty content request to be read
        void onFailure(IRError error);

        // Invoked when Immersive Reader is exiting (e.g.) user pressed back in the Immersive Reader experience
        void onExit();
    }

    public IRLauncher(Context context, WebView webView) {
        this.mContext = context;
        this.mWebView = webView;
    }

    public void launch(final IRLaunchListener launchListener) {

        AuthenticationTask authenticationTask = new AuthenticationTask();
        AuthenticationTask.TaskParams params = authenticationTask.new TaskParams(IRDataHolder.getInstance().getAuthenticator(), new AuthenticationTask.ITaskListener() {
            @Override
            public void onAccessTokenObtained(String accessToken) {

                // Basic validation for access token
                if (TextUtils.isEmpty(accessToken)) {
                    launchListener.onFailure(new IRError(Error.INVALID_ACCESS_TOKEN, "Access token is empty"));
                }

                // Create list of chunks from data that was passed originally by the client and stored in the data holder
                List<Chunk> chunkList = new ArrayList<>();
                for (ReadableTextChunk textChunk : IRDataHolder.getInstance().getContentToRead().getTextChunks()) {
                    chunkList.add(new Chunk(textChunk.mText, textChunk.mLocale, "text/plain"));
                }
                Content content = new Content(IRDataHolder.getInstance().getContentToRead().getTitle(), chunkList);
                Options options = new Options(new Callable<Void>() {
                    public Void call() {
                        launchListener.onExit();
                        return null;
                    }
                }, "en", 0);

                // Prepare the webview
                prepareWebView(accessToken, content, options, launchListener);
                mWebView.loadUrl("file:///android_asset/immersiveReader.html");
                launchListener.onSuccess();
            }
        });

        authenticationTask.setParams(params);
        authenticationTask.execute();
    }

    private void prepareWebView(String accessToken, Content content, Options options, final IRLaunchListener launchListener) {
        mWebView.getSettings().setAllowContentAccess(true);
        mWebView.getSettings().setJavaScriptEnabled(true);
        mWebView.getSettings().setLoadsImagesAutomatically(true);
        mWebView.getSettings().setLoadWithOverviewMode(true);
        mWebView.getSettings().setUseWideViewPort(true);
        mWebView.getSettings().setUserAgentString("Android");
        mWebView.getSettings().setDomStorageEnabled(true);
        mWebView.getSettings().setAppCacheEnabled(false);
        mWebView.getSettings().setSupportZoom(true);
        mWebView.setInitialScale(1);

        // Enable web view cookies
        if (android.os.Build.VERSION.SDK_INT >= android.os.Build.VERSION_CODES.LOLLIPOP) {
            CookieManager.getInstance().setAcceptThirdPartyCookies(mWebView, true);
        } else {
            CookieManager.getInstance().setAcceptCookie(true);
        }

        final Date startPostMessageSentDurationInMs = new Date();

        // Create the Message
        final Message messageData = new Message(accessToken, SUBDOMAIN, content, 0, options);

        // Set WebView Client
        mWebView.setWebViewClient(new WebViewClient() {

            @Override
            public boolean shouldOverrideUrlLoading(WebView view, String url) {
                mWebView.loadUrl(url);
                return true;
            }

            @Override
            public void onPageFinished(WebView view, String url) {
                Date endPostMessageSentDurationInMs = new Date();
                long postMessageSentDurationInMs = endPostMessageSentDurationInMs.getTime() - startPostMessageSentDurationInMs.getTime();

                // Updates launchToPostMessageSentDurationInMs
                if (Build.VERSION.SDK_INT >= Build.VERSION_CODES.N) {
                    messageData.launchToPostMessageSentDurationInMs = Math.toIntExact(postMessageSentDurationInMs);
                } else {
                    messageData.launchToPostMessageSentDurationInMs = 0;
                }

                GsonBuilder gsonBuilder = new GsonBuilder();
                Gson gson = gsonBuilder.create();
                String messageJson = gson.toJson(messageData);

                if (Build.VERSION.SDK_INT >= Build.VERSION_CODES.KITKAT) {
                    StringBuilder scriptStringBuilder = new StringBuilder().append("handleLaunchImmersiveReader(").append(messageJson).append(")");
                    view.evaluateJavascript(scriptStringBuilder.toString(), null);
                } else {
                    StringBuilder urlStringBuilder = new StringBuilder().append("javascript:handleLaunchImmersiveReader(").append(messageJson).append(")");
                    view.loadUrl(urlStringBuilder.toString());
                }
                mWebView.setVisibility(View.VISIBLE);
            }
        });

        // Prepare and set the WebAppInterface to hear back from the JavaScript
        WebAppInterface jsInterface = new WebAppInterface(new WebAppInterface.WebAppListener() {
            @Override
            public void onShowToast(String toast) {
                Toast.makeText(mContext, toast, Toast.LENGTH_SHORT).show();
            }

            @Override
            public void onImmersiveReaderExit() {
                IRDataHolder.getInstance().clearContent();
                mWebView.post(new Runnable() {
                    @Override
                    public void run() {
                        mWebView.clearHistory();
                        mWebView.clearCache(true);
                        mWebView.loadUrl("about:blank");
                        mWebView.onPause();
                        mWebView.removeAllViews();
                        mWebView.pauseTimers();
                        mWebView.destroy();
                    }
                });
                launchListener.onExit();
            }
        });

        mWebView.addJavascriptInterface(jsInterface, "Android");
    }
}
Crie um novo arquivo de classe IRStore.java Java.
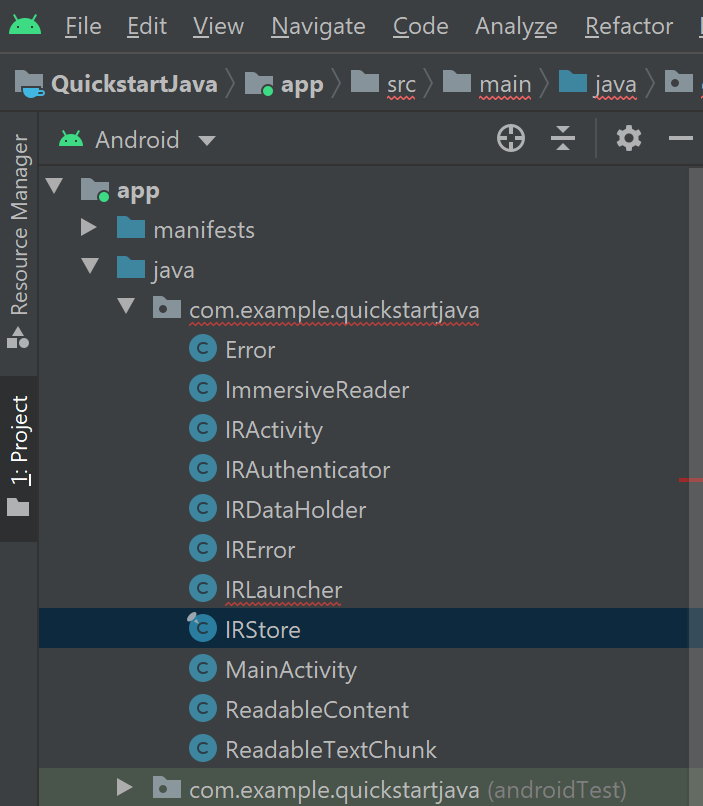
Substitua IRStore.java conteúdo pelo seguinte código:
/**
 * Copyright (c) Microsoft Corporation. All rights reserved.
 * Licensed under the MIT License.
 */

package com.example.quickstartjava;

import androidx.annotation.Keep;

@Keep
public final class IRStore {
    @Keep
    public final static class Output {
        public final static String ERROR = "Error";
    }
}
Crie um novo arquivo de classe AuthenticationTask.java Java.
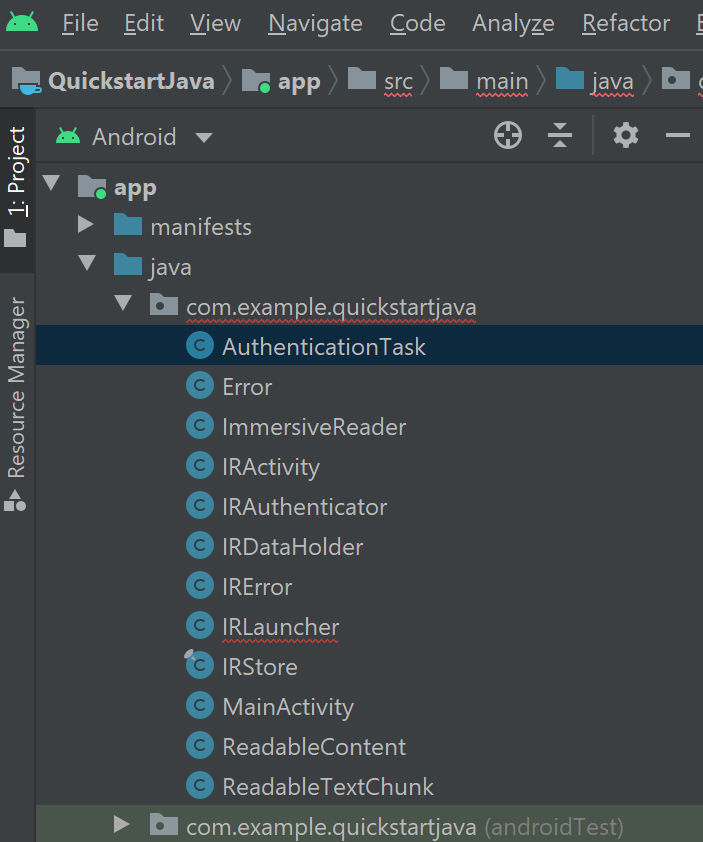
Substitua AuthenticationTask.java conteúdo pelo seguinte código:
/**
 * Copyright (c) Microsoft Corporation. All rights reserved.
 * Licensed under the MIT License.
 */

package com.example.quickstartjava;

import android.os.AsyncTask;

/**
 * Async task to request the client for the access token in background thread.
 */

public class AuthenticationTask extends AsyncTask<Void, Void, String> {

    private TaskParams mParams;

    public interface ITaskListener {
        void onAccessTokenObtained(String accessToken);
    }

    public class TaskParams {
        ImmersiveReader.IAuthenticator mAccessTokenProvider;
        ITaskListener mTaskListener;

        public TaskParams(ImmersiveReader.IAuthenticator accessTokenProvider, ITaskListener taskListener) {
            this.mAccessTokenProvider = accessTokenProvider;
            this.mTaskListener = taskListener;
        }
    }

    public void setParams(TaskParams mParams) {
        this.mParams = mParams;
    }

    @Override
    protected String doInBackground(Void... voids) {
        return mParams.mAccessTokenProvider.getAccessToken();
    }

    @Override
    protected void onPostExecute(String accessToken) {
        super.onPostExecute(accessToken);
        if (mParams.mTaskListener != null) {
            mParams.mTaskListener.onAccessTokenObtained(accessToken);
        }
    }
}
Crie um novo arquivo de classe Chunk.java Java.
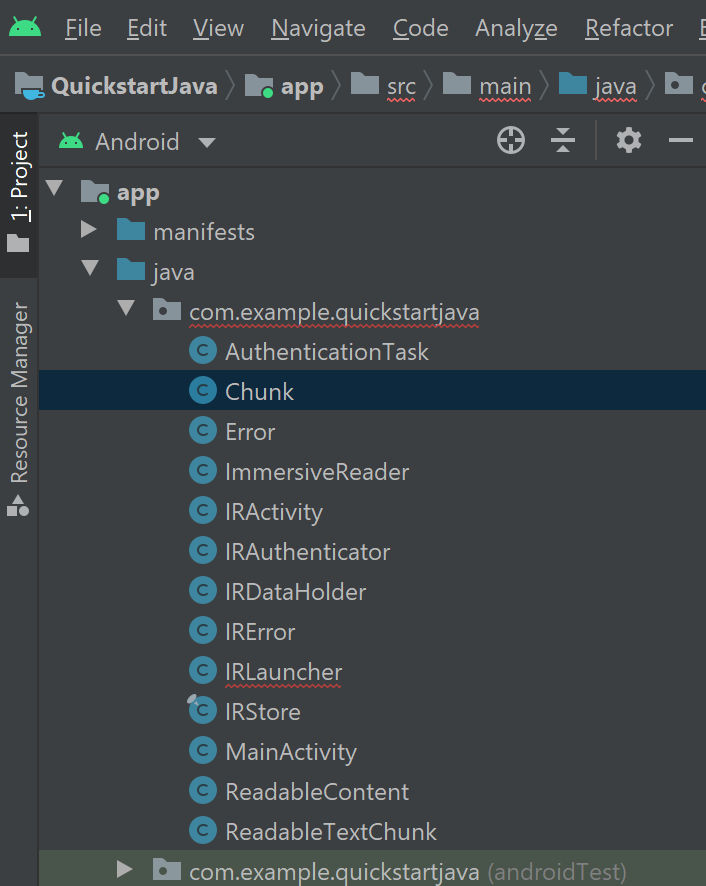
Substitua Chunk.java conteúdo pelo seguinte código:
/**
 * Copyright (c) Microsoft Corporation. All rights reserved.
 * Licensed under the MIT License.
 */

package com.example.quickstartjava;

import androidx.annotation.Keep;

/**
 * The chunk object that will be sent to the Immersive Reader SDK.
 * The content is a string of text, the lang is a string, e.g. 'll-cc',
 * and the mimeType is also a string, e.g. 'text/plain'.
 */

@Keep
public class Chunk {

    public String content;
    public String lang;
    public String mimeType;

    public Chunk(String content, String lang, String mimeType) {
        this.content = content;
        this.lang = lang;
        this.mimeType = mimeType;
    }
}
Crie um novo arquivo de classe Content.java Java.
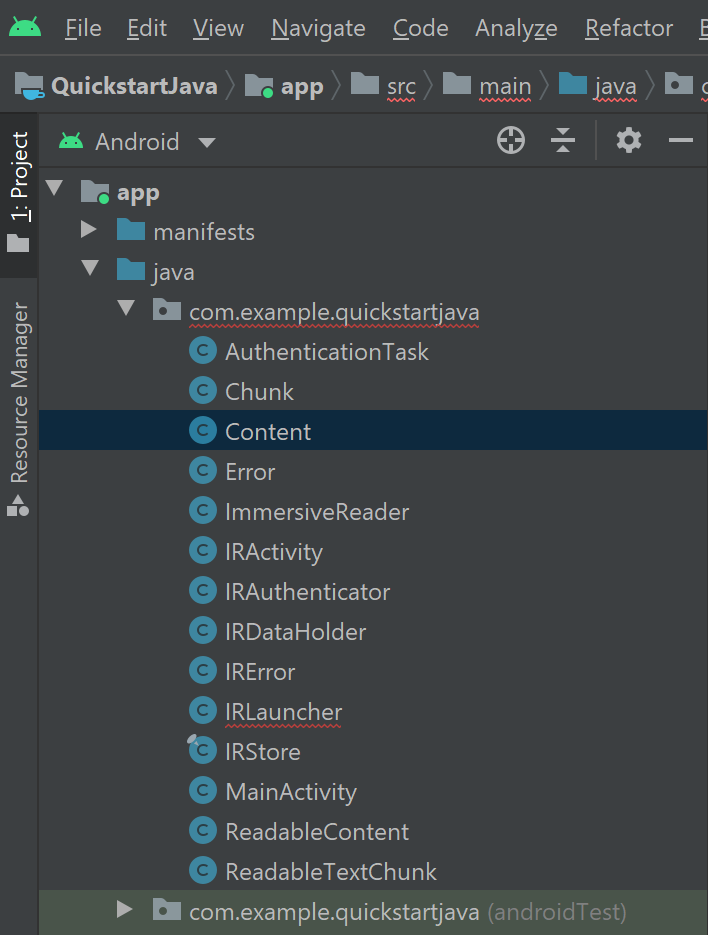
Substitua Content.java conteúdo pelo seguinte código:
/**
 * Copyright (c) Microsoft Corporation. All rights reserved.
 * Licensed under the MIT License.
 */

package com.example.quickstartjava;

import androidx.annotation.Keep;
import java.util.List;

/**
 * The content object that will be sent to the Immersive Reader SDK.
 * This object contains the title and a list of Chunk objects.
 */

@Keep
public class Content {

    public String title;
    public List<Chunk> chunks;

    public Content(String title, List<Chunk> chunks) {
        this.title = title;
        this.chunks = chunks;
    }

}
Crie um novo arquivo de classe Options.java Java.
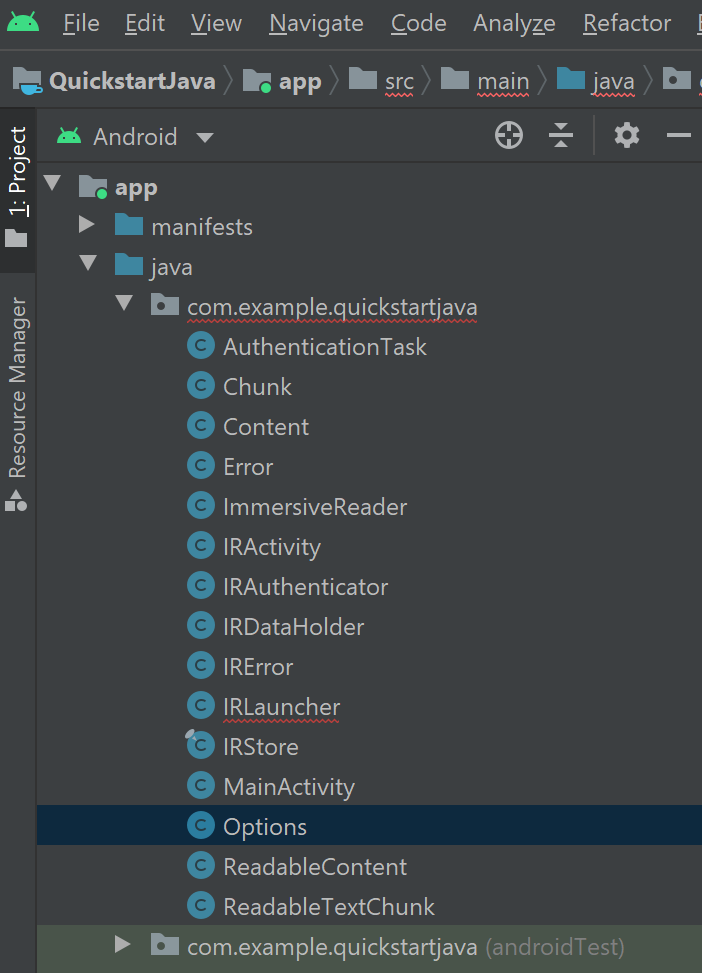
Substitua Options.java conteúdo pelo seguinte código:
/**
 * Copyright (c) Microsoft Corporation. All rights reserved.
 * Licensed under the MIT License.
 */

import java.util.concurrent.Callable;
import androidx.annotation.Keep;

/**
 * The options object that will be sent to the Immersive Reader SDK.
 */

@Keep
public class Options {

    public Callable<Void> onExit;
    public String uiLang;
    public Integer timeout;

    public Options(Callable<Void> exitCallback, String uiLang, Integer timeout) {
        this.onExit = exitCallback;
        this.uiLang = uiLang;
        this.timeout = timeout;
    }
}
Crie um novo arquivo de classe Message.java Java.
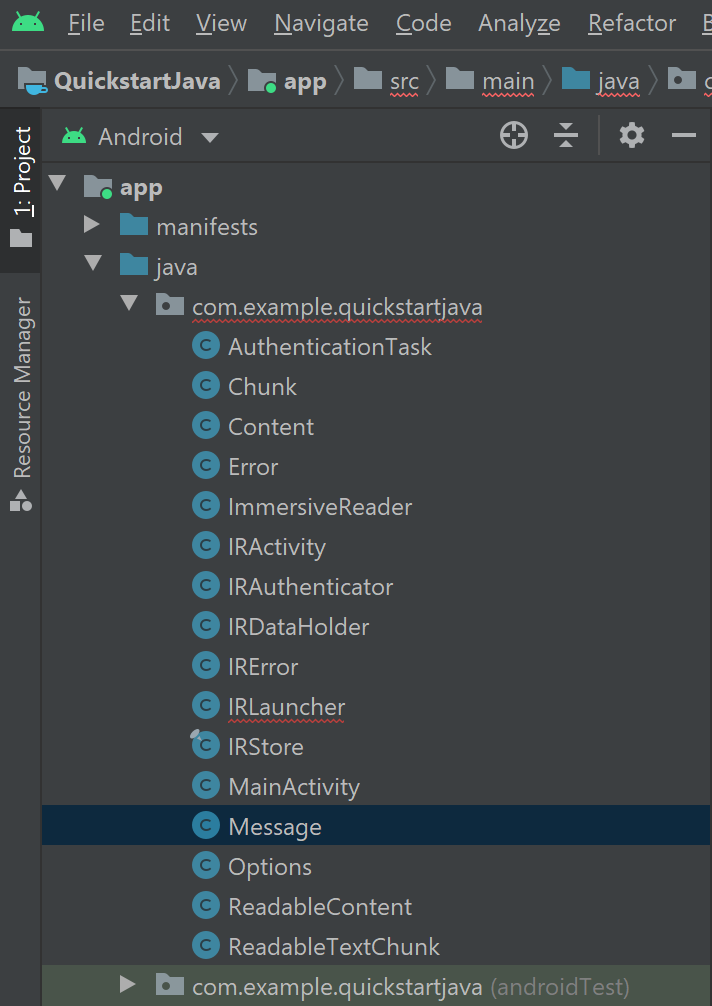
Substitua Message.java conteúdo pelo seguinte código:
/**
 * Copyright (c) Microsoft Corporation. All rights reserved.
 * Licensed under the MIT License.
 */

import androidx.annotation.Keep;

/**
 * The message object that will be sent to the Immersive Reader SDK.
 * This object contains the access token, sub domain, Content, and Options.
 */

@Keep
public class Message {

    public String cogSvcsAccessToken;
    public String cogSvcsSubdomain;
    public Content request;
    public Integer launchToPostMessageSentDurationInMs;
    public Options options;

    public Message(String cogSvcsAccessToken, String cogSvcsSubdomain, Content request, Integer launchToPostMessageSentDurationInMs, Options options) {
        this.cogSvcsAccessToken = cogSvcsAccessToken;
        this.cogSvcsSubdomain = cogSvcsSubdomain;
        this.request = request;
        this.launchToPostMessageSentDurationInMs = launchToPostMessageSentDurationInMs;
        this.options = options;
    }
}
Crie um novo arquivo de classe WebAppInterface.java Java.
Substitua WebAppInterface.java conteúdo pelo seguinte código:
/**
 * Copyright (c) Microsoft Corporation. All rights reserved.
 * Licensed under the MIT License.
 */

package com.example.quickstartjava;

import androidx.annotation.Keep;
import android.webkit.JavascriptInterface;

/**
 * JavaScript interface implementation passed to the WebView to enable talking between JavaScript and Java.
 */

@Keep
public class WebAppInterface {

    public static WebAppListener mListener;

    interface WebAppListener {
        void onShowToast(String toast);

        void onImmersiveReaderExit();
    }

    public WebAppInterface(WebAppListener listener) {
        this.mListener = listener;
    }

    @JavascriptInterface
    public void showToast(String toast) {
        mListener.onShowToast(toast);
    }

    @JavascriptInterface
    public void immersiveReaderExit() {
        mListener.onImmersiveReaderExit();
    }

}
Adicionar o HTML da aplicação à vista Web
A implementação do modo de exibição da Web precisa de HTML para funcionar. Clique com o botão direito do mouse na pasta /assets , crie um novo arquivo e nomeie-o immersiveReader.html.

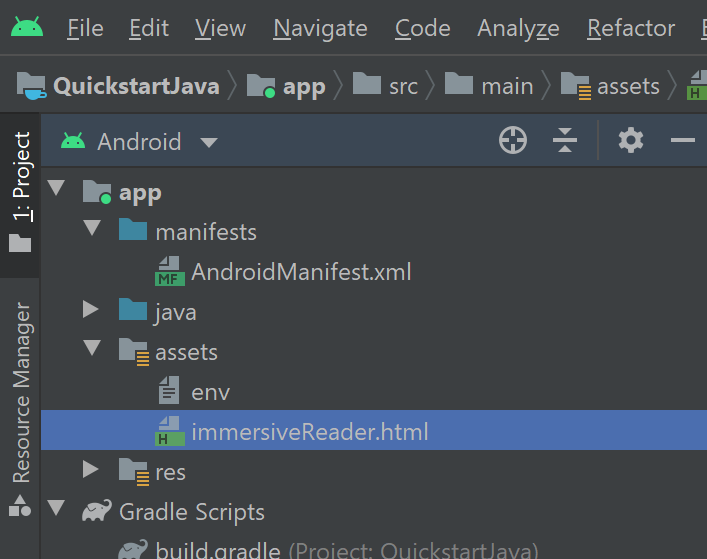
Adicione o seguinte HTML e JavaScript. Esse código adiciona o SDK do Leitor Imersivo ao aplicativo e o usa para abrir o Leitor Imersivo usando o código do aplicativo que escrevemos.
<!-- Copyright (c) Microsoft Corporation. All rights reserved.
Licensed under the MIT License. -->

<!DOCTYPE html>
<html>
<head>
    <meta charset="utf-8">
    <meta name="viewport" content="width=device-width, initial-scale=1, shrink-to-fit=no">
    <script type="text/javascript" src="https://ircdname.azureedge.net/immersivereadersdk/immersive-reader-sdk.1.4.0.js"></script>
</head>
<body>
    <script type="text/javascript">
        function handleLaunchImmersiveReader(message) {
            if (!message) {
                Android.showToast('Message is null or undefined!');
            } else {
                // Learn more about chunk usage and supported MIME types https://learn.microsoft.com/azure/ai-services/immersive-reader/reference#chunk
                var data = {
                    title: message.request.title,
                    chunks: []
                };

                for (var chunkIndex = 0; chunkIndex < message.request.chunks.length; chunkIndex++) {
                    data.chunks.push({
                        content: message.request.chunks[chunkIndex].content,
                        lang: message.request.chunks[chunkIndex].lang,
                        mimeType: message.request.chunks[chunkIndex].mimeType
                    });
                }

                // Learn more about options https://learn.microsoft.com/azure/ai-services/immersive-reader/reference#options
                var options = {
                    onExit: exitCallback,
                    uiZIndex: 2000
                };

                // Use the JavaScript SDK to launch the Immersive Reader.
                ImmersiveReader.launchAsync(message.cogSvcsAccessToken, message.cogSvcsSubdomain, data, options);

                // A simple declarative function used to close the Immersive Reader WebView via @JavaScriptInterface
                function exitCallback() {
                    Android.immersiveReaderExit();
                }
            }
        }
    </script>
</body>
</html>
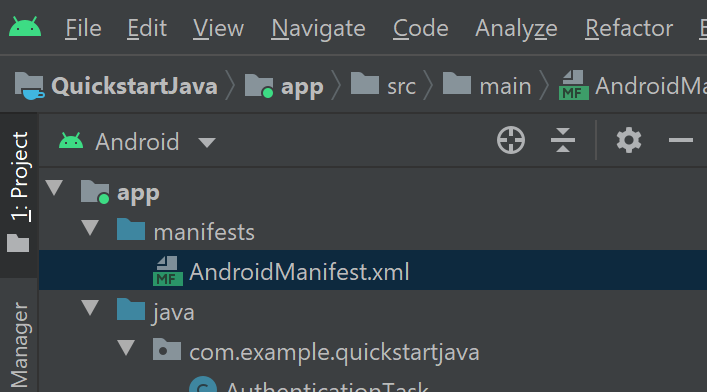
Configurar permissões de aplicativo
Como o aplicativo precisa fazer chamadas de rede para o SDK do Leitor Imersivo para funcionar, precisamos garantir que as permissões do aplicativo estejam configuradas para permitir o acesso à rede. Substitua o conteúdo de /manifests/AndroidManifest.xml pelo seguinte XML:
<?xml version="1.0" encoding="utf-8"?>
<manifest xmlns:android="http://schemas.android.com/apk/res/android"
    package="com.example.quickstartjava">

    <uses-permission android:name="android.permission.INTERNET" />

    <application
        android:allowBackup="true"
        android:icon="@mipmap/ic_launcher"
        android:label="@string/app_name"
        android:roundIcon="@mipmap/ic_launcher_round"
        android:supportsRtl="true"
        android:theme="@style/AppTheme">
        <activity android:name=".MainActivity">
            <intent-filter>
                <action android:name="android.intent.action.MAIN" />

                <category android:name="android.intent.category.LAUNCHER" />
            </intent-filter>
        </activity>
        <activity
            android:name=".IRActivity"
            android:multiprocess="true" />
    </application>

</manifest>
Executar a aplicação
Use o Android Studio para executar o aplicativo em um emulador de dispositivo. Quando você seleciona Leitor imersivo, o leitor imersivo é aberto com o conteúdo no aplicativo.

Próximo passo
Neste início rápido, você cria um aplicativo Android do zero e integra o Immersive Reader. Uma amostra de trabalho completa deste início rápido está disponível no GitHub.
Pré-requisitos
- Uma subscrição do Azure. Você pode criar um gratuitamente.
- Um recurso do Immersive Reader configurado para autenticação do Microsoft Entra. Siga estas instruções para se configurar. Salve a saída da sessão em um arquivo de texto para que você possa configurar as propriedades do ambiente.
- Git.
- Android Studio.
Criar um projeto Android
Inicie um novo projeto no Android Studio.

Na janela Modelos, selecione Atividade de Vistas Vazias e, em seguida, selecione Seguinte.

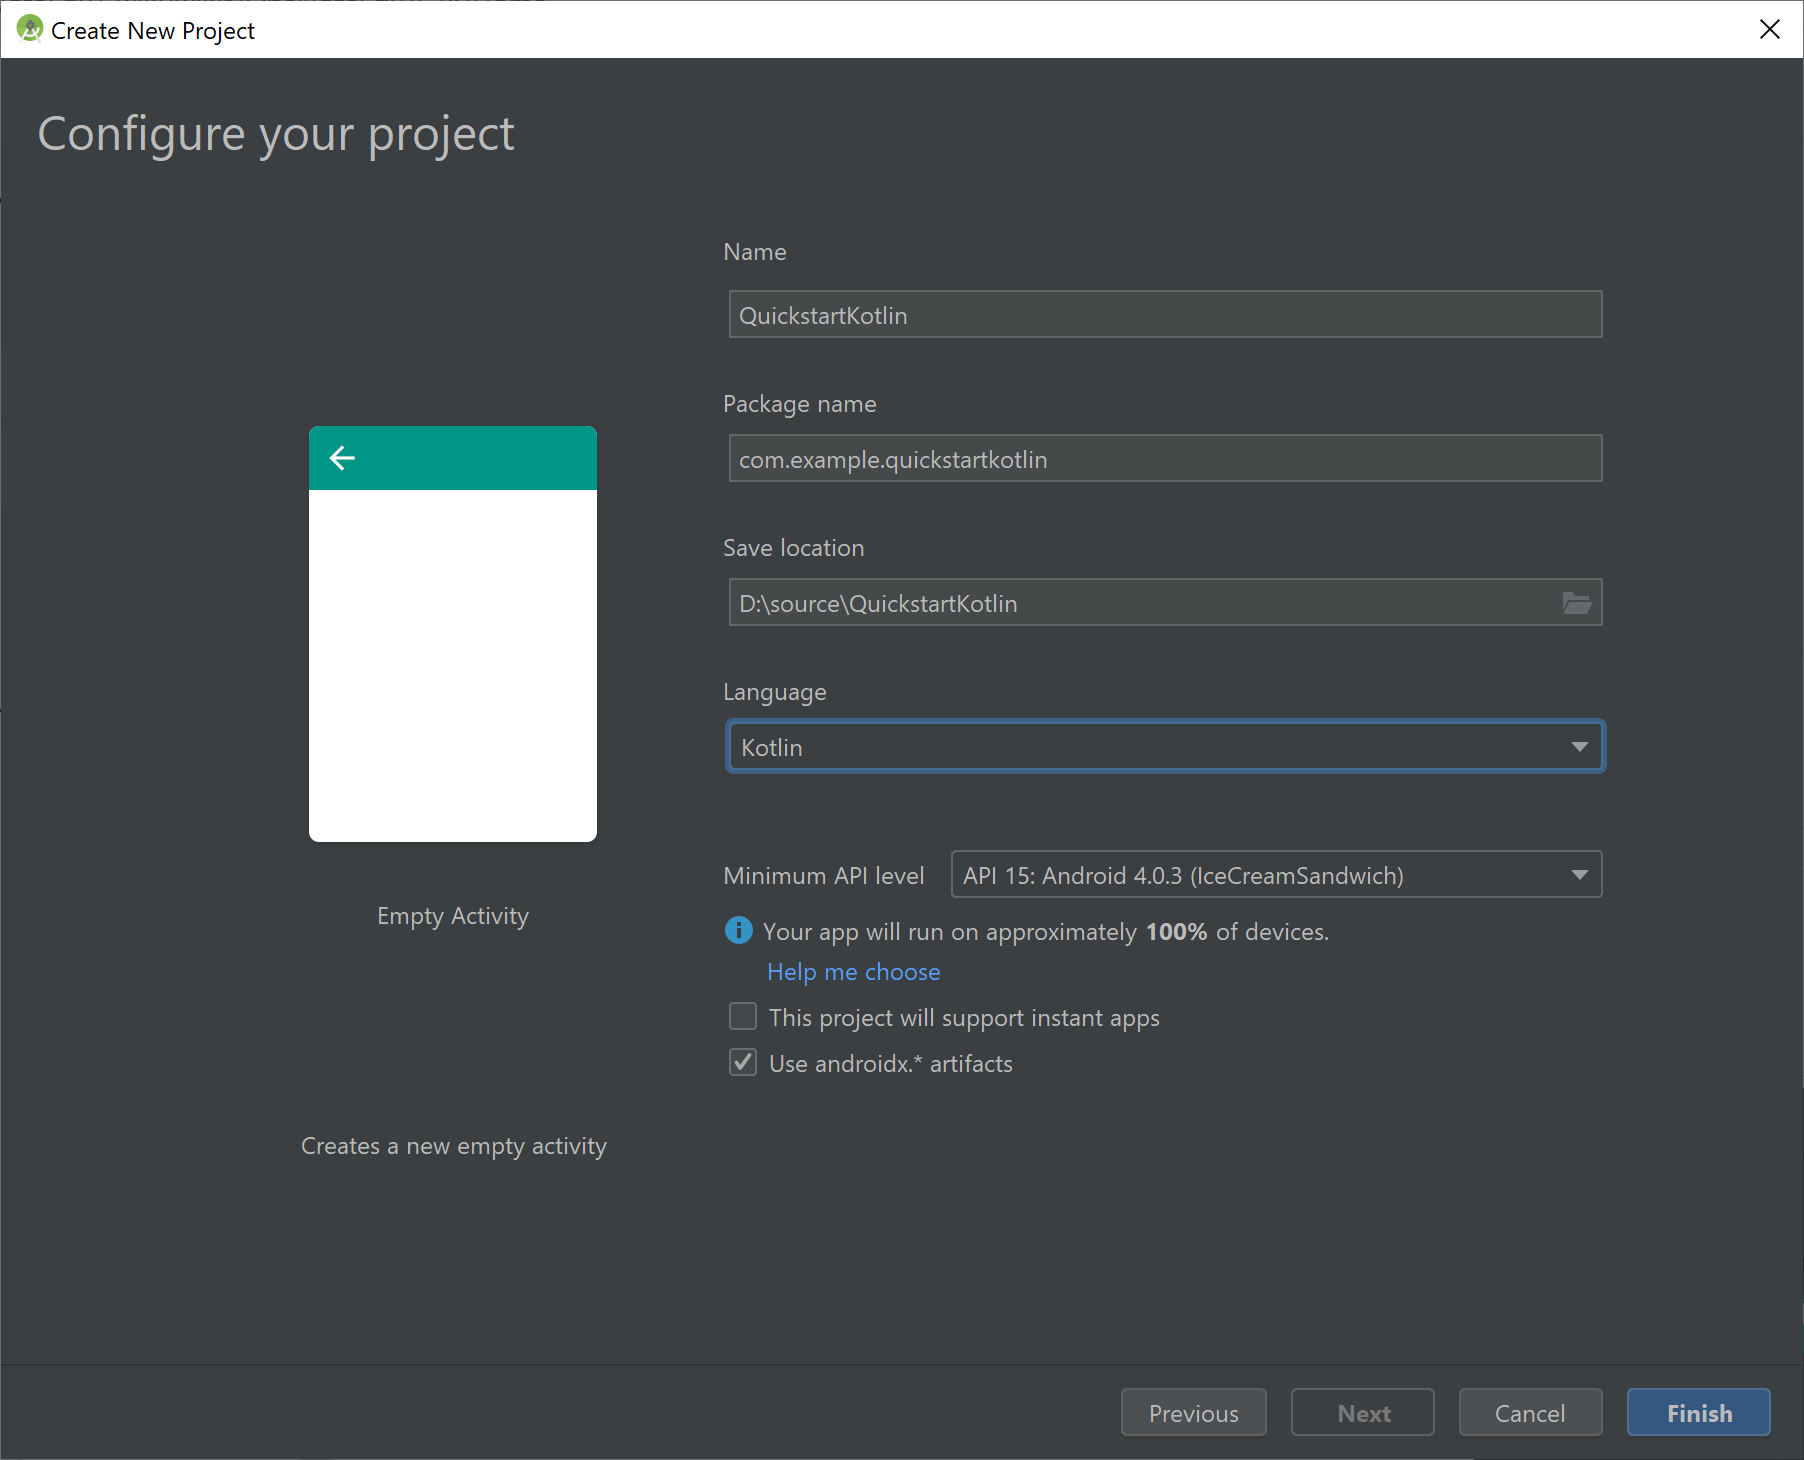
Configurar o projeto
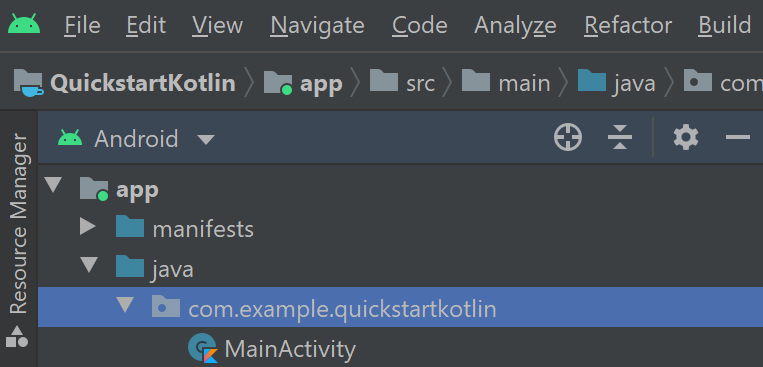
Nomeie o projeto QuickstartKotlin e selecione um local para salvá-lo. Selecione Kotlin como a linguagem de programação e, em seguida, selecione Concluir.
Configurar ativos e autenticação
Para criar uma nova pasta de ativos , clique com o botão direito do mouse no aplicativo e selecione Pasta ->Pasta de ativos na lista suspensa.

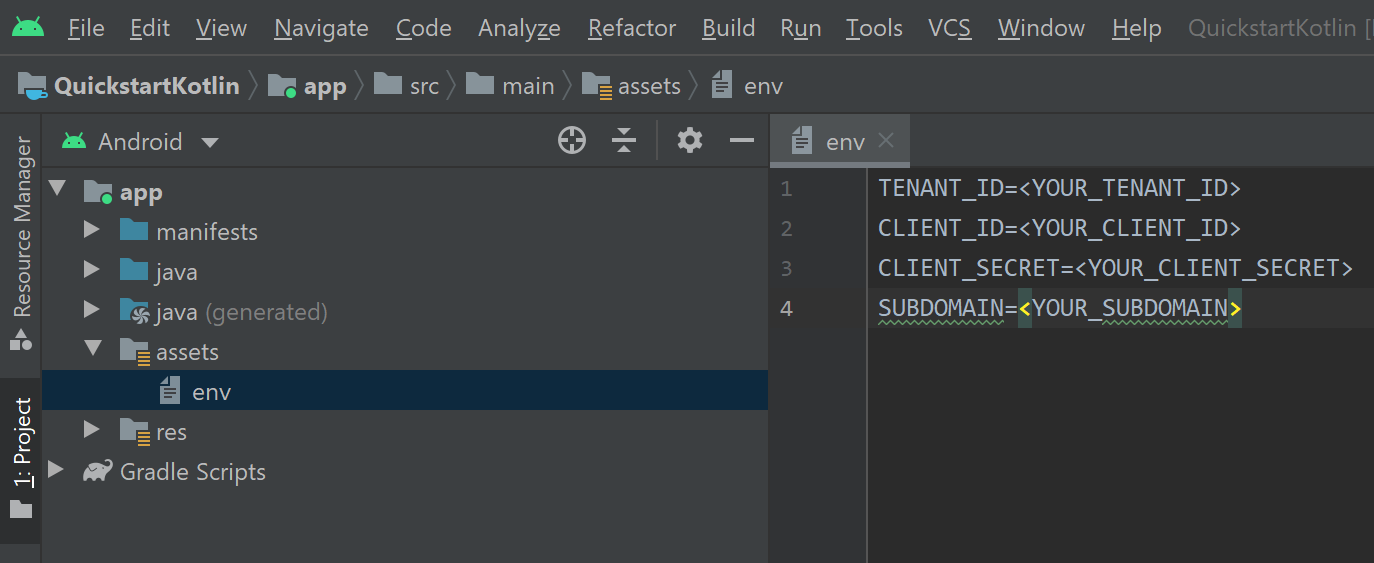
Clique com o botão direito do mouse em ativos e selecione Novo ->Arquivo. Nomeie o arquivo env.

Adicione os seguintes nomes e valores e forneça valores conforme apropriado. Não confirme este arquivo env no controle do código-fonte porque ele contém segredos que não devem ser tornados públicos.
TENANT_ID=<YOUR_TENANT_ID>
CLIENT_ID=<YOUR_CLIENT_ID>
CLIENT_SECRET=<YOUR_CLIENT_SECRET>
SUBDOMAIN=<YOUR_SUBDOMAIN>
Importante
Lembre-se de nunca postar segredos publicamente. Para produção, use uma maneira segura de armazenar e acessar suas credenciais, como o Azure Key Vault.
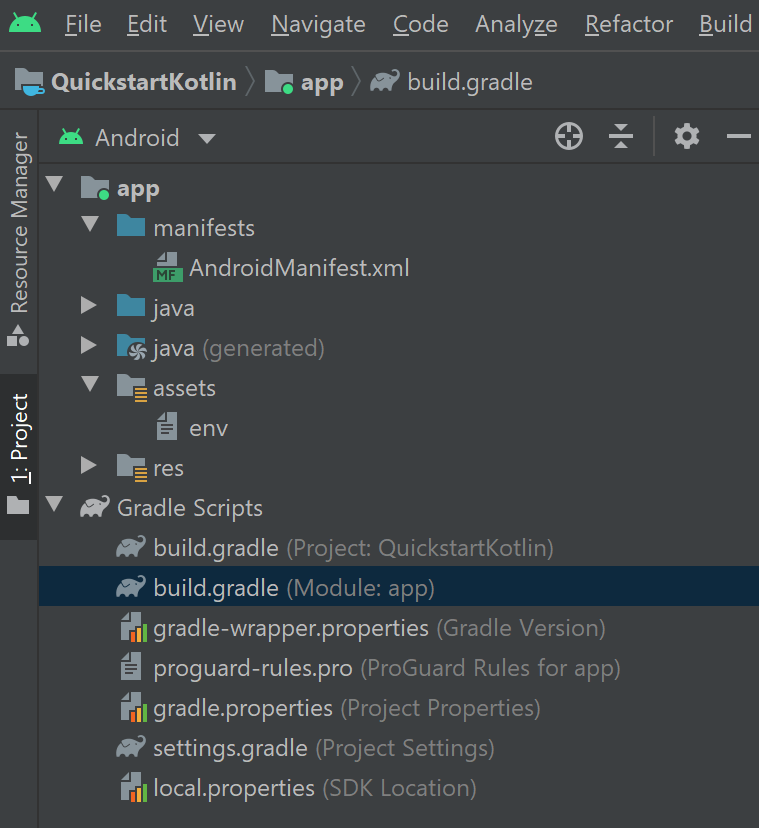
Adicionar dependências
Substitua as dependências existentes no arquivo build.gradle pelas seguintes implementações para habilitar co-rotinas (programação assíncrona), gson (análise JSON e serialização) e dotenv para fazer referência às variáveis definidas no arquivo env. Talvez seja necessário sincronizar o projeto novamente ao implementar MainActivity.kt em uma etapa posterior deste início rápido.
dependencies {
    implementation fileTree(dir: 'libs', include: ['*.jar'])
    implementation"org.jetbrains.kotlin:kotlin-stdlib-jdk7:$kotlin_version"
    implementation 'androidx.appcompat:appcompat:1.0.2'
    implementation 'androidx.core:core-ktx:1.0.2'
    implementation 'androidx.constraintlayout:constraintlayout:1.1.3'
    implementation "org.jetbrains.kotlinx:kotlinx-coroutines-core:1.1.1"
    implementation "org.jetbrains.kotlinx:kotlinx-coroutines-android:1.1.1"
    implementation 'com.google.code.gson:gson:2.8.6'
    implementation 'io.github.cdimascio:java-dotenv:5.1.3'
    testImplementation 'junit:junit:4.12'
    androidTestImplementation 'androidx.test.ext:junit:1.1.0'
    androidTestImplementation 'androidx.test.espresso:espresso-core:3.1.1'
}
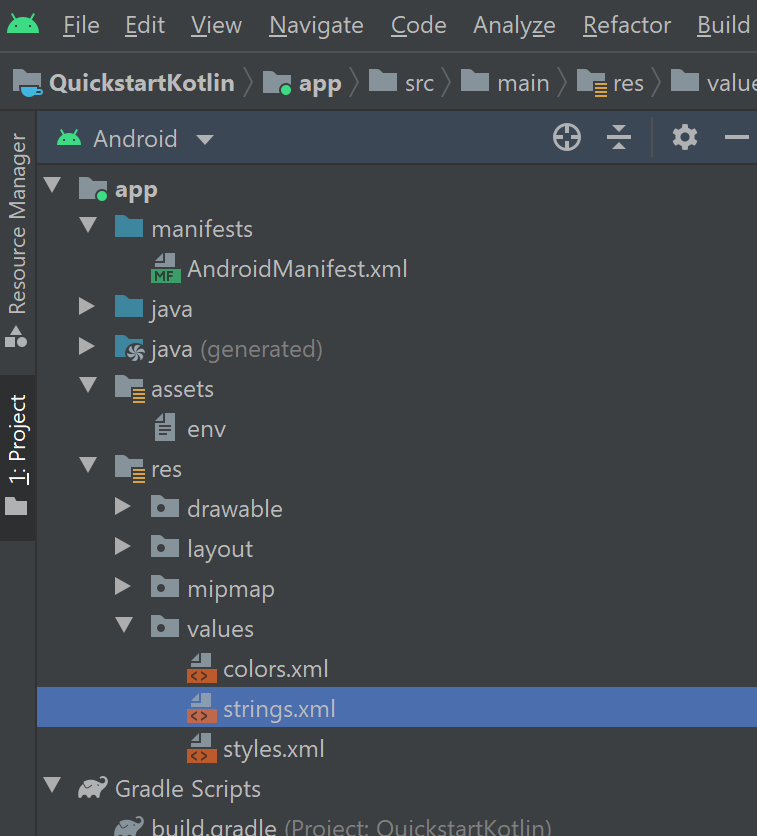
Atualizar cadeias de caracteres e recursos de layout do aplicativo
Substitua o conteúdo em res/values/strings.xml pelas seguintes cadeias de caracteres a serem usadas no aplicativo.
<resources>

    <!-- Copyright (c) Microsoft Corporation. All rights reserved. -->
    <!-- Licensed under the MIT License. -->

    <string name="app_name">ImmersiveReaderSDK</string>
    <string name="geographyTitle">Geography</string>
    <string name="geographyTextEn">The study of Earth's landforms is called physical geography. Landforms can be mountains and valleys. They can also be glaciers, lakes or rivers. Landforms are sometimes called physical features. It is important for students to know about the physical geography of Earth. The seasons, the atmosphere and all the natural processes of Earth affect where people are able to live. Geography is one of a combination of factors that people use to decide where they want to live.The physical features of a region are often rich in resources. Within a nation, mountain ranges become natural borders for settlement areas. In the U.S., major mountain ranges are the Sierra Nevada, the Rocky Mountains, and the Appalachians. Fresh water sources also influence where people settle. People need water to drink. They also need it for washing. Throughout history, people have settled near fresh water. Living near a water source helps ensure that people have the water they need. There was an added bonus, too. Water could be used as a travel route for people and goods. Many Americans live near popular water sources, such as the Mississippi River, the Colorado River and the Great Lakes.Mountains and deserts have been settled by fewer people than the plains areas. However, they have valuable resources of their own.</string>
    <string name="geographyTextFr">L\'étude des reliefs de la Terre est appelée géographie physique. Les reliefs peuvent être des montagnes et des vallées. Il peut aussi s\'agira de glaciers, delacs ou de rivières. Les reliefs sont parfois appelés caractéristiques physiques. Il est important que les élèves connaissent la géographie physique de laTerre. Les saisons, l\'atmosphère et tous les processus naturels de la Terre affectent l\'endroit où les gens sont capables de vivre. La géographie est l\'un desfacteurs que les gens utilisent pour décider où ils veulent vivre. Les caractéristiques physiques d\'une région sont souvent riches en ressources. Àl\'intérieur d\'une nation, les chaînes de montagnes deviennent des frontières naturelles pour les zones de peuplement. Aux États-Unis, les principaleschaînes de montagnes sont la Sierra Nevada, les montagnes Rocheuses et les Appalaches.Les sources d\'eau douce influencent également l\'endroit où lesgens s\'installent. Les gens ont besoin d\'eau pour boire. Ils en ont aussi besoin pour se laver. Tout au long de l\'histoire, les gens se sont installés près del\'eau douce. Vivre près d\'une source d\'eau permet de s\'assurer que les gens ont l\'eau dont ils ont besoin. Il y avait un bonus supplémentaire, aussi. L\'eaupourrait être utilisée comme voie de voyage pour les personnes et les marchandises. Beaucoup d\'Américains vivent près des sources d\'eau populaires,telles que le fleuve Mississippi, le fleuve Colorado et les Grands Lacs.Mountains et les déserts ont été installés par moins de gens que les zones desplaines. Cependant, ils disposent de ressources précieuses.Les gens ont une réponse.</string>
    <string name="immersiveReaderButtonText">Immersive Reader</string>
</resources>
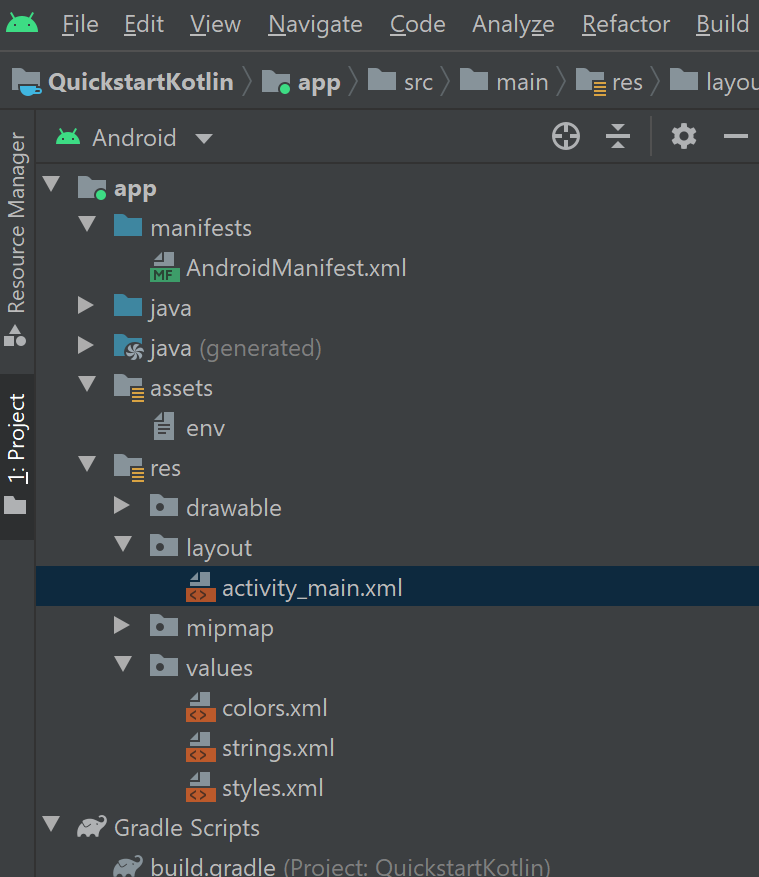
Substitua o conteúdo em res/layout/activity_main.xml pelo seguinte XML a ser usado no aplicativo. Este XML é o layout da interface do usuário do aplicativo. Se você não vir o código no arquivo activity_main.xml, clique com o botão direito do mouse na tela e selecione Ir para XML.
<?xml version="1.0" encoding="utf-8"?>

<!-- Copyright (c) Microsoft Corporation. All rights reserved. -->
<!-- Licensed under the MIT License. -->

<androidx.constraintlayout.widget.ConstraintLayout xmlns:android="http://schemas.android.com/apk/res/android"
    xmlns:app="http://schemas.android.com/apk/res-auto"
    xmlns:tools="http://schemas.android.com/tools"
    android:layout_width="match_parent"
    android:layout_height="match_parent"
    android:background="#FFFFFF"
    tools:context=".MainActivity">

    <LinearLayout
        android:id="@+id/linearLayout"
        android:layout_width="match_parent"
        android:layout_height="0dp"
        android:background="#FFFFFF"
        android:orientation="vertical"
        app:layout_constraintBottom_toBottomOf="parent"
        app:layout_constraintEnd_toEndOf="parent"
        app:layout_constraintHorizontal_bias="0.0"
        app:layout_constraintStart_toStartOf="parent"
        app:layout_constraintTop_toTopOf="parent"
        app:layout_constraintVertical_bias="0.0">

        <TextView
            android:id="@+id/Title"
            android:layout_width="match_parent"
            android:layout_height="wrap_content"
            android:layout_marginLeft="48dp"
            android:layout_marginTop="24dp"
            android:layout_marginRight="48dp"
            android:layout_marginBottom="24dp"
            android:text="@string/geographyTitle"
            android:textSize="24sp"
            android:textStyle="bold" />

        <ScrollView
            android:id="@+id/ContentPane"
            android:layout_width="match_parent"
            android:layout_height="480dp"
            android:layout_marginBottom="48dp"
            android:clipToPadding="false"
            android:fillViewport="false"
            android:paddingLeft="48dp"
            android:paddingRight="48dp"
            android:scrollbarStyle="outsideInset"
            android:visibility="visible"
            tools:visibility="visible">

            <LinearLayout
                android:layout_width="match_parent"
                android:layout_height="match_parent"
                android:orientation="vertical">

                <TextView
                    android:id="@+id/Content1"
                    android:layout_width="match_parent"
                    android:layout_height="wrap_content"
                    android:background="#00FFFFFF"
                    android:text="@string/geographyTextEn"
                    android:textSize="18sp" />

                <TextView
                    android:id="@+id/Content2"
                    android:layout_width="match_parent"
                    android:layout_height="wrap_content"
                    android:background="#00FFFFFF"
                    android:text="@string/geographyTextFr"
                    android:textSize="18sp" />

            </LinearLayout>

        </ScrollView>

        <Button
            android:id="@+id/LaunchImmersiveReaderButton"
            android:layout_width="match_parent"
            android:layout_height="60dp"
            android:layout_marginLeft="40dp"
            android:layout_marginRight="40dp"
            android:layout_marginBottom="80dp"
            android:text="@string/immersiveReaderButtonText"
            android:textAllCaps="false"
            android:textSize="24sp"
            android:visibility="visible"
            tools:visibility="visible" />

    </LinearLayout>

</androidx.constraintlayout.widget.ConstraintLayout>
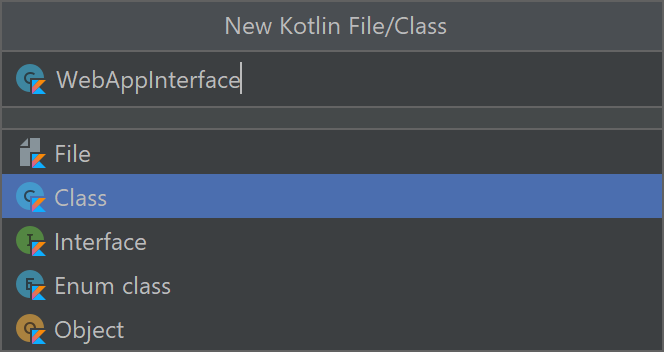
Configurar a interface JavaScript do código Kotlin do aplicativo
Na pasta kotlin+java/com.example.quickstartkotlin/, crie uma nova classe Kotlin e nomeie-a WebAppInterface. Em seguida, adicione o seguinte código a ele. Esse código permite que o aplicativo interaja com funções JavaScript em HTML que serão adicionadas em uma etapa posterior.
// Copyright (c) Microsoft Corporation. All rights reserved.
// Licensed under the MIT License.

package com.example.quickstartkotlin

import android.content.Context
import android.webkit.JavascriptInterface
import android.webkit.WebView
import android.widget.LinearLayout
import android.widget.Toast

class WebAppInterface(private val mContext: Context, var parentLayout: LinearLayout, var webView: WebView) {

    // Show a toast from html.
    @JavascriptInterface
    fun showToast(toast: String) {
        Toast.makeText(mContext, toast, Toast.LENGTH_SHORT).show()
    }

    // Exit the Immersive Reader.
    @JavascriptInterface
    fun immersiveReaderExit() {
        webView.post(Runnable { destroyWebView(parentLayout, webView) })

        // Any additional functionality may be added here.
        Toast.makeText(mContext, "The Immersive Reader has been closed!", Toast.LENGTH_SHORT).show()
    }

    // Disposes of the WebView when the back arrow is tapped.
    private fun destroyWebView(parentLayout: LinearLayout, webView: WebView) {

        // Removes the WebView from its parent view before doing anything.
        parentLayout.removeView(webView)

        // Cleans things up before destroying the WebView.
        webView.clearHistory()
        webView.clearCache(true)
        webView.loadUrl("about:blank")
        webView.onPause()
        webView.removeAllViews()
        webView.pauseTimers()
        webView.destroy()
    }
}
Configurar o aplicativo Código Kotlin Atividade principal
Na pasta kotlin+java/com.example.quickstartkotlin/, há um arquivo de classe Kotlin MainActivity.kt existente. Este arquivo é onde a lógica do aplicativo é criada. Substitua seu conteúdo pelo código a seguir.
// Copyright (c) Microsoft Corporation. All rights reserved.
// Licensed under the MIT License.

package com.example.quickstartkotlin

import android.app.Activity
import androidx.appcompat.app.AppCompatActivity
import android.os.Bundle
import android.webkit.CookieManager
import android.webkit.WebView
import android.widget.Button
import android.webkit.WebViewClient
import android.widget.LinearLayout
import android.widget.TextView
import com.google.gson.*
import io.github.cdimascio.dotenv.dotenv
import java.io.IOException
import java.io.*
import java.net.HttpURLConnection
import java.net.HttpURLConnection.HTTP_OK
import java.net.URL
import kotlinx.coroutines.*
import org.json.JSONObject
import java.util.*

// This sample app uses the Dotenv. It's a module that loads environment variables from a .env file to better manage secrets.
// https://github.com/cdimascio/java-dotenv
// Be sure to add a "env" file to the /assets folder.
// Instead of '.env', use 'env'.

class MainActivity : AppCompatActivity() {
    private val dotEnv = dotenv {
        directory = "/assets"
        filename = "env"
        ignoreIfMalformed = true
        ignoreIfMissing = true
    }

    private lateinit var contextualWebView: WebView

    override fun onCreate(savedInstanceState: Bundle?) {
        super.onCreate(savedInstanceState)
        this.supportActionBar!!.hide()
        setContentView(R.layout.activity_main)
        val immersiveReaderButton = findViewById<Button>(R.id.LaunchImmersiveReaderButton)
        immersiveReaderButton.setOnClickListener { GlobalScope.launch { handleLoadImmersiveReaderWebView() } }
    }

    // Assigns values to the objects sent to the Immersive Reader SDK,
    // acquires the token and authorizes the app, then launches
    // the Web View to get the response and load the Immersive Reader
    // when the button is clicked in HTML.
    private suspend fun handleLoadImmersiveReaderWebView() {
        val exampleActivity = this
        val subdomain = dotEnv["SUBDOMAIN"]
        val irTitle = findViewById<TextView>(R.id.Title)
        val irText1 = findViewById<TextView>(R.id.Content1)
        val irText2 = findViewById<TextView>(R.id.Content2)

        // The content of the request that's shown in the Immersive Reader.
        // This basic example contains chunks of two different languages.
        val chunk1 = Chunk()
        chunk1.content = irText1.text.toString()
        chunk1.lang = "en"
        chunk1.mimeType = "text/plain"

        val chunk2 = Chunk()
        chunk2.content = irText2.text.toString()
        chunk2.lang = "fr"
        chunk2.mimeType = "text/plain"

        val chunks = ArrayList<Chunk>()
        chunks.add(chunk1)
        chunks.add(chunk2)

        val content = Content()
        content.title = irTitle.text.toString()
        content.chunks = chunks

        // Options may be assigned values here (e.g. options.uiLang = "en").
        val options = Options()

        var token: String

        runBlocking{
            val resp = async { getImmersiveReaderTokenAsync() }
            token = resp.await()
            val jsonResp = JSONObject(token)
            loadImmersiveReaderWebView(exampleActivity, jsonResp.getString("access_token"), subdomain, content, options)
        }
    }

    // The next two functions get the token from the Immersive Reader SDK
    // and authorize the app.
    private suspend fun getImmersiveReaderTokenAsync(): String {
        return getToken()
    }

    @Throws(IOException::class)
    fun getToken(): String {
        val clientId = dotEnv["CLIENT_ID"]
        val clientSecret = dotEnv["CLIENT_SECRET"]
        val tenantId = dotEnv["TENANT_ID"]
        val tokenUrl = URL("https://login.windows.net/$tenantId/oauth2/token")
        val form = "grant_type=client_credentials&resource=https://cognitiveservices.azure.com/&client_id=$clientId&client_secret=$clientSecret"

        val connection = tokenUrl.openConnection() as HttpURLConnection
        connection.requestMethod = "POST"
        connection.setRequestProperty("content-type", "application/x-www-form-urlencoded")
        connection.doOutput = true

        val writer = DataOutputStream(connection.outputStream)
        writer.writeBytes(form)
        writer.flush()
        writer.close()

        val responseCode = connection.responseCode

        if (responseCode == HTTP_OK) {
            val readerIn = BufferedReader(InputStreamReader(connection.inputStream))
            var inputLine = readerIn.readLine()
            val response = StringBuffer()

            do {
                response.append(inputLine)
            } while (inputLine.length < 0)
            readerIn.close()

            // Return token
            return response.toString()
        } else {
            val responseError = Error(code = "BadRequest", message = "There was an error getting the token.")
            throw IOException(responseError.toString())
        }
    }

    // To be assigned values and sent to the Immersive Reader SDK
    class Chunk(var content: String? = null,
                var lang: String? = null,
                var mimeType: String? = null)

    class Content(var title: String? = null,
                  var chunks: List<Chunk>? = null)

    class Message(var cogSvcsAccessToken: String? = null,
                  var cogSvcsSubdomain: String? = null,
                  var content: Content? = null,
                  var launchToPostMessageSentDurationInMs: Int? = null,
                  var options: Options? = null)

    // Only includes Immersive Reader options relevant to Android apps.
    // For a complete list, visit https://learn.microsoft.com/azure/ai-services/immersive-reader/reference
    class Options(var uiLang: String? = null, // Language of the UI, e.g. en, es-ES (optional). Defaults to browser language if not specified.
                  var timeout: Int? = null, // Duration (in milliseconds) before launchAsync fails with a timeout error (default is 15000 ms).
                  var uiZIndex: Int? = null, // Z-index of the iframe that will be created (default is 1000)
                  var onExit: (() -> Any)? = null, // Executes a callback function when the Immersive Reader exits
                  var customDomain: String? = null, // Reserved for internal use. Custom domain where the Immersive Reader webapp is hosted (default is null).
                  var allowFullscreen: Boolean? = null, // The ability to toggle fullscreen (default is true).
                  var hideExitButton: Boolean? = null // Whether or not to hide the Immersive Reader's exit button arrow (default is false). This should only be true if there is an alternative mechanism provided to exit the Immersive Reader (e.g a mobile toolbar's back arrow).
    )

    class Error(var code: String? = null,
                var message: String? = null)

    // A custom Web View component that launches inside the app
    @Throws(IOException::class)
    fun loadImmersiveReaderWebView(
        exampleActivity: Activity,
        token: String,
        subdomain: String?,
        content: Content,
        options: Options
    ) {
        val startPostMessageSentDurationInMs = Date()

        // Populate the message
        val messageData = Message()
        messageData.cogSvcsAccessToken = token
        messageData.cogSvcsSubdomain = subdomain
        messageData.content = content
        messageData.options = options

        GlobalScope.launch {
            withContext(Dispatchers.Main) {
                contextualWebView = WebView(exampleActivity)
                val parentLayout = findViewById<LinearLayout>(R.id.linearLayout)
                val contextualWebViewSettings = contextualWebView.settings

                contextualWebViewSettings.allowContentAccess = true
                contextualWebViewSettings.builtInZoomControls = true
                contextualWebViewSettings.javaScriptEnabled = true
                contextualWebViewSettings.loadsImagesAutomatically = true
                contextualWebViewSettings.loadWithOverviewMode = true
                contextualWebViewSettings.useWideViewPort = true
                contextualWebViewSettings.userAgentString = "Android"
                contextualWebViewSettings.domStorageEnabled = true

                contextualWebViewSettings.setAppCacheEnabled(false)
                contextualWebViewSettings.setSupportZoom(true)
                contextualWebView.setInitialScale(1)

                // Enables WebView Cookies
                if (android.os.Build.VERSION.SDK_INT >= android.os.Build.VERSION_CODES.LOLLIPOP) {
                    CookieManager.getInstance().setAcceptThirdPartyCookies(contextualWebView, true)
                } else {
                    CookieManager.getInstance().setAcceptCookie(true)
                }

                val contextualWebViewLayout = LinearLayout.LayoutParams(LinearLayout.LayoutParams.MATCH_PARENT, LinearLayout.LayoutParams.MATCH_PARENT)
                parentLayout.addView(contextualWebView, 0, contextualWebViewLayout)

                // This is required to launch the WebView *inside* the host application.
                contextualWebView.webViewClient = object : WebViewClient() {
                    override fun shouldOverrideUrlLoading(view: WebView, url: String): Boolean {
                        view.loadUrl(url)
                        return true
                    }

                    // Send message JSON object to Immersive Reader html
                    override fun onPageFinished(view: WebView, url: String) {
                        val endPostMessageSentDurationInMs = Date()
                        val postMessageSentDurationInMs = (endPostMessageSentDurationInMs.time - startPostMessageSentDurationInMs.time).toInt()

                        // Updates launchToPostMessageSentDurationInMs
                        messageData.launchToPostMessageSentDurationInMs = postMessageSentDurationInMs

                        // Serializes message data class to JSON
                        val gson = Gson()
                        val message = gson.toJson(messageData)

                        // Calls the handleLaunchImmersiveReader function in HTML
                        if (android.os.Build.VERSION.SDK_INT >= android.os.Build.VERSION_CODES.KITKAT) {
                            view.evaluateJavascript("handleLaunchImmersiveReader($message)", null)
                        } else {
                            view.loadUrl("javascript:handleLaunchImmersiveReader($message)")
                        }

                        // Sets the visibility of the WebView after the function has been called.
                        view.visibility = WebView.VISIBLE
                    }
                }

                // This is where the WebAppInterface Class is used.
                // Affords a way for JavaScript to work with the app directly from
                // the Web View's HTML.
                val jsInterface = WebAppInterface(exampleActivity, parentLayout, contextualWebView)
                contextualWebView.addJavascriptInterface(jsInterface, "Android")
                contextualWebView.loadUrl("file:///android_asset/immersiveReader.html")
            }
        }
    }
}
Talvez seja necessário sincronizar o projeto novamente.
Adicionar o HTML da aplicação à vista Web
A implementação do modo de exibição da Web precisa de HTML para funcionar. Clique com o botão direito do mouse na pasta /assets , crie um novo arquivo e nomeie-o immersiveReader.html.

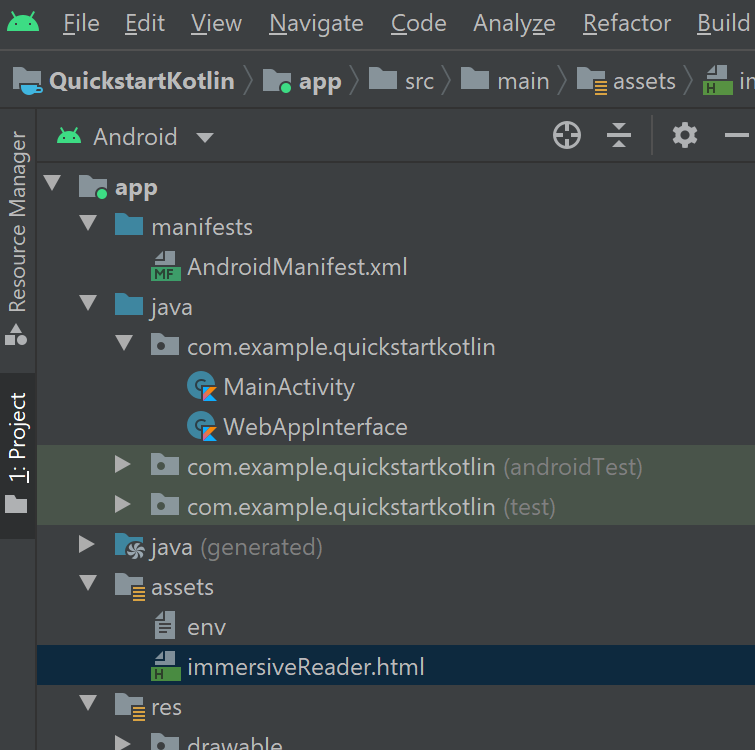
Adicione o seguinte HTML e JavaScript. Esse código adiciona o SDK do Leitor Imersivo ao aplicativo e o usa para abrir o Leitor Imersivo usando o código do aplicativo que escrevemos.
<!-- Copyright (c) Microsoft Corporation. All rights reserved.
Licensed under the MIT License. -->

<!DOCTYPE html>
<html>
<head>
    <meta charset="utf-8">
    <meta name="viewport" content="width=device-width, initial-scale=1, shrink-to-fit=no">
    <script type="text/javascript" src="https://ircdname.azureedge.net/immersivereadersdk/immersive-reader-sdk.1.4.0.js"></script>
</head>
<body>
<script type="text/javascript">
        function handleLaunchImmersiveReader(message) {
            if (!message) {
                Android.showToast('Message is null or undefined!');
            } else {
                // Learn more about chunk usage and supported MIME types https://learn.microsoft.com/azure/ai-services/immersive-reader/reference#chunk
                var data = {
                    title: message.content.title,
                    chunks: message.content.chunks
                };

                // A simple declarative function used to close the Immersive Reader WebView via @JavaScriptInterface
                var exitCallback = function() {
                    Android.immersiveReaderExit();
                }

                // Learn more about options https://learn.microsoft.com/azure/ai-services/immersive-reader/reference#options
                var options = {
                    onExit: exitCallback,
                    uiZIndex: 2000
                };

                // Use the JavaScript SDK to launch the Immersive Reader.
                ImmersiveReader.launchAsync(message.cogSvcsAccessToken, message.cogSvcsSubdomain, data, options);
            }
        }
    </script>
</body>
</html>
Configurar permissões de aplicativo
Como o aplicativo precisa fazer chamadas de rede para o SDK do Leitor Imersivo para funcionar, precisamos garantir que as permissões do aplicativo estejam configuradas para permitir o acesso à rede. Substitua o conteúdo de /manifests/AndroidManifest.xml pelo XML a seguir.
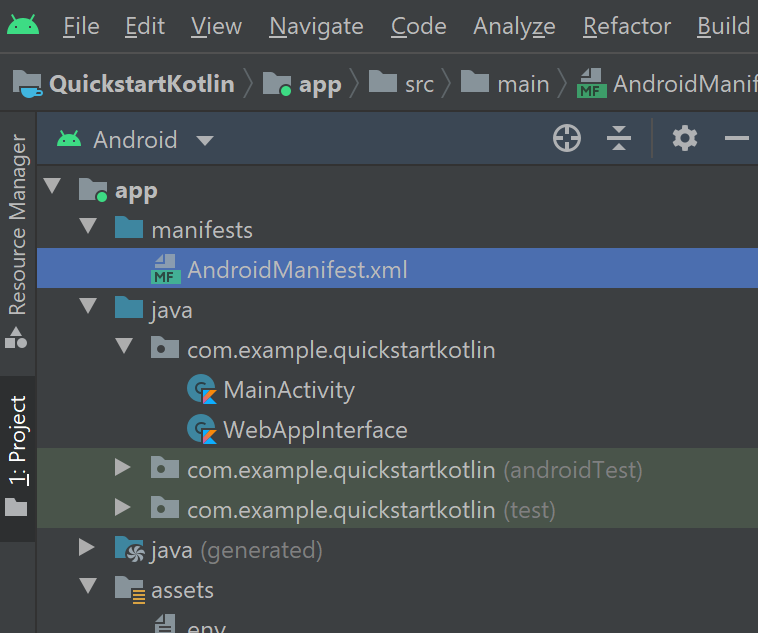
<?xml version="1.0" encoding="utf-8"?>
<manifest xmlns:android="http://schemas.android.com/apk/res/android"
    package="com.example.quickstartkotlin">

    <uses-permission android:name="android.permission.INTERNET" />

    <application
        android:allowBackup="true"
        android:icon="@mipmap/ic_launcher"
        android:label="@string/app_name"
        android:roundIcon="@mipmap/ic_launcher_round"
        android:supportsRtl="true"
        android:theme="@style/AppTheme">
        <activity android:name=".MainActivity">
            <intent-filter>
                <action android:name="android.intent.action.MAIN" />

                <category android:name="android.intent.category.LAUNCHER" />
            </intent-filter>
        </activity>
    </application>

</manifest>
Executar a aplicação
Use o Android Studio para executar o aplicativo em um emulador de dispositivo. Quando você seleciona Leitor imersivo, o leitor imersivo é aberto com o conteúdo no aplicativo.
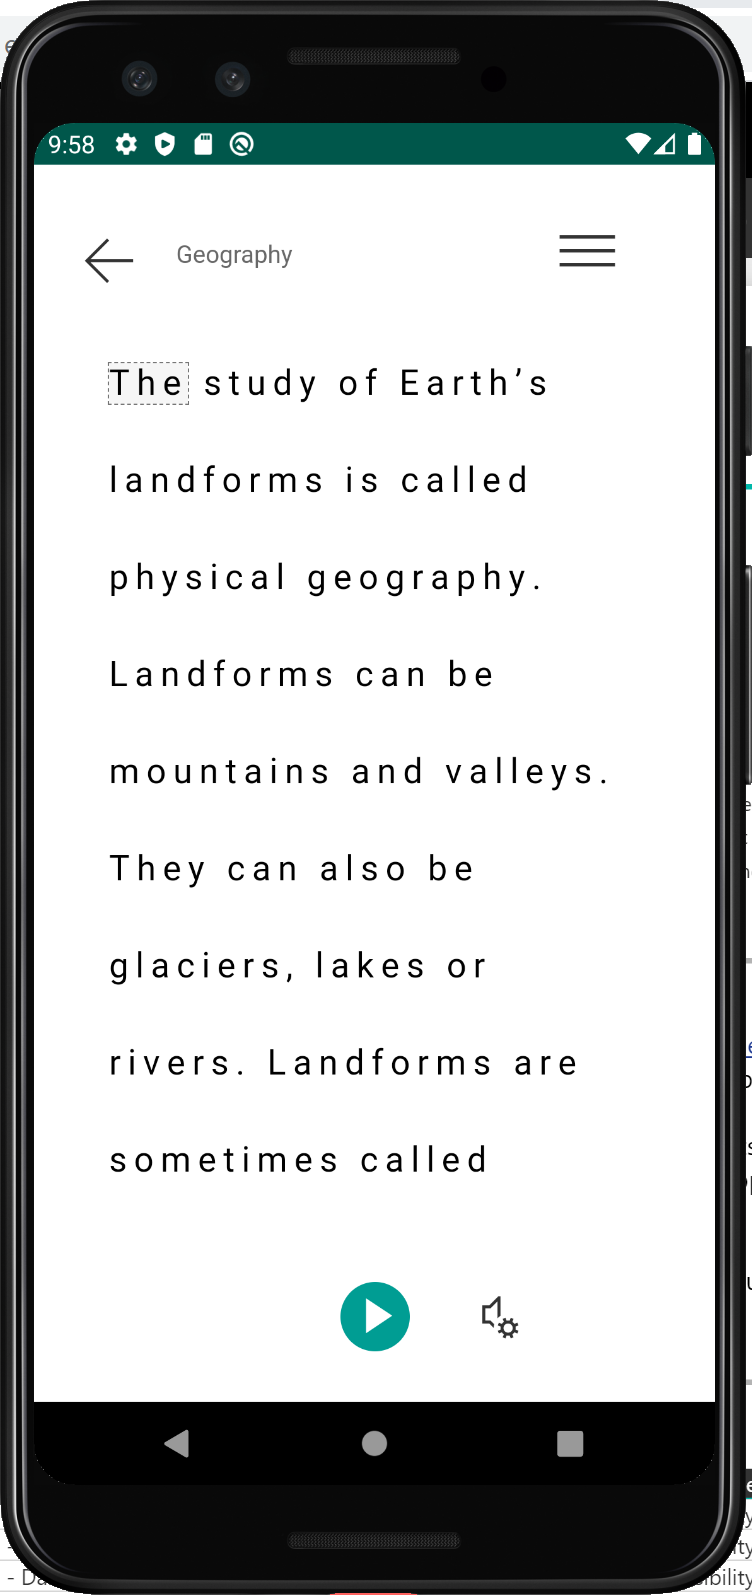
Próximo passo
Neste início rápido, você cria um aplicativo iOS do zero e integra o Immersive Reader. Uma amostra de trabalho completa deste início rápido está disponível no GitHub.
Pré-requisitos
- Uma subscrição do Azure. Você pode criar um gratuitamente.
- Um recurso do Immersive Reader configurado para autenticação do Microsoft Entra. Siga estas instruções para se configurar. Salve a saída da sessão em um arquivo de texto para que você possa configurar as propriedades do ambiente.
- macOS e Xcode.
Criar um projeto Xcode
Crie um novo projeto no Xcode.
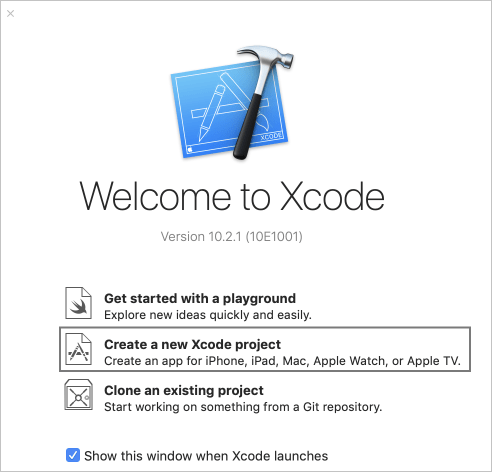
Escolha Single View App.

Configurar a autenticação
No menu superior, selecione Product > Scheme > Edit Scheme....
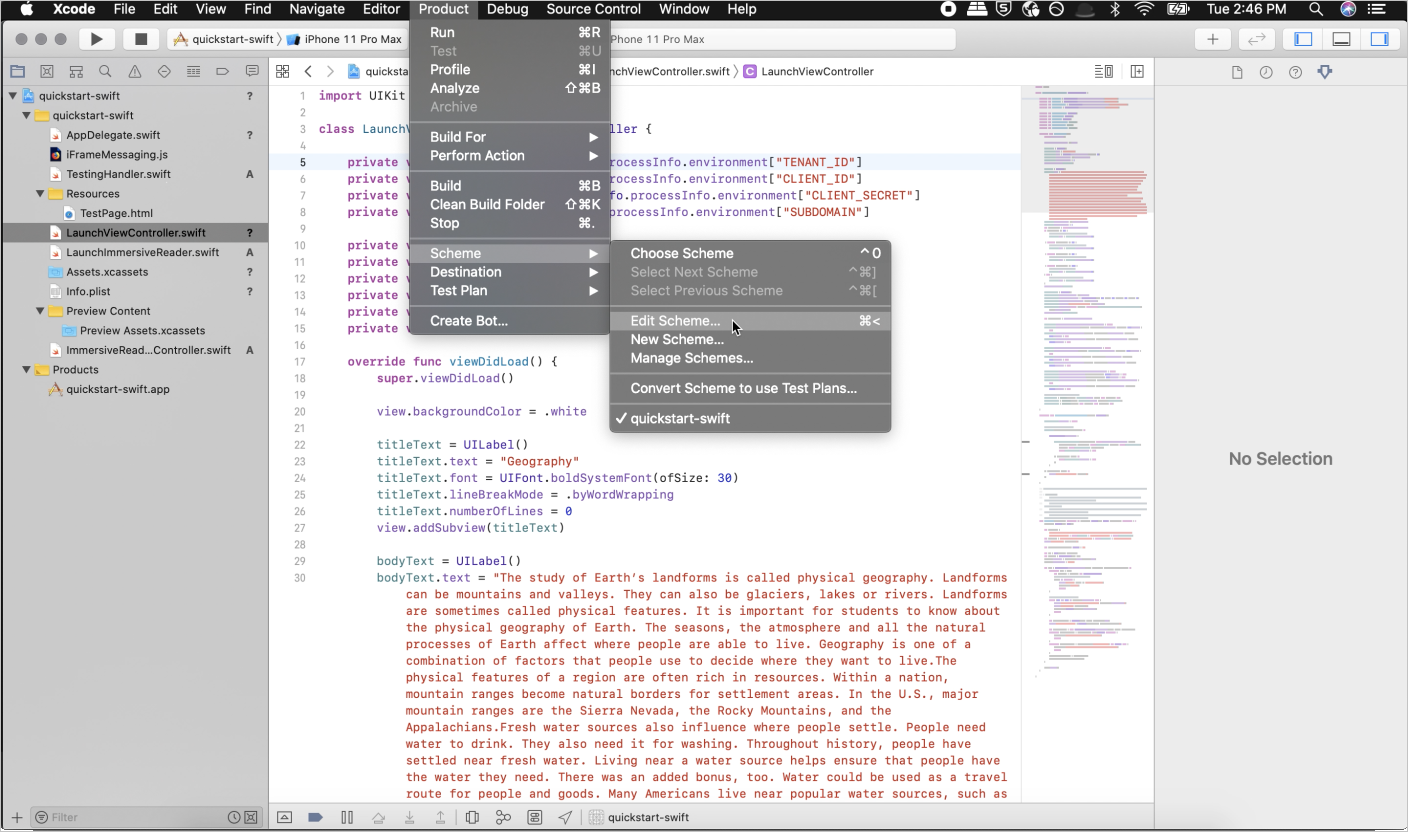
No modo de exibição Executar, selecione a guia Argumentos.
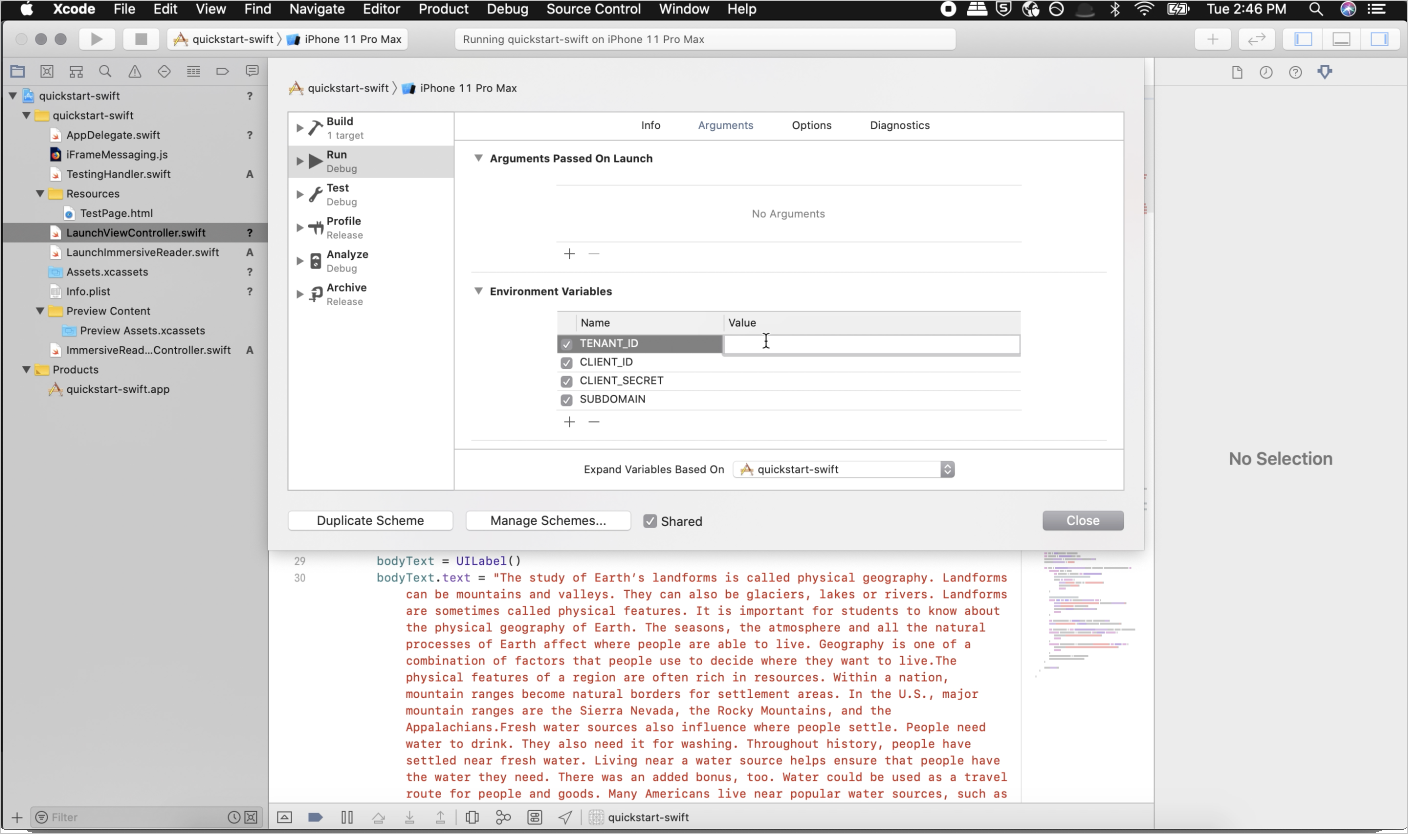
Na seção Variáveis de Ambiente, adicione os seguintes nomes e valores, fornecendo os valores fornecidos quando você criou o recurso Leitor Imersivo.
Importante
Lembre-se de nunca postar segredos publicamente. Para produção, use uma maneira segura de armazenar e acessar suas credenciais, como o Azure Key Vault.
TENANT_ID=<YOUR_TENANT_ID>
CLIENT_ID=<YOUR_CLIENT_ID>
CLIENT_SECRET<YOUR_CLIENT_SECRET>
SUBDOMAIN=<YOUR_SUBDOMAIN>
Configurar o aplicativo para ser executado sem um storyboard
Abra AppDelegate.swift e substitua o arquivo pelo código a seguir.
import UIKit

@UIApplicationMain
class AppDelegate: UIResponder, UIApplicationDelegate {
    var window: UIWindow?

    var navigationController: UINavigationController?

    func application(_ application: UIApplication, didFinishLaunchingWithOptions launchOptions: [UIApplication.LaunchOptionsKey: Any]?) -> Bool {
        // Override point for customization after application launch.

        window = UIWindow(frame: UIScreen.main.bounds)

        if let window = window {
            let mainViewController = LaunchViewController()
            navigationController = UINavigationController(rootViewController: mainViewController)
            window.rootViewController = navigationController
            window.makeKeyAndVisible()
        }
        return true
    }

    func applicationWillResignActive(_ application: UIApplication) {
        // Sent when the application is about to move from active to inactive state. This can occur for certain types of temporary interruptions (such as an incoming phone call or SMS message) or when the user quits the application and it begins the transition to the background state.
        // Use this method to pause ongoing tasks, disable timers, and invalidate graphics rendering callbacks. Games should use this method to pause the game.
    }

    func applicationDidEnterBackground(_ application: UIApplication) {
        // Use this method to release shared resources, save user data, invalidate timers, and store enough application state information to restore your application to its current state in case it is terminated later.
        // If your application supports background execution, this method is called instead of applicationWillTerminate: when the user quits.
    }

    func applicationWillEnterForeground(_ application: UIApplication) {
        // Called as part of the transition from the background to the active state; here you can undo many of the changes made on entering the background.
    }

    func applicationDidBecomeActive(_ application: UIApplication) {
        // Restart any tasks that were paused (or not yet started) while the application was inactive. If the application was previously in the background, optionally refresh the user interface.
    }

    func applicationWillTerminate(_ application: UIApplication) {
        // Called when the application is about to terminate. Save data if appropriate. See also applicationDidEnterBackground:.
    }
}
Criar os controladores de exibição e adicionar conteúdo de exemplo
Renomeie ViewController.swift para LaunchViewController.swift e substitua o arquivo pelo código a seguir.
import UIKit

class LaunchViewController: UIViewController {
    private var tenantId = ProcessInfo.processInfo.environment["TENANT_ID"]
    private var clientId = ProcessInfo.processInfo.environment["CLIENT_ID"]
    private var clientSecret = ProcessInfo.processInfo.environment["CLIENT_SECRET"]
    private var subdomain = ProcessInfo.processInfo.environment["SUBDOMAIN"]

    private var launchButton: UIButton!
    private var titleText: UILabel!
    private var bodyText: UILabel!
    private var sampleContent: Content!
    private var sampleChunk: Chunk!
    private var sampleOptions: Options!

    override func viewDidLoad() {
        super.viewDidLoad()

        view.backgroundColor = .white

        titleText = UILabel()
        titleText.text = "Geography"
        titleText.font = UIFont.boldSystemFont(ofSize: 30)
        titleText.lineBreakMode = .byWordWrapping
        titleText.numberOfLines = 0
        view.addSubview(titleText)

        bodyText = UILabel()
        bodyText.text = "The study of Earth's landforms is called physical geography. Landforms can be mountains and valleys. They can also be glaciers, lakes or rivers. Landforms are sometimes called physical features. It is important for students to know about the physical geography of Earth. The seasons, the atmosphere and all the natural processes of Earth affect where people are able to live. Geography is one of a combination of factors that people use to decide where they want to live.The physical features of a region are often rich in resources. Within a nation, mountain ranges become natural borders for settlement areas. In the U.S., major mountain ranges are the Sierra Nevada, the Rocky Mountains, and the Appalachians.Fresh water sources also influence where people settle. People need water to drink. They also need it for washing. Throughout history, people have settled near fresh water. Living near a water source helps ensure that people have the water they need. There was an added bonus, too. Water could be used as a travel route for people and goods. Many Americans live near popular water sources, such as the Mississippi River, the Colorado River and the Great Lakes.Mountains and deserts have been settled by fewer people than the plains areas. However, they have valuable resources of their own."
        bodyText.lineBreakMode = .byWordWrapping
        bodyText.numberOfLines = 0
        let screenSize = self.view.frame.height
        if screenSize <= 667 {
            // Font size for smaller iPhones.
            bodyText.font = bodyText.font.withSize(14)

         } else if screenSize <= 812 {
            // Font size for medium iPhones.
            bodyText.font = bodyText.font.withSize(15)

         } else if screenSize <= 896 {
            // Font size for larger iPhones.
            bodyText.font = bodyText.font.withSize(17)

         } else if screenSize <= 1024 {
            // Font size for iPads.
            bodyText.font = bodyText.font.withSize(25)
        } else {
            // Font size for large iPads.
            bodyText.font = bodyText.font.withSize(28)
        }
        view.addSubview(bodyText)

        launchButton = UIButton()
        launchButton.backgroundColor = .darkGray
        launchButton.contentEdgeInsets = UIEdgeInsets(top: 10, left: 10, bottom: 10, right: 10)
        launchButton.setTitleColor(.white, for: .normal)
        launchButton.setTitle("Immersive Reader", for: .normal)
        launchButton.addTarget(self, action: #selector(launchImmersiveReaderButton(sender:)), for: .touchUpInside)
        view.addSubview(launchButton)

        let layoutGuide = view.safeAreaLayoutGuide

        titleText.translatesAutoresizingMaskIntoConstraints = false
        titleText.topAnchor.constraint(equalTo: layoutGuide.topAnchor, constant: 20).isActive = true
        titleText.leadingAnchor.constraint(equalTo: layoutGuide.leadingAnchor, constant: 20).isActive = true
        titleText.trailingAnchor.constraint(equalTo: layoutGuide.trailingAnchor, constant: -20).isActive = true

        bodyText.translatesAutoresizingMaskIntoConstraints = false
        bodyText.topAnchor.constraint(equalTo: titleText.bottomAnchor, constant: 15).isActive = true
        bodyText.leadingAnchor.constraint(equalTo: layoutGuide.leadingAnchor, constant: 20).isActive = true
        bodyText.trailingAnchor.constraint(equalTo: layoutGuide.trailingAnchor, constant: -20).isActive = true

        launchButton.translatesAutoresizingMaskIntoConstraints = false
        launchButton.widthAnchor.constraint(equalToConstant: 200).isActive = true
        launchButton.heightAnchor.constraint(equalToConstant: 50).isActive = true
        launchButton.centerXAnchor.constraint(equalTo: layoutGuide.centerXAnchor).isActive = true
        launchButton.bottomAnchor.constraint(equalTo: layoutGuide.bottomAnchor, constant: -10).isActive = true

        // Create content and options.
        sampleChunk = Chunk(content: bodyText.text!, lang: nil, mimeType: nil)
        sampleContent = Content(title: titleText.text!, chunks: [sampleChunk])
        sampleOptions = Options(uiLang: nil, timeout: nil, uiZIndex: nil)
    }

    @IBAction func launchImmersiveReaderButton(sender: AnyObject) {
        launchButton.isEnabled = false

        // Callback to get token.
        getToken(onSuccess: {cognitiveToken in
            DispatchQueue.main.async {
                launchImmersiveReader(navController: self.navigationController!, token: cognitiveToken, subdomain: self.subdomain!, content: self.sampleContent, options: self.sampleOptions, onSuccess: {
                    self.launchButton.isEnabled = true
                }, onFailure: { error in
                    self.launchButton.isEnabled = true
                })
            }
        }, onFailure: { error in
            print("an error occurred: \(error)")
        })
    }

    func getToken(onSuccess: @escaping (_ theToken: String) -> Void, onFailure: @escaping ( _ theError: String) -> Void) {
        let tokenForm = "grant_type=client_credentials&resource=https://cognitiveservices.azure.com/&client_id=" + self.clientId! + "&client_secret=" + self.clientSecret!
        let tokenUrl = "https://login.windows.net/" + self.tenantId! + "/oauth2/token"

        var responseTokenString: String = "0"

        let url = URL(string: tokenUrl)!
        var request = URLRequest(url: url)
        request.httpBody = tokenForm.data(using: .utf8)
        request.httpMethod = "POST"

        let task = URLSession.shared.dataTask(with: request) { data, response, error in
            guard let data = data,
                let response = response as? HTTPURLResponse,
                error == nil else {
                    onFailure("Error")
                    return
                }

            guard (200 ... 299) ~= response.statusCode else {
                onFailure(String(response.statusCode))
                return
            }

            let responseString = String(data: data, encoding: .utf8)

            let jsonResponse = try? JSONSerialization.jsonObject(with: data, options: [])
            guard let jsonDictonary = jsonResponse as? [String: Any] else {
                onFailure("Error parsing JSON response.")
                return
            }
            guard let responseToken = jsonDictonary["access_token"] as? String else {
                onFailure("Error retrieving token from JSON response.")
                return
            }
            responseTokenString = responseToken
            onSuccess(responseTokenString)
        }

        task.resume()
    }
}
Adicione um novo arquivo à pasta raiz do projeto chamada ImmersiveReaderViewController.swift e adicione o código a seguir.
import UIKit
import Foundation
import WebKit

@available(iOS 11.0, *)
public class ImmersiveReaderWebView: WKWebView {

    init(frame: CGRect, contentController: WKUserContentController) {
        let conf = WKWebViewConfiguration()
        conf.userContentController = contentController
        super.init(frame: frame, configuration: conf)
    }

    required init?(coder: NSCoder) {
        fatalError("init(coder:) has not been implemented")
    }
}

public class ImmersiveReaderViewController: UIViewController, WKUIDelegate, WKNavigationDelegate {
    let tokenToSend: String
    let subdomainToSend: String
    let contentToSend: Content
    let optionsToSend: Options?
    let onSuccessImmersiveReader: (() -> Void)?
    let onFailureImmersiveReader: ((_ error: Error) -> Void)?
    let onTimeout: ((_ timeoutValue: TimeInterval) -> Void)?
    let onError: ((_ error: String) -> Void)?

    let startTime = Date().timeIntervalSince1970*1000
    var src: String
    var webView: WKWebView!
    var timer: Timer!
    var timeoutValue: TimeInterval!

    public init(tokenToPass: String, subdomainToPass: String, contentToPass: Content, optionsToPass: Options?, onSuccessImmersiveReader: @escaping () -> Void, onFailureImmersiveReader: @escaping (_ status: Error) -> Void, onTimeout: @escaping (_ timeoutValue: TimeInterval) -> Void, onError: @escaping (_ error: String) -> Void) {
        self.tokenToSend = tokenToPass
        self.subdomainToSend = subdomainToPass
        self.contentToSend = contentToPass
        self.optionsToSend = optionsToPass
        self.onSuccessImmersiveReader = onSuccessImmersiveReader
        self.onFailureImmersiveReader = onFailureImmersiveReader
        self.onTimeout = onTimeout
        self.onError = onError
        self.src = "https://" + subdomainToPass + ".cognitiveservices.azure.com/immersivereader/webapp/v1.0/reader"
        super.init(nibName: nil, bundle: nil)
    }

    required init?(coder aDecoder: NSCoder) {
        fatalError("init(coder:) has not been implemented")
    }

    override public func viewDidLoad() {
        super.viewDidLoad()

        // If uiLang options are set update src to reflect this.
        switch optionsToSend?.uiLang {
        case .none: break
        case .some(let value):
            src = src + "?omkt=" + value
        }

        // Set timeout to default or value user specifies.
        switch optionsToSend?.timeout {
        case .none:
            timeoutValue = 15
        case .some(let value):
            timeoutValue = value
        }

        view.backgroundColor = .white
        webView = WKWebView()

        let contentController = WKUserContentController()
        if #available(iOS 11.0, *) {
            webView = ImmersiveReaderWebView(frame: .zero, contentController: contentController)
        } else {
            // Fallback on earlier versions
            webView = WKWebView()
            let config = WKWebViewConfiguration()
            config.userContentController = contentController
            webView = WKWebView(frame: .zero, configuration: config)
        }
        webView.navigationDelegate = self
        webView.uiDelegate = self

        contentController.add(self, name: "readyForContent")
        contentController.add(self, name: "launchSuccessful")
        contentController.add(self, name: "tokenExpired")
        contentController.add(self, name: "throttled")

        view.addSubview(webView)
        webView.translatesAutoresizingMaskIntoConstraints = false

        if #available(iOS 11.0, *) {
            let layoutGuide = view.safeAreaLayoutGuide
            webView.leadingAnchor.constraint(equalTo: layoutGuide.leadingAnchor).isActive = true
            webView.trailingAnchor.constraint(equalTo: layoutGuide.trailingAnchor).isActive = true
            webView.topAnchor.constraint(equalTo: layoutGuide.topAnchor).isActive = true
            webView.bottomAnchor.constraint(equalTo: layoutGuide.bottomAnchor).isActive = true

        } else {
            webView.leadingAnchor.constraint(equalTo: view.leadingAnchor).isActive = true
            webView.trailingAnchor.constraint(equalTo: view.trailingAnchor).isActive = true
            webView.topAnchor.constraint(equalTo: view.topAnchor).isActive = true
            webView.bottomAnchor.constraint(equalTo: view.bottomAnchor).isActive = true
        }
        // Get path to JavaScript file.
        guard let scriptPath = Bundle.main.path(forResource: "iFrameMessaging", ofType: "js") else {
            onError!("Could not create script path from resource.")
            return
        }
        do {
            let scriptSource = try String(contentsOfFile: scriptPath)
            let userScript = WKUserScript(source: scriptSource, injectionTime: .atDocumentStart, forMainFrameOnly: true)
            contentController.addUserScript(userScript)
        } catch {
            onError!("Could not parse JavaScript file.")
            return
        }

        // Start the timer.
        timer = Timer.scheduledTimer(timeInterval: timeoutValue, target: self, selector: #selector(self.timedOut), userInfo: nil, repeats: false)

        // Load the iframe from HTML.
        webView.loadHTMLString("<!DOCTYPE html><html style='width: 100%; height: 100%; margin: 0; padding: 0;'><head><meta name='viewport' content='width=device-width, initial-scale=1, shrink-to-fit=no'></head><body style='width: 100%; height: 100%; margin: 0; padding: 0;'><iframe id='immersiveReaderIframe' src = '\(src)' width='100%' height='100%' style='border: 0'></iframe></body></html>", baseURL: URL(string: "test://learningtools.onenote.com/learningtoolsapp/cognitive/reader"))
    }

    @objc func timedOut(_ timer: AnyObject) {
        onTimeout!(timeoutValue)
    }

    public func webView(_ webView: WKWebView, decidePolicyFor navigationAction: WKNavigationAction, decisionHandler: @escaping (WKNavigationActionPolicy) -> Void) {
        decisionHandler(.allow)
    }

    public func webView(_ webView: WKWebView, decidePolicyFor navigationResponse: WKNavigationResponse, decisionHandler: @escaping (WKNavigationResponsePolicy) -> Void ) {
        decisionHandler(.allow)
    }
}

extension ImmersiveReaderViewController: WKScriptMessageHandler {
    public func userContentController(_ userContentController: WKUserContentController, didReceive message: WKScriptMessage) {
        if message.name == "readyForContent" {
            // Stop the timer.
            timer.invalidate()

            // Create the message variable
            let message = Message(cogSvcsAccessToken: tokenToSend, cogSvcsSubdomain: subdomainToSend, resourceName: nil, request: contentToSend, launchToPostMessageSentDurationInMs: Int(Date().timeIntervalSince1970*1000 - startTime))
            do {
                let jsonData = try JSONEncoder().encode(message)
                let jsonString = String(data: jsonData, encoding: .utf8)
                self.webView.evaluateJavaScript("sendContentToReader(\(jsonString!))") { (result, error) in
                    if error != nil {
                        self.onError!("Error evaluating JavaScript \(String(describing: error))")
                    }
                }
            } catch { print(error)}
        }

        if message.name == "launchSuccessful" {
            onSuccessImmersiveReader!()
        }

        if message.name == "tokenExpired" {
            let tokenExpiredError = Error(code: "TokenExpired", message: "The access token supplied is expired.")
            onFailureImmersiveReader!(tokenExpiredError)
        }

        if message.name == "throttled" {
            let throttledError = Error(code: "Throttled", message: "You have exceeded the call rate limit.")
            onFailureImmersiveReader!(throttledError)
        }
    }
}
Adicione outro novo arquivo à pasta raiz do projeto chamada LaunchImmersiveReader.swift e adicione o código a seguir.
import UIKit
import Foundation

var navigationController: UINavigationController?

public struct Content: Encodable {
    var title: String
    var chunks: [Chunk]

    public init(title: String, chunks: [Chunk]) {
        self.title = title
        self.chunks = chunks
    }
}

public struct Chunk: Encodable {
    var content: String
    var lang: String?
    var mimeType: String?

    public init(content: String, lang: String?, mimeType: String?) {
        self.content = content
        self.lang = lang
        self.mimeType = mimeType
    }
}

public struct Options {
    var uiLang: String?
    var timeout: TimeInterval?

    public init(uiLang: String?, timeout: TimeInterval?, uiZIndex: NSNumber?) {
        self.uiLang = uiLang
        self.timeout = timeout
    }
}

public struct Error {
    public var code: String
    public var message: String

    public init(code: String, message: String) {
        self.code = code
        self.message = message
    }
}

struct Message: Encodable {
    let cogSvcsAccessToken: String
    let cogSvcsSubdomain: String
    let resourceName: String?
    let request: Content
    let launchToPostMessageSentDurationInMs: Int

    init(cogSvcsAccessToken: String, cogSvcsSubdomain: String, resourceName: String?, request: Content, launchToPostMessageSentDurationInMs: Int) {
        self.cogSvcsAccessToken = cogSvcsAccessToken
        self.cogSvcsSubdomain = cogSvcsSubdomain
        self.resourceName = resourceName
        self.request = request
        self.launchToPostMessageSentDurationInMs = launchToPostMessageSentDurationInMs
    }
}

public func launchImmersiveReader(navController: UINavigationController, token: String, subdomain: String, content: Content, options: Options?, onSuccess: @escaping () -> Void, onFailure: @escaping (_ error: Error) -> Void) {
    if (content.chunks.count == 0) {
        let badArgumentError = Error(code: "BadArgument", message: "Chunks must not be empty.")
        onFailure(badArgumentError)
    }

    navigationController = navController
    let immersiveReaderViewController = ImmersiveReaderViewController(tokenToPass: token, subdomainToPass: subdomain, contentToPass: content, optionsToPass: options, onSuccessImmersiveReader: {
        onSuccess()
    }, onFailureImmersiveReader: { error in
        onFailure(error)
    }, onTimeout: { timeout in
        navigationController?.popViewController(animated: true)
        let timeoutError = Error(code: "Timeout", message: "Page failed to load after timeout \(timeout) ms.")
        onFailure(timeoutError)
    }, onError: { error in
        navigationController?.popViewController(animated: true)
        let errorMessage = Error(code: "Internal Error", message: error)
        onFailure(errorMessage)
    })
    navigationController!.pushViewController(immersiveReaderViewController, animated: true)
}
Adicione um arquivo à pasta Recursos chamado iFrameMessaging.js e adicione o código a seguir.
window.addEventListener("message", function(message) {
    if(message.data == "ImmersiveReader-ReadyForContent") {
        window.webkit.messageHandlers.readyForContent.postMessage(null);
    }

    if(message.data == "ImmersiveReader-LaunchSuccessful") {
        window.webkit.messageHandlers.launchSuccessful.postMessage(null);
    }

    if(message.data == "ImmersiveReader-TokenExpired") {
        window.webkit.messageHandlers.tokenExpired.postMessage(null);
    }

    if(message.data == "ImmersiveReader-Throttled") {
        window.webkit.messageHandlers.throttled.postMessage(null);
    }
});

function sendContentToReader(message) {
    document.getElementById('immersiveReaderIframe').contentWindow.postMessage(JSON.stringify({messageType:'Content', messageValue: message}), '*');
}
Compilar e executar a aplicação
Defina o esquema de arquivamento no Xcode selecionando um simulador ou destino de dispositivo.


No Xcode, pressione Ctrl+R ou selecione o botão de reprodução para executar o projeto. O aplicativo deve ser iniciado no simulador ou dispositivo especificado.
No seu aplicativo, você deve ver:
Ao selecionar o botão Leitor Imersivo , você verá o Leitor Imersivo iniciado com o conteúdo no aplicativo.