How to archive Microsoft Entra activity logs to an Azure storage account
If you need to store Microsoft Entra activity logs for longer than the default retention period, you can archive your logs to a storage account. We recommend that you use a general storage account and not a Blob storage account. We recommend that you use a general storage account and not a Blob storage account. For storage pricing information, see the Azure Storage pricing calculator.
Prerequisites
To use this feature, you need:
- An Azure subscription. If you don't have an Azure subscription, you can sign up for a free trial.
- An Azure storage account you have
ListKeyspermissions for. Learn how to create a storage account. - A user who's a Security Administrator for the Microsoft Entra tenant.
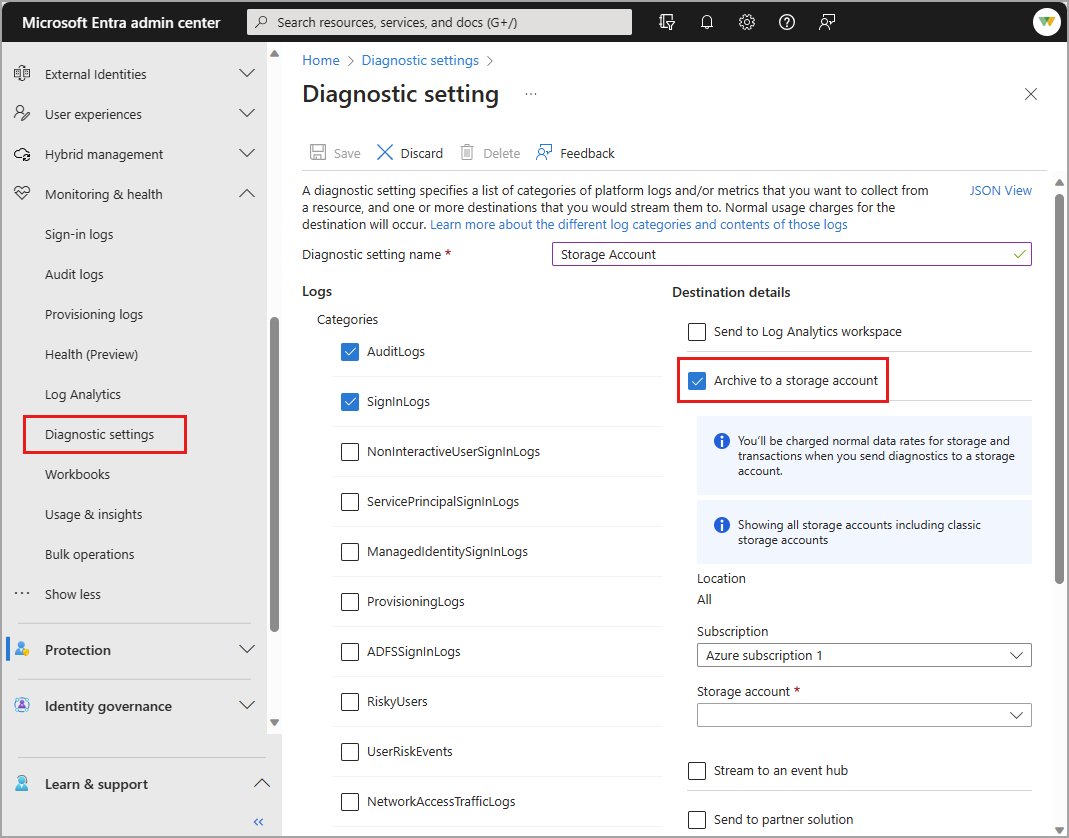
Archive logs to an Azure storage account
Tip
Steps in this article might vary slightly based on the portal you start from.
Sign in to the Microsoft Entra admin center as at least a Security Administrator.
Browse to Identity > Monitoring & health > Diagnostic settings. You can also select Export Settings from either the Audit Logs or Sign-ins page.
Select + Add diagnostic setting to create a new integration or select Edit setting for an existing integration.
Enter a Diagnostic setting name. If you're editing an existing integration, you can't change the name.
Select the log categories that you want to stream.
Under Destination Details select the Archive to a storage account check box.
Select the appropriate Subscription and Storage account from the menus.
Note
The Diagnostic settings storage retention feature has been deprecated. If you're editing a diagnostic setting created when the retention option was available, those fields are still visible. For details on this change, see Migrate from diagnostic settings storage retention to Azure Storage lifecycle management.
Select Save to save the setting.
Close the window to return to the diagnostic settings page.
Next steps
Pripomienky
Pripravujeme: V priebehu roka 2024 postupne zrušíme službu Problémy v službe GitHub ako mechanizmus pripomienok týkajúcich sa obsahu a nahradíme ju novým systémom pripomienok. Ďalšie informácie nájdete na stránke: https://aka.ms/ContentUserFeedback.
Odoslať a zobraziť pripomienky pre