你当前正在访问 Microsoft Azure Global Edition 技术文档网站。 如果需要访问由世纪互联运营的 Microsoft Azure 中国技术文档网站,请访问 https://docs.azure.cn。
为托管在 Linux 中的 ASP.NET Core Web 应用启用探查器
通过使用探查器,可以跟踪托管在 Azure 应用服务上 Linux 中的实时 ASP.NET Core Web 应用的每种方法所花费的时间。 本文重点介绍了托管在 Linux 中的 Web 应用。 还可以使用 Linux、Windows 和 Mac 开发环境进行试验。
本文内容:
- 设置和部署托管在 Linux 上的 ASP.NET Core Web 应用程序。
- 将 Application Insights Profiler 添加到 ASP.NET Core Web 应用程序。
先决条件
- 安装最新的 .NET Core SDK。
- 根据位于入门:安装 Git 的说明安装 Git。
- 查看以下示例,了解上下文:
在本地设置项目
在计算机上打开命令提示符窗口。
创建 ASP.NET Core MVC Web 应用程序:
dotnet new mvc -n LinuxProfilerTest将工作目录切换到项目的根文件夹。
添加用于收集探查器跟踪的 NuGet 包:
dotnet add package Microsoft.ApplicationInsights.Profiler.AspNetCore在你偏好的代码编辑器中,在
Program.cs中启用 Application Insights 和 Profiler。 添加自定义 Profiler 设置(如果适用)。对于
WebAPI:// Add services to the container. builder.Services.AddApplicationInsightsTelemetry(); builder.Services.AddServiceProfiler();对于
Worker:IHost host = Host.CreateDefaultBuilder(args) .ConfigureServices(services => { services.AddApplicationInsightsTelemetryWorkerService(); services.AddServiceProfiler(); // Assuming Worker is your background service class. services.AddHostedService<Worker>(); }) .Build(); await host.RunAsync();保存并提交对本地存储库的更改:
git init
git add .
git commit -m "first commit"
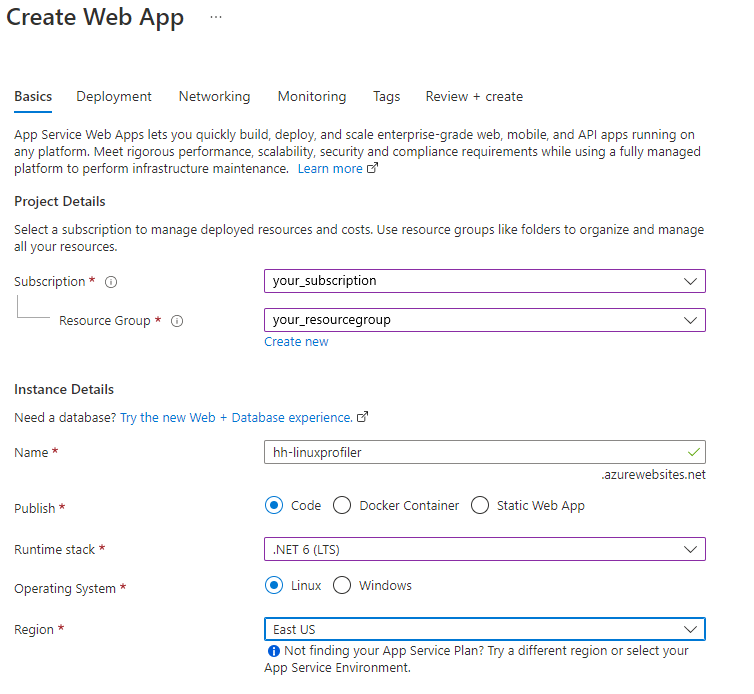
创建用于托管项目的 Linux Web 应用
在 Azure 门户中,使用 Linux 上的应用服务创建 Web 应用环境。
转到新的 Web 应用资源,然后选择“部署中心”>“FTPS 凭据”以创建部署凭据。 记下你的凭据以供稍后使用。
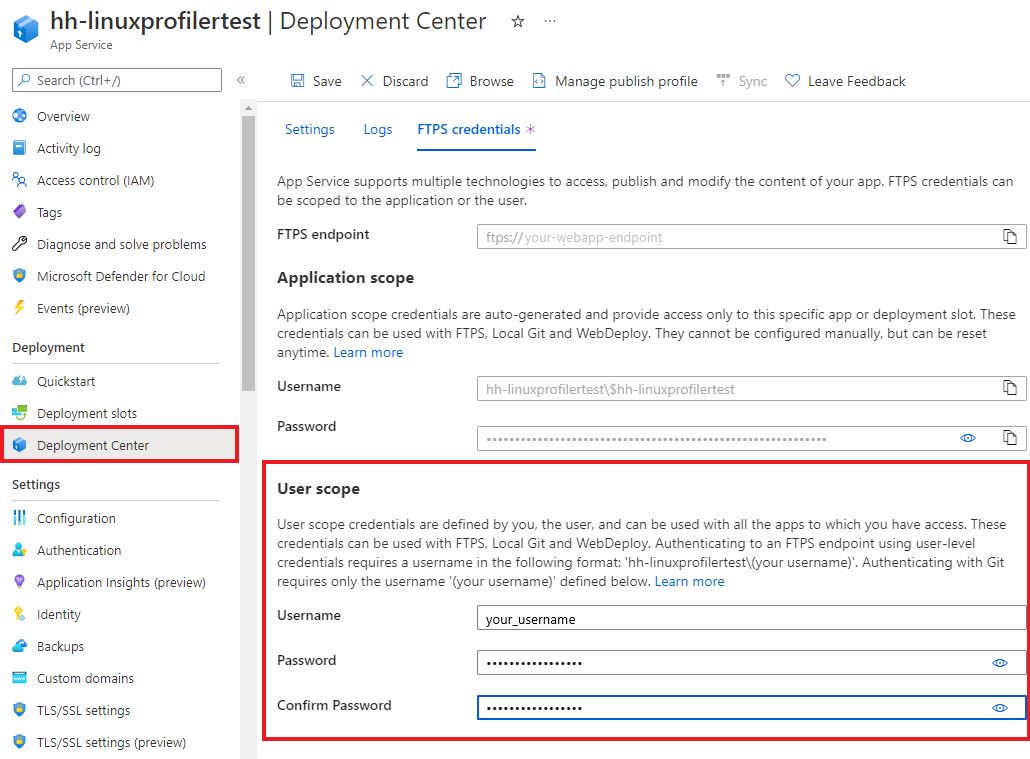
选择“保存”。
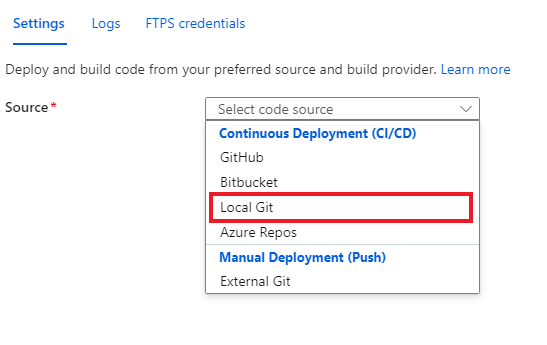
选择“设置”选项卡。
在下拉列表中,选择“本地 Git”,以在 Web 应用中设置本地 Git 存储库。
选择“保存”以使用 Git Clone URI 创建 Git 存储库。
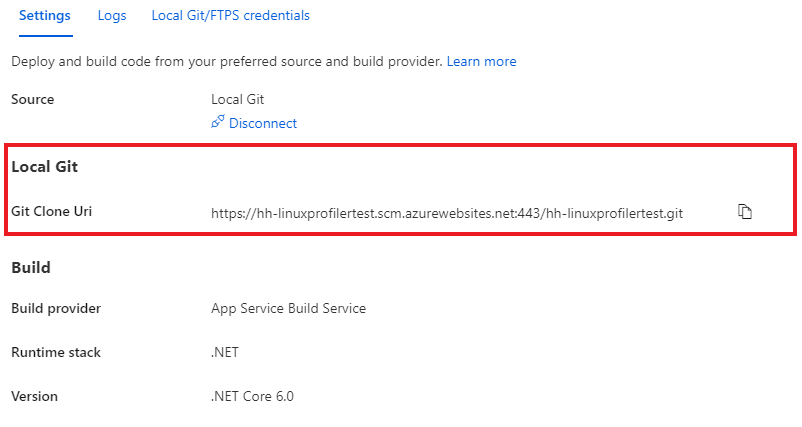
有关更多部署选项,请参阅应用服务文档。
部署项目
在命令提示符窗口中,浏览到项目的根文件夹。 添加 Git 远程存储库以指向应用服务上的存储库:
git remote add azure https://<username>@<app_name>.scm.azurewebsites.net:443/<app_name>.git- 使用创建部署凭据时所用的用户名。
- 使用通过 Linux 上的应用服务创建 Web 应用时所用的应用名称。
通过将更改推送到 Azure 来部署项目:
git push azure main应会看到与如下示例类似的输出:
Counting objects: 9, done.
Delta compression using up to 8 threads.
Compressing objects: 100% (8/8), done.
Writing objects: 100% (9/9), 1.78 KiB | 911.00 KiB/s, done.
Total 9 (delta 3), reused 0 (delta 0)
remote: Updating branch 'main'.
remote: Updating submodules.
remote: Preparing deployment for commit id 'd7369a99d7'.
remote: Generating deployment script.
remote: Running deployment command...
remote: Handling ASP.NET Core Web Application deployment.
remote: ......
remote:   Restoring packages for /home/site/repository/EventPipeExampleLinux.csproj...
remote: .
remote:   Installing Newtonsoft.Json 10.0.3.
remote:   Installing Microsoft.ApplicationInsights.Profiler.Core 1.1.0-LKG
...
添加 Application Insights 来监视 Web 应用
可以使用三个选项将 Application Insights 添加到 Web 应用:
- 使用 Azure 门户中的“Application Insights”窗格。
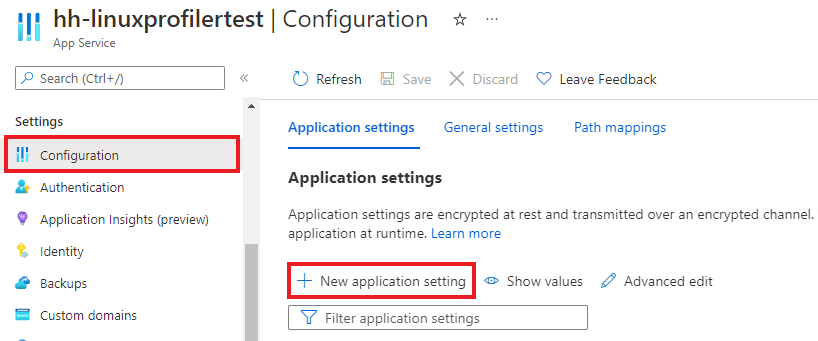
- 使用 Azure 门户中的“配置”窗格。
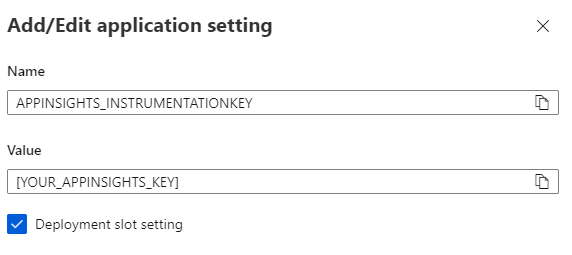
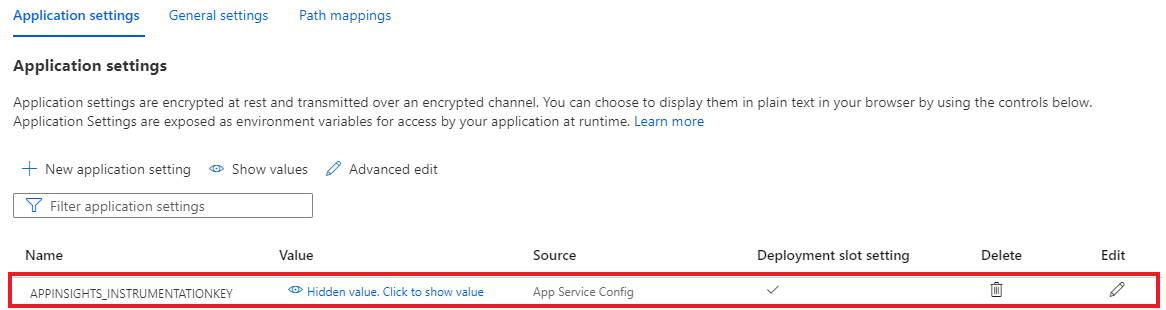
- 手动添加到 Web 应用设置。
在 Azure 门户上的 Web 应用中,选择左侧窗格中的“Application Insights”。
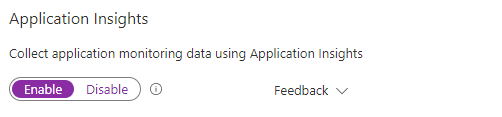
选择“启用 Application Insights”。

在“Application Insights”下,选择“启用”。
在“链接到 Application Insights 资源”下,创建新资源或选择现有资源。 对于本示例,我们将创建新的资源。
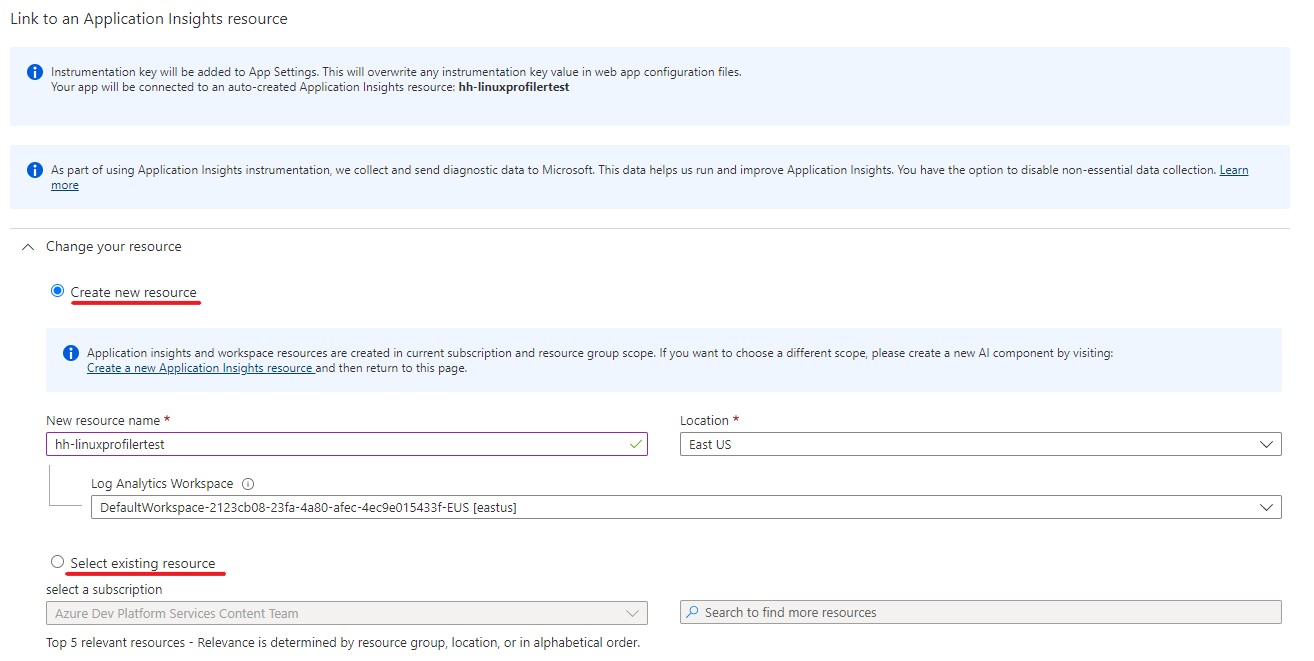
选择“应用”>“确定”以应用并确认。