你当前正在访问 Microsoft Azure Global Edition 技术文档网站。 如果需要访问由世纪互联运营的 Microsoft Azure 中国技术文档网站,请访问 https://docs.azure.cn。
教程:操作模型
在本教程中,你将了解如何执行以下操作:
- 添加围绕远程渲染模型的视觉和操作边界
- 移动、旋转和缩放
- 使用空间查询实现光线投射
- 为远程渲染对象添加简单动画
先决条件
- 本教程在教程:接口和自定义模型的基础上构建。
查询远程对象边界并应用于本地边界
要与远程对象进行交互,我们首先需要一个要用于进行交互的本地表示形式。 对象边界对于快速操作远程对象非常有用。 可以使用本地实体作为参考,从 ARR 查询远程边界。 在将模型加载到远程会话中后查询边界。
模型的边界由包含整个模型的框定义 - 就像 Unity 的 BoxCollider 一样,为 x、y 和 z 轴分别定义了中心和大小。 事实上,我们将使用 Unity 的 BoxCollider 来表示远程模型的边界。
在与 RemoteRenderedModel 相同的目录中创建新的脚本,并将其命名为 RemoteBounds 。
将脚本的内容替换为以下代码:
// Copyright (c) Microsoft Corporation. All rights reserved.
// Licensed under the MIT License. See LICENSE in the project root for license information.

using Microsoft.Azure.RemoteRendering;
using Microsoft.Azure.RemoteRendering.Unity;
using System;
using UnityEngine;

[RequireComponent(typeof(BaseRemoteRenderedModel))]
public class RemoteBounds : BaseRemoteBounds
{
    //Remote bounds works with a specific remotely rendered model
    private BaseRemoteRenderedModel targetModel = null;

    private RemoteBoundsState currentBoundsState = RemoteBoundsState.NotReady;

    public override RemoteBoundsState CurrentBoundsState
    {
        get => currentBoundsState;
        protected set
        {
            if (currentBoundsState != value)
            {
                currentBoundsState = value;
                BoundsStateChange?.Invoke(value);
            }
        }
    }

    public override event Action<RemoteBoundsState> BoundsStateChange;

    public void Awake()
    {
        BoundsStateChange += HandleUnityEvents;
        targetModel = GetComponent<BaseRemoteRenderedModel>();

        targetModel.ModelStateChange += TargetModel_OnModelStateChange;
        TargetModel_OnModelStateChange(targetModel.CurrentModelState);
    }

    private void TargetModel_OnModelStateChange(ModelState state)
    {
        switch (state)
        {
            case ModelState.Loaded:
                QueryBounds();
                break;
            default:
                BoundsBoxCollider.enabled = false;
                CurrentBoundsState = RemoteBoundsState.NotReady;
                break;
        }
    }

    // Create an async query using the model entity
    async private void QueryBounds()
    {
        //Implement me
    }
}
注意
如果你在 Visual Studio 中看到一个错误,声明“功能‘X’在 C# 6 中不可用。请使用语言版本 7.0 或更高版本”,可以忽略这些错误。 这与 Unity 的解决方案和项目生成有关。
应将此脚本添加到与实现 BaseRemoteRenderedModel 的脚本相同的 GameObject 中。 在这种情况下,即为 RemoteRenderedModel。 与之前的脚本类似,这个初始代码会处理与远程边界相关的所有状态更改、事件和数据。
只剩一个方法有待实现:QueryBounds。 QueryBounds 以异步方式提取边界,获取查询结果,并将其应用到本地 BoxCollider 。
QueryBounds 方法非常直截了当:向远程渲染会话发送查询并等待结果。
将 QueryBounds 方法替换为以下已完成的方法:
// Create a query using the model entity
async private void QueryBounds()
{
    var remoteBounds = targetModel.ModelEntity.QueryLocalBoundsAsync();
    CurrentBoundsState = RemoteBoundsState.Updating;
    await remoteBounds;

    if (remoteBounds.IsCompleted)
    {
        var newBounds = remoteBounds.Result.toUnity();
        BoundsBoxCollider.center = newBounds.center;
        BoundsBoxCollider.size = newBounds.size;
        BoundsBoxCollider.enabled = true;
        CurrentBoundsState = RemoteBoundsState.Ready;
    }
    else
    {
        CurrentBoundsState = RemoteBoundsState.Error;
    }
}
我们会检查查询结果,看看是否成功。 如果成功,将返回的边界转换为 BoxCollider 可以接受的格式并应用边界。
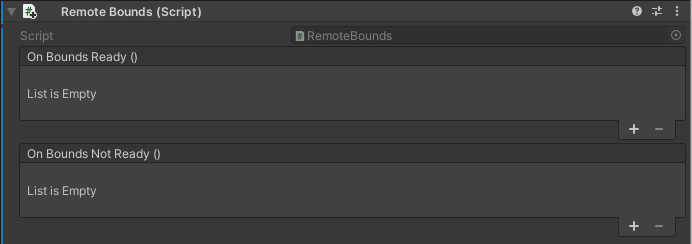
现在,将 RemoteBounds 脚本添加到与 RemoteRenderedModel 相同的游戏对象时,会在需要时添加 BoxCollider,当模型达到其 Loaded 状态时,会自动查询边界,并将其应用到 BoxCollider。
使用之前创建的 TestModel GameObject,添加 RemoteBounds 组件 。
确认已添加脚本。
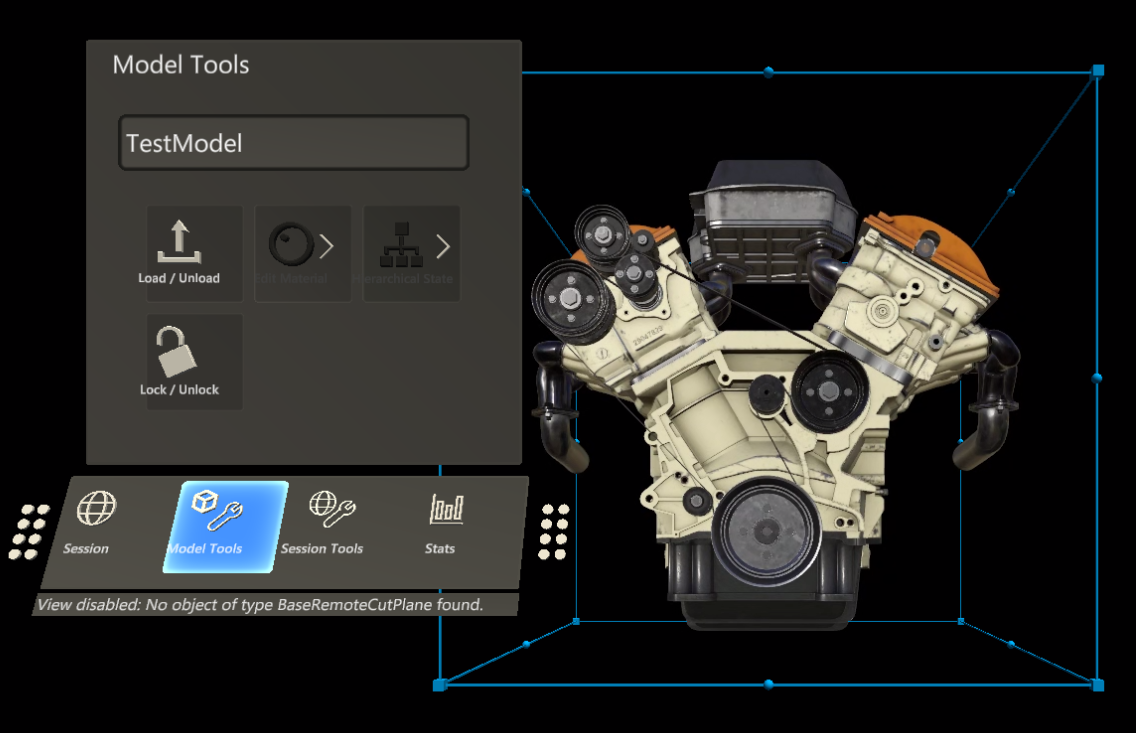
再次运行应用程序。 模型加载后不久,你会看到远程对象的边界。 你会看到类似以下值的内容:

现在,我们在 Unity 对象上有了一个配置了准确边界的本地 BoxCollider。 这些边界允许使用与本地渲染对象相同的策略进行可视化和交互。 例如,应用可更改“转换”、物理数据等的脚本。
移动、旋转和缩放
移动、旋转和缩放远程渲染的对象的工作方式与其他 Unity 对象相同。 RemoteRenderingCoordinator 在其 LateUpdate 方法中调用当前活动会话上的 Update。 Update 的一部分工作是将本地模型实体的转换与远程对应项进行同步。 要移动、旋转或缩放远程渲染的模型,只需移动、旋转或缩放表示远程模型的 GameObject 的转换。 这里,我们将修改附加了 RemoteRenderedModel 脚本的父 GameObject 的转换。
本教程使用 MRTK 进行对象交互。 大部分用于移动、旋转和缩放对象的特定于 MRTK 的实现不在本教程范围内。 在“模型工具”菜单的“AppMenu”内预配置了一个模型视图控制器 。
- 确保场景中有之前创建的 TestModel GameObject。
- 确保场景中有 AppMenu prefab。
- 按下 Unity 的播放按钮以播放场景,并打开 AppMenu 中的“模型工具”菜单 。
AppMenu 具有一个子菜单“模型工具”,可实现用于与模型绑定的视图控制器 。 当 GameObject 包含 RemoteBounds 组件时,视图控制器将添加 BoundingBox 组件,该组件是一个 MRTK 组件,使用 BoxCollider 渲染围绕对象的边界框 。 ObjectManipulator,负责手势交互。 通过组合运用这些脚本,我们可以移动、旋转和缩放远程渲染的模型。
将鼠标移到游戏面板,然后单击游戏面板内部使其拥有焦点。
使用 MRTK 的手势模拟,按住左 Shift 键。
操纵模拟手,使手部射线指向测试模型。
左键单击并按住,然后拖动模型以移动它。
你应会看到远程渲染的内容随边界框一起移动。 你可能会注意到边界框和远程内容之间存在一些延迟和滞后。 此延迟将取决于你的 Internet 延迟和带宽。
远程模型的光线投射和空间查询
模型周围的框碰撞体适合用于与整个模型交互,但不够详细,无法用于与模型的各个部分进行交互。 要解决此问题,可以使用远程光线投射。 远程光线投射是 Azure 远程渲染提供的 API,用于将光线投射到远程场景并在本地返回命中结果。 此技术可用于选择大型模型的子实体或获取命中结果信息,如位置、表面法线和距离。
测试模型具有许多可查询和选择的子实体。 现在,所选内容将所选实体的名称输出到 Unity 控制台。 查看材料、照明和效果一章,了解如何突出显示所选实体。
首先,围绕远程光线投射查询创建一个静态包装器。 此脚本将接受 Unity 空间中的位置和方向,将其转换为远程光线投射接受的数据类型,并返回结果。 此脚本将使用 RayCastQueryAsync API。
创建名为 RemoteRayCaster 的新脚本,并将其内容替换为以下代码:
// Copyright (c) Microsoft Corporation. All rights reserved.
// Licensed under the MIT License. See LICENSE in the project root for license information.

using Microsoft.Azure.RemoteRendering;
using Microsoft.Azure.RemoteRendering.Unity;
using System.Linq;
using System.Threading.Tasks;
using UnityEngine;

/// <summary>
/// Wraps the Azure Remote Rendering RayCast queries to easily send requests using Unity data types
/// </summary>
public class RemoteRayCaster
{
    public static double maxDistance = 30.0;

    public static async Task<RayCastHit[]> RemoteRayCast(Vector3 origin, Vector3 dir, HitCollectionPolicy hitPolicy = HitCollectionPolicy.ClosestHit)
    {
        if(RemoteRenderingCoordinator.instance.CurrentCoordinatorState == RemoteRenderingCoordinator.RemoteRenderingState.RuntimeConnected)
        {
            var rayCast = new RayCast(origin.toRemotePos(), dir.toRemoteDir(), maxDistance, hitPolicy);
            var result = await RemoteRenderingCoordinator.CurrentSession.Connection.RayCastQueryAsync(rayCast);
            return result.Hits;
        }
        else
        {
            return new RayCastHit[0];
        }
    }

    public static async Task<Entity[]> RemoteRayCastEntities(Vector3 origin, Vector3 dir, HitCollectionPolicy hitPolicy = HitCollectionPolicy.ClosestHit)
    {
        var hits = await RemoteRayCast(origin, dir, hitPolicy);
        return hits.Select(hit => hit.HitEntity).Where(entity => entity != null).ToArray();
    }
}
注意
Unity 有一个名为 RaycastHit 的类,Azure 远程渲染有一个名为 RayCastHit 的类 。 大写 C 是用于避免编译错误的一个重要区分信息。
RemoteRayCaster 提供了用于将远程光线投射到当前会话的通用访问点。 具体而言,我们接下来将实现 MRTK 指针处理程序。 该脚本将实现
IMixedRealityPointerHandler接口,该接口会告诉 MRTK 我们想要该脚本侦听混合现实指针事件。创建名为 RemoteRayCastPointerHandler 的新脚本,并将该代码替换为以下代码:
// Copyright (c) Microsoft Corporation. All rights reserved.
// Licensed under the MIT License. See LICENSE in the project root for license information.

using Microsoft.Azure.RemoteRendering;
using Microsoft.MixedReality.Toolkit.Input;
using System;
using System.Linq;
using System.Threading.Tasks;
using UnityEngine;

public class RemoteRayCastPointerHandler : BaseRemoteRayCastPointerHandler, IMixedRealityPointerHandler
{
    public UnityRemoteEntityEvent OnRemoteEntityClicked = new UnityRemoteEntityEvent();

    public override event Action<Entity> RemoteEntityClicked;

    public void Awake()
    {
        // Forward events to Unity events
        RemoteEntityClicked += (entity) => OnRemoteEntityClicked?.Invoke(entity);
    }

    public async void OnPointerClicked(MixedRealityPointerEventData eventData)
    {
        if (RemoteEntityClicked != null) //Ensure someone is listening before we do the work
        {
            var firstHit = await PointerDataToRemoteRayCast(eventData.Pointer);
            if (firstHit.success)
                RemoteEntityClicked.Invoke(firstHit.hit.HitEntity);
        }
    }

    public void OnPointerDown(MixedRealityPointerEventData eventData) { }

    public void OnPointerDragged(MixedRealityPointerEventData eventData) { }

    public void OnPointerUp(MixedRealityPointerEventData eventData) { }

    private async Task<(bool success, RayCastHit hit)> PointerDataToRemoteRayCast(IMixedRealityPointer pointer, HitCollectionPolicy hitPolicy = HitCollectionPolicy.ClosestHit)
    {
        RayCastHit hit;
        var result = pointer.Result;
        if (result != null)
        {
            var endPoint = result.Details.Point;
            var direction = pointer.Rays[pointer.Result.RayStepIndex].Direction;
            Debug.DrawRay(endPoint, direction, Color.green, 0);
            hit = (await RemoteRayCaster.RemoteRayCast(endPoint, direction, hitPolicy)).FirstOrDefault();
        }
        else
        {
            hit = new RayCastHit();
        }
        return (hit.HitEntity != null, hit);
    }
}
当指针“点击”碰撞体(像框碰撞体那样),MRTK 即调用 RemoteRayCastPointerHandler 的 OnPointerClicked 方法。 之后,调用 PointerDataToRemoteRayCast,将指针的结果转换为点和方向。 然后,使用该点和方向在远程会话中投射远程射线。
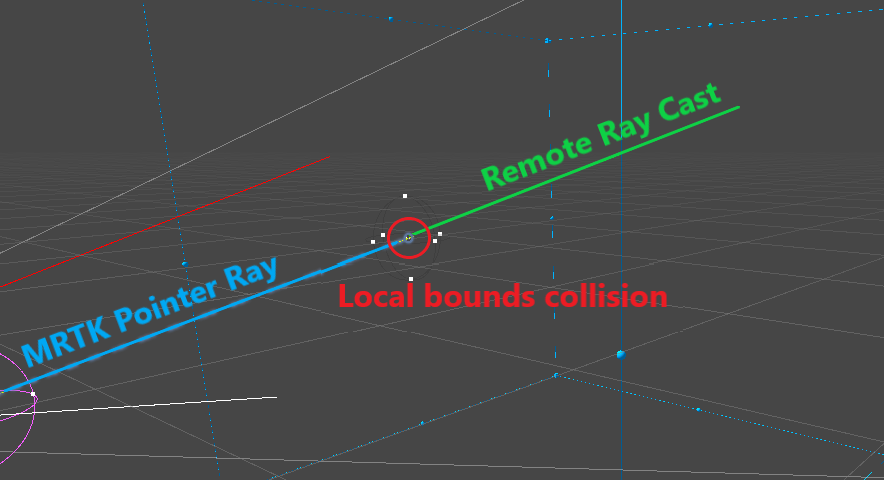
在单击时发送光线投射请求是查询远程对象的有效策略。 但是,这不是理想的用户体验,因为是光标与框碰撞体发生碰撞,而不是模型本身。
还可以创建一个新的 MRTK 指针,该指针在远程会话中更频繁地投射光线。 虽然这是一种更复杂的方法,但用户体验会更好。 此策略超出了本教程的范围,但可以在“展示”应用中查看此方法的示例,可通过 ARR 示例存储库获取。
如果在 RemoteRayCastPointerHandler 中成功完成光线投射,则会从 OnRemoteEntityClicked Unity 事件发出命中的 Entity。 为了响应该事件,我们将创建一个帮助程序脚本,用于接受 Entity 并对其执行操作。 首先让脚本将 Entity 的名称打印到调试日志。
创建一个名为 RemoteEntityHelper 的新脚本,并将其内容替换为以下内容:
// Copyright (c) Microsoft Corporation. All rights reserved.
// Licensed under the MIT License. See LICENSE in the project root for license information.

using Microsoft.Azure.RemoteRendering;
using Microsoft.Azure.RemoteRendering.Unity;
using UnityEngine;

public class RemoteEntityHelper : MonoBehaviour
{
    public void EntityToDebugLog(Entity entity)
    {
        Debug.Log(entity.Name);
    }
}
在之前创建的 TestModel GameObject 中,添加 RemoteRayCastPointerHandler 组件和 RemoteEntityHelper 组件 。
将
EntityToDebugLog方法分配给OnRemoteEntityClicked事件。 当事件的输出类型和方法的输入类型匹配时,我们可以使用 Unity 的动态事件挂钩,该挂钩会自动将事件值传递到方法中。- 创建新的回调字段
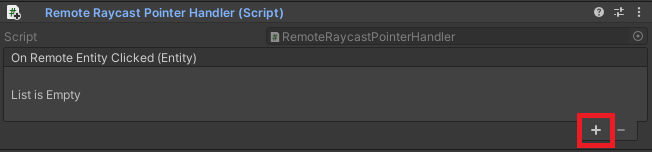
- 将“远程实体帮助程序”组件拖到对象字段,以引用父 GameObject
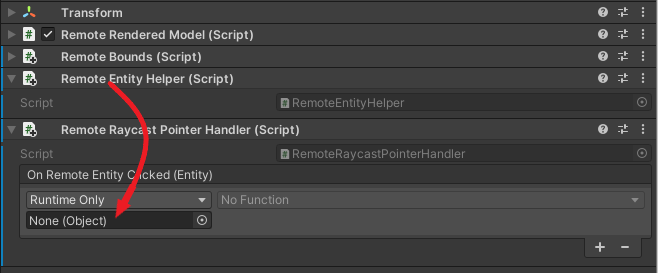
- 将
EntityToDebugLog分配为回调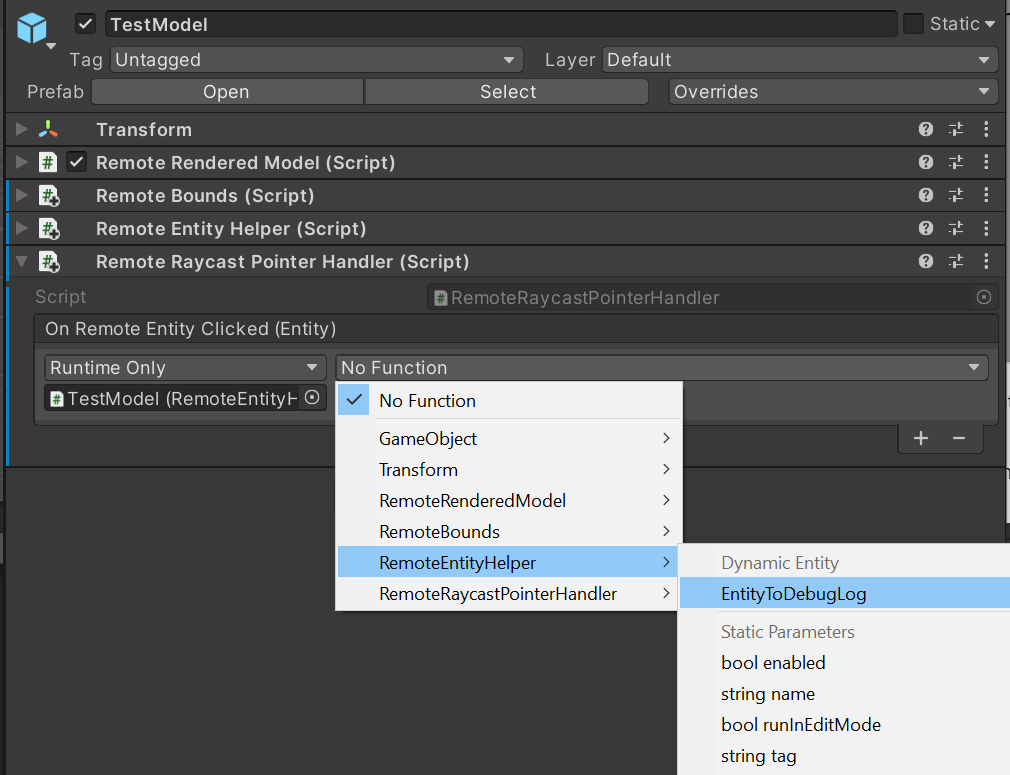
- 创建新的回调字段
按 Unity 编辑器中的“播放”以启动场景、连接到远程会话并加载测试模型。
使用 MRTK 的手势模拟,按住左 Shift 键。
操纵模拟手,使手部射线指向测试模型。
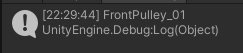
单击并长按以模拟隔空敲击,从而执行
OnPointerClicked事件。观察 Unity 控制台,看是否显示包含所选子实体名称的日志消息。 例如:
将远程对象图同步到 Unity 层次结构中
到此时为止,我们只看到一个表示整个模型的本地 GameObject。 这适用于整个模型的渲染和操作。 但是,如果我们想要应用效果或操作特定的子实体,需要创建本地 GameObject 来表示这些实体。 首先,可以在测试模型中手动浏览。
- 启动场景并加载测试模型。
- 在 Unity 层次结构中展开 TestModel GameObject 的子项,并选择 TestModel_Entity GameObject 。
- 在检查器中,单击“显示子项”按钮。
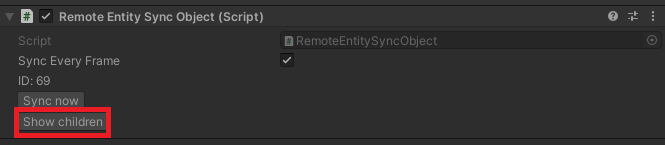
- 继续展开层次结构中的子项,然后单击“显示子项”,直到显示一个大的子项列表。
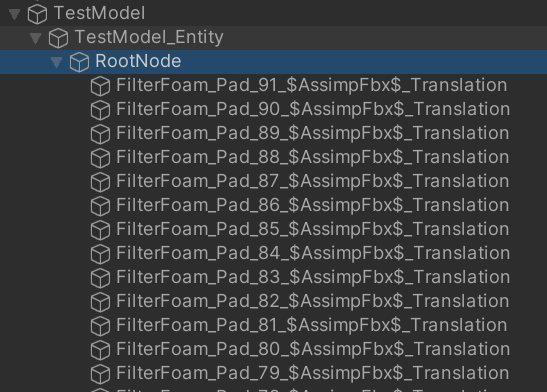
现在,层次结构中填充了数十个实体。 选择其中一个,随即会在检查器中显示 Transform 和 RemoteEntitySyncObject 组件。 默认情况下,每个实体不会自动同步每个帧,因此对 Transform 的本地更改不会同步到服务器。 你可以查看“同步每个帧”,然后在场景视图中移动、缩放或旋转转换,你不会在场景视图中看到渲染的模型,查看“游戏”视图,从视觉上体验模型位置和旋转效果的更新。
上述过程可以编程方式实现,这是修改特定远程实体的第一步。
修改 RemoteEntityHelper 脚本以同时包含以下方法:
public void MakeSyncedGameObject(Entity entity)
{
    var entityGameObject = entity.GetOrCreateGameObject(UnityCreationMode.DoNotCreateUnityComponents);
    var sync = entityGameObject.GetComponent<RemoteEntitySyncObject>();
    sync.SyncEveryFrame = true;
}
将另一个回调添加到 RemoteRayCastPointerHandler 事件
OnRemoteEntityClicked中,并将其设置为MakeSyncedGameObject。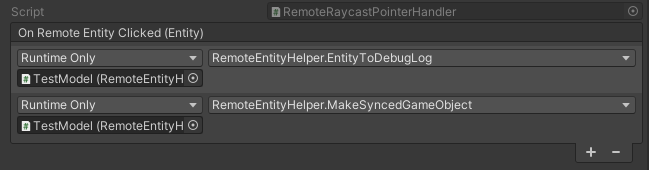
使用 MRTK 的手势模拟,按住左 Shift 键。
操纵模拟手,使手部射线指向测试模型。
单击并长按以模拟隔空敲击,从而执行
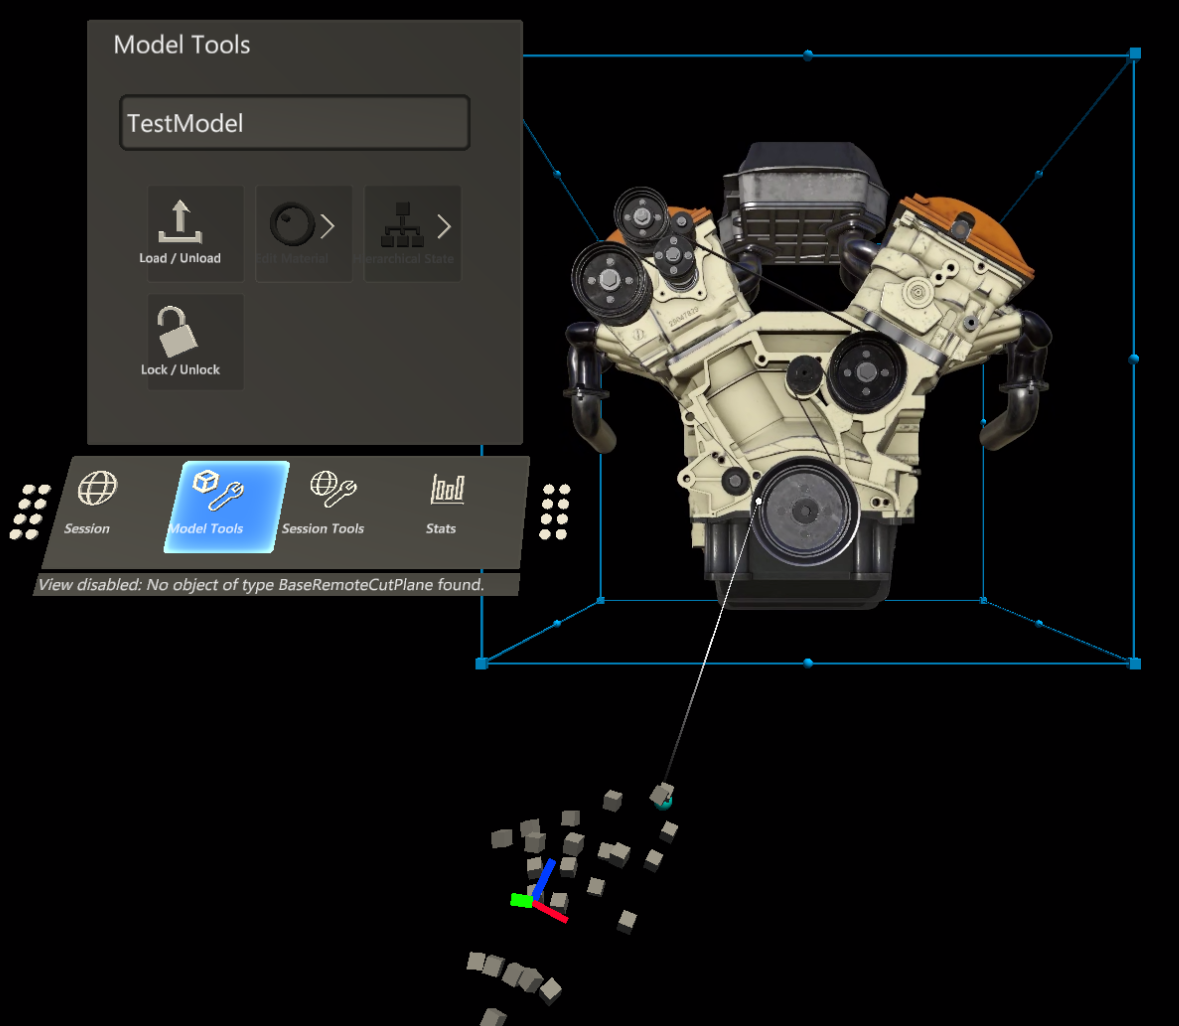
OnPointerClicked事件。选中并展开层次结构以查看表示被单击的实体的新子对象。

测试后,删除对
MakeSyncedGameObject的回调,因为稍后要将其作为其他效果的一部分包含。
注意
仅当需要同步转换数据时,才需要同步每个帧。 同步转换会产生一些开销,因此应谨慎使用。
创建本地实例并使其自动同步是操作子实体的第一步。 操作整体模型时所使用的技术也适用于子实体。 例如,在创建实体的同步本地实例后,可以查询其边界并添加操作处理程序,使用户可通过手部射线移动它。
后续步骤
你现在已可以操作远程渲染模型并与之交互了! 在下一教程中,我们将介绍如何修改材料、更改照明以及将效果应用于远程渲染模型。