Xamarin.Mac 中的对话框
在 Xamarin.Mac 应用程序中使用 C# 和 .NET 时,可以访问与使用 Objective-CXcode 的开发人员相同的对话框和模式窗口。 由于 Xamarin.Mac 与 Xcode 直接集成,因此可以使用 Xcode 的 Interface Builder 创建和维护模式 Windows (,也可以选择直接在 C# 代码) 中创建它们。
将显示一个对话框来响应用户操作,通常提供用户完成操作的方式。 对话框需要用户响应才能关闭。
Windows 可用于无模式状态 (例如可以同时打开多个文档的文本编辑器) 或模式 ((例如,在应用程序继续) 之前必须关闭的导出对话框)。

本文介绍在 Xamarin.Mac 应用程序中使用对话框和模式 Windows 的基础知识。 强烈建议先完成 Hello, Mac 一文,特别是 Xcode 和接口生成器简介 以及 输出口和操作 部分,因为它涵盖了我们将在本文中使用的关键概念和技术。
你可能还想要查看 Xamarin.Mac Internals 文档的向 Objective-CC# 类/方法公开部分,其中介绍了Register用于将 C# 类Objective-C连接到对象和 UI 元素的 和 Export 命令。
对话框简介
此时将显示一个对话框,用于响应用户操作 (例如保存文件) ,并为用户提供完成该操作的方法。 对话框需要用户响应才能关闭。
根据 Apple 的说法,有三种方法可以显示对话框:
- 文档模式 - 文档模式对话框阻止用户在给定文档中执行任何其他操作,直到文档被关闭。
- 应用模式 - 应用模式对话框阻止用户与应用程序交互,直到应用程序被消除。
- 模 态 无模式对话框使用户能够在与文档窗口交互的同时更改对话框中的设置。
模式窗口
任何标准 NSWindow 都可以通过模式显示来用作自定义对话框:

文档模式对话框工作表
工作表是附加到给定文档窗口的模式对话框,防止用户与窗口交互,直到他们关闭对话框。 工作表附加到它从中出现的窗口,并且一次只能为窗口打开一个工作表。

首选项窗口
首选项窗口是一个无模式对话框,其中包含用户不经常更改的应用程序设置。 首选项 Windows 通常包括允许用户在不同设置组之间切换的工具栏:

打开对话框
“打开对话框”为用户提供一致的方式来在应用程序中查找和打开项:
打印和页面设置对话框
macOS 提供应用程序可以显示的标准打印和页面设置对话框,以便用户可以在他们使用的每个应用程序中获得一致的打印体验。
打印对话框可以同时显示为自由浮动对话框:

也可以显示为工作表:

“页面设置”对话框可以同时显示为自由浮动对话框:

也可以显示为工作表:

保存对话框
“保存对话框”为用户提供了一致的方式来在应用程序中保存项。 保存对话框有两种状态: 最小 (也称为折叠) :

展开状态:

最小保存对话框也可以显示为工作表:

展开 的保存 对话框可以:

有关详细信息,请参阅 Apple OS X 人机接口指南中的对话框部分
将模式窗口添加到项目
除了main文档窗口之外,Xamarin.Mac 应用程序可能需要向用户显示其他类型的窗口,例如“首选项”或“检查器面板”。
若要添加新窗口,请执行以下操作:
在解决方案资源管理器,在
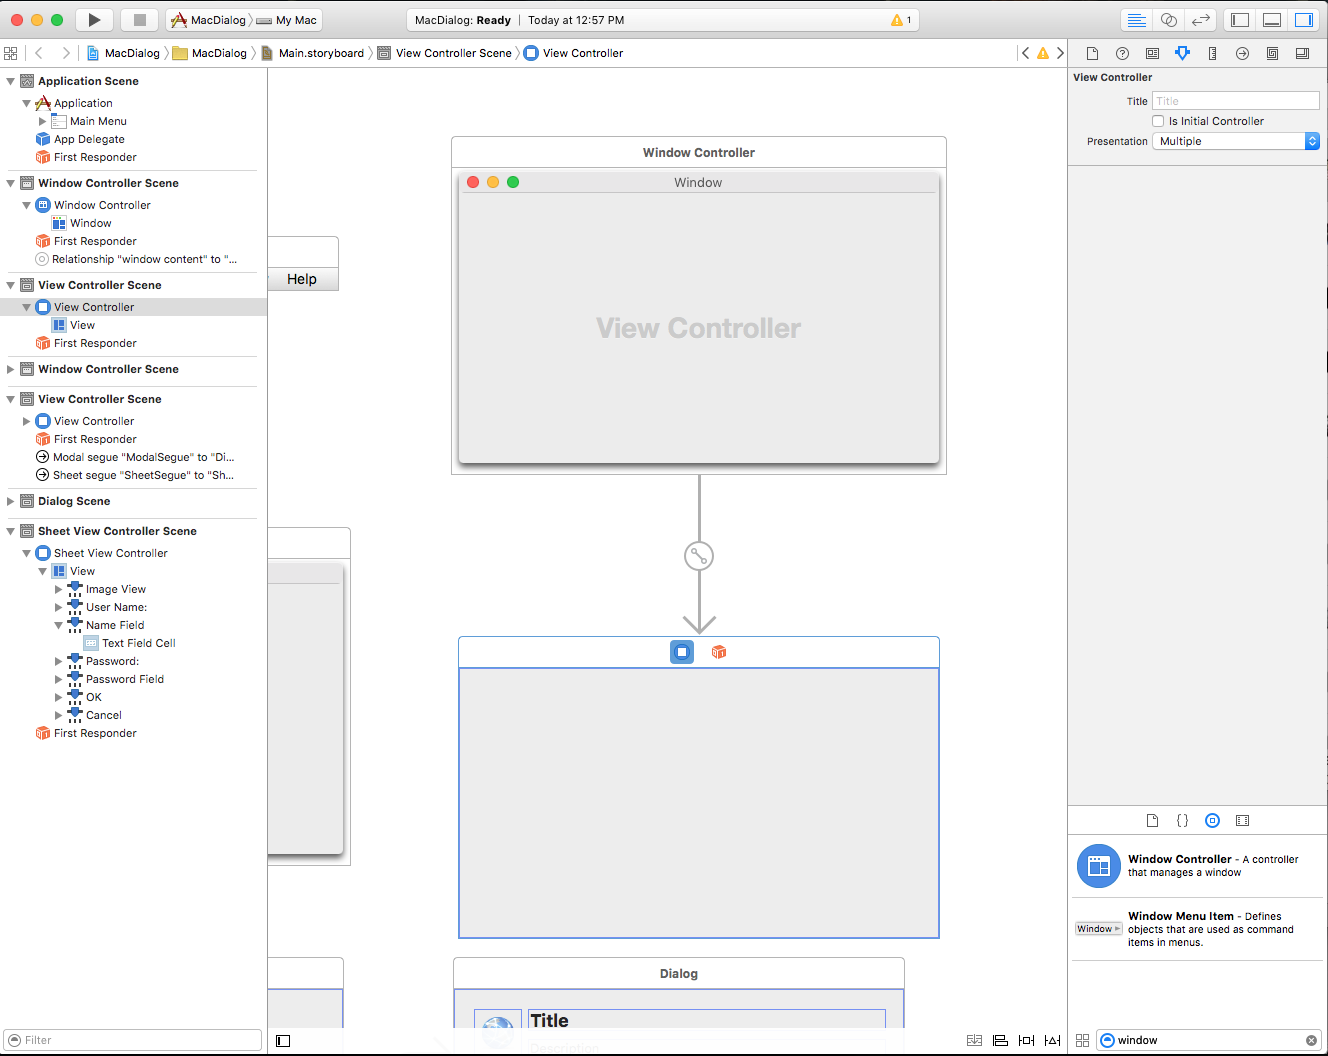
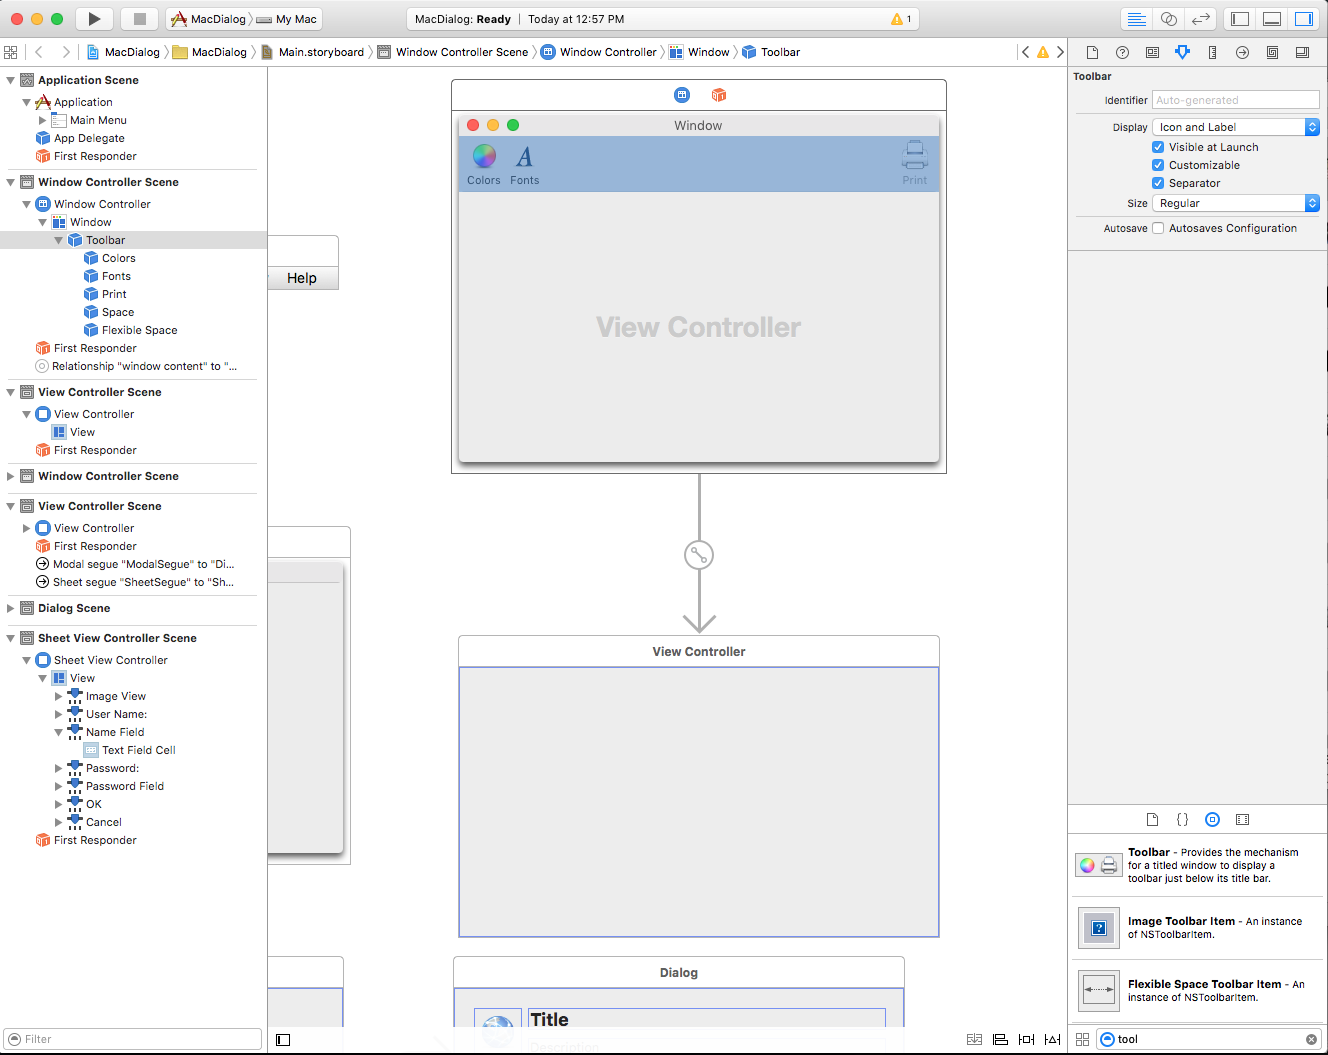
Main.storyboardXcode 的 Interface Builder 中打开文件进行编辑。将新的 视图控制器 拖到设计图面中:
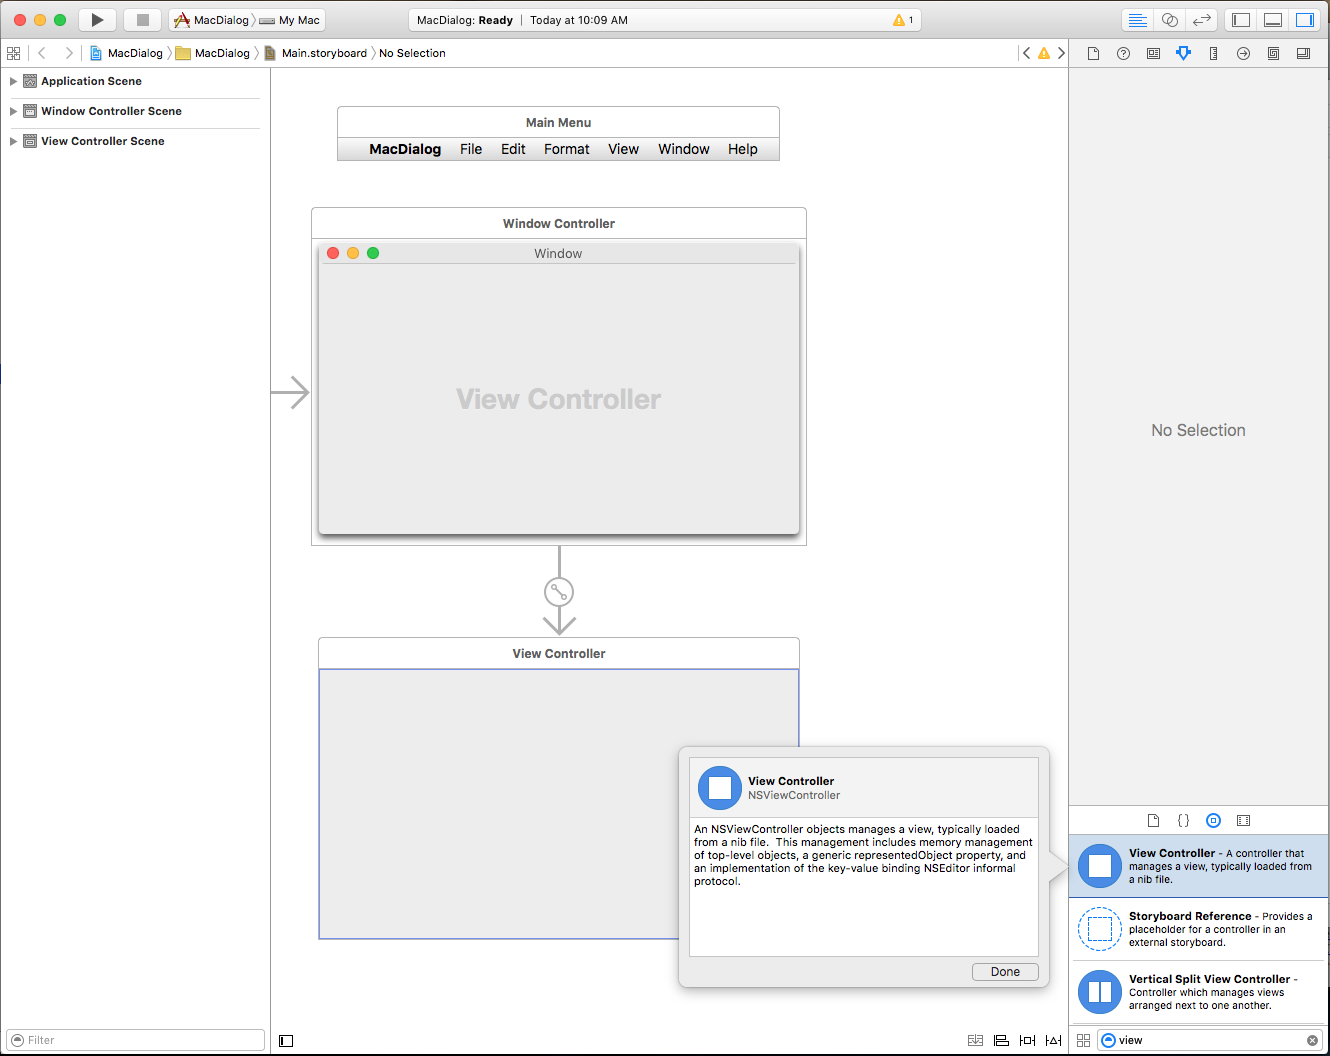
在 标识检查器中,输入
CustomDialogController“ 类名” :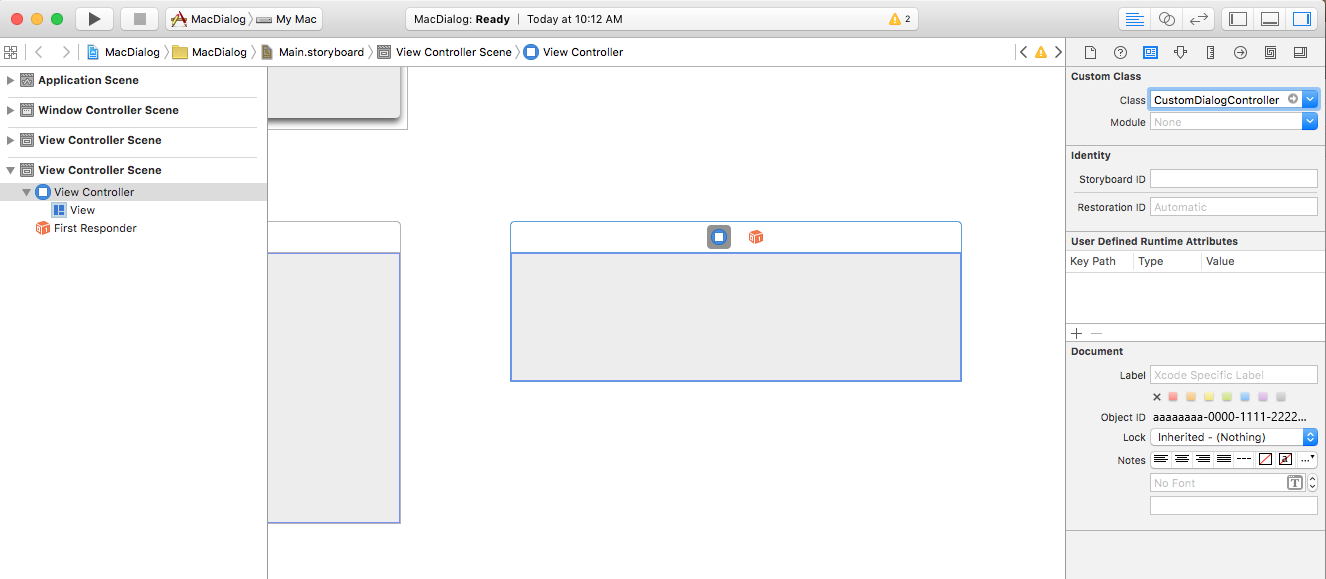
切换回Visual Studio for Mac,允许它与 Xcode 同步并创建
CustomDialogController.h文件。返回到 Xcode 并设计接口:
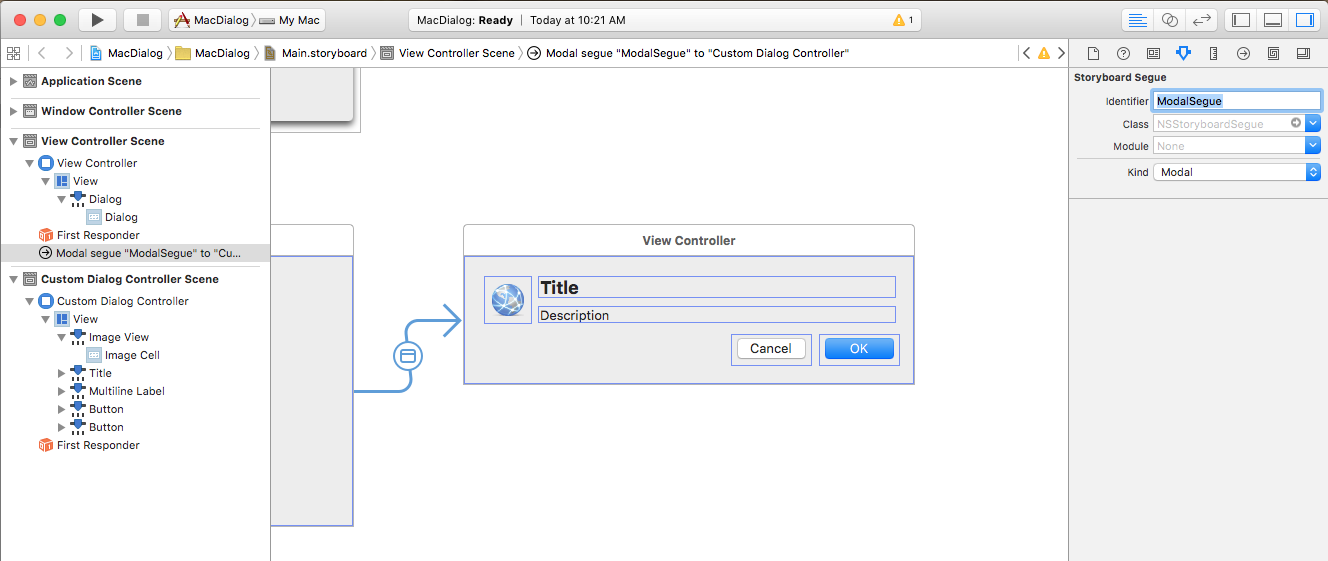
通过从 UI 元素(将打开对话框)的控件拖动到对话框窗口,创建从应用主窗口到新视图控制器的 模式 Segue 。 分配 标识符
ModalSegue: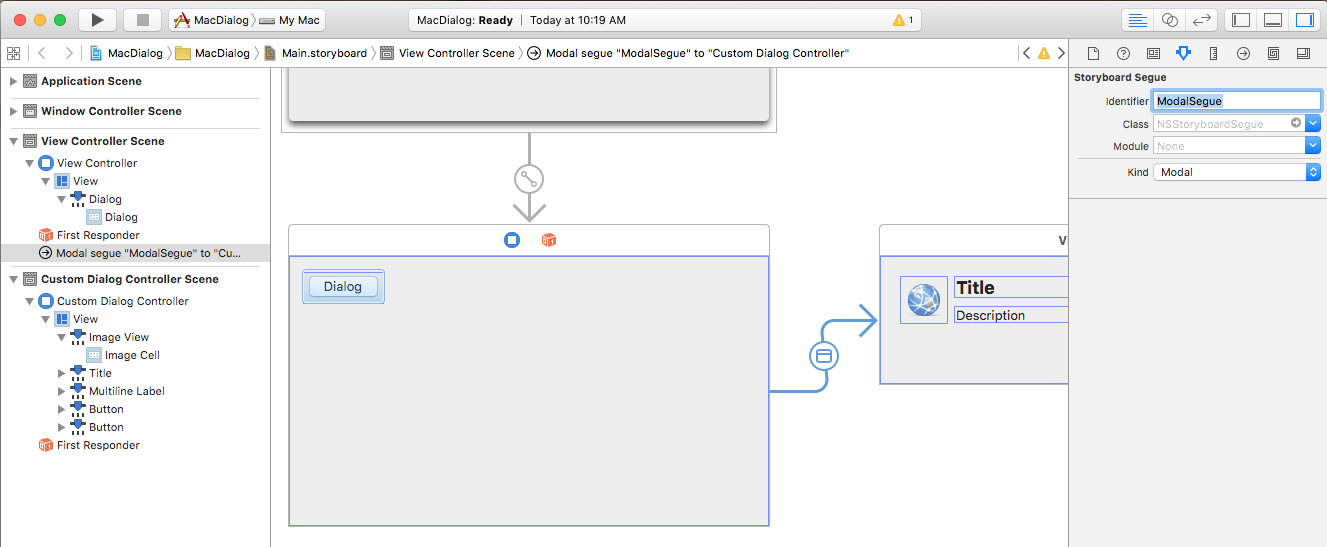
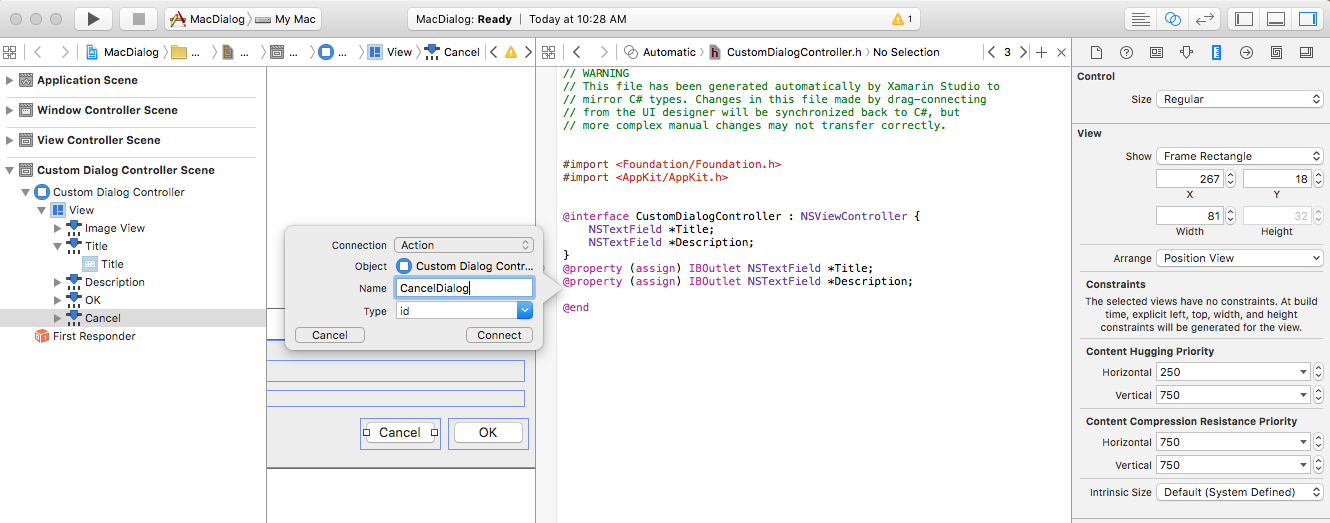
连接所有 操作 和 输出口:
保存更改并返回到 Visual Studio for Mac 以与 Xcode 同步。


使 CustomDialogController.cs 文件如下所示:
using System;
using Foundation;
using AppKit;

namespace MacDialog
{
    public partial class CustomDialogController : NSViewController
    {
        #region Private Variables
        private string _dialogTitle = "Title";
        private string _dialogDescription = "Description";
        private NSViewController _presentor;
        #endregion

        #region Computed Properties
        public string DialogTitle {
            get { return _dialogTitle; }
            set { _dialogTitle = value; }
        }

        public string DialogDescription {
            get { return _dialogDescription; }
            set { _dialogDescription = value; }
        }

        public NSViewController Presentor {
            get { return _presentor; }
            set { _presentor = value; }
        }
        #endregion

        #region Constructors
        public CustomDialogController (IntPtr handle) : base (handle)
        {
        }
        #endregion

        #region Override Methods
        public override void ViewWillAppear ()
        {
            base.ViewWillAppear ();

            // Set initial title and description
            Title.StringValue = DialogTitle;
            Description.StringValue = DialogDescription;
        }
        #endregion

        #region Private Methods
        private void CloseDialog() {
            Presentor.DismissViewController (this);
        }
        #endregion

        #region Custom Actions
        partial void AcceptDialog (Foundation.NSObject sender) {
            RaiseDialogAccepted();
            CloseDialog();
        }

        partial void CancelDialog (Foundation.NSObject sender) {
            RaiseDialogCanceled();
            CloseDialog();
        }
        #endregion

        #region Events
        public EventHandler DialogAccepted;

        internal void RaiseDialogAccepted() {
            if (this.DialogAccepted != null)
                this.DialogAccepted (this, EventArgs.Empty);
        }

        public EventHandler DialogCanceled;

        internal void RaiseDialogCanceled() {
            if (this.DialogCanceled != null)
                this.DialogCanceled (this, EventArgs.Empty);
        }
        #endregion
    }
}
此代码公开了一些属性来设置对话框的标题和说明,以及一些事件来响应正在取消或接受的对话。
接下来,编辑 ViewController.cs 文件,重写 PrepareForSegue 方法并使其如下所示:
public override void PrepareForSegue (NSStoryboardSegue segue, NSObject sender)
{
    base.PrepareForSegue (segue, sender);

    // Take action based on the segue name
    switch (segue.Identifier) {
    case "ModalSegue":
        var dialog = segue.DestinationController as CustomDialogController;
        dialog.DialogTitle = "MacDialog";
        dialog.DialogDescription = "This is a sample dialog.";
        dialog.DialogAccepted += (s, e) => {
            Console.WriteLine ("Dialog accepted");
            DismissViewController (dialog);
        };
        dialog.Presentor = this;
        break;
    }
}
此代码将我们在 Xcode 的 Interface Builder 中定义的 segue 初始化为对话框,并设置标题和说明。 它还处理用户在对话框中做出的选择。
我们可以运行应用程序并显示自定义对话框:

有关在 Xamarin.Mac 应用程序中使用 Windows 的详细信息,请参阅使用 Windows 文档。
创建自定义工作表
工作表是附加到给定文档窗口的模式对话框,防止用户与窗口交互,直到他们关闭对话框。 工作表附加到它从中出现的窗口,并且一次只能为窗口打开一个工作表。
若要在 Xamarin.Mac 中创建自定义工作表,请执行下列操作:
在解决方案资源管理器,在
Main.storyboardXcode 的 Interface Builder 中打开文件进行编辑。将新的 视图控制器 拖到设计图面中:
设计用户界面:
创建从主窗口到新视图控制器的 工作表 Segue :
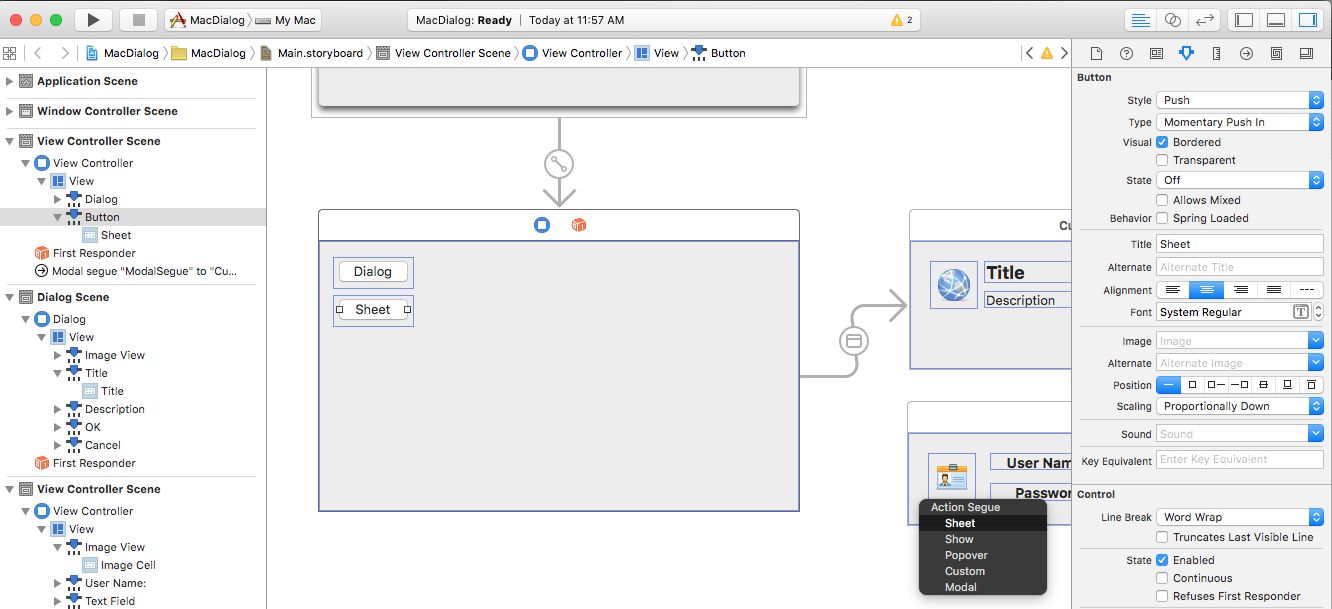
在 标识检查器中,将视图控制器的 类
SheetViewController命名为: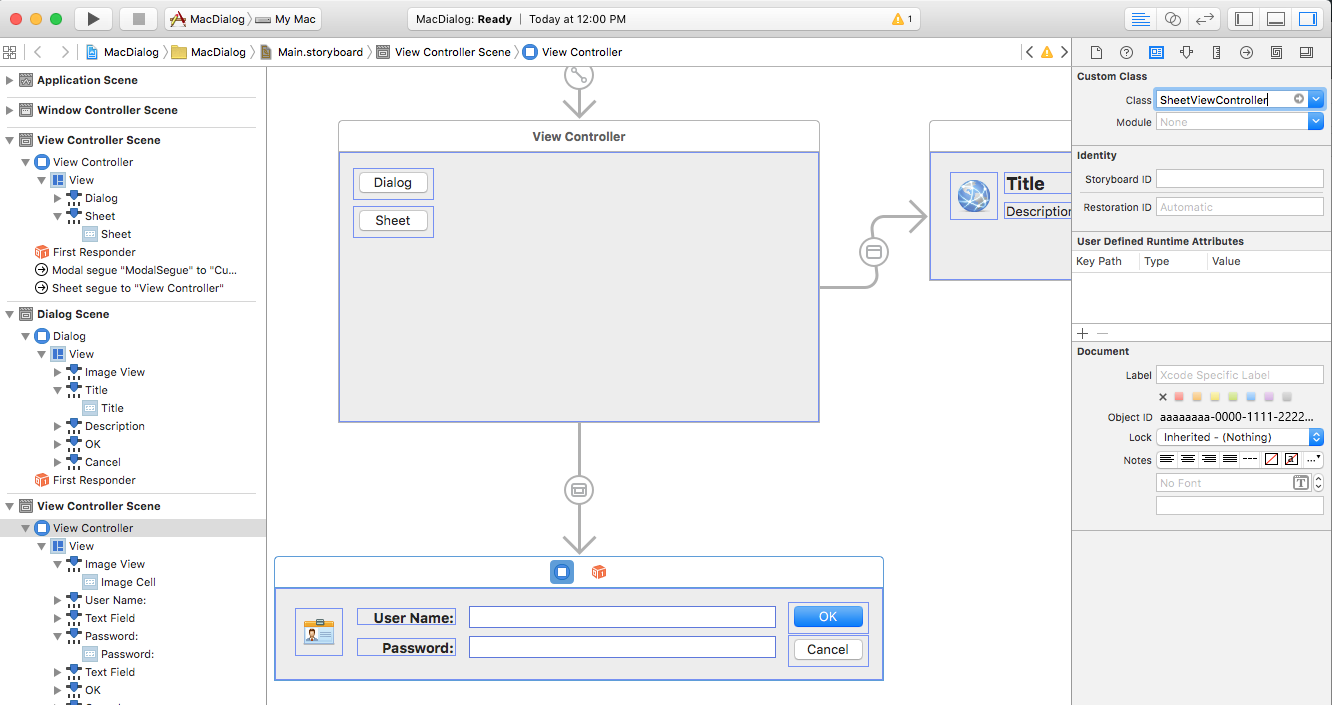
定义任何所需的 输出口 和 操作:

保存更改并返回到Visual Studio for Mac进行同步。


接下来,编辑 SheetViewController.cs 文件,使其如下所示:
using System;
using Foundation;
using AppKit;

namespace MacDialog
{
    public partial class SheetViewController : NSViewController
    {
        #region Private Variables
        private string _userName = "";
        private string _password = "";
        private NSViewController _presentor;
        #endregion

        #region Computed Properties
        public string UserName {
            get { return _userName; }
            set { _userName = value; }
        }

        public string Password {
            get { return _password;}
            set { _password = value;}
        }

        public NSViewController Presentor {
            get { return _presentor; }
            set { _presentor = value; }
        }
        #endregion

        #region Constructors
        public SheetViewController (IntPtr handle) : base (handle)
        {
        }
        #endregion

        #region Override Methods
        public override void ViewWillAppear ()
        {
            base.ViewWillAppear ();

            // Set initial values
            NameField.StringValue = UserName;
            PasswordField.StringValue = Password;

            // Wireup events
            NameField.Changed += (sender, e) => {
                UserName = NameField.StringValue;
            };
            PasswordField.Changed += (sender, e) => {
                Password = PasswordField.StringValue;
            };
        }
        #endregion

        #region Private Methods
        private void CloseSheet() {
            Presentor.DismissViewController (this);
        }
        #endregion

        #region Custom Actions
        partial void AcceptSheet (Foundation.NSObject sender) {
            RaiseSheetAccepted();
            CloseSheet();
        }

        partial void CancelSheet (Foundation.NSObject sender) {
            RaiseSheetCanceled();
            CloseSheet();
        }
        #endregion

        #region Events
        public EventHandler SheetAccepted;

        internal void RaiseSheetAccepted() {
            if (this.SheetAccepted != null)
                this.SheetAccepted (this, EventArgs.Empty);
        }

        public EventHandler SheetCanceled;

        internal void RaiseSheetCanceled() {
            if (this.SheetCanceled != null)
                this.SheetCanceled (this, EventArgs.Empty);
        }
        #endregion
    }
}
接下来,编辑 ViewController.cs 文件,编辑 PrepareForSegue 方法并使其如下所示:
public override void PrepareForSegue (NSStoryboardSegue segue, NSObject sender)
{
    base.PrepareForSegue (segue, sender);

    // Take action based on the segue name
    switch (segue.Identifier) {
    case "ModalSegue":
        var dialog = segue.DestinationController as CustomDialogController;
        dialog.DialogTitle = "MacDialog";
        dialog.DialogDescription = "This is a sample dialog.";
        dialog.DialogAccepted += (s, e) => {
            Console.WriteLine ("Dialog accepted");
            DismissViewController (dialog);
        };
        dialog.Presentor = this;
        break;
    case "SheetSegue":
        var sheet = segue.DestinationController as SheetViewController;
        sheet.SheetAccepted += (s, e) => {
            Console.WriteLine ("User Name: {0} Password: {1}", sheet.UserName, sheet.Password);
        };
        sheet.Presentor = this;
        break;
    }
}
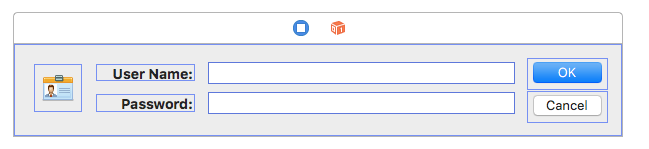
如果我们运行应用程序并打开工作表,它将附加到窗口:
创建首选项对话框
在 Interface Builder 中布局首选项视图之前,我们需要添加自定义 segue 类型来处理切换首选项。 将新类添加到项目,并将其称为 ReplaceViewSeque。 编辑 类,使其如下所示:
using System;
using AppKit;
using Foundation;

namespace MacWindows
{
    [Register("ReplaceViewSeque")]
    public class ReplaceViewSeque : NSStoryboardSegue
    {
        #region Constructors
        public ReplaceViewSeque() {

        }

        public ReplaceViewSeque (string identifier, NSObject sourceController, NSObject destinationController) : base(identifier,sourceController,destinationController) {

        }

        public ReplaceViewSeque (IntPtr handle) : base(handle) {
        }

        public ReplaceViewSeque (NSObjectFlag x) : base(x) {
        }
        #endregion

        #region Override Methods
        public override void Perform ()
        {
            // Cast the source and destination controllers
            var source = SourceController as NSViewController;
            var destination = DestinationController as NSViewController;

            // Is there a source?
            if (source == null) {
                // No, get the current key window
                var window = NSApplication.SharedApplication.KeyWindow;

                // Swap the controllers
                window.ContentViewController = destination;

                // Release memory
                window.ContentViewController?.RemoveFromParentViewController ();
            } else {
                // Swap the controllers
                source.View.Window.ContentViewController = destination;

                // Release memory
                source.RemoveFromParentViewController ();
            }

        }
        #endregion

    }

}
创建自定义 segue 后,我们可以在 Xcode 的 Interface Builder 中添加一个新窗口来处理我们的首选项。
若要添加新窗口,请执行以下操作:
在解决方案资源管理器,在
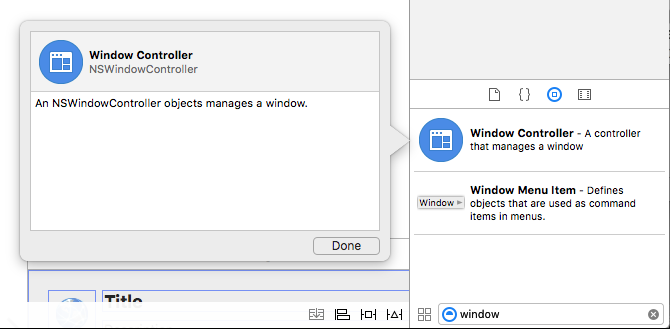
Main.storyboardXcode 的 Interface Builder 中打开文件进行编辑。将新的 窗口控制器 拖到设计图面中:
在 菜单栏 设计器附近排列窗口:
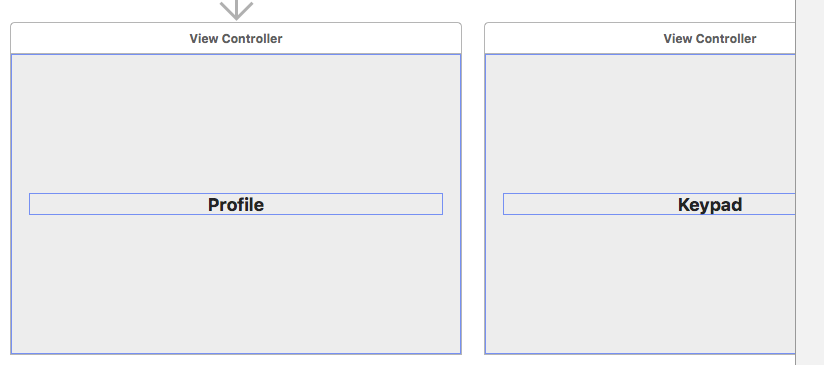
创建附加的视图控制器的副本,因为首选项视图中会有选项卡:
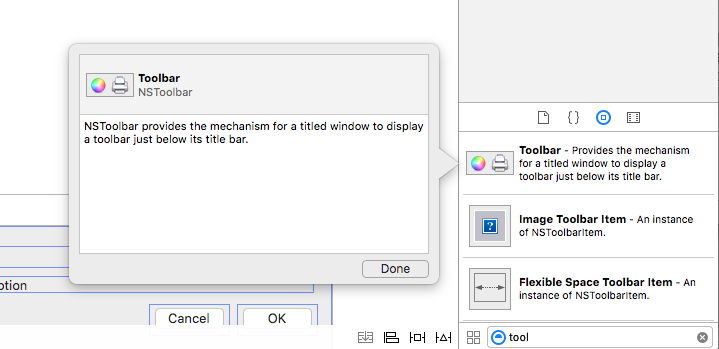
从库中拖动新的工具栏控制器:
并将其拖放到“设计图面”中的“窗口”上:
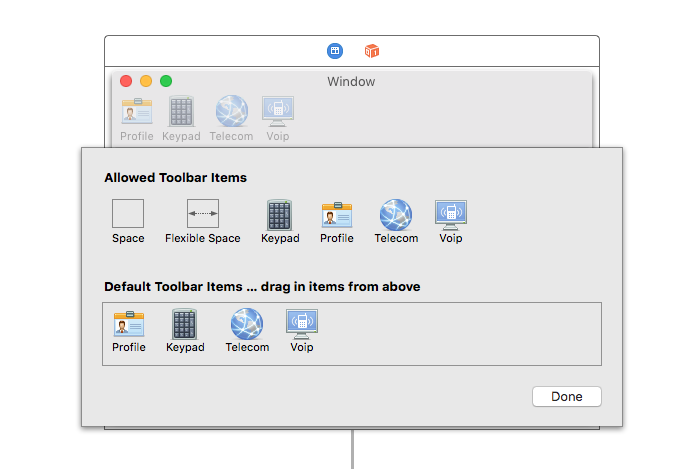
布局工具栏的设计:
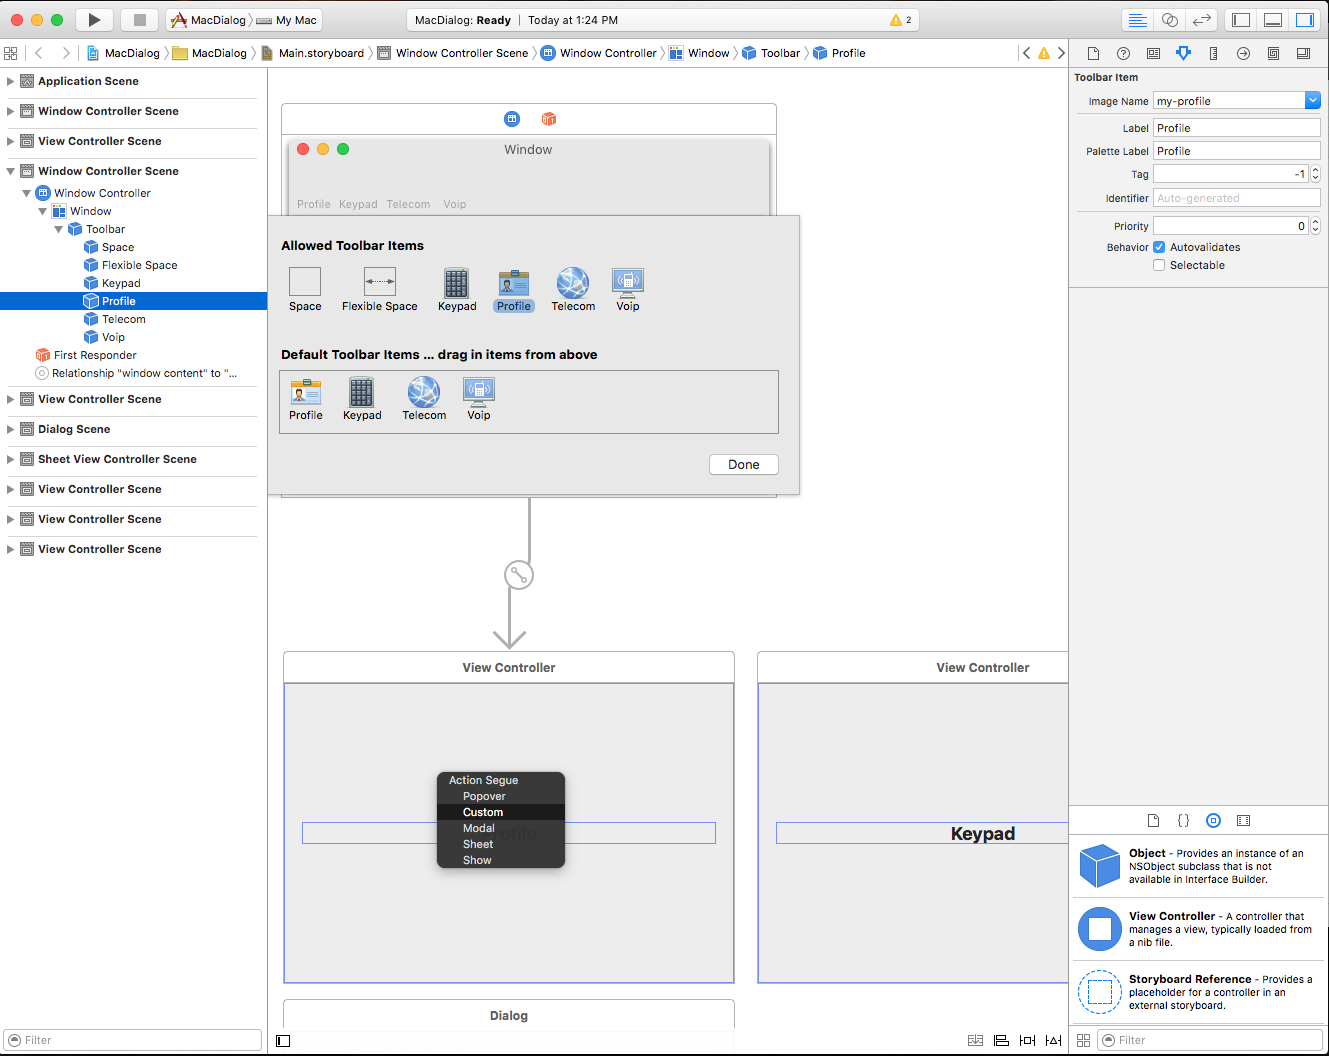
Control-Click,然后从每个 工具栏按钮 拖动到上面创建的视图。 选择 自定义 segue 类型:
选择新的 Segue 并将 类 设置为
ReplaceViewSegue: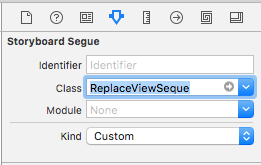
在设计图面上的菜单栏Designer,从“应用程序”菜单中选择“首选项...”,按住 control 并单击并拖动到“首选项窗口”以创建“显示”segue:
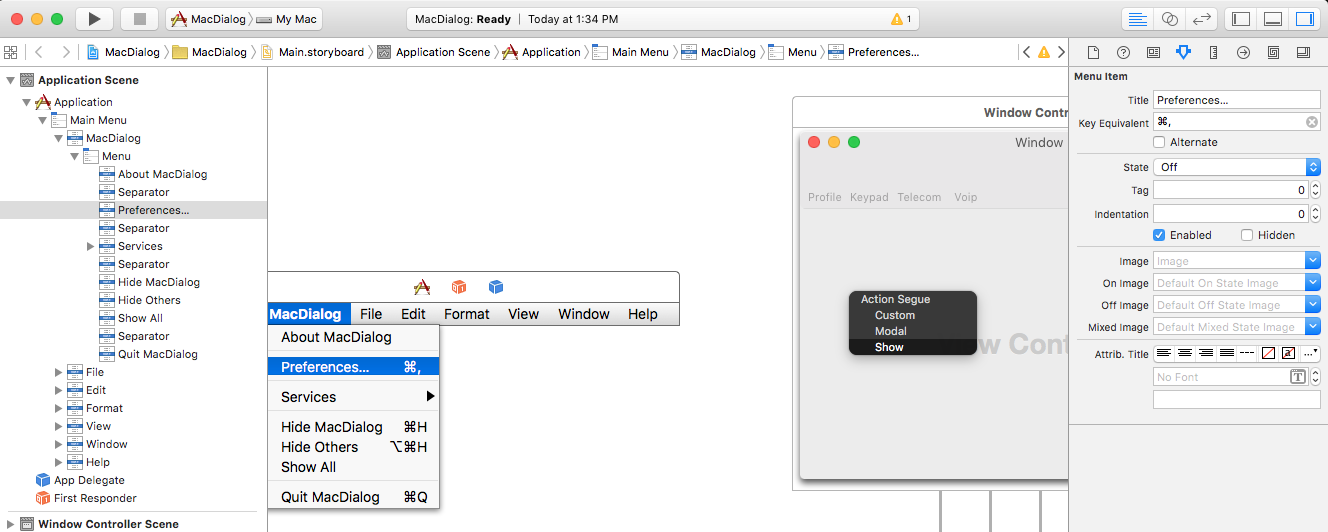
保存更改并返回到Visual Studio for Mac进行同步。


如果我们运行代码并从“应用程序”菜单中选择“首选项...”,则会显示窗口:

有关使用 Windows 和工具栏的详细信息,请参阅 Windows 和 工具栏 文档。
保存和加载首选项
在典型的 macOS 应用中,当用户更改应用的任何用户首选项时,这些更改会自动保存。 在 Xamarin.Mac 应用中处理此问题的最简单方法是创建单个类来管理用户的所有首选项,并在系统范围内共享它。
首先,向项目添加新 AppPreferences 类并从 继承 NSObject。 首选项将设计为使用 数据绑定和Key-Value编码 ,这将大大简化创建和维护首选项表单的过程。 由于首选项将包含少量的简单数据类型,请使用内置的 NSUserDefaults 来存储和检索值。
AppPreferences.cs编辑文件,使其如下所示:
using System;
using Foundation;
using AppKit;

namespace SourceWriter
{
    [Register("AppPreferences")]
    public class AppPreferences : NSObject
    {
        #region Computed Properties
        [Export("DefaultLanguage")]
        public int DefaultLanguage {
            get {
                var value = LoadInt ("DefaultLanguage", 0);
                return value;
            }
            set {
                WillChangeValue ("DefaultLanguage");
                SaveInt ("DefaultLanguage", value, true);
                DidChangeValue ("DefaultLanguage");
            }
        }

        [Export("SmartLinks")]
        public bool SmartLinks {
            get { return LoadBool ("SmartLinks", true); }
            set {
                WillChangeValue ("SmartLinks");
                SaveBool ("SmartLinks", value, true);
                DidChangeValue ("SmartLinks");
            }
        }

        // Define any other required user preferences in the same fashion
        ...

        [Export("EditorBackgroundColor")]
        public NSColor EditorBackgroundColor {
            get { return LoadColor("EditorBackgroundColor", NSColor.White); }
            set {
                WillChangeValue ("EditorBackgroundColor");
                SaveColor ("EditorBackgroundColor", value, true);
                DidChangeValue ("EditorBackgroundColor");
            }
        }
        #endregion

        #region Constructors
        public AppPreferences ()
        {
        }
        #endregion

        #region Public Methods
        public int LoadInt(string key, int defaultValue) {
            // Attempt to read int
            var number = NSUserDefaults.StandardUserDefaults.IntForKey(key);

            // Take action based on value
            if (number == null) {
                return defaultValue;
            } else {
                return (int)number;
            }
        }

        public void SaveInt(string key, int value, bool sync) {
            NSUserDefaults.StandardUserDefaults.SetInt(value, key);
            if (sync) NSUserDefaults.StandardUserDefaults.Synchronize ();
        }

        public bool LoadBool(string key, bool defaultValue) {
            // Attempt to read int
            var value = NSUserDefaults.StandardUserDefaults.BoolForKey(key);

            // Take action based on value
            if (value == null) {
                return defaultValue;
            } else {
                return value;
            }
        }

        public void SaveBool(string key, bool value, bool sync) {
            NSUserDefaults.StandardUserDefaults.SetBool(value, key);
            if (sync) NSUserDefaults.StandardUserDefaults.Synchronize ();
        }

        public string NSColorToHexString(NSColor color, bool withAlpha) {
            //Break color into pieces
            nfloat red=0, green=0, blue=0, alpha=0;
            color.GetRgba (out red, out green, out blue, out alpha);

            // Adjust to byte
            alpha *= 255;
            red *= 255;
            green *= 255;
            blue *= 255;

            //With the alpha value?
            if (withAlpha) {
                return String.Format ("#{0:X2}{1:X2}{2:X2}{3:X2}", (int)alpha, (int)red, (int)green, (int)blue);
            } else {
                return String.Format ("#{0:X2}{1:X2}{2:X2}", (int)red, (int)green, (int)blue);
            }
        }

        public NSColor NSColorFromHexString (string hexValue)
        {
            var colorString = hexValue.Replace ("#", "");
            float red, green, blue, alpha;

            // Convert color based on length
            switch (colorString.Length) {
            case 3 : // #RGB
                red = Convert.ToInt32(string.Format("{0}{0}", colorString.Substring(0, 1)), 16) / 255f;
                green = Convert.ToInt32(string.Format("{0}{0}", colorString.Substring(1, 1)), 16) / 255f;
                blue = Convert.ToInt32(string.Format("{0}{0}", colorString.Substring(2, 1)), 16) / 255f;
                return NSColor.FromRgba(red, green, blue, 1.0f);
            case 6 : // #RRGGBB
                red = Convert.ToInt32(colorString.Substring(0, 2), 16) / 255f;
                green = Convert.ToInt32(colorString.Substring(2, 2), 16) / 255f;
                blue = Convert.ToInt32(colorString.Substring(4, 2), 16) / 255f;
                return NSColor.FromRgba(red, green, blue, 1.0f);
            case 8 : // #AARRGGBB
                alpha = Convert.ToInt32(colorString.Substring(0, 2), 16) / 255f;
                red = Convert.ToInt32(colorString.Substring(2, 2), 16) / 255f;
                green = Convert.ToInt32(colorString.Substring(4, 2), 16) / 255f;
                blue = Convert.ToInt32(colorString.Substring(6, 2), 16) / 255f;
                return NSColor.FromRgba(red, green, blue, alpha);
            default :
                throw new ArgumentOutOfRangeException(string.Format("Invalid color value '{0}'. It should be a hex value of the form #RBG, #RRGGBB or #AARRGGBB", hexValue));
            }
        }

        public NSColor LoadColor(string key, NSColor defaultValue) {

            // Attempt to read color
            var hex = NSUserDefaults.StandardUserDefaults.StringForKey(key);

            // Take action based on value
            if (hex == null) {
                return defaultValue;
            } else {
                return NSColorFromHexString (hex);
            }
        }

        public void SaveColor(string key, NSColor color, bool sync) {
            // Save to default
            NSUserDefaults.StandardUserDefaults.SetString(NSColorToHexString(color,true), key);
            if (sync) NSUserDefaults.StandardUserDefaults.Synchronize ();
        }
        #endregion
    }
}
此类包含一些帮助程序例程,例如 SaveInt、LoadInt、SaveColorLoadColor、 等,以便更轻松地使用NSUserDefaults。 此外,由于 NSUserDefaults 没有处理 的内置方法 NSColors, NSColorToHexString 因此, 和 NSColorFromHexString 方法用于将颜色转换为基于 Web 的十六进制字符串 (#RRGGBBAA 其中 AA 是可轻松存储和检索的 alpha 透明度) 。
在 AppDelegate.cs 文件中,创建将在应用范围内使用的 AppPreferences 对象的实例:
using AppKit;
using Foundation;
using System.IO;
using System;

namespace SourceWriter
{
    [Register ("AppDelegate")]
    public class AppDelegate : NSApplicationDelegate
    {
        #region Computed Properties
        public int NewWindowNumber { get; set;} = -1;

        public AppPreferences Preferences { get; set; } = new AppPreferences();
        #endregion

        #region Constructors
        public AppDelegate ()
        {
        }
        #endregion

        ...
将首选项连接到首选项视图
接下来,将 Preference 类连接到上面创建的首选项窗口和视图上的 UI 元素。 在“接口生成器”中,选择首选项视图控制器并切换到 标识检查器,为该控制器创建自定义类:

切换回Visual Studio for Mac以同步更改,并打开新创建的类进行编辑。 使 类如下所示:
using System;
using Foundation;
using AppKit;

namespace SourceWriter
{
    public partial class EditorPrefsController : NSViewController
    {
        #region Application Access
        public static AppDelegate App {
            get { return (AppDelegate)NSApplication.SharedApplication.Delegate; }
        }
        #endregion

        #region Computed Properties
        [Export("Preferences")]
        public AppPreferences Preferences {
            get { return App.Preferences; }
        }
        #endregion

        #region Constructors
        public EditorPrefsController (IntPtr handle) : base (handle)
        {
        }
        #endregion
    }
}
请注意,此类在此处执行了两项操作:第一,有一个帮助程序 App 属性,使访问 AppDelegate 变得更容易。 其次, Preferences 属性公开全局 AppPreferences 类,以便使用放置在此视图上的任何 UI 控件进行数据绑定。
接下来,双击情节提要文件以在 Interface Builder (中重新打开它,并查看上面刚刚进行的更改) 。 将生成首选项界面所需的任何 UI 控件拖动到视图中。 对于每个控件,切换到 绑定检查器 并绑定到 AppPreference 类的各个属性:

对所需的所有面板重复上述步骤, (视图控制器) 和首选项属性。
将首选项更改应用于所有打开的窗口
如上所述,在典型的 macOS 应用中,当用户对应用的任何用户首选项进行更改时,这些更改将自动保存,并应用于用户在应用程序中可能打开的任何窗口。
仔细规划和设计应用的首选项和窗口将使此过程能够顺利且透明地对最终用户进行,只需最少的编码工作。
对于将使用应用首选项的任何窗口,将以下帮助程序属性添加到其内容视图控制器,以便更轻松地访问 AppDelegate :
#region Application Access
public static AppDelegate App {
    get { return (AppDelegate)NSApplication.SharedApplication.Delegate; }
}
#endregion
接下来,添加一个类,以根据用户的首选项配置内容或行为:
public void ConfigureEditor() {

    // General Preferences
    TextEditor.AutomaticLinkDetectionEnabled = App.Preferences.SmartLinks;
    TextEditor.AutomaticQuoteSubstitutionEnabled = App.Preferences.SmartQuotes;
    ...

}
首次打开 Window 时,需要调用配置方法,以确保它符合用户的首选项:
public override void ViewDidLoad ()
{
    base.ViewDidLoad ();

    // Configure editor from user preferences
    ConfigureEditor ();
    ...
}
接下来,编辑 文件并 AppDelegate.cs 添加以下方法,以将所有首选项更改应用于所有打开的窗口:
public void UpdateWindowPreferences() {

    // Process all open windows
    for(int n=0; n<NSApplication.SharedApplication.Windows.Length; ++n) {
        var content = NSApplication.SharedApplication.Windows[n].ContentViewController as ViewController;
        if (content != null ) {
            // Reformat all text
            content.ConfigureEditor ();
        }
    }

}
接下来,将类 PreferenceWindowDelegate 添加到项目,使其如下所示:
using System;
using AppKit;
using System.IO;
using Foundation;

namespace SourceWriter
{
    public class PreferenceWindowDelegate : NSWindowDelegate
    {
        #region Application Access
        public static AppDelegate App {
            get { return (AppDelegate)NSApplication.SharedApplication.Delegate; }
        }
        #endregion

        #region Computed Properties
        public NSWindow Window { get; set;}
        #endregion

        #region constructors
        public PreferenceWindowDelegate (NSWindow window)
        {
            // Initialize
            this.Window = window;

        }
        #endregion

        #region Override Methods
        public override bool WindowShouldClose (Foundation.NSObject sender)
        {

            // Apply any changes to open windows
            App.UpdateWindowPreferences();

            return true;
        }
        #endregion
    }
}
这将导致当首选项窗口关闭时,任何首选项更改都会发送到所有打开的 Windows。
最后,编辑首选项窗口控制器并添加上面创建的委托:
using System;
using Foundation;
using AppKit;

namespace SourceWriter
{
    public partial class PreferenceWindowController : NSWindowController
    {
        #region Constructors
        public PreferenceWindowController (IntPtr handle) : base (handle)
        {
        }
        #endregion

        #region Override Methods
        public override void WindowDidLoad ()
        {
            base.WindowDidLoad ();

            // Initialize
            Window.Delegate = new PreferenceWindowDelegate(Window);
            Toolbar.SelectedItemIdentifier = "General";
        }
        #endregion
    }
}
完成所有这些更改后,如果用户编辑应用的“首选项”并关闭“首选项窗口”,则更改将应用于所有打开的 Windows:

“打开”对话框
“打开对话框”为用户提供了在应用程序中查找和打开项的一致方法。 若要在 Xamarin.Mac 应用程序中显示“打开对话框”,请使用以下代码:
var dlg = NSOpenPanel.OpenPanel;
dlg.CanChooseFiles = true;
dlg.CanChooseDirectories = false;
dlg.AllowedFileTypes = new string[] { "txt", "html", "md", "css" };

if (dlg.RunModal () == 1) {
    // Nab the first file
    var url = dlg.Urls [0];

    if (url != null) {
        var path = url.Path;

        // Create a new window to hold the text
        var newWindowController = new MainWindowController ();
        newWindowController.Window.MakeKeyAndOrderFront (this);

        // Load the text into the window
        var window = newWindowController.Window as MainWindow;
        window.Text = File.ReadAllText(path);
        window.SetTitleWithRepresentedFilename (Path.GetFileName(path));
        window.RepresentedUrl = url;

    }
}
在上面的代码中,我们将打开一个新的文档窗口以显示文件的内容。 需要将此代码替换为应用程序所需的功能。
使用 NSOpenPanel时,可以使用以下属性:
- CanChooseFiles - 如果用户
true可以选择文件。 - CanChooseDirectories - 如果用户
true可以选择目录。 - AllowsMultipleSelection - 如果用户
true一次可以选择多个文件。 - ResolveAliases - 如果选择
true和 别名,则将其解析为原始文件的路径。 - AllowedFileTypes - 用户可以选择作为扩展名或 UTI 的文件类型的字符串数组。 默认值
null为 ,它允许打开任何文件。
方法RunModal ()显示“打开对话框”,并允许用户选择 () 属性指定的文件或目录,如果用户单击“打开”按钮,则1返回 。
打开对话框将用户的选定文件或目录作为 属性中的 URL URL 数组返回。
如果我们运行程序并从“文件”菜单中选择“打开...”项,则会显示以下内容:
“打印”和“页面设置”对话框
macOS 提供应用程序可以显示的标准打印和页面设置对话框,以便用户可以在他们使用的每个应用程序中获得一致的打印体验。
以下代码将显示标准打印对话框:
public bool ShowPrintAsSheet { get; set;} = true;
...

[Export ("showPrinter:")]
void ShowDocument (NSObject sender) {
    var dlg = new NSPrintPanel();

    // Display the print dialog as dialog box
    if (ShowPrintAsSheet) {
        dlg.BeginSheet(new NSPrintInfo(),this,this,null,new IntPtr());
    } else {
        if (dlg.RunModalWithPrintInfo(new NSPrintInfo()) == 1) {
            var alert = new NSAlert () {
                AlertStyle = NSAlertStyle.Critical,
                InformativeText = "We need to print the document here...",
                MessageText = "Print Document",
            };
            alert.RunModal ();
        }
    }
}
如果将 属性设置为 ShowPrintAsSheetfalse,则运行应用程序并显示打印对话框,将显示以下内容:
如果将 属性设置为 ShowPrintAsSheettrue,则运行应用程序并显示打印对话框,将显示以下内容:
以下代码将显示“页面布局”对话框:
[Export ("showLayout:")]
void ShowLayout (NSObject sender) {
    var dlg = new NSPageLayout();

    // Display the print dialog as dialog box
    if (ShowPrintAsSheet) {
        dlg.BeginSheet (new NSPrintInfo (), this);
    } else {
        if (dlg.RunModal () == 1) {
            var alert = new NSAlert () {
                AlertStyle = NSAlertStyle.Critical,
                InformativeText = "We need to print the document here...",
                MessageText = "Print Document",
            };
            alert.RunModal ();
        }
    }
}
如果将 属性设置为 ShowPrintAsSheetfalse,则运行应用程序并显示打印布局对话框,将显示以下内容:
如果将 属性设置为 ShowPrintAsSheettrue,则运行应用程序并显示打印版式对话框,将显示以下内容:
有关使用打印和页面设置对话框的详细信息,请参阅 Apple 的 NSPrintPanel 和 NSPageLayout 文档。
“保存”对话框
“保存对话框”为用户提供了一致的方式来在应用程序中保存项。
以下代码将显示标准保存对话框:
public bool ShowSaveAsSheet { get; set;} = true;
...

[Export("saveDocumentAs:")]
void ShowSaveAs (NSObject sender)
{
    var dlg = new NSSavePanel ();
    dlg.Title = "Save Text File";
    dlg.AllowedFileTypes = new string[] { "txt", "html", "md", "css" };

    if (ShowSaveAsSheet) {
        dlg.BeginSheet(mainWindowController.Window,(result) => {
            var alert = new NSAlert () {
                AlertStyle = NSAlertStyle.Critical,
                InformativeText = "We need to save the document here...",
                MessageText = "Save Document",
            };
            alert.RunModal ();
        });
    } else {
        if (dlg.RunModal () == 1) {
            var alert = new NSAlert () {
                AlertStyle = NSAlertStyle.Critical,
                InformativeText = "We need to save the document here...",
                MessageText = "Save Document",
            };
            alert.RunModal ();
        }
    }

}
属性 AllowedFileTypes 是文件类型的字符串数组,用户可以选择将其另存为。 可以将文件类型指定为扩展名或 UTI。 默认值 null为 ,它允许使用任何文件类型。
如果将 属性设置为 ShowSaveAsSheetfalse,请运行应用程序,并从“文件”菜单中选择“另存为...”,将显示以下内容:
用户可以展开对话框:
如果将 属性设置为 ShowSaveAsSheettrue,请运行应用程序,并从“文件”菜单中选择“另存为...”,将显示以下内容:
用户可以展开对话框:
有关使用“保存”对话框的详细信息,请参阅 Apple 的 NSSavePanel 文档。
总结
本文详细介绍了在 Xamarin.Mac 应用程序中使用模式窗口、工作表和标准系统对话框。 我们了解了模式窗口、工作表和对话框的不同类型和用法,如何在 Xcode 的 Interface Builder 中创建和维护模式窗口和工作表,以及如何在 C# 代码中使用模式窗口、工作表和对话框。