在 Azure Stack HCI 上建立 Arc 虛擬機
適用於:Azure Stack HCI 版本 23H2
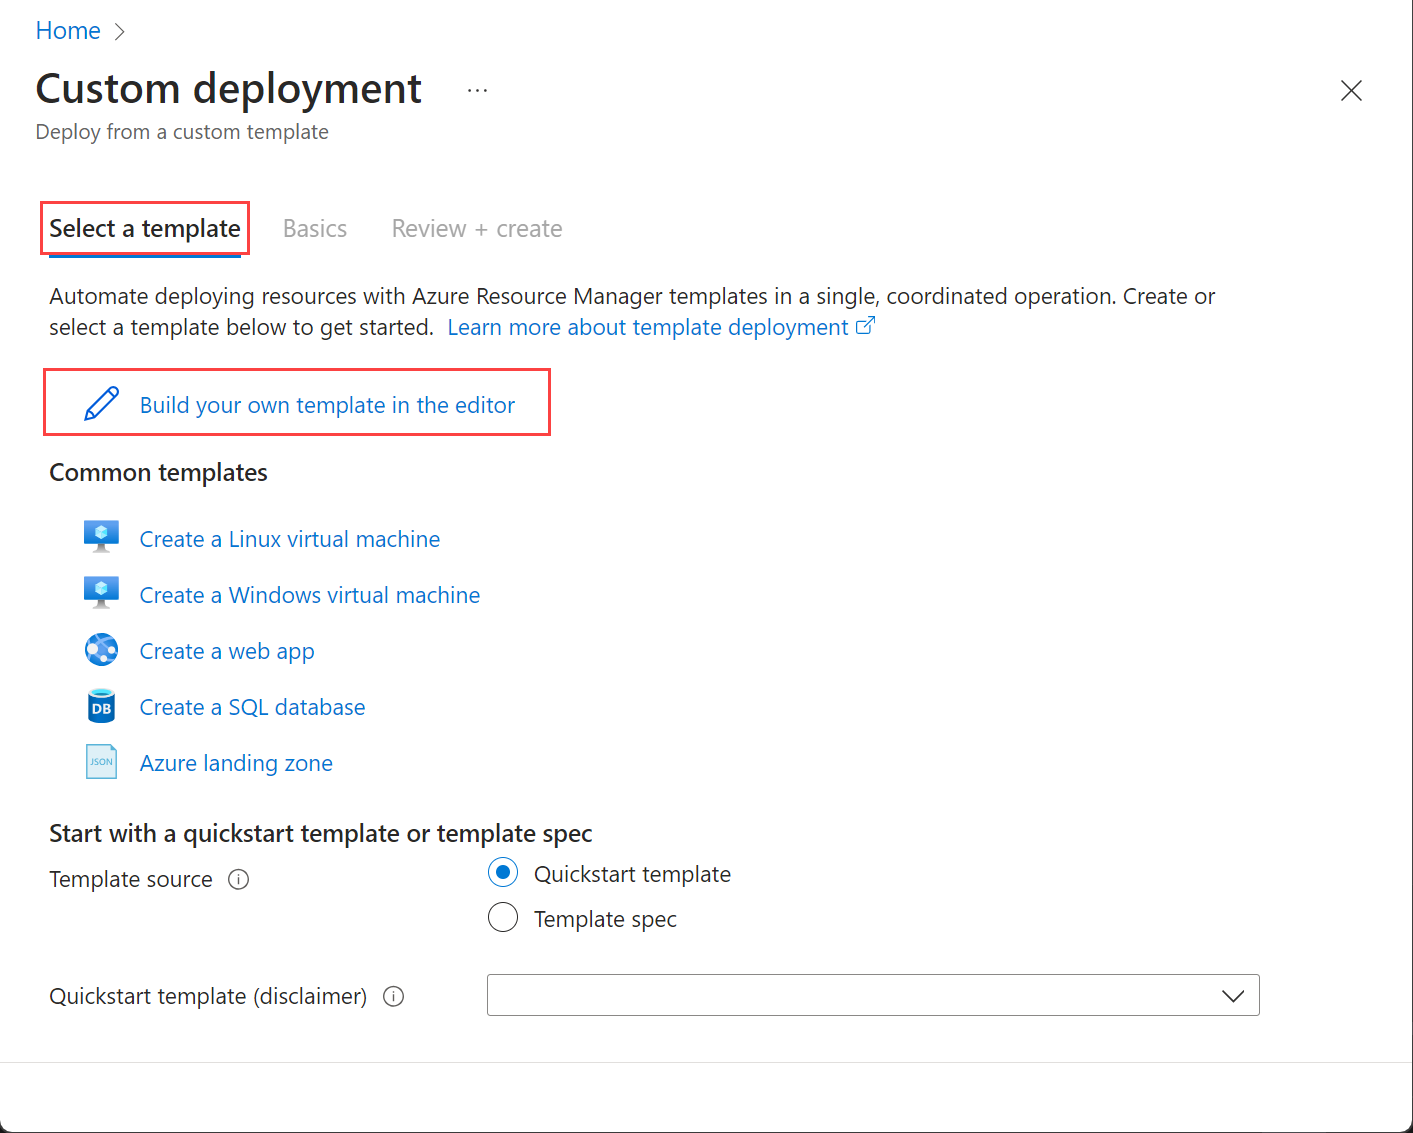
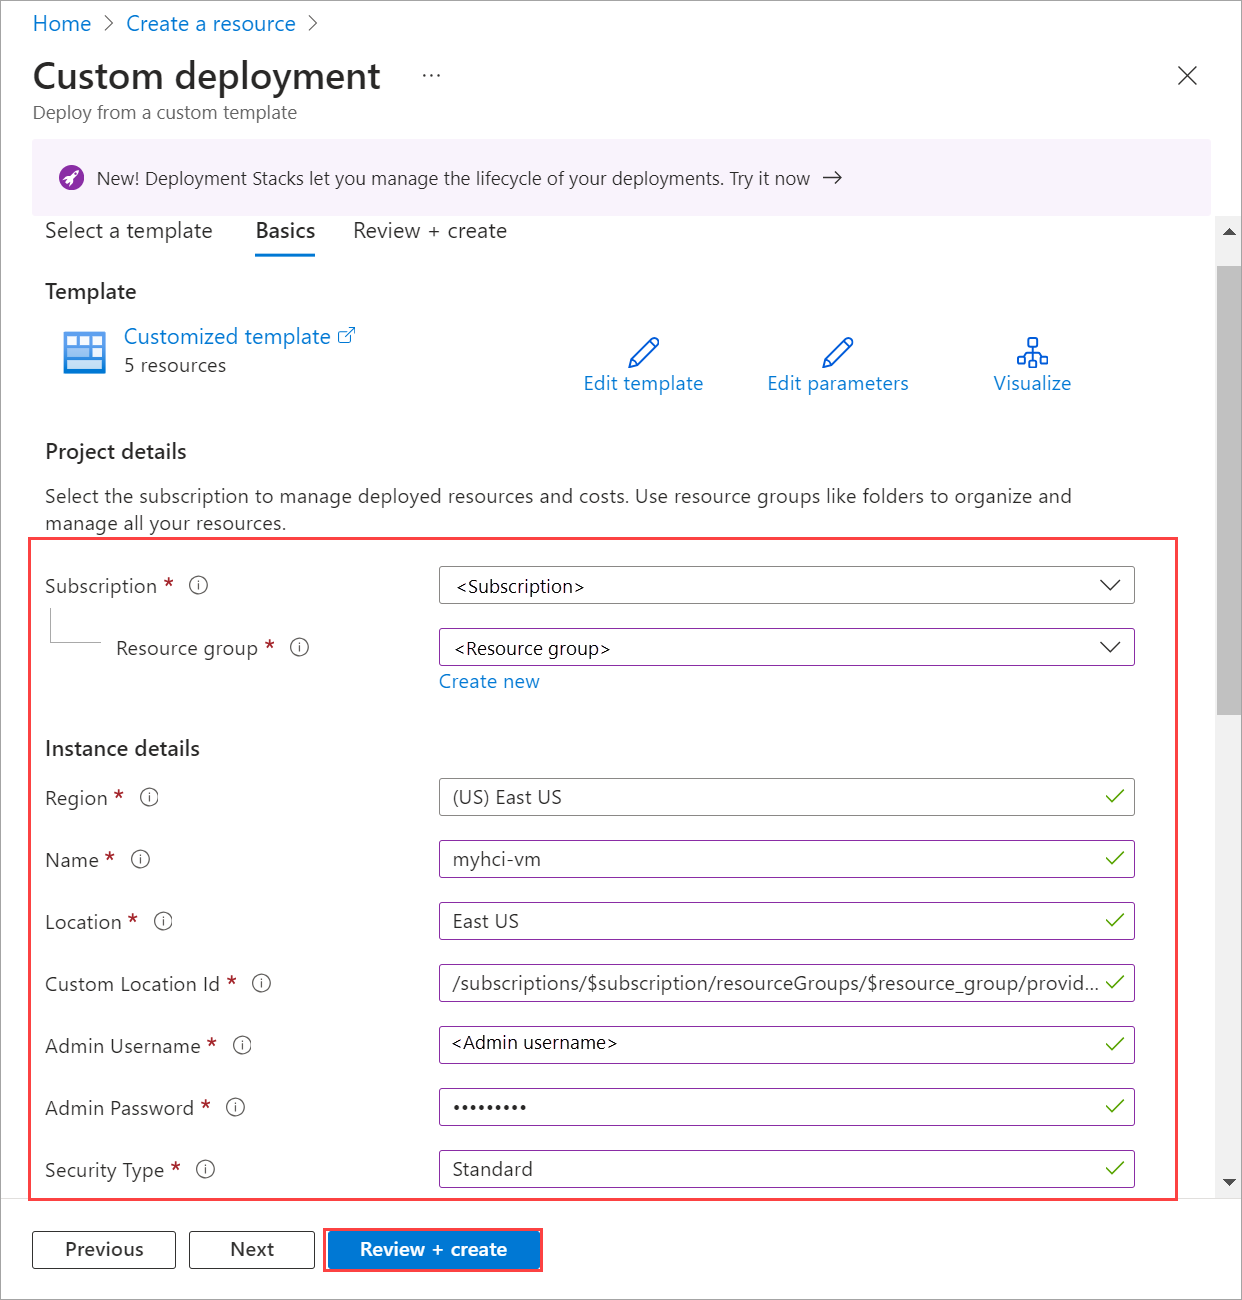
本文說明如何從您在 Azure Stack HCI 叢集上建立的 VM 映射開始建立 Arc VM。 您可以使用 Azure CLI、Azure 入口網站 或 Azure Resource Manager 範本來建立 Arc VM。
關於 Azure Stack HCI 叢集資源
使用 Azure Stack HCI 叢集資源頁面來進行下列作業:
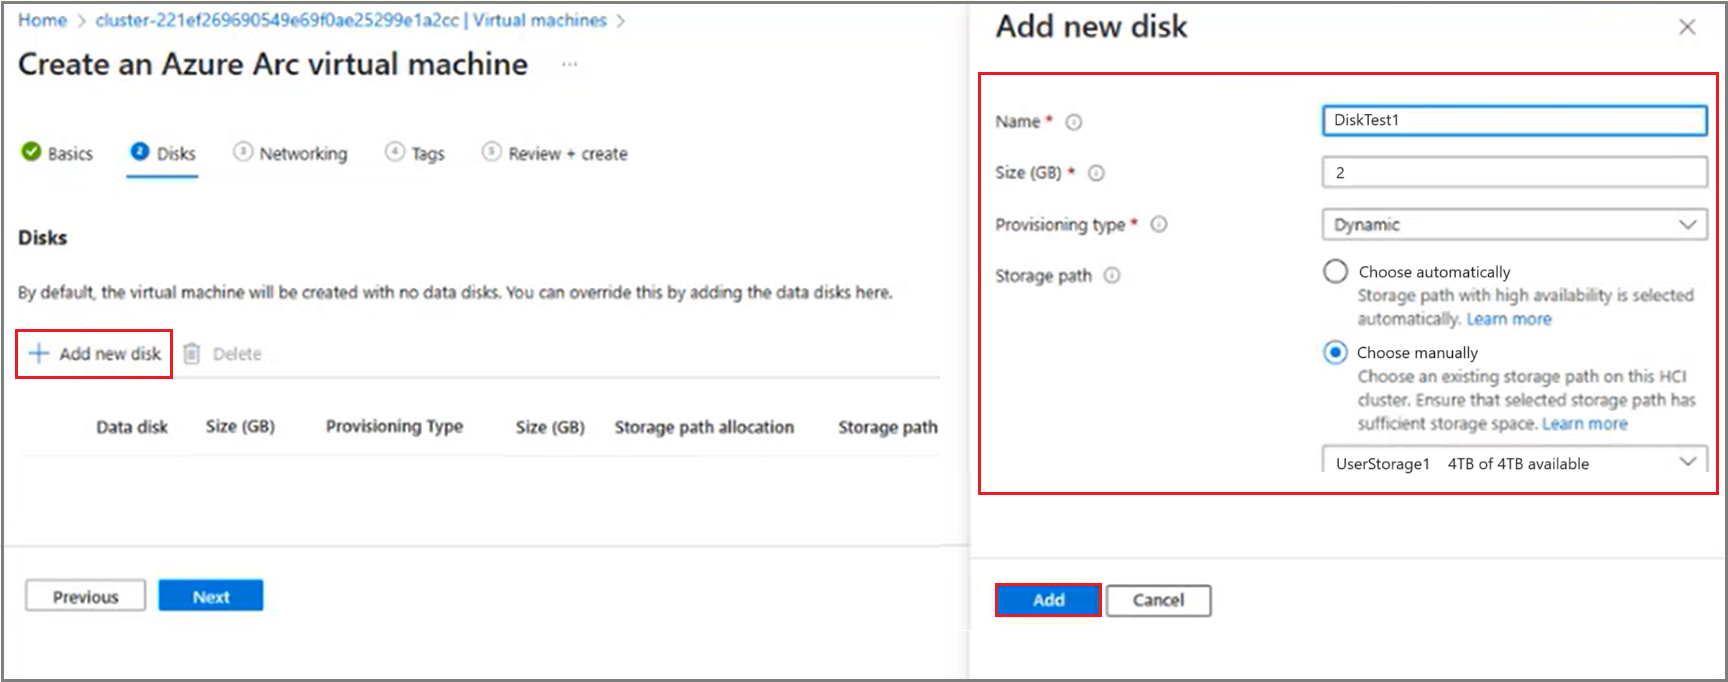
- 建立和管理 Arc VM 資源,例如 VM 映像、磁碟、網路介面。
- 檢視及存取與 Azure Stack HCI 叢集相關聯的 Azure Arc 資源網橋和自定義位置。
- 布建和管理Arc VM。
下一節將說明建立Arc VM的程式。
必要條件
建立已啟用 Azure Arc 的 VM 之前,請確定下列必要條件已完成。
- 具有指派適當 RBAC 角色和許可權的 Azure 訂用帳戶存取權。 如需詳細資訊,請參閱 Azure Stack HCI Arc VM 管理的 RBAC 角色。
- 要布建 VM 的資源群組存取權。
- 存取 Azure Stack HCI 叢集上的一或多個 VM 映像。 下列其中一個程式可以建立這些 VM 映射:
- 從 Azure Marketplace 中的映像開始的 VM 映射。
- 從 Azure 儲存體 帳戶中的映射開始的 VM 映像。
- 從叢集本機共用中的映像開始的 VM 映像。
- 您將用來布建 VM 的 Azure Stack HCI 叢集自定義位置。 自定義位置也會顯示在 Azure Stack HCI 叢集的 [概觀 ] 頁面中。
如果使用用戶端連線到 Azure Stack HCI 叢集,請參閱 透過 Azure CLI 用戶端連線到 Azure Stack HCI。
存取您已在與 Azure Stack HCI 叢集相關聯的邏輯網路上建立的網路介面。 您可以選擇具有靜態 IP 的網路介面,或是具有動態 IP 配置的網路介面。 如需詳細資訊,請參閱如何 建立網路介面。
建立 Arc VM
請遵循下列步驟,在您的 Azure Stack HCI 叢集上建立 Arc VM。
在執行已連線至 Azure Stack HCI 叢集的 az CLI 用戶端上,遵循下列步驟。
登入並設定訂用帳戶
線上到 Azure Stack HCI 系統上的伺服器。
登入。 輸入:
az login --use-device-code設定您的訂用帳戶。
az account set --subscription <Subscription ID>
建立 Windows VM
視您建立的網路介面類型而定,您可以建立具有具有靜態 IP 網路介面的 VM,或是具有動態 IP 配置的 VM。
注意
如果您需要一個以上的網路介面搭配 VM 的靜態 IP,請在建立 VM 之前先建立介面。 不支援在布建 VM 之後新增具有靜態 IP 的網路介面。
在這裡,我們會建立使用指定記憶體路徑上特定記憶體和處理器計數的 VM。
設定部分參數。
$vmName ="myhci-vm"
$subscription =  "<Subscription ID>"
$resource_group = "myhci-rg"
$customLocationName = "myhci-cl"
$customLocationID ="/subscriptions/$subscription/resourceGroups/$resource_group/providers/Microsoft.ExtendedLocation/customLocations/$customLocationName"
$location = "eastus"
$computerName = "mycomputer"
$userName = "myhci-user"
$password = "<Password for the VM>"
$imageName ="ws22server"
$nicName ="myhci-vnic"
$storagePathName = "myhci-sp"
$storagePathId = "/subscriptions/<Subscription ID>/resourceGroups/myhci-rg/providers/Microsoft.AzureStackHCI/storagecontainers/myhci-sp"
建立 VM 的參數會以下列方式表化:
參數 描述 name 您為 Azure Stack HCI 叢集建立的 VM 名稱。 請務必提供遵循 Azure 資源規則的名稱。 admin-username 您要在 Azure Stack HCI 叢集上部署之 VM 上使用者的使用者名稱。 admin-password 您要在 Azure Stack HCI 叢集上部署之 VM 上的使用者密碼。 image-name 用來布建 VM 的 VM 映像名稱。 位置 Azure 區域,如 所 az locations指定。 例如,這可能是eastus、westeurope。資源群組 您在其中建立 VM 的資源群組名稱。 為了方便管理,建議您使用與 Azure Stack HCI 叢集相同的資源群組。 訂閱 部署 Azure Stack HCI 之訂用帳戶的名稱或標識碼。 這可能是您在 Azure Stack HCI 叢集上用於 VM 的另一個訂用帳戶。 custom-location 使用此選項來提供與您建立此 VM 的 Azure Stack HCI 叢集相關聯的自定義位置。 authentication-type 要與 VM 搭配使用的驗證類型。 接受的值為 all、password與ssh。 預設值是適用於Linux的 Windows 和 SSH 公鑰的密碼。 使用all來啟用ssh和password驗證。nics 與您的 VM 相關聯的網路介面名稱或識別碼。 建立 VM 時,您至少必須有一個網路介面,才能啟用客體管理。 memory-mb 配置給 VM 的 MB 記憶體。 如果未指定,則會使用預設值。 處理器 配置給 VM 的處理器數目。 如果未指定,則會使用預設值。 storage-path-id VM 組態和數據儲存所在的相關聯記憶體路徑。 proxy-configuration 使用此選擇性參數來設定 VM 的 Proxy 伺服器。 如需詳細資訊,請參閱 建立已設定 Proxy 的 VM。 執行下列命令以建立 VM。
az stack-hci-vm create --name $vmName --resource-group $resource_group --admin-username $userName --admin-password $password --computer-name $computerName --image $imageName --location $location --authentication-type all --nics $nicName --custom-location $customLocationID --hardware-profile memory-mb="8192" processors="4" --storage-path-id $storagePathId
當 顯示為succeeded輸出時provisioningState,已成功建立 VM。
注意
建立的 VM 預設會啟用來賓管理。 如果因為任何原因,客體管理在 VM 建立期間失敗,您可以遵循在建立 VM 之後在 Arc VM 上啟用客體管理中的步驟。
在此範例中,已使用 --storage-path-id 旗標指定記憶體路徑,並確保工作負載數據(包括 VM、VM 映射、非 OS 數據磁碟)都放在指定的記憶體路徑中。
如果未指定旗標,工作負載(VM、VM 映像、非 OS 數據磁碟)會自動放在高可用性記憶體路徑中。
建立 Linux VM
若要建立Linux VM,請使用您用來建立 Windows VM 的相同命令。
- 指定的資源庫映像應該是Linux映像。
- 用戶名稱和密碼適用於
authentication-type-all參數。 - 針對 SSH 金鑰,您必須與一起
authentication-type-all傳遞ssh-key-values參數。
重要
Linux VM 不支援在建立 VM 期間設定 Proxy 伺服器。
建立已設定 Proxy 的 VM
使用此選擇性參數 Proxy 組態 來設定 VM 的 Proxy 伺服器。
如果在 Proxy 伺服器後方建立 VM,請執行下列命令:
az stack-hci-vm create --name $vmName --resource-group $resource_group --admin-username $userName --admin-password $password --computer-name $computerName --image $imageName --location $location --authentication-type all --nics $nicName --custom-location $customLocationID --hardware-profile memory-mb="8192" processors="4" --storage-path-id $storagePathId --proxy-configuration http_proxy="<Http URL of proxy server>" https_proxy="<Https URL of proxy server>" no_proxy="<URLs which bypass proxy>" cert_file_path="<Certificate file path for your server>"
您可以針對 輸入下列參數 proxy-server-configuration:
| 參數 | 描述 |
|---|---|
| http_proxy | Proxy 伺服器的 HTTP URL。 範例 URL 為:http://proxy.example.com:3128。 |
| https_proxy | Proxy 伺服器的 HTTPS URL。 伺服器仍可使用 HTTP 位址,如下列範例所示: http://proxy.example.com:3128。 |
| no_proxy | URL,可略過 Proxy。 典型的範例是 localhost,127.0.0.1,.svc,10.0.0.0/8,172.16.0.0/12,192.168.0.0/16,100.0.0.0/8。 |
| cert_file_path | Proxy 伺服器的憑證檔案路徑名稱。 例如:C:\Users\Palomino\proxycert.crt。 |
以下是命令範例:
az stack-hci-vm create --name $vmName --resource-group $resource_group --admin-username $userName --admin-password $password --computer-name $computerName --image $imageName --location $location --authentication-type all --nics $nicName --custom-location $customLocationID --hardware-profile memory-mb="8192" processors="4" --storage-path-id $storagePathId --proxy-configuration http_proxy="http://ubuntu:ubuntu@192.168.200.200:3128" https_proxy="http://ubuntu:ubuntu@192.168.200.200:3128" no_proxy="localhost,127.0.0.1,.svc,10.0.0.0/8,172.16.0.0/12,192.168.0.0/16,100.0.0.0/8,s-cluster.test.contoso.com" cert_file_path="C:\ClusterStorage\UserStorage_1\server.crt"
針對 Proxy 驗證,您可以傳遞 URL 中結合的使用者名稱和密碼,如下所示:"http://username:password@proxyserver.contoso.com:3128"
視您在 VM 上執行的 PowerShell 版本而定,您可能需要啟用 VM 的 Proxy 設定。
針對執行 PowerShell 5.1 版或更早版本的 Windows VM,請在建立之後登入 VM。 執行下列命令以啟用 Proxy:
netsh winhttp set proxy proxy-server="http=myproxy;https=sproxy:88" bypass-list="*.foo.com"啟用 Proxy 之後,您就可以 啟用來賓管理。
對於執行 PowerShell 版本晚於 5.1 的 Windows VM,在建立 VM 期間傳遞的 Proxy 設定僅用於啟用 Arc 客體管理。 建立 VM 之後,請登入 VM 並執行上述命令,以啟用其他應用程式的 Proxy。
使用受控識別來驗證Arc VM
透過 Azure CLI 或 Azure 入口網站 在 Azure Stack HCI 系統上建立 Arc VM 時,也會建立系統指派的受控識別,以持續 Arc VM 的存留期。
Azure Stack HCI 上的 Arc VM 會從已啟用 Arc 的伺服器延伸,而且可以使用系統指派的受控識別來存取支援 Microsoft Entra ID 型驗證的其他 Azure 資源。 例如,Arc VM 可以使用系統指派的受控識別來存取 Azure 金鑰保存庫。
如需詳細資訊,請參閱使用已啟用 Azure Arc 的伺服器對 Azure 資源進行系統指派的受控識別和驗證。
下一步
- 刪除 Arc VM。
- 安裝和管理 VM 擴充功能。
- 針對 Arc VM 進行疑難解答。
- Arc VM 管理的常見問題。
![選取 [+ 新增/建立 VM] 的螢幕快照。](media/create-arc-virtual-machines/select-create-vm.png)
![[基本] 索引標籤上 [項目詳細數據] 的螢幕快照。](media/create-arc-virtual-machines/create-virtual-machines-project-details.png)
![[基本] 索引標籤上 [實例詳細數據] 的螢幕快照。](media/create-arc-virtual-machines/create-virtual-machines-instance-details.png)
![在 [基本] 索引標籤上啟用 inVM 擴充功能的來賓管理螢幕快照。](media/create-arc-virtual-machines/create-virtual-machines-vmext-adminacct-domainjoin.png)


![Azure 入口網站 中範本的 [檢閱 + 建立] 索引標籤螢幕快照。](media/create-arc-virtual-machines/filled-review-create.png)