設定 Visual Studio Code for Go 開發

在本快速入門中,您將安裝和設定 Go for Visual Studio Code 擴充功能。

在 Go 開發人員問卷 2020 結果中 41% 的受訪者選擇 Visual Studio Code 作為他們 最偏好的 Go 編輯器 這讓 Visual Studio Code 成為 Go 開發人員最受歡迎的編輯器。

Visual Studio Code 和 Go 延伸模組提供 IntelliSense、程式碼流覽和進階偵錯。 在本快速入門中,您將設定 Visual Studio Code。 然後,您將撰寫、執行及偵錯範例 Go 程式。

A screenshot showing a Go program within Visual Studio Code

1.安裝 Go

請遵循下列步驟來安裝 Go:

  1. 在網頁瀏覽器中,移至 [go.dev/doc/install ]。
  2. 下載作業系統的版本。
  3. 下載之後,請執行安裝程式。
  4. 開啟命令提示字元,然後執行 go version 以確認已安裝 Go。

2.安裝 Visual Studio Code

請遵循下列步驟來安裝 Visual Studio Code:

  1. 在網頁瀏覽器中,移至 [code.visualstudio.com ]。
  2. 下載作業系統的版本、支援 Windows、Linux 和 macOS。
  3. 下載之後,請執行安裝程式。 這只需要一分鐘的時間。

3.安裝 Go 擴充功能

指示 Screenshot
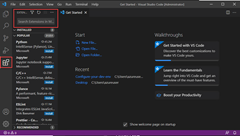
在 Visual Studio Code 中,按一下活動列中的 [延伸模組] 圖示,以顯示 [延伸模組] 檢視。 或使用鍵盤快速鍵(Ctrl+Shift+X)。 A screenshot showing how search for the Go extension.
搜尋 Go 擴充功能,然後選取 [安裝]。 A screenshot showing how to use the search box in the top tool bar to find App Services in Azure.

4.更新 Go 工具

指示 Screenshot
在 Visual Studio Code 中,開啟 [命令選擇區 的說明 > 顯示所有命令]。 或使用鍵盤快速鍵 (Ctrl+Shift+P) A screenshot showing how search the Command Palette.
Go: Install/Update tools搜尋 ,然後從託盤執行命令 A screenshot showing how to run the Go: install/update tool from the command pallet.
出現提示時,選取所有可用的 Go 工具,然後按一下 [確定]。 A screenshot showing how to update all the available Go tools.
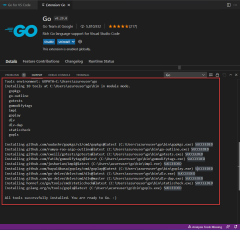
等候 Go 工具完成更新。 A screenshot showing all the Go tools that were updated.

5.撰寫範例 Go 程式

指示 Screenshot
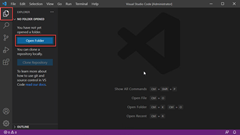
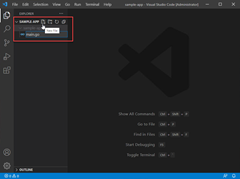
在 Visual Studio Code 中,開啟您要在其中建立 Go 應用程式的根目錄的資料夾。 若要開啟資料夾,請按一下活動列中的 [總管] 圖示,然後按一下 [ 開啟資料夾 ]。 A screenshot showing how to create a new folder.
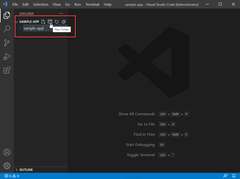
按一下 [總管] 面板中的 [ 新增資料夾 ],然後為名為 的範例 Go 應用程式建立根主管 sample-app A screenshot showing how to create a folder in vs code.
按一下 [總管] 面板中的 [ 新增檔案 ],然後將檔案命名為 main.go A screenshot showing how to create a file in vs code.
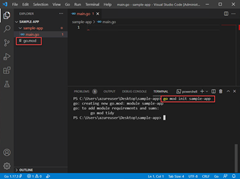
開啟終端機、 終端 > 機新終端機 ,然後執行 命令 go mod init sample-app 來初始化範例 Go 應用程式。 A screenshot running the go mod init command.
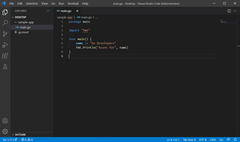
將下列程式碼 main.go 複製到 檔案中。 A screenshot displaying a sample Go program.

範例程式碼:

package main

import "fmt"

func main() {
    name := "Go Developers"
    fmt.Println("Azure for", name)
}

6.執行偵錯工具

指示 Screenshot
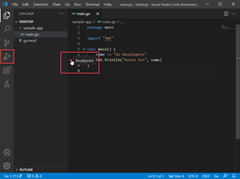
按一下編號行左側,在行 7 上建立中斷點。 或將游標放在第 7 行,然後按 F9。 A screenshot showing how to set a breakpoint.
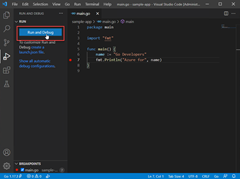
按一下 Visual Studio Code 側邊 [活動列] 中的偵錯圖示來顯示 [偵錯] 檢視。 或使用鍵盤快速鍵(Ctrl+Shift+D)。 A screenshot showing how to navigate to the debug panel.
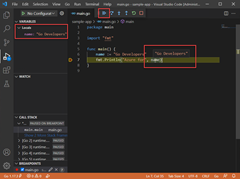
按一下 [ 執行並偵錯 ],或按 F5 執行偵錯工具。 然後將滑鼠暫留在第 7 行上的變數 name 上,以查看其值。 按一下偵錯工具列上的 [繼續] 或按 F5 鍵結束偵錯工具。 A screenshot showing running the debugger in VS code.

下一步