練習 - 建構 Web 應用程式並建立用於推斷的介面
開始之前,請確定您已在電腦上安裝下列軟體:
- Node.js
- npm \(英文\)
- Visual Studio Code
- Vue CLI
注意
您的機器上需要有可用的 Node 和 npm,才能使用 Vue CLI。 您也可以嘗試 Vue UI,也就是疊加在 Vue CLI 上的 GUI。 輸入 vue ui 來啟動適用於 CLI 的 GUI,並以更視覺化的方式建立應用程式。
建構應用程式
在安裝了 Node、npm 和 Vue CLI 之後,建立新的應用程式將變得輕鬆無比。 使用 cd 瀏覽至要用來放置程式碼的資料夾、開啟命令提示字元或終端機,然後輸入:
vue create this-or-that
當 CLI 詢問您是要使用預設建構還是手動建構時,請選擇 [手動]。 如此一來,您就可以控制所要安裝的外掛程式。
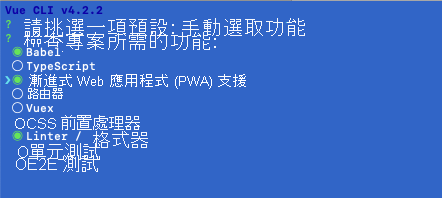
請務必要在 CLI 設定常式的這個畫面上選擇 [漸進式 Web 應用程式]。 您想要建立可在線上和離線運作的應用程式。
注意
安裝 Vue CLI 時,請確定您選取 Vue 2。
建置好基本應用程式之後,請輸入下列命令來執行:
cd this-or-that && npm run serve
您應該會在本機瀏覽器中看到所建構的基本 Vue.js 應用程式 scaffold。
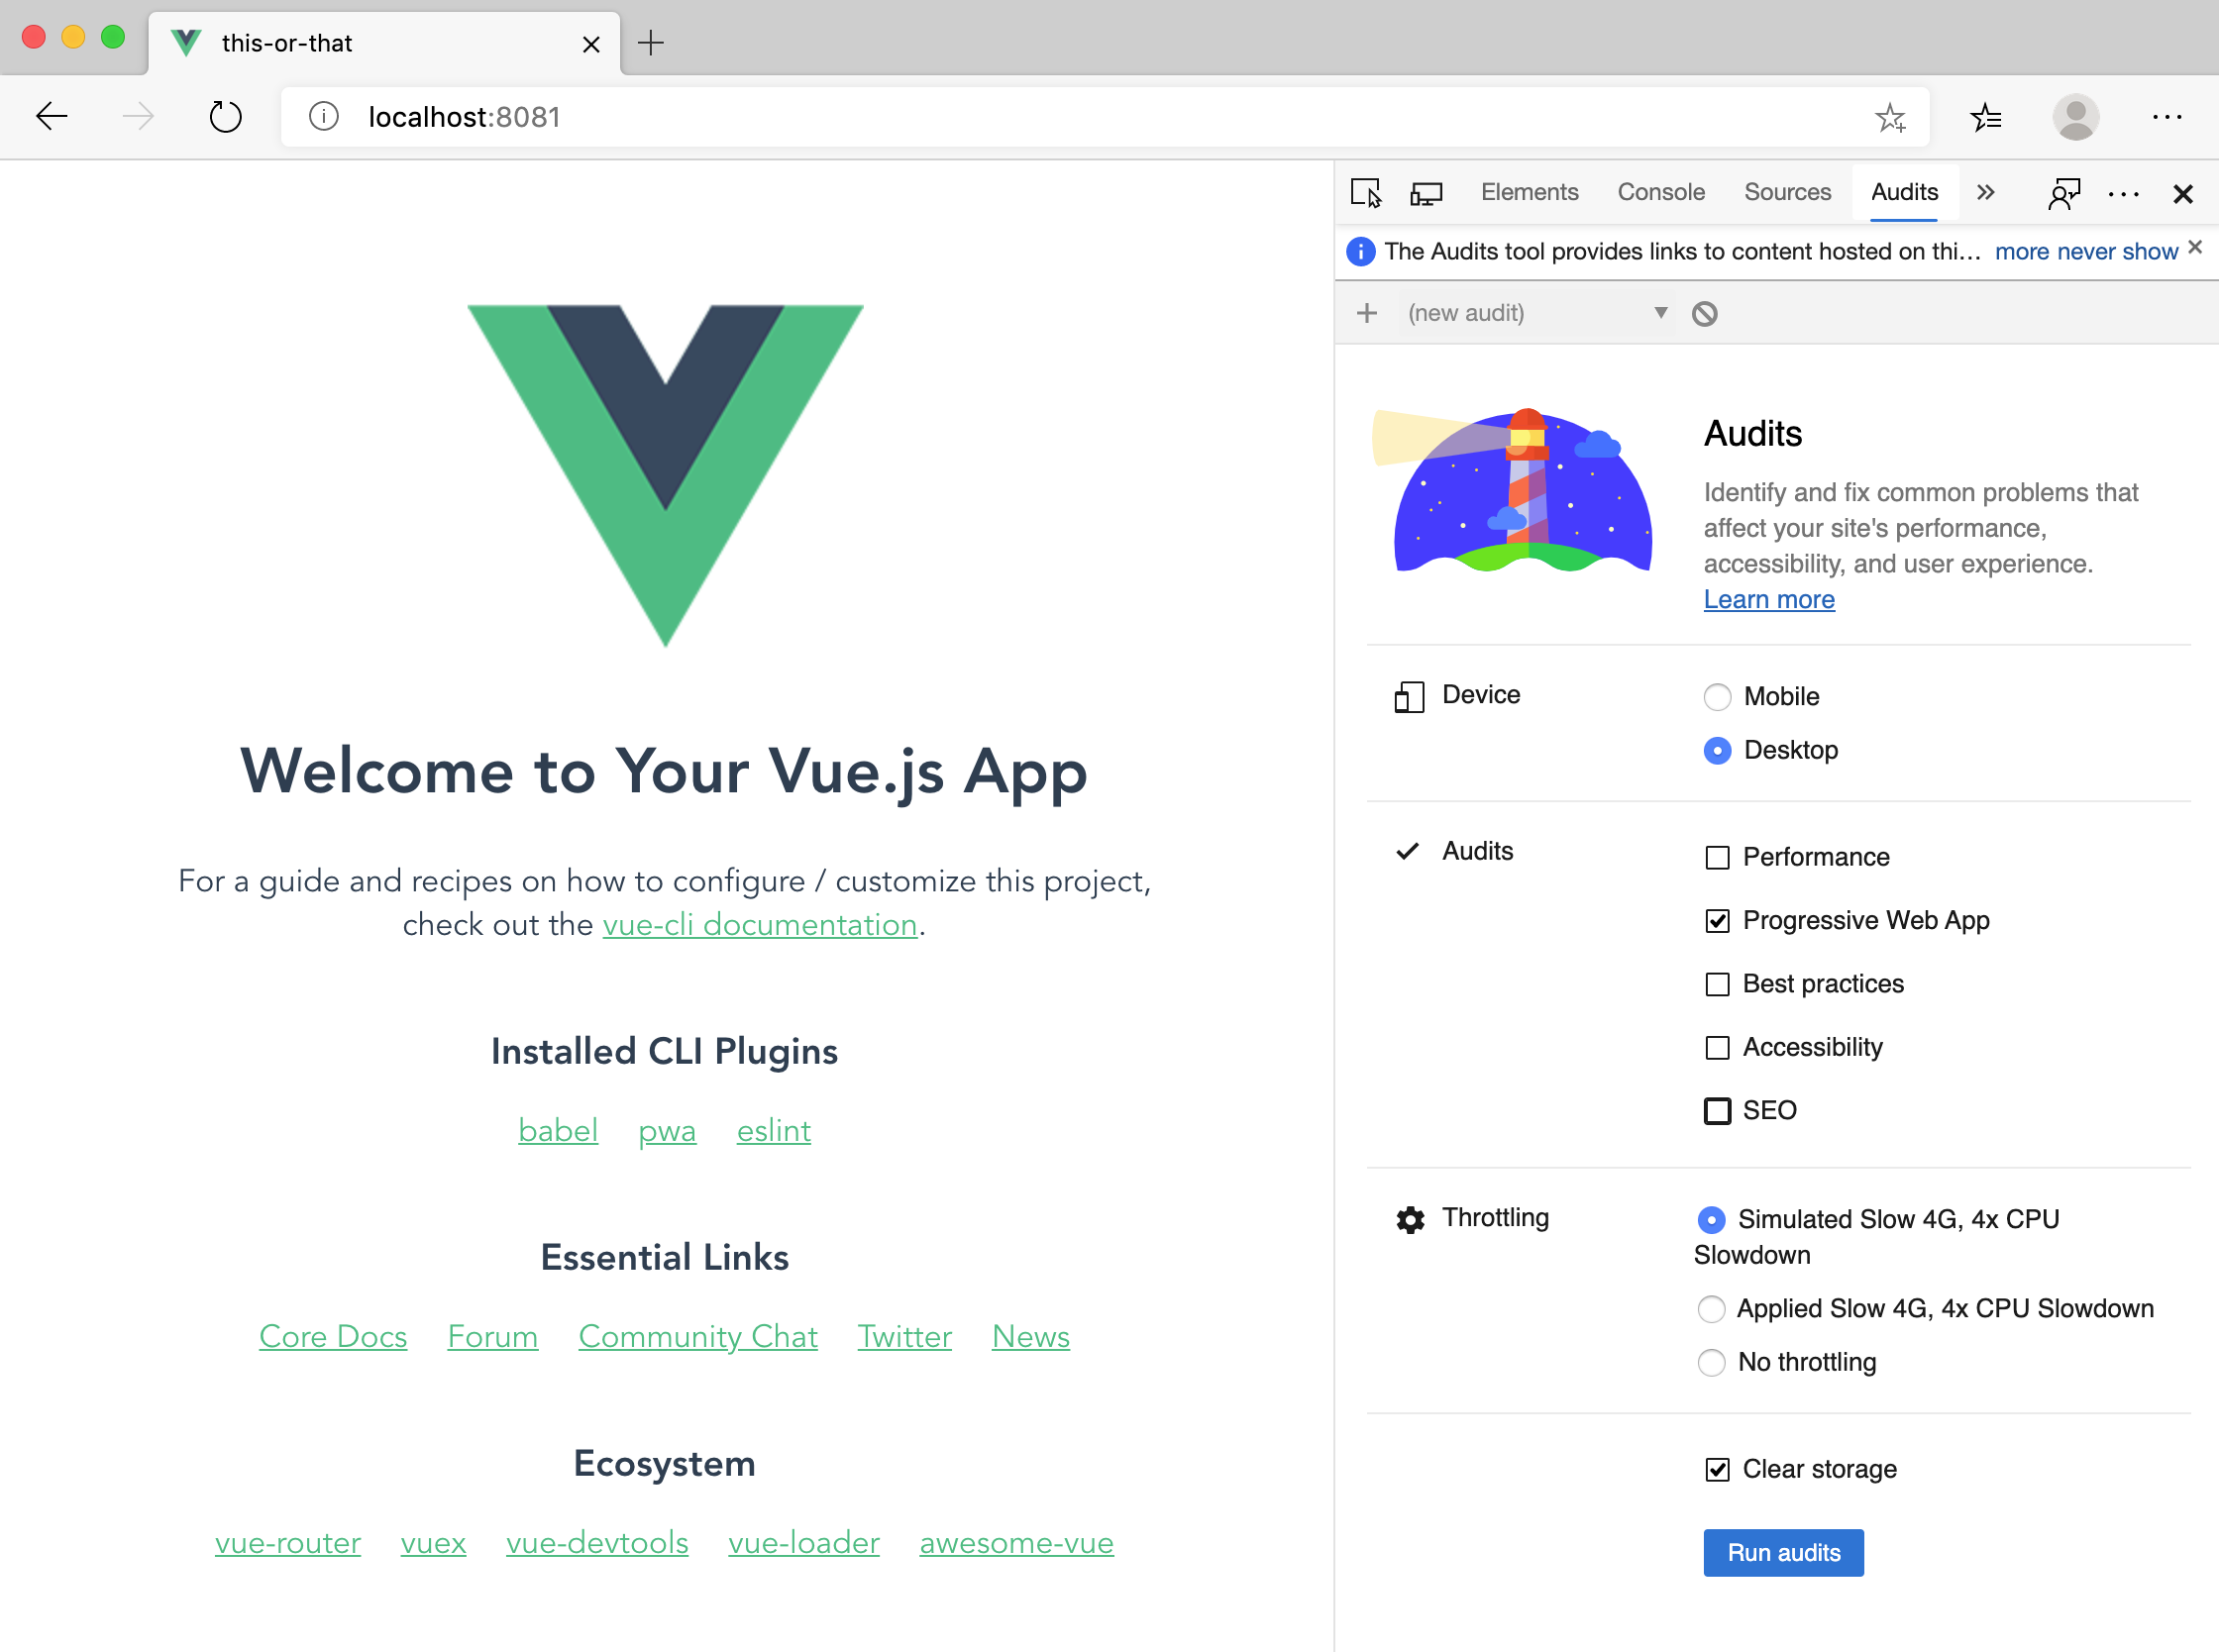
在開發人員工具中,按一下 [稽核],並檢閱應用程式的 Lighthouse 區域。 您可以使用此工具來測試漸進式 Web 應用程式的執行情況,但要等到之後將應用程式部署至 azurewebsites.net 時,才會這麼做。
建置推斷介面
現在,您需要建置一個非常簡單的介面,以載入可供模型作為執行推斷對象的影像。 此模型會提供分數,依據其判斷影像對應至給定標籤的確定程度來分辨影像。 在此案例中,我們會提供一些大麥町和巧克力碎片冰淇淋的影像。 您稍後將會定型模型。
首先,將程式碼基底 /src/components 資料夾中的檔案 HelloWorld.vue 重新命名為 DetectImage.vue。 也請移除 App.vue 中 HelloWorld 的參考。 現在,App.vue 檔案看起來像這樣:
<template>
    <div id="app">
        <DetectImage msg="What do you see?" />
    </div>
</template>

<script>
    import DetectImage from './components/DetectImage.vue';

    export default {
        name: 'app',
        components: {
            DetectImage,
        },
    };
</script>

<style>
    #app {
        font-family: 'Avenir', Helvetica, Arial, sans-serif;
        -webkit-font-smoothing: antialiased;
        -moz-osx-font-smoothing: grayscale;
        text-align: center;
        color: #2c3e50;
        margin-top: 60px;
    }
</style>
在 /src/assets 中建立名為 images 的資料夾,以存放要用於推斷的影像。 將此 ZIP 檔案解壓縮至該資料夾。 此檔案包含 17 個影像,其中包括一個空白影像。
這些影像是 Karen Zack 用來建立其大麥町和冰淇淋拼貼的影像。
藉由編輯 DetectImage.vue 中的 <template> 來包含下列配置,以顯示影像和用來切換的按鈕。
<div>
    <h1>{{ msg }}</h1>
    <div>
        <img class="image" ref="img" :src="require('../assets/images/' + getImgIndex + '.jpg')" />
    </div>
    <div>
        <button class="button" @click="next()" :disabled="disable">Next</button>
    </div>
    <div v-for="pred in predictions" :key="pred.index">
        {{ pred.label }}: {{ pred.probability.toFixed(0) + '%' }}
    </div>
    <div v-if="!predictions.length">hmm.....</div>
</div>
在 DetectImage.vue 中,於 props 物件 (在該物件的結尾處新增逗號) 的右括弧底下新增 data() 方法,以便為資料建立預留位置。
data() {
    return {
        image: 0,
        numImages: 16,
    };
},
在此物件底下,建立 computed 屬性以傳回影像的索引,並在到達索引時停用範本中的按鈕。
computed: {
    getImgIndex() {
        return this.image.toString();
    },
    disable() {
        if (this.image == this.numImages) {
            return true;
        } else return false;
    },
},
在計算屬性物件底下建立 methods 物件,以擷取使用者互動。
methods: {
    next() {
        this.image++;
        this.predictions = [];
        setTimeout(this.predict, 500);
    },
},
最後,藉由覆寫 DetectImage.vue 檔案底部的 <styles> 區塊來新增一些樣式。
<style scoped>
h3 {
    margin: 40px 0 0;
}
.image {
    min-height: 300px;
    max-height: 300px;
    max-width: 100%;
}
.button {
    width: 200px;
    height: 50px;
    border-radius: 5px;
    background-color: blueviolet;
    color: white;
    font-size: 20pt;
    margin: 10px;
}
.button:disabled,
.button[disabled] {
    border: 1px solid #999999;
    background-color: #cccccc;
    color: #666666;
}
</style>
現在,您應該能夠逐一閱覽資源庫中的 16 個影像,從空白影像開始一個接著一個地進行。 接下來,您必須建置模型以便用於此應用程式。