練習 - 將檔案認可至您的存放庫,並檢視其歷程記錄
在先前的練習中,您已將玩具公司網站的 Git 存放庫初始化。 您新增了 Bicep 檔案,但並未加以認可。
在本練習中,您將會:
- 認可您在先前練習中建立的檔案。
- 新增 Bicep 模組,並使用 Git 來比較 Bicep 程式碼中的差異。
- 認可更新的 Bicep 程式碼。
- 檢視認可歷程記錄和主要 Bicep 檔案的歷程記錄。
對 Bicep 程式碼進行更多變更,將呈現 Git 和 Visual Studio Code 對變更追蹤和管理的助益。
使用 Git CLI 認可 Bicep 檔案
使用 Visual Studio Code 終端執行下列命令,以暫存 main.bicep 檔案:
git add deploy/main.bicep執行下列命令來認可暫存的變更,並提供認可訊息:
git commit --message "Add first version of Bicep template"
新增 Bicep 模組
您可以在此新增 Bicep 模組,並從 main.bicep 檔案中加以參考。
在 deploy 資料夾中,建立名為 modules 的子資料夾。
在 modules 資料夾中,建立名為 app-service.bicep 的新檔案。
開啟並儲存空白的 app-service.bicep 檔案,讓 Visual Studio Code 載入 Bicep 工具。
將下列程式碼複製到 app-service.bicep:
@description('The Azure region into which the resources should be deployed.')
param location string

@description('The type of environment. This must be nonprod or prod.')
@allowed([
  'nonprod'
  'prod'
])
param environmentType string

@description('The name of the App Service app. This name must be globally unique.')
param appServiceAppName string

var appServicePlanName = 'toy-website-plan'
var appServicePlanSkuName = (environmentType == 'prod') ? 'P2v3' : 'F1'
var appServicePlanTierName = (environmentType == 'prod') ? 'PremiumV3' : 'Free'

resource appServicePlan 'Microsoft.Web/serverFarms@2022-03-01' = {
  name: appServicePlanName
  location: location
  sku: {
    name: appServicePlanSkuName
    tier: appServicePlanTierName
  }
}

resource appServiceApp 'Microsoft.Web/sites@2022-03-01' = {
  name: appServiceAppName
  location: location
  properties: {
    serverFarmId: appServicePlan.id
    httpsOnly: true
  }
}
儲存並關閉 app-service.bicep 檔案。
開啟 main.bicep 檔案。
在參數宣告下方,新增下列參數宣告和模組定義:
@description('The name of the App Service app. This name must be globally unique.')
param appServiceAppName string = 'toyweb-${uniqueString(resourceGroup().id)}'

module appService 'modules/app-service.bicep' = {
  name: 'app-service'
  params: {
    location: location
    environmentType: environmentType
    appServiceAppName: appServiceAppName
  }
}
儲存並關閉 main.bicep 檔案。
比較差異
現在您已變更 main.bicep 檔案,因此我們能檢查差異。 最好檢閱一下每個即將要暫存和認可檔案的差異。 您可以進行檢閱,以確認您的變更是否正確。
在 Visual Studio Code 中,選取 [檢視原始程式碼控制]>,或選取鍵盤上的 Ctrl+Shift+G。
在開啟的 [原始程式碼控制] 面板上,選取 main.bicep 檔案。
檔案差異的檢視會隨即開啟。
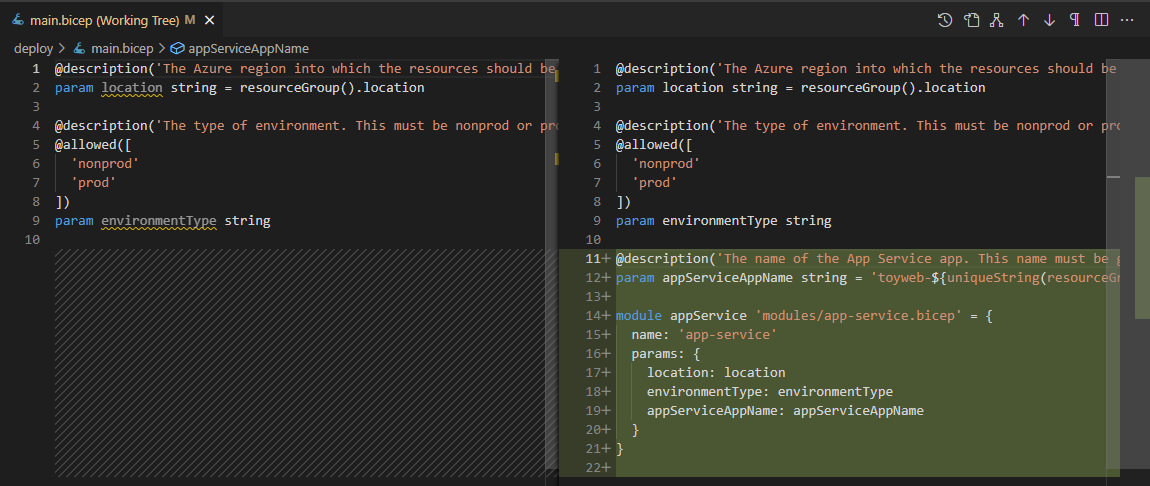
請注意,Visual Studio Code 會顯示您所做的變更。 原始檔案位於左邊,而變更的檔案位於右邊。 檔案的新增內容會以綠色顯示。 當您編輯檔案並移除內容時,刪除項目會以紅色顯示。
開啟 app-service.bicep 檔案的差異。
請注意,差異檢視的左邊沒有任何內容,因為此檔案是新的,而且尚未新增至存放庫。
使用 Visual Studio Code 認可更新的 Bicep 程式碼
檢查變更且沒發現問題,即可認可檔案的更新。 這次,您會使用 Visual Studio Code。
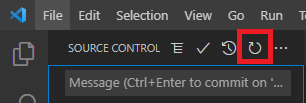
開啟 [原始檔控制]。
應該會出現兩個已變更的檔案。 如果您沒有看到這些檔案,請選取 [重新整理] 按鈕,讓 Visual Studio Code 掃描是否有變更。
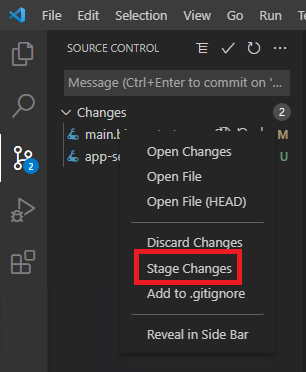
選取兩個變更的檔案,並將其暫存。 您可以選取每個檔案上的加號 (+) 圖示,也可以選取並按住 (或以滑鼠右鍵按一下) 每個檔案,然後選取 [暫存變更]。
在 [原始程式碼控制] 頂端,輸入描述性的認可訊息,如下所示:
Add App Service module選取認可訊息文字方塊上方的核取記號圖示。 或者,您可以選取 [認可]。
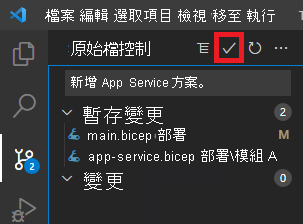
Visual Studio Code 認可這兩個變更。
使用 Git CLI 來檢視認可歷程記錄
在 Visual Studio Code 終端中,輸入下列命令以檢視存放庫的認可歷程記錄:
git log --pretty=oneline輸出會看似像以下範例:
238b0867f533e14bcaabbade31b9d9e1bda6123b (HEAD -> main) Add App Service module
9e41f816bf0f5c590cee88590aacc977f1361124 Add first version of Bicep template
檢查輸出。 請注意,這兩個認可都會出現在認可歷程記錄中。
使用 Visual Studio Code 來檢視檔案的歷程記錄
您也可以檢視單一檔案的歷程記錄、該認可的檔案狀態,以及認可套用的變更。
在 Visual Studio Code 中開啟 [Explorer]。
選取並按住 (或以滑鼠右鍵按一下) main.bicep 檔案,然後選取 [開啟時間軸]。
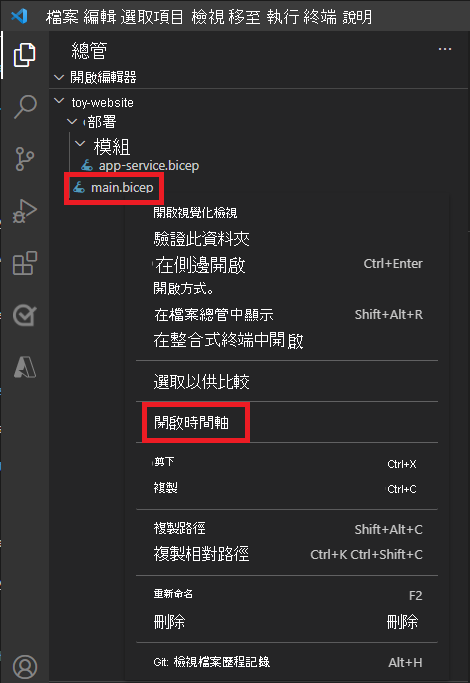
時間軸會隨即開啟,並顯示這兩個認可。

選取清單中的每個認可,以檢視該時間點的檔案狀態。