教學課程:在 Visual Studio 中使用 XAML 和 C# 來建立您的第一個通用 Windows 平台應用程式
注意
如果您對於目前通用 Windows 平台 (UWP) 中的功能感到滿意,則不需要將專案類型移轉至 Windows App SDK。 WinUI 2.x 和 Windows SDK 支援 UWP 專案類型。 如果您想要開始使用 WinUI 3 和 Windows App SDK,您可以遵循 Windows App SDK 教學課程中的步驟。
在這個 Visual Studio 整合式開發環境 (IDE) 的簡介中,您將建立一個可在任何 Windows 10 或更新版本裝置上執行的 "Hello World" 應用程式。 為了這樣做,您將使用「通用 Windows 平台」(UWP) 專案範本、Extensible Application Markup Language (XAML) 及 C# 程式設計語言。
如果您尚未安裝 Visual Studio,請前往 Visual Studio 下載頁面免費進行安裝。
建立專案
首先,請建立一個「通用 Windows 平台」專案。 此專案類型隨附您需要的所有範本檔案,甚至是在您新增任何項目之前便已完備!
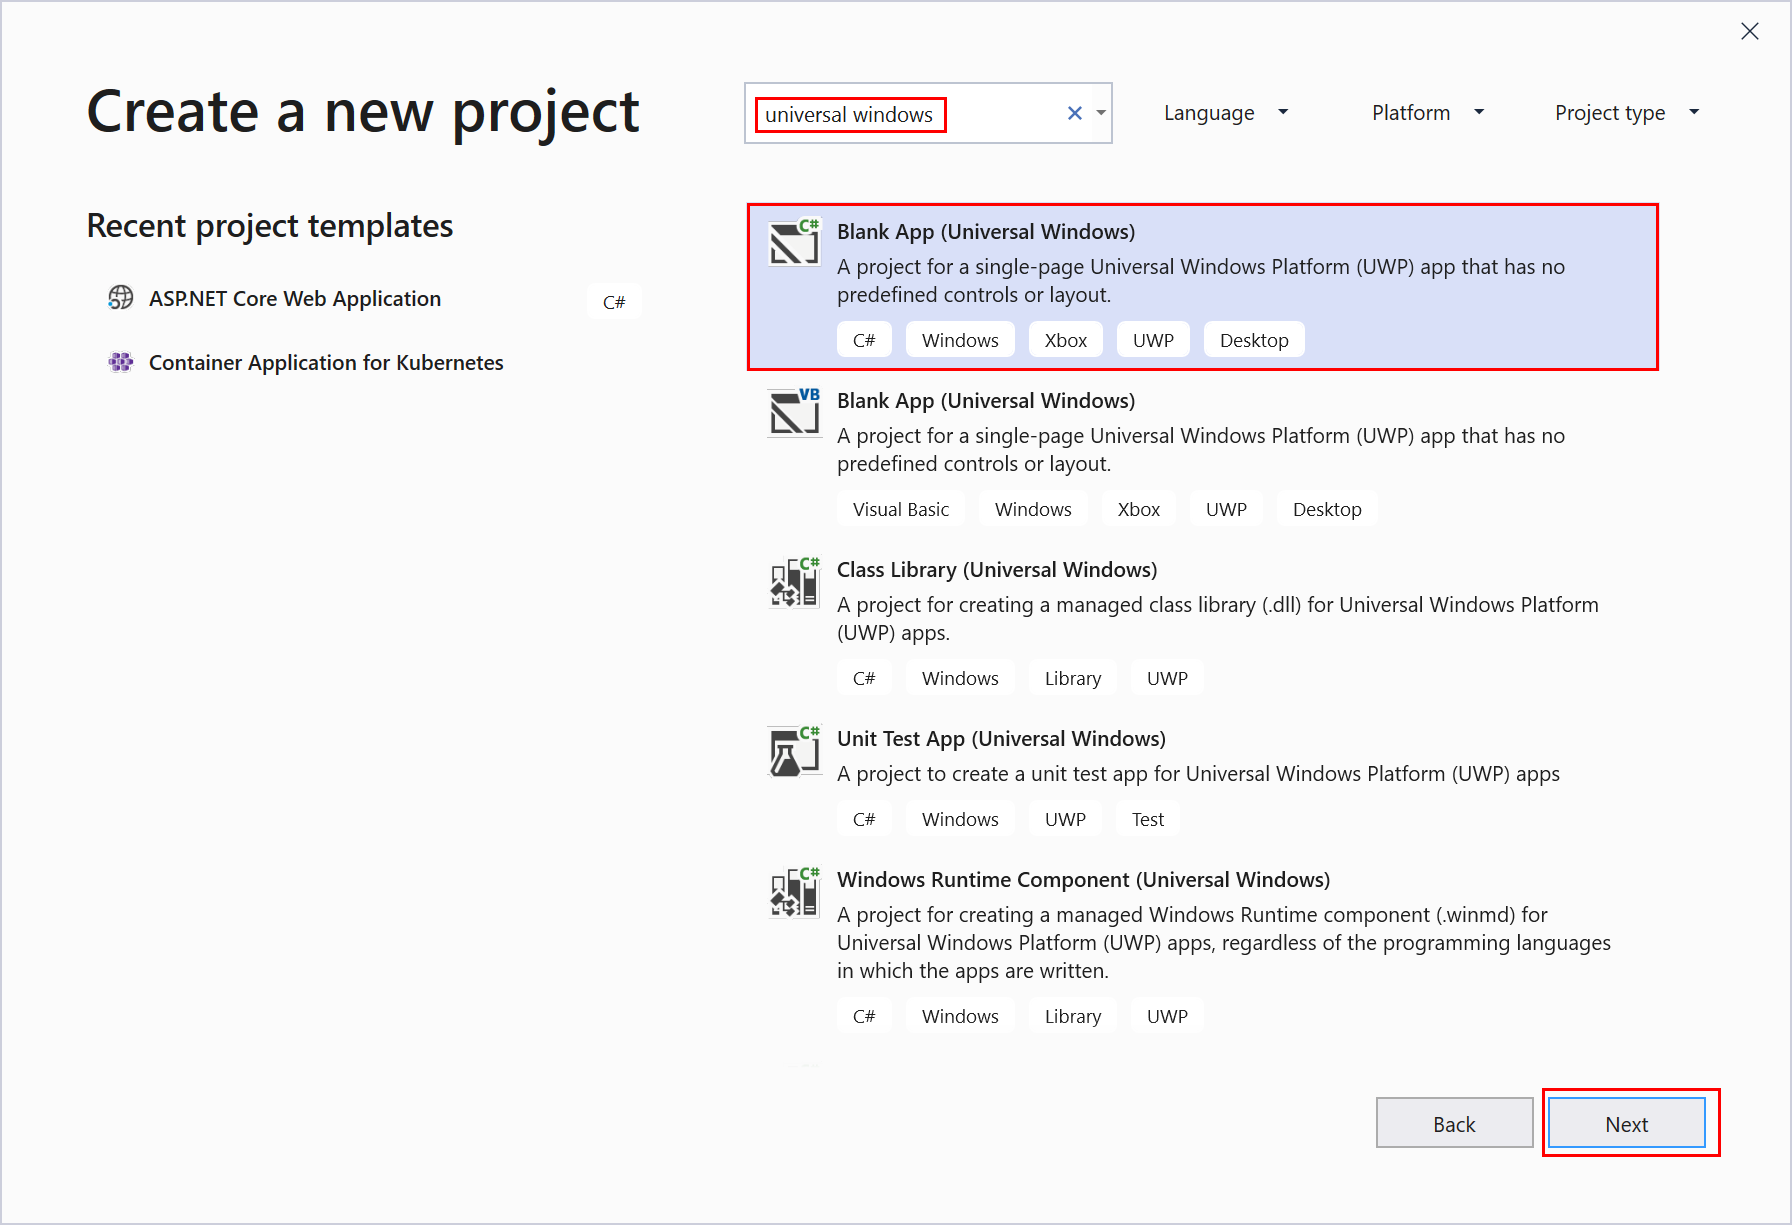
開啟 Visual Studio,並在開始視窗中選擇 [建立新專案]。
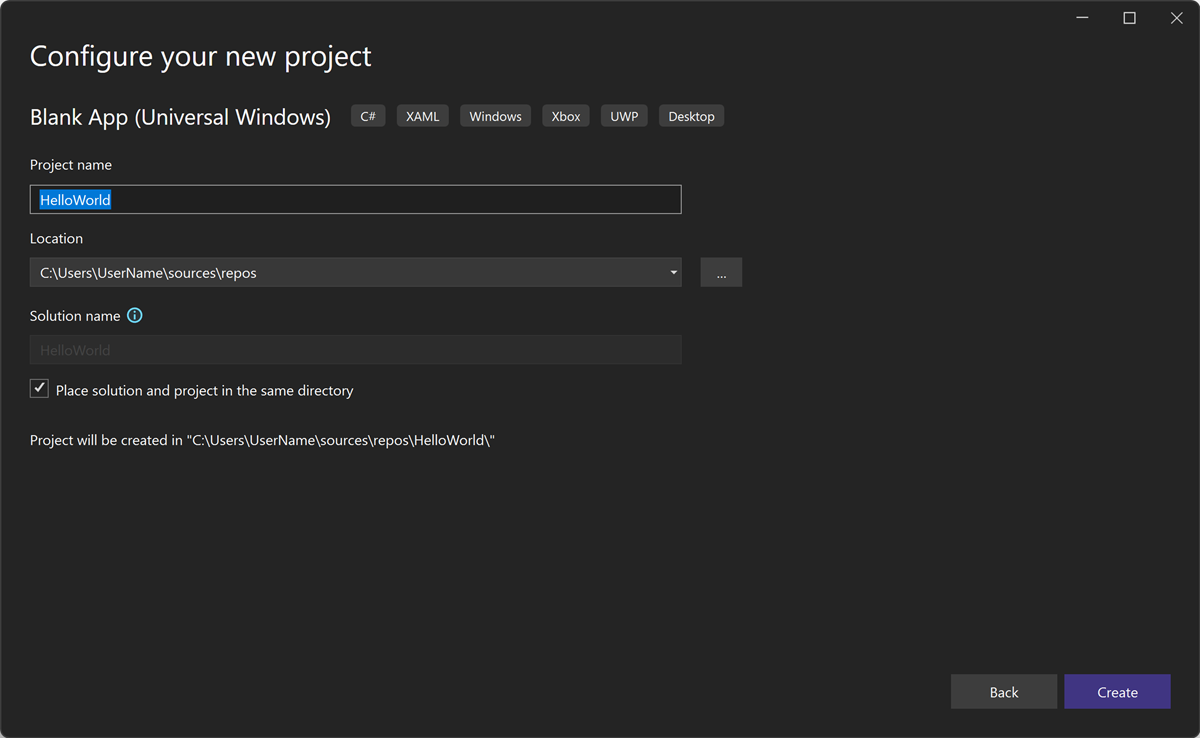
在 [建立新專案] 畫面上,於搜尋方塊中輸入通用 Windows、選擇適用於空白應用程式 (通用 Windows) 的 C# 範本,然後選擇 [下一步]。
注意
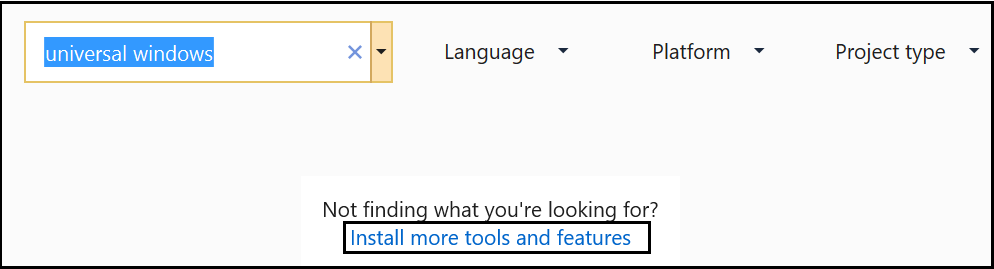
如果您看不到 [空白應用程式 (通用 Windows)] 專案範本,請按一下 [安裝更多工具與功能] 連結。
Visual Studio 安裝程式即會啟動。 選擇 [通用 Windows 平台開發] 工作負載,然後選擇 [修改]。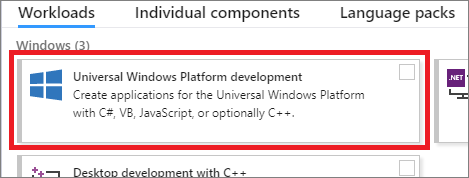
提供專案名稱 (HelloWorld),然後選擇 [建立]
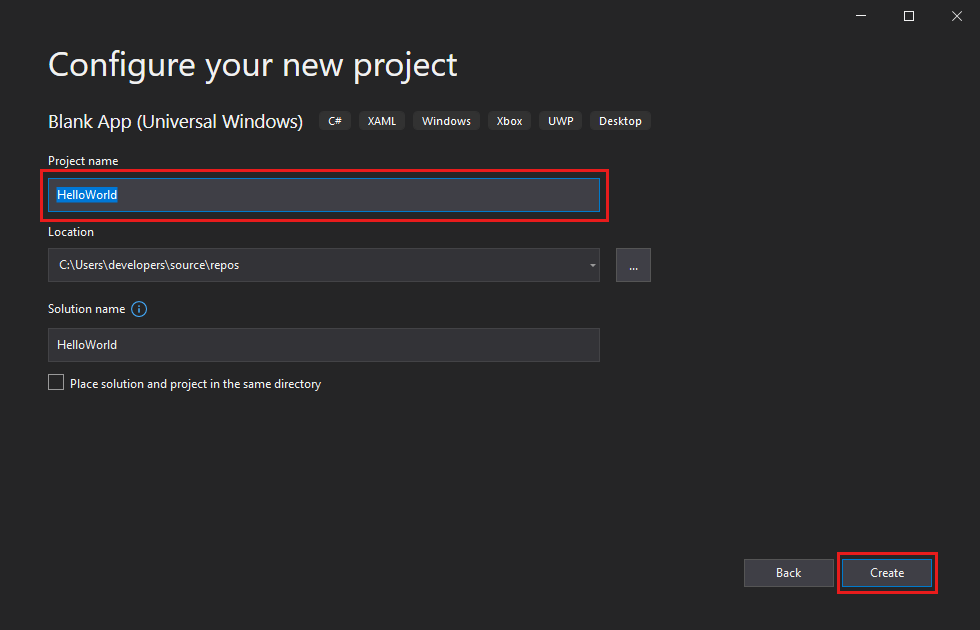
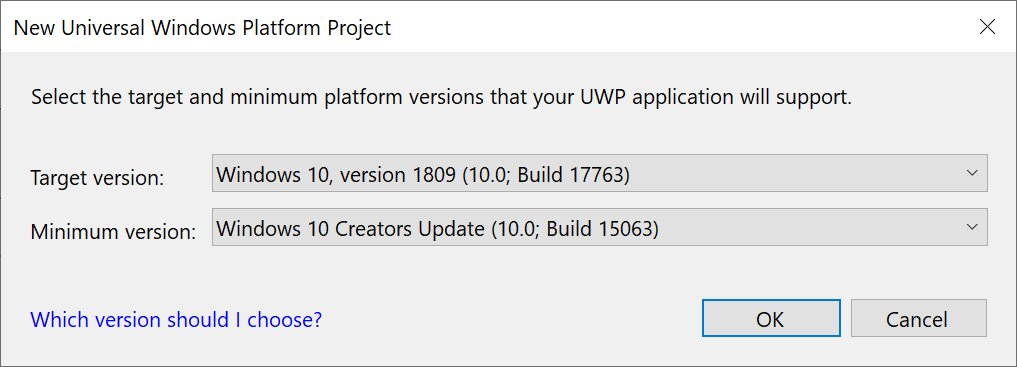
在 [新增通用 Windows 平台專案] 對話方塊中,接受預設的目標版本和最低版本設定。
注意
如果這是您第一次使用 Visual Studio 來建立 UWP 應用程式,可能會出現 [設定] 對話方塊。 請選擇 [開發人員模式],然後選擇 [是]。
Visual Studio 會為您安裝額外的「開發人員模式」套件。 當套件安裝完成時,請關閉 [設定] 對話方塊。
開啟 Visual Studio,並在開始視窗中選擇 [建立新專案]。
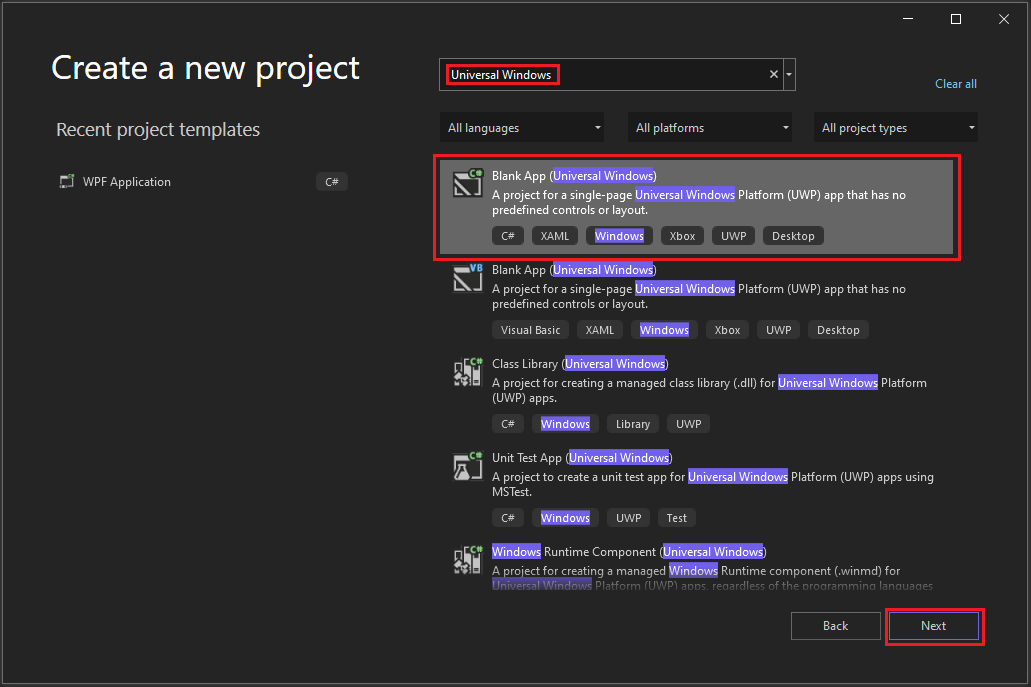
在 [建立新專案] 畫面上,於搜尋方塊中輸入通用 Windows、選擇適用於空白應用程式 (通用 Windows) 的 C# 範本,然後選擇 [下一步]。
注意
如果您看不到 [空白應用程式 (通用 Windows)] 專案範本,請按一下 [安裝更多工具與功能] 連結。

Visual Studio 安裝程式即會啟動。 選擇 [通用 Windows 平台開發] 工作負載,然後選取 [修改]。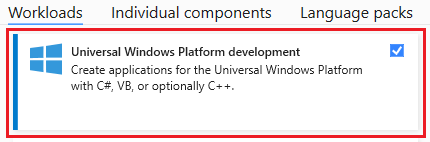
提供專案名稱 (HelloWorld),然後選擇 [建立]
在 [新增通用 Windows 平台專案] 對話方塊中,接受預設的目標版本和最低版本設定。

注意
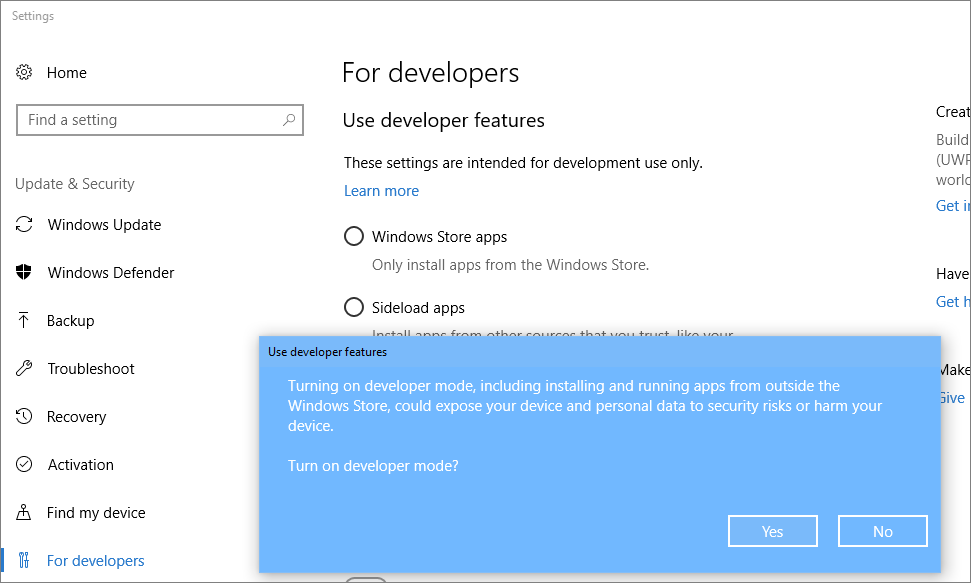
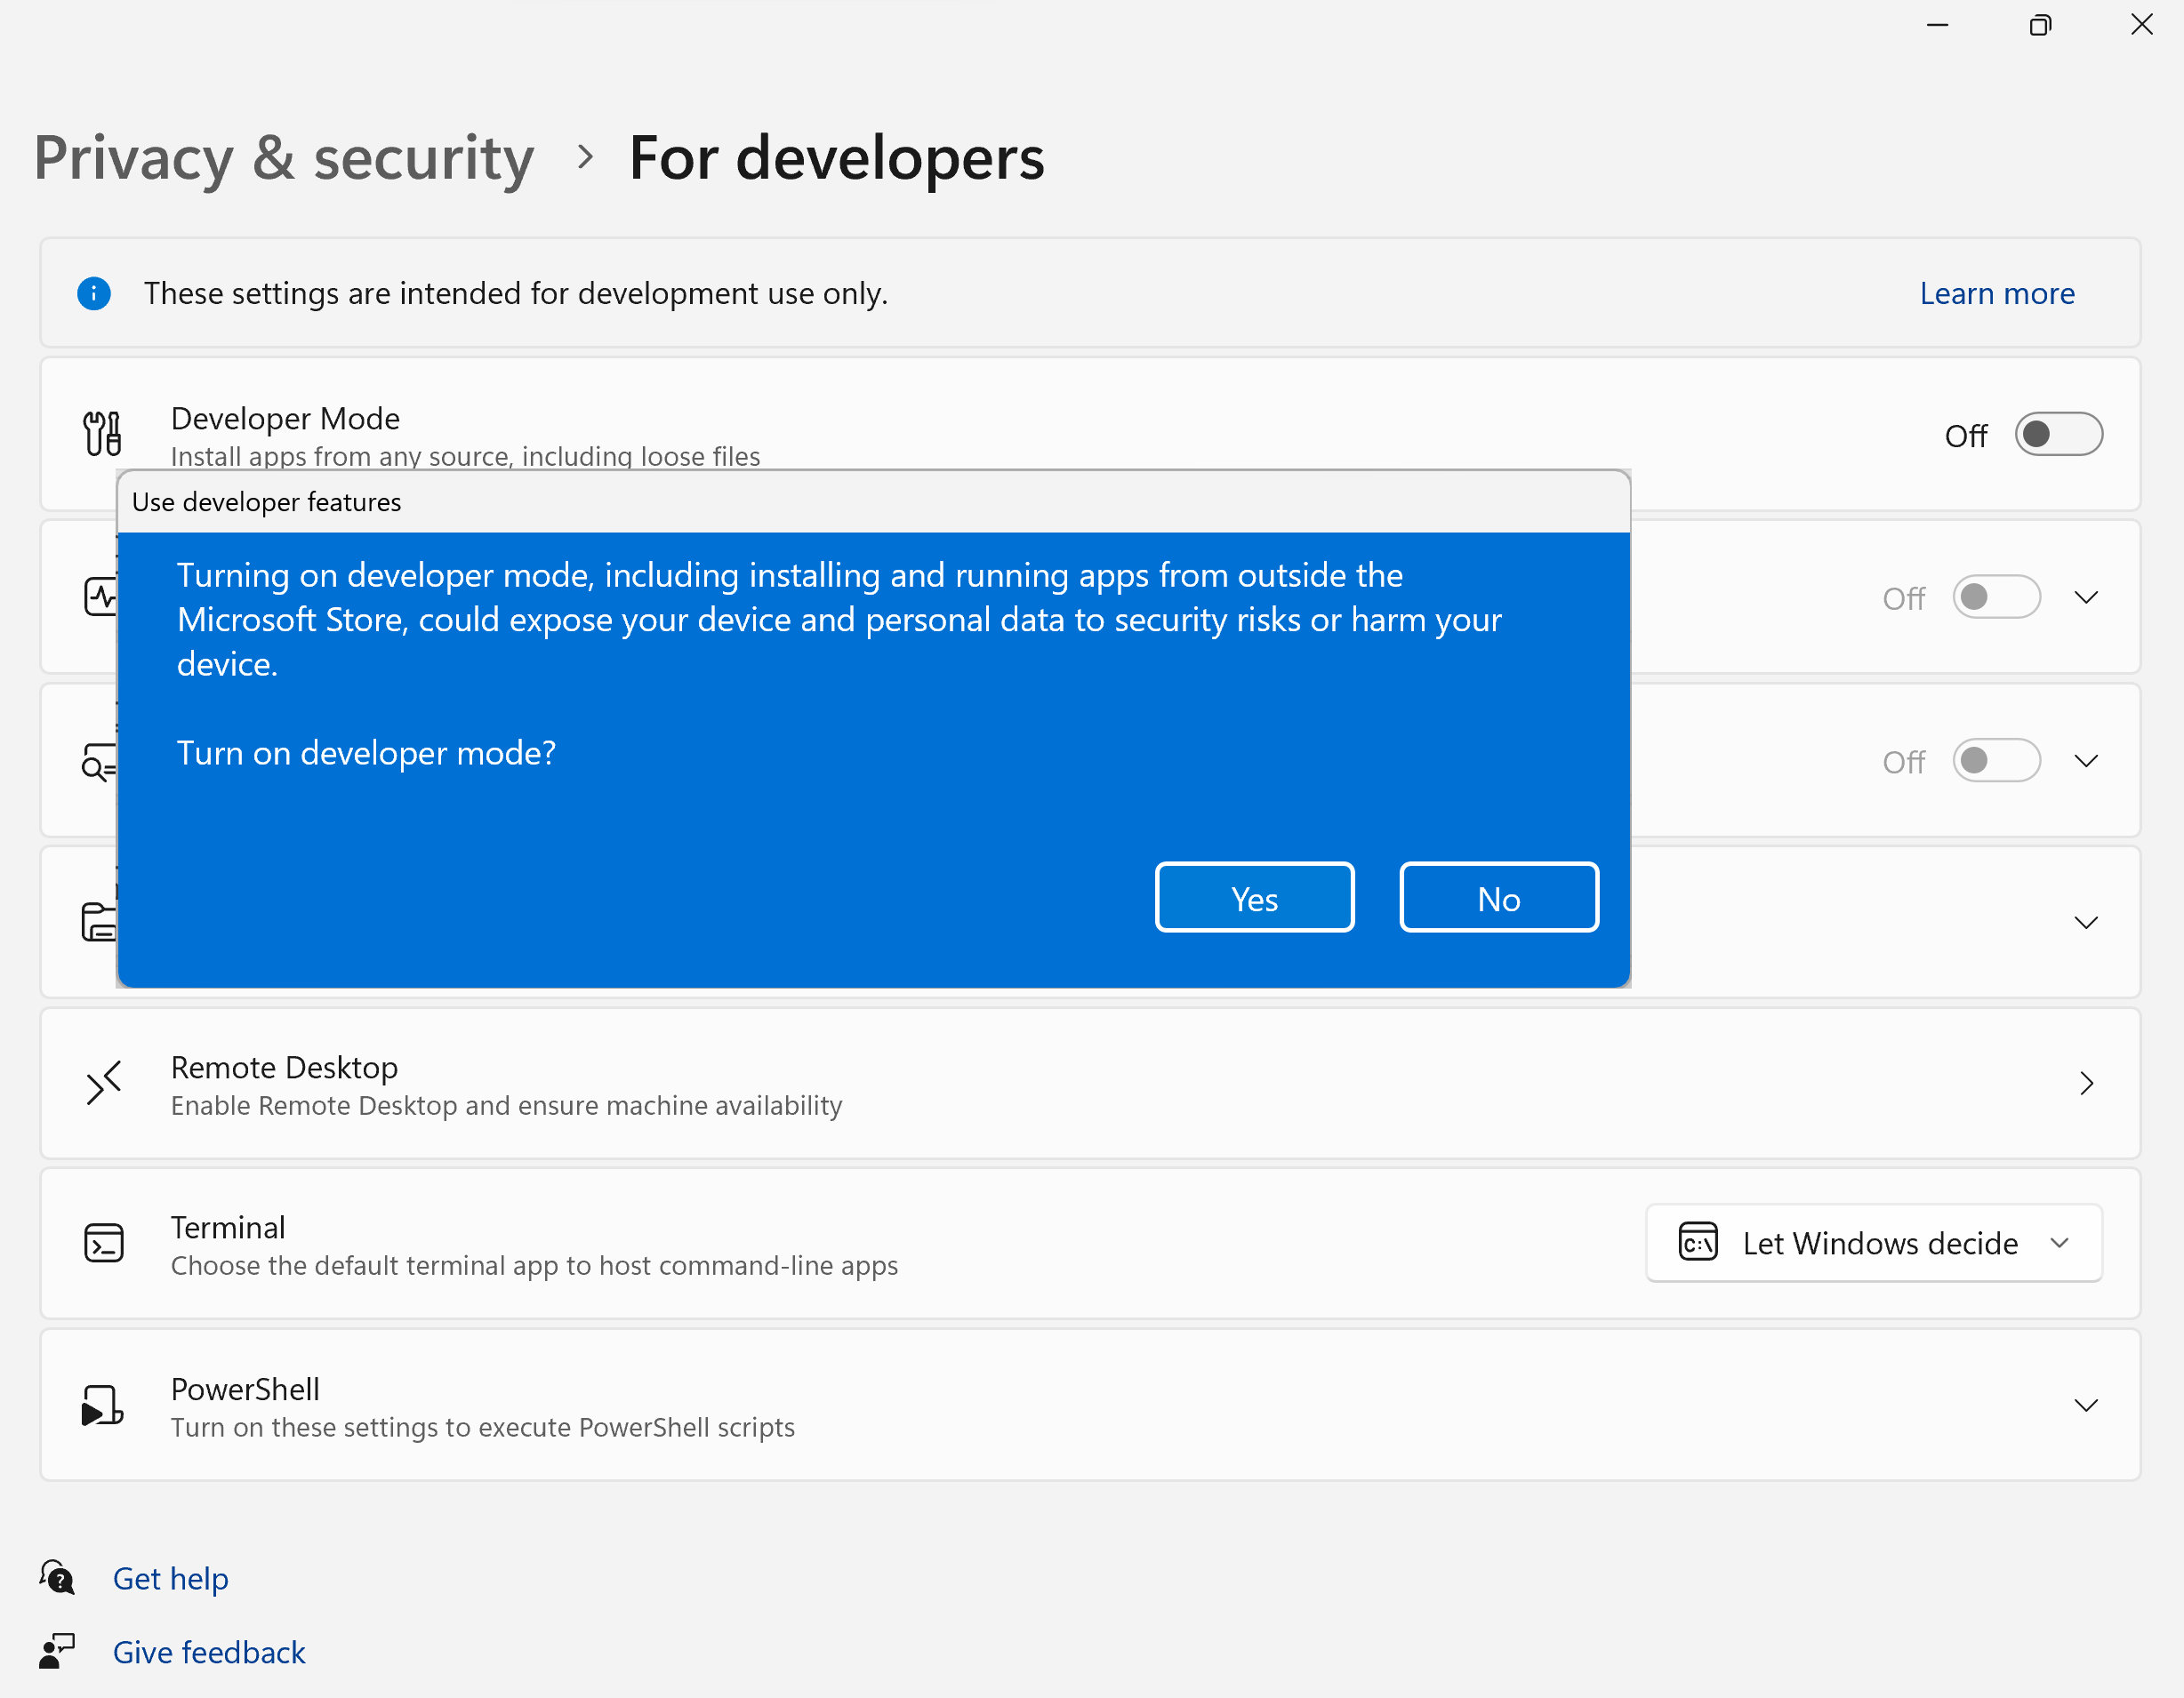
如果這是您第一次使用 Visual Studio 來建立 UWP 應用程式,則會顯示 [啟用 Windows 的開發人員模式] 對話方塊。 選取 [開發人員設定],以開啟 [設定]。 開啟 [開發人員模式],然後選擇 [是]。
Visual Studio 會為您安裝額外的「開發人員模式」套件。 當套件安裝完成時,請關閉 [設定] 對話方塊。
建立應用程式
現在即可開始進行開發。 您將新增按鈕控制項、為按鈕新增動作,然後啟動 "Hello World" 應用程式來看看它的樣子。
將按鈕新增至設計畫布
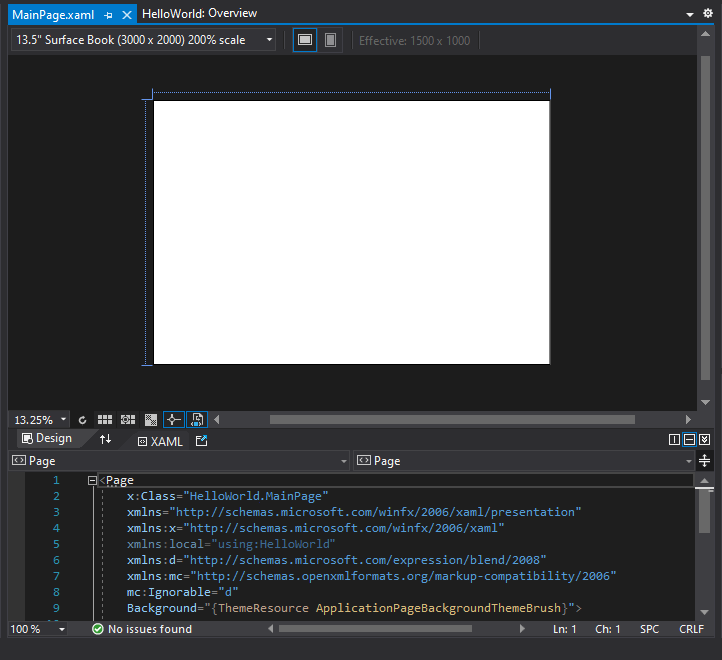
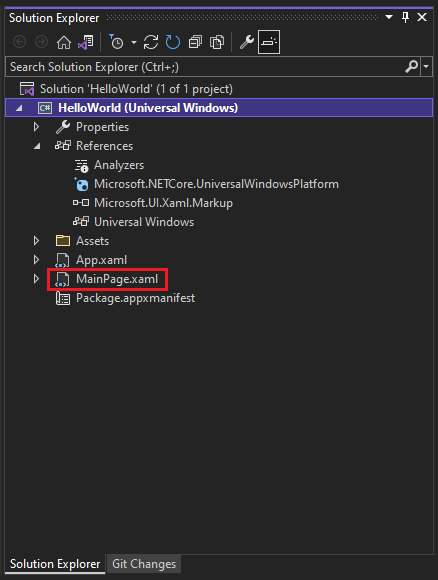
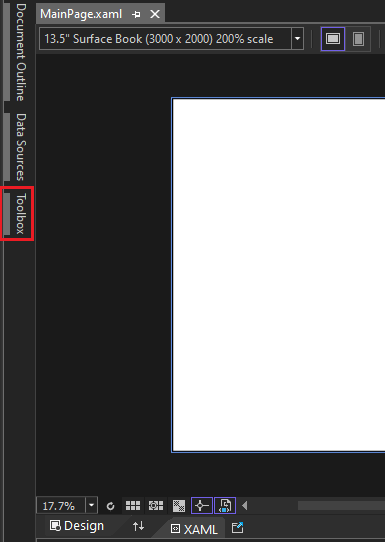
在 [方案總管] 中,按兩下 [MainPage.xaml] 以開啟分割檢視。

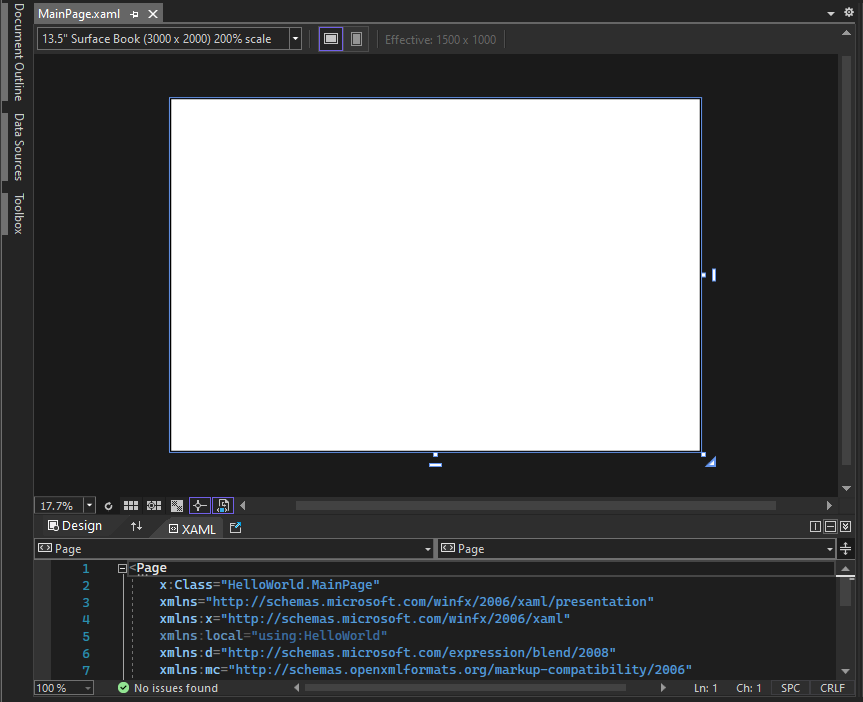
有兩個窗格:[XAML 設計工具] (其中包含設計畫布) 和 [XAML 編輯器] (可供您新增或變更程式碼)。
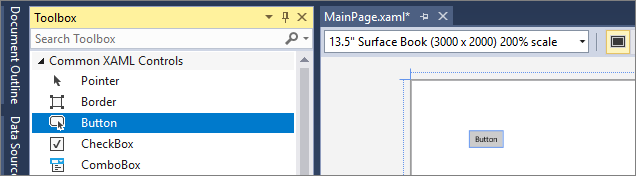
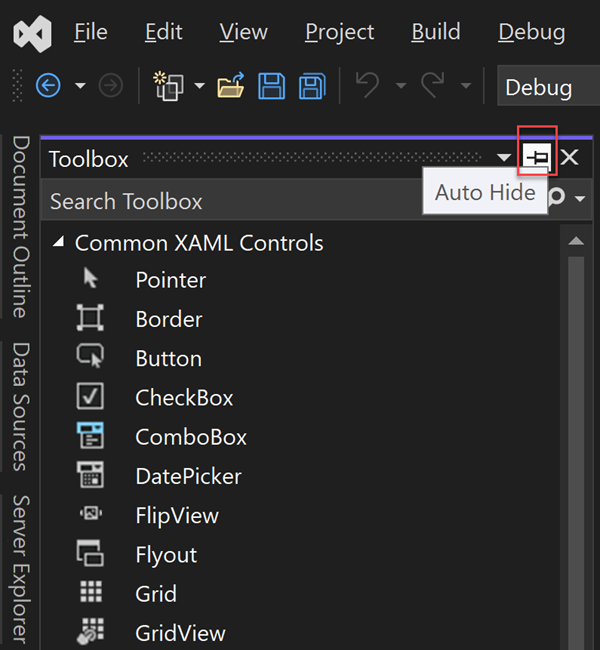
選擇 [工具箱] 以開啟 [工具箱] 飛出視窗。
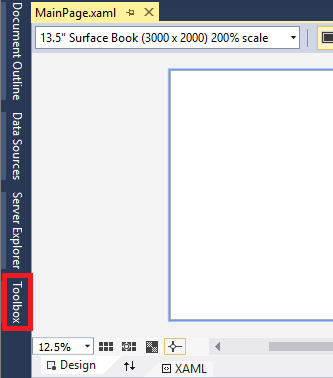
(如果沒有看到 [工具箱] 選項,您可以從功能表列中開啟它。若要這樣做,請選擇 [檢視]>[工具列]。或按 Ctrl+Alt+X)。
按一下固定圖示,以固定 [工具箱] 視窗。

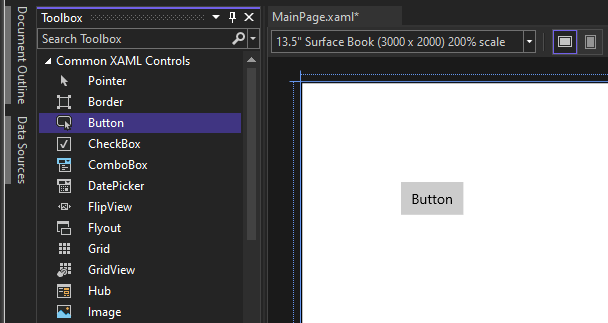
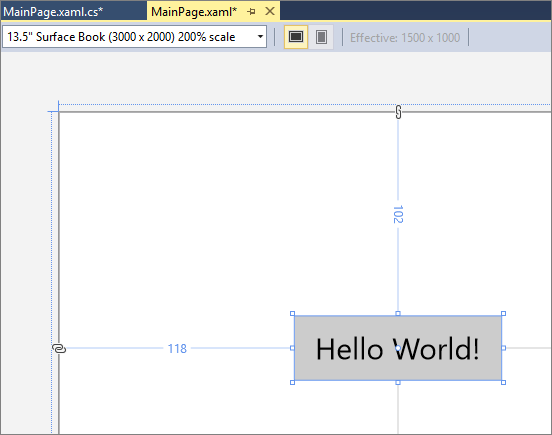
按一下 [Button] 控制項,然後將它拖曳至設計畫布。
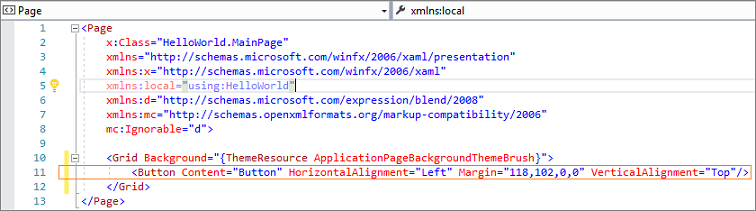
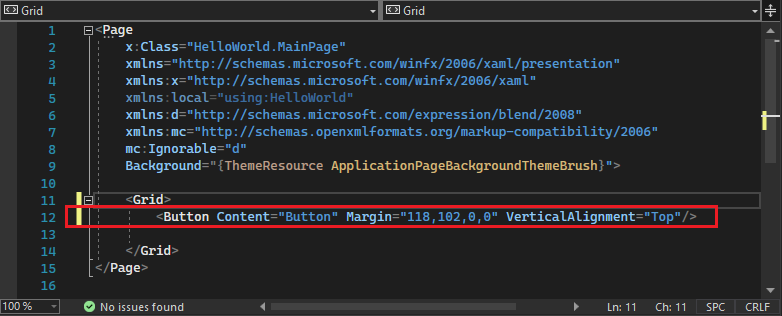
如果您查看 [XAML 編輯器] 中的程式碼,就會看到在該處也新增了 Button:
在 [方案總管] 中,按兩下 [MainPage.xaml] 以開啟分割檢視。
有兩個窗格:[XAML 設計工具] (其中包含設計畫布) 和 [XAML 編輯器] (可供您新增或變更程式碼)。
選擇 [工具箱] 以開啟 [工具箱] 飛出視窗。
(如果沒有看到 [工具箱] 選項,您可以從功能表列中開啟它。若要這樣做,請選擇 [檢視]>[工具列]。或按 Ctrl+Alt+X)。
選取 [釘選] 圖示以固定 [工具箱] 視窗。
選取 [Button] \(按鈕)\ 控制項,然後將它拖曳至設計畫布。
如果您查看 [XAML 編輯器] 中的程式碼,就會看到在該處也新增了 Button:
為按鈕新增標籤
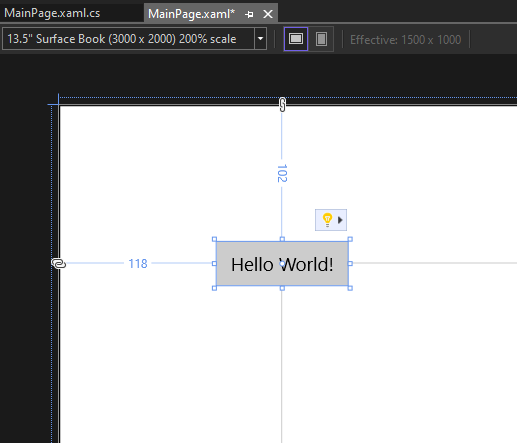
在 [XAML 編輯器] 中,將 Button Content 值從 "Button" 變更為 "Hello World!"。

請注意,[XAML 設計工具] 中的按鈕也會變更。
在 [XAML 編輯器] 中,將 Button Content 值從 "Button" 變更為 "Hello World!"。

請注意,[XAML 設計工具] 中的按鈕也會變更。
新增事件處理常式
「事件處理常式」聽起來很複雜,但它其實只是事件發生時所呼叫程式碼的另一個名稱。 在此案例中,其會新增一項 "Hello World!" 按鈕動作。
按兩下設計畫布上的按鈕控制項。
編輯 MainPage.xaml.cs (程式碼後置頁面) 中的事件處理常式程式碼。
這是開始有趣的地方。 預設的事件處理常式看起來會像這樣:

我們會變更它,讓它看起來像這樣:
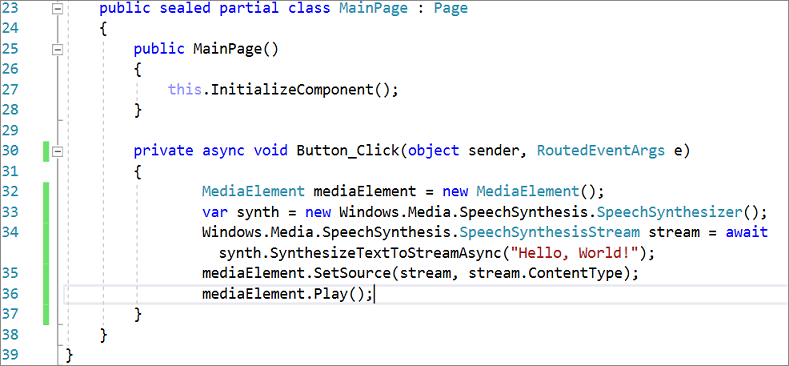
以下是要複製和貼上的程式碼:
private async void Button_Click(object sender, RoutedEventArgs e)
{
   MediaElement mediaElement = new MediaElement();
   var synth = new Windows.Media.SpeechSynthesis.SpeechSynthesizer();
   Windows.Media.SpeechSynthesis.SpeechSynthesisStream stream = await synth.SynthesizeTextToStreamAsync("Hello, World!");
   mediaElement.SetSource(stream, stream.ContentType);
   mediaElement.Play();
}
按兩下設計畫布上的按鈕控制項。
編輯 MainPage.xaml.cs (程式碼後置頁面) 中的事件處理常式程式碼。
這是開始有趣的地方。 預設的事件處理常式看起來會像這樣:

我們會變更它,讓它看起來像這樣:
以下是要複製和貼上的程式碼:
private async void Button_Click(object sender, RoutedEventArgs e)
{
   MediaElement mediaElement = new MediaElement();
   var synth = new Windows.Media.SpeechSynthesis.SpeechSynthesizer();
   Windows.Media.SpeechSynthesis.SpeechSynthesisStream stream = await synth.SynthesizeTextToStreamAsync("Hello, World!");
   mediaElement.SetSource(stream, stream.ContentType);
   mediaElement.Play();
}
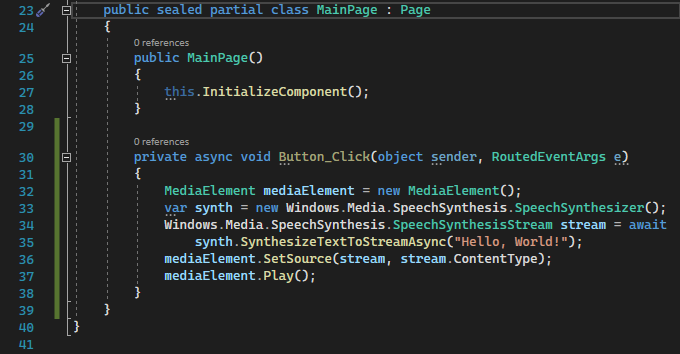
我們剛剛做了什麼?
程式碼使用一些 Windows API 來建立語音合成物件,然後提供一些文字給它說出。 (如需使用 SpeechSynthesis 的詳細資訊,請參閱 System.Speech.Synthesis)。
執行應用程式
現在即可建置、部署及啟動 "Hello World" UWP 應用程式,來看看其外觀和音效。 方法如下。
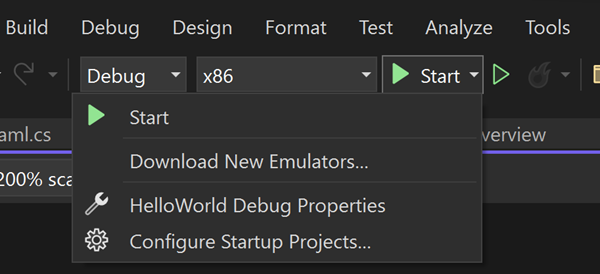
使用 [播放] 按鈕 (它的文字為本機電腦),在本機電腦上啟動應用程式。
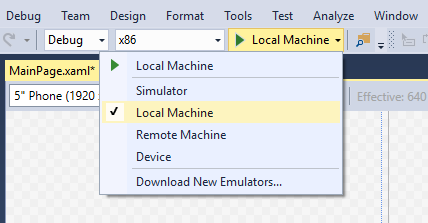
(或者,您也可以從功能表列中選擇 [偵錯]>[開始偵錯],或按 F5,來啟動應用程式)。
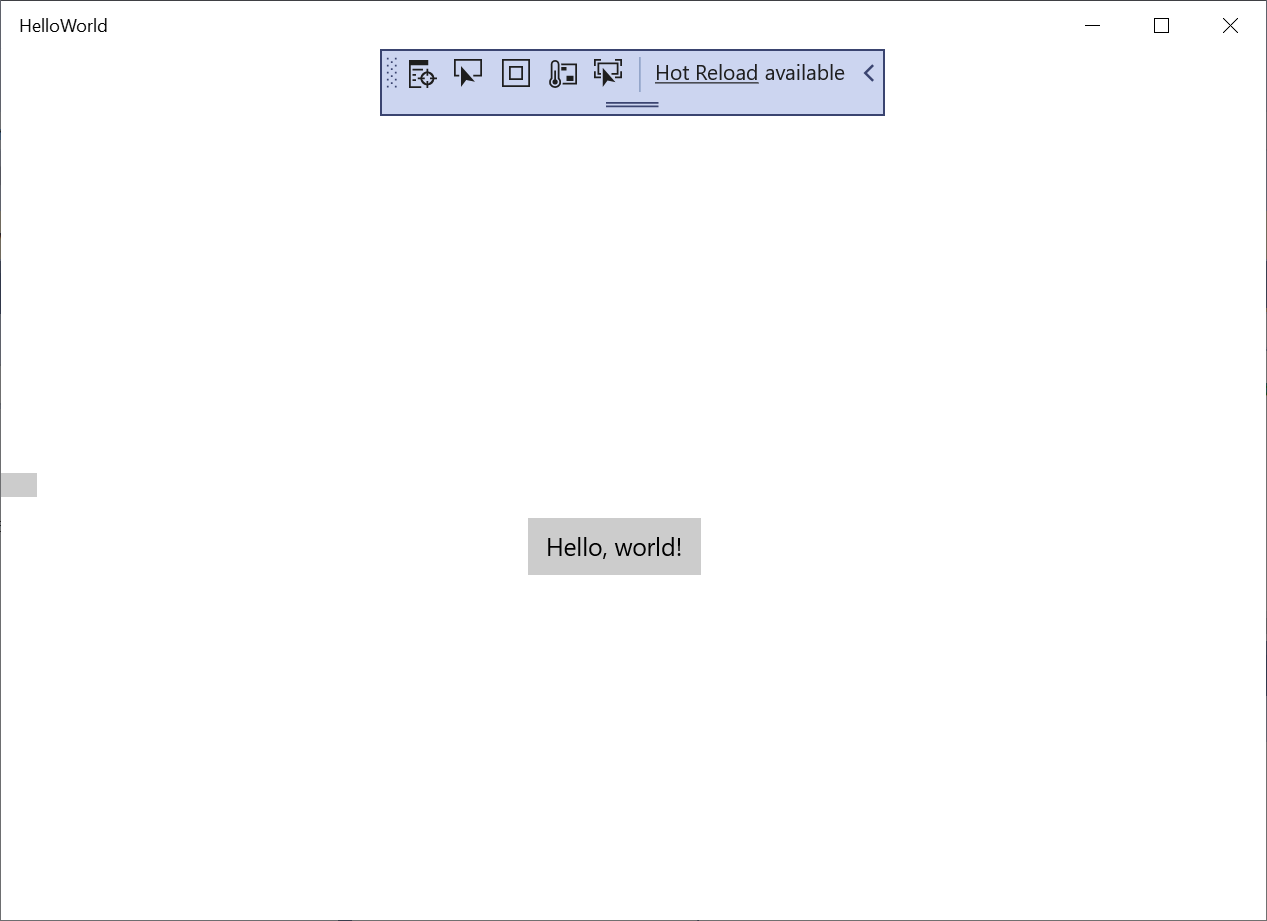
檢視您的應用程式 (在啟動顯示畫面消失後會立即出現)。 應用程式應該看起來像這樣:
按一下 [Hello World] 按鈕。
您的 Windows 10 或更新版本裝置字面上會顯示 "Hello, World!"
若要關閉此應用程式,請按一下工具列中的 [停止偵錯] 按鈕。 (或者,從功能表列中選擇 [偵錯]>[停止偵錯],或按 Shift+F5。)
現在即可建置、部署及啟動 "Hello World" UWP 應用程式,來看看其外觀和音效。 方法如下。
使用 [播放] 按鈕 (它的文字為本機電腦),在本機電腦上啟動應用程式。
(或者,您也可以從功能表列中選擇 [偵錯]>[開始偵錯],或按 F5,來啟動應用程式)。
檢視您的應用程式 (在啟動顯示畫面消失後會立即出現)。 應用程式應該看起來像此影像:
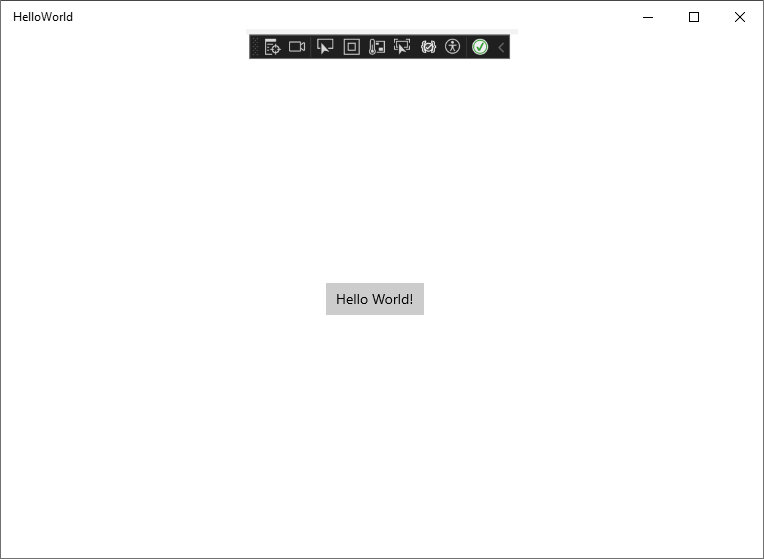
選取 [Hello World] 按鈕。
您的 Windows 10 或更新版本裝置字面上會顯示 "Hello, World!"。
若要關閉此應用程式,請選取工具列中的 [停止偵錯] 按鈕。 (或者,從功能表列中選擇 [偵錯]>[停止偵錯],或按 [Shift+F5]。)
下一步
恭喜您完成此教學課程! 我們希望您已了解有關 UWP 和 Visual Studio IDE 的一些基本概念。 若要深入了解,請繼續進行下列教學課程:
另請參閱
意見反應
即將登場:在 2024 年,我們將逐步淘汰 GitHub 問題作為內容的意見反應機制,並將它取代為新的意見反應系統。 如需詳細資訊,請參閱:https://aka.ms/ContentUserFeedback。
提交並檢視相關的意見反應