教學課程:從存放庫開啟專案
在本教學課程中,您將第一次使用 Visual Studio 連線到存放庫、複製存放庫,然後從中開啟專案。
如果您尚未安裝 Visual Studio,請前往 Visual Studio 下載頁面免費進行安裝。
從 GitHub 存放庫開啟專案
Visual Studio 可讓您輕鬆地從存放庫開啟專案。 您可以在啟動 Visual Studio 時執行此動作,也可以直接從 Visual Studio IDE 內執行此動作。
方法如下。
使用 [開始] 視窗
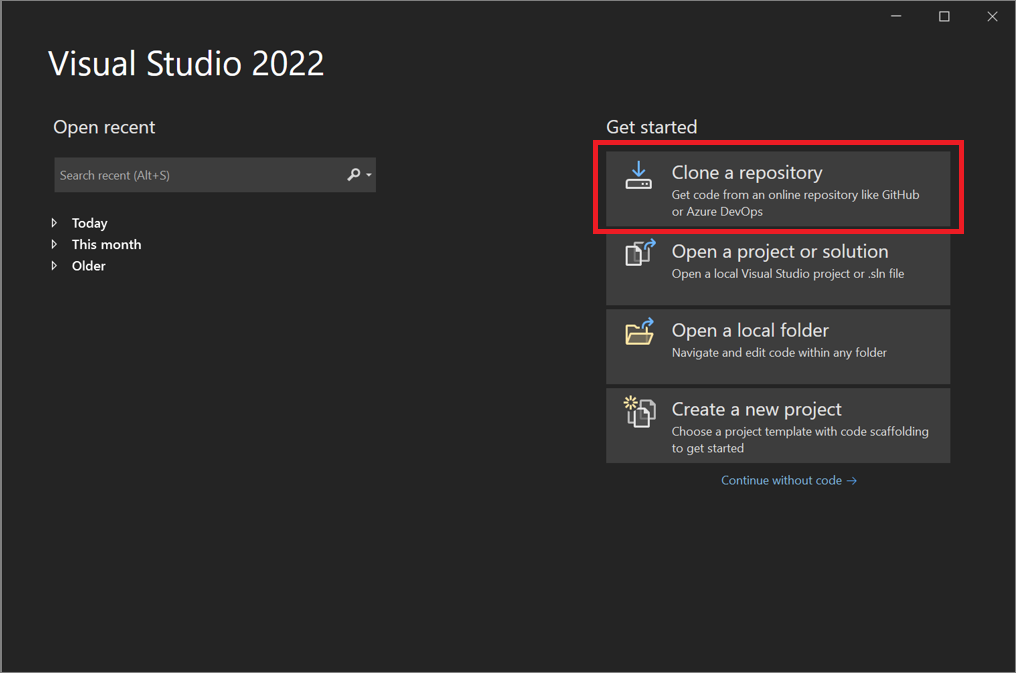
開啟 Visual Studio。
在 [開始] 視窗上,選取 [複製存放庫]。
輸入存放庫位置,然後選取 [複製] 按鈕。
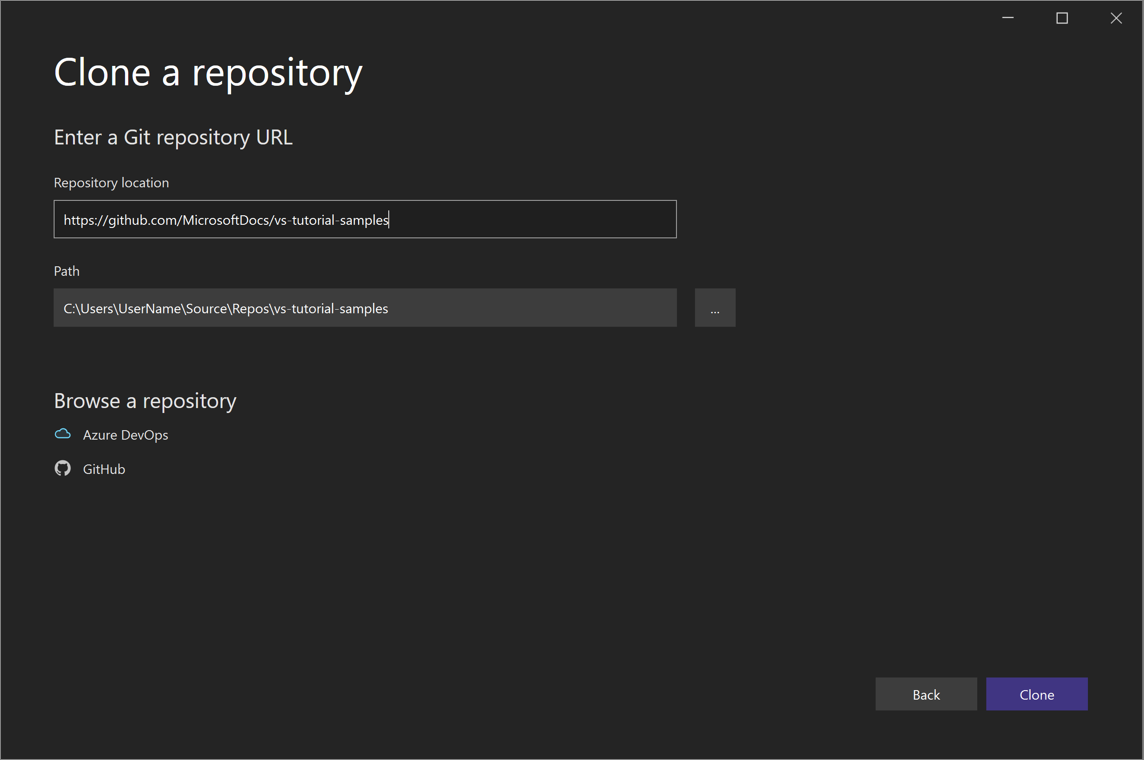
如果您尚未登入,系統可能會提示您登入 Visual Studio 或 GitHub 帳戶。
提示
如需登入 Visual Studio 的詳細資訊,請參閱登入 Visual Studio 頁面。 如需有關如何使用 GitHub 帳戶登入的特定資訊,請參閱在 Visual Studio 中使用 GitHub 帳戶頁面。 如果您收到信任通知並想要深入了解此通知,請參閱設定檔案和資料夾的信任設定頁面。
檢視方案總管中的檔案
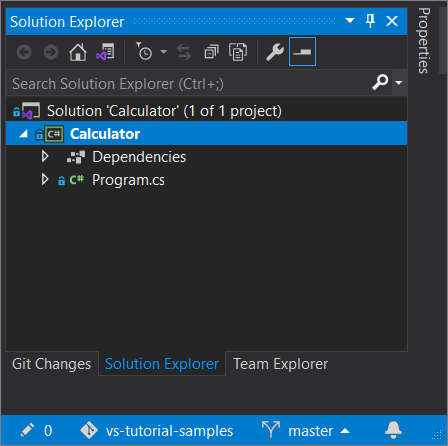
接下來,Visual Studio 會使用方案總管中的 [資料夾檢視],從存放庫載入解決方案。
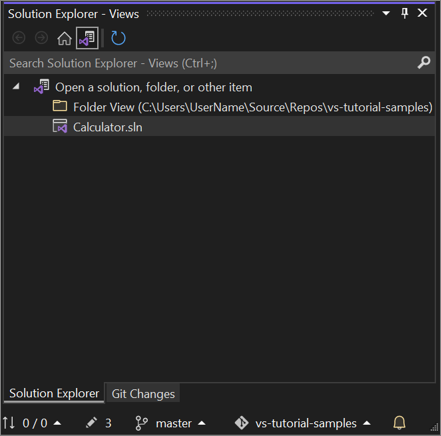
您可以在 [解決方案檢視] 中按兩下.sln 檔案來檢視解決方案。
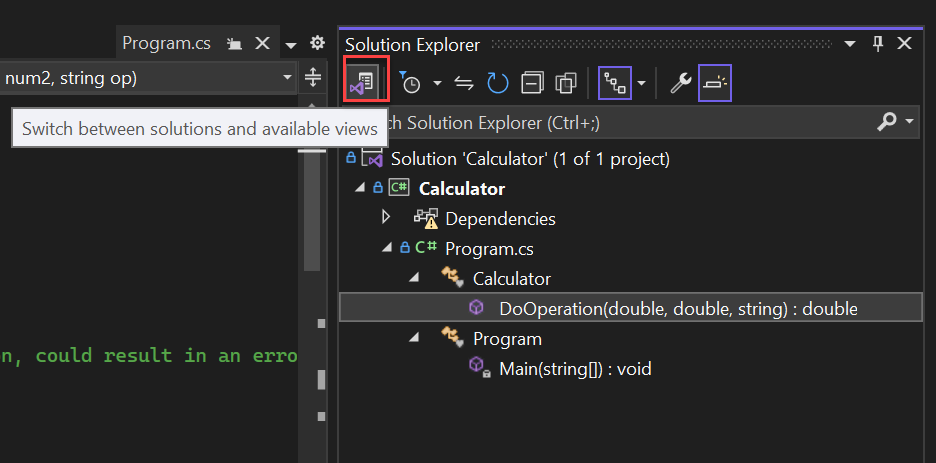
或者,您可以選取 [切換檢視] 按鈕,然後選取 Program.cs 來檢視解決方案的程式碼。
提示
您可以從 Git 功能表,從預設的資料夾檢視變更為 [方案檢視]。 選取 [設定]>[原始程式碼控制]>[Git 全域設定]>[開啟 Git 存放庫時自動載入解決方案] 來執行此動作。
在本機從先前複製的 GitHub 存放庫開啟專案
開啟 Visual Studio。
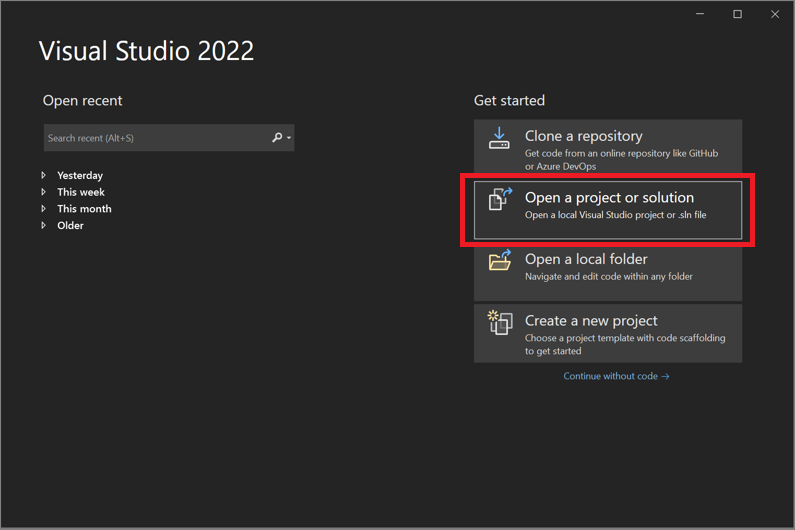
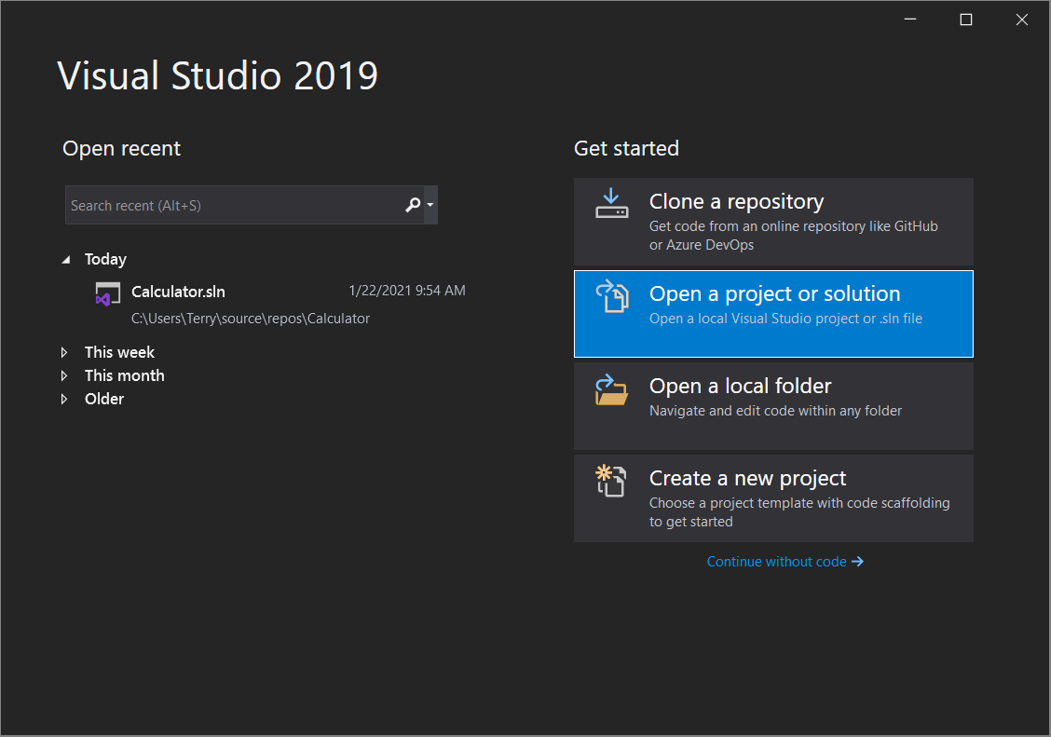
在 [開始] 視窗上,選取 [開啟專案或解決方案]。
Visual Studio 會開啟檔案總管的執行個體,您可以在其中瀏覽至您的解決方案或專案,然後選取該解決方案或專案來開啟。
提示
如果您最近已開啟專案或解決方案,請從 [開啟最近使用的項目] 區段選取該專案或解決方案,以再次快速將其開啟。
開始編寫程式碼!
使用 IDE
您也可以使用 Visual Studio IDE 中的 [Git] 功能表或 [選取存放庫] 控制項,與存放庫的資料夾和檔案互動。
方法如下。
複製存放庫並開啟專案
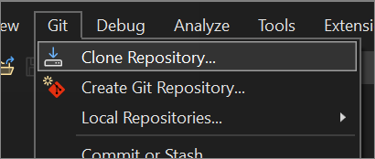
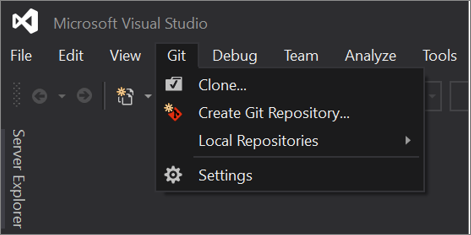
在 Visual Studio IDE 中,選取 [Git] 功能表,然後選取 [複製存放庫]。
請遵循提示來連線至 Git 存放庫,其中包含您正要尋找的檔案。
開啟本機資料夾和檔案
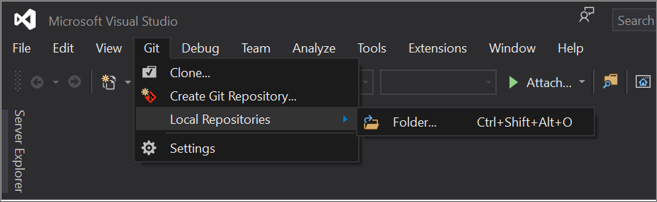
在 Visual Studio IDE 中,選取 [Git] 功能表、選取 [本機存放庫],然後選取 [開啟本機存放庫]。

請遵循提示來連線至 Git 存放庫,其中具有您正要尋找的檔案。
瀏覽至 Azure DevOps 存放庫
以下描述如何使用 Visual Studio 瀏覽至 Azure DevOps 存放庫並複製該存放庫。
開啟 Visual Studio。
在 [開始] 視窗上,選取 [複製存放庫]。
在 [瀏覽存放庫] 區段中,選取 [Azure DevOps]。

請遵循提示來複製 Azure DevOps 存放庫,其中包含您正要尋找的檔案,然後開啟您的專案。
使用 Visual Studio 2019 從 GitHub 存放庫開啟專案
如何使用 Visual Studio 從 GitHub 存放庫開啟專案,取決於您具有的版本。 具體來說,如果您已安裝 Visual Studio 2019 16.8 版或更新版本,Visual Studio 中有新的、更完整的 Git 體驗可供您使用。
但是,無論您已安裝哪個版本,一律可以使用 Visual Studio 從 GitHub 存放庫開啟專案。
Visual Studio 2019 16.8 版和更新版本
以下描述如何在 Visual Studio 2019 16.8 版或更新版本中使用 Git。
複製 GitHub 存放庫,然後開啟專案
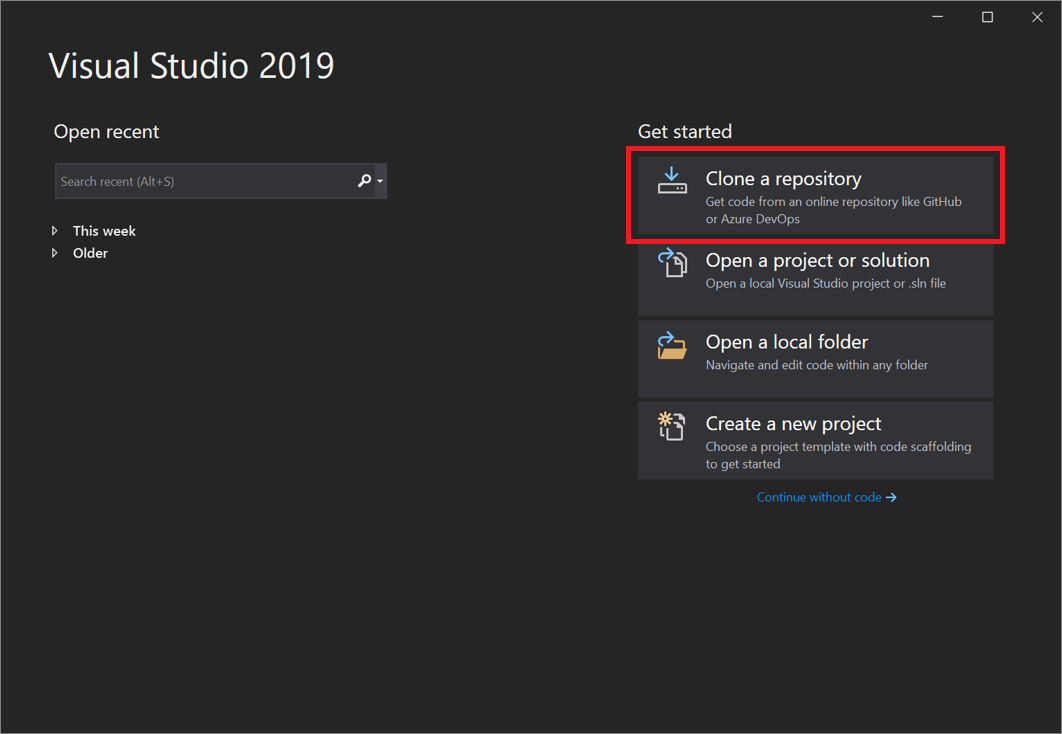
開啟 Visual Studio 2019。
在 [開始] 視窗上,選取 [複製存放庫]。
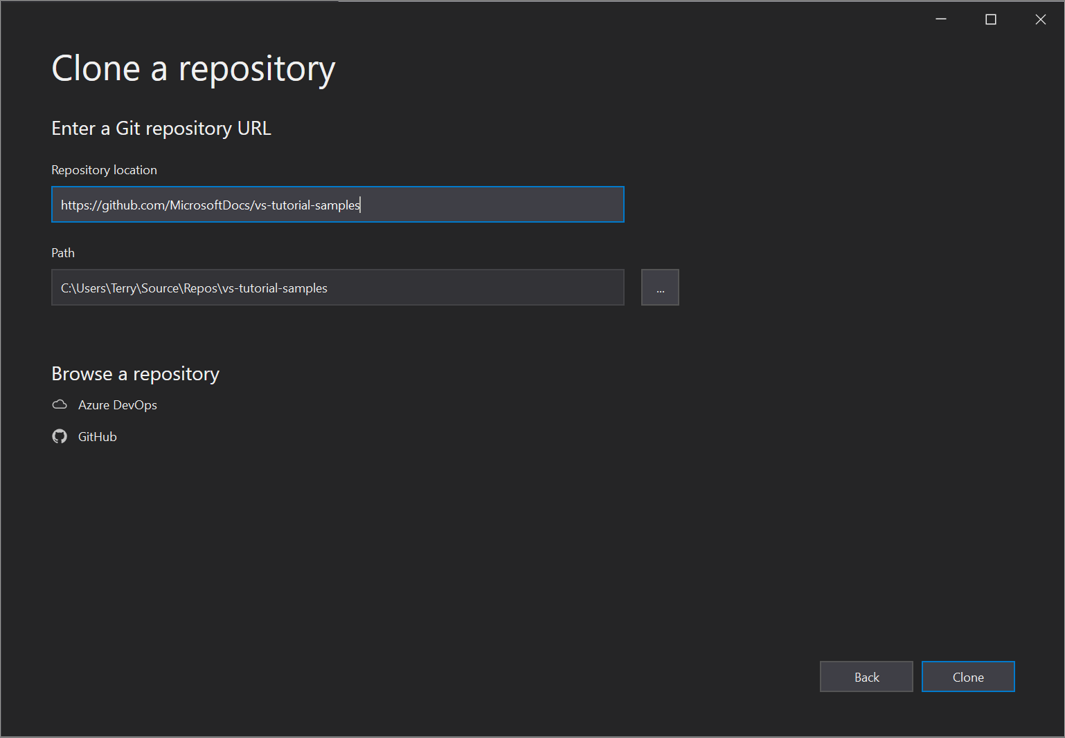
輸入存放庫位置,然後選取 [複製]。
系統可能會在 [Git 使用者資訊] 對話方塊中要求您提供使用者登入資訊。 您可以新增資訊或編輯其提供的預設資訊。
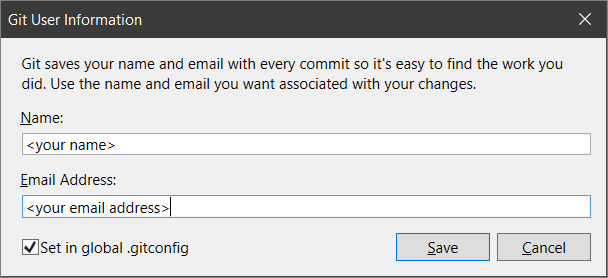
選取 [儲存] 將資訊新增至您的全域 .gitconfig 檔案。 (或者,如果您想要稍後儲存資訊,您可以選取 [取消]。)
提示
如需登入 Visual Studio 的詳細資訊,請參閱登入 Visual Studio 頁面。 如需有關如何使用 GitHub 帳戶登入的特定資訊,請參閱在 Visual Studio 中使用 GitHub 帳戶頁面。
接下來,Visual Studio 會自動從存放庫載入並開啟解決方案。
如果您的存放庫包含多個解決方案,方案總管會顯示這些解決方案。 如需解決方案的清單檢視,請選取方案總管中的 [切換檢視] 按鈕。
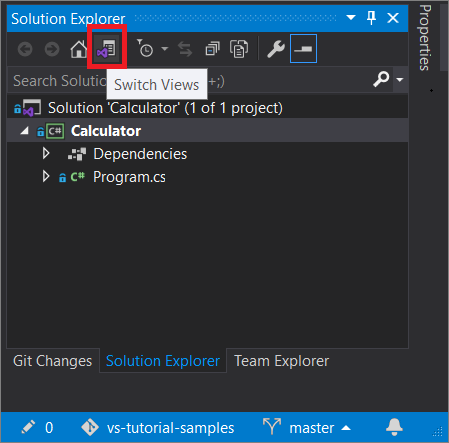
方案總管接著會提供選項,讓您可在 [資料夾檢視] 中開啟根資料夾,或選取要開啟的解決方案檔案。
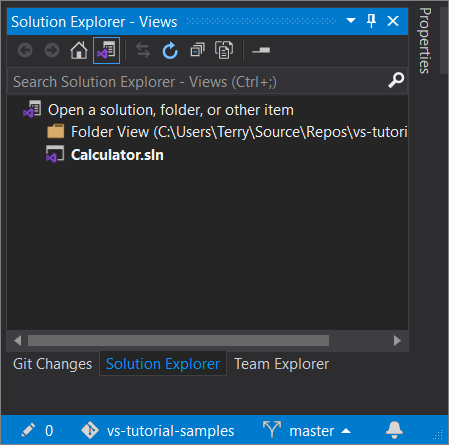
若要切換檢視,請再次選取 [切換檢視] 按鈕。
提示
您也可以使用 Visual Studio IDE 中的 [Git] 功能表,來複製存放庫並開啟專案。
在本機從先前複製的 GitHub 存放庫開啟專案
開啟 Visual Studio 2019 16.8 版或更新版本。
在 [開始] 視窗上,選取 [開啟專案或解決方案]。
Visual Studio 會開啟檔案總管的執行個體,您可以在其中瀏覽至您的解決方案或專案,然後選取該解決方案或專案來開啟。
如果您最近已開啟專案或解決方案,請從 [開啟最近使用的項目] 區段選取該專案或解決方案,以再次快速將其開啟。
提示
您也可以使用 Visual Studio IDE 中的 [Git] 功能表,從您先前複製的存放庫開啟本機資料夾和檔案。
開始編寫程式碼!
Visual Studio 2019 16.7 版及更舊版本
以下描述如何在 Visual Studio 2019 16.7 版或更舊版本中使用 Git。
複製 GitHub 存放庫,然後開啟專案
開啟 Visual Studio 2019 16.7 版或更舊版本。
在 [開始] 視窗上,選取 [複製或簽出程式碼]。
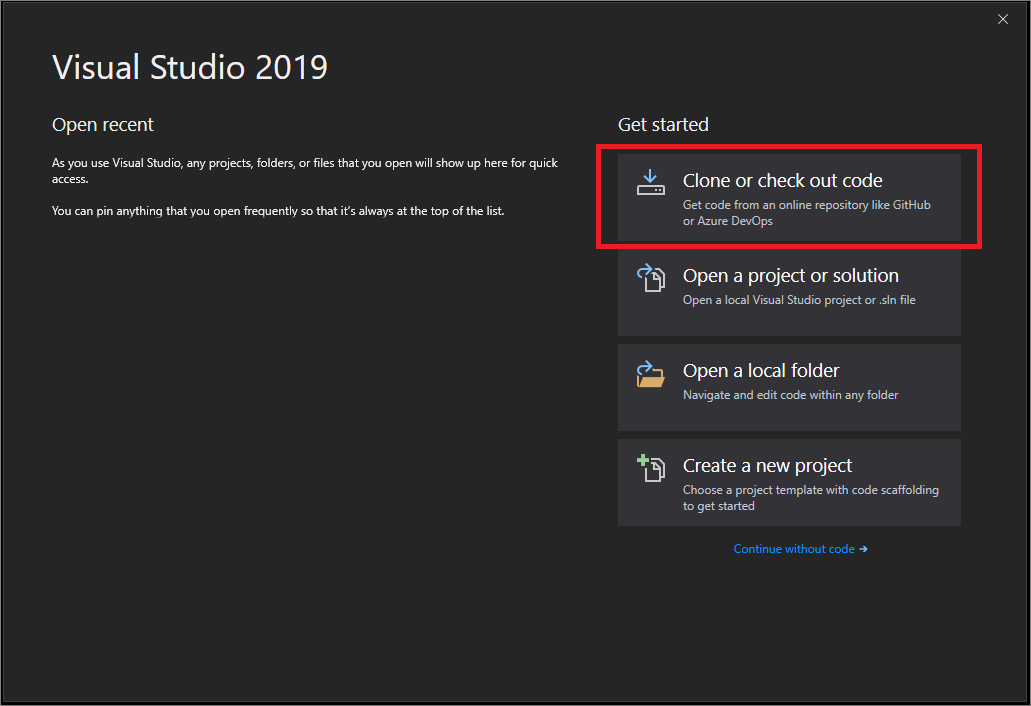
輸入存放庫位置,然後選取 [複製]。
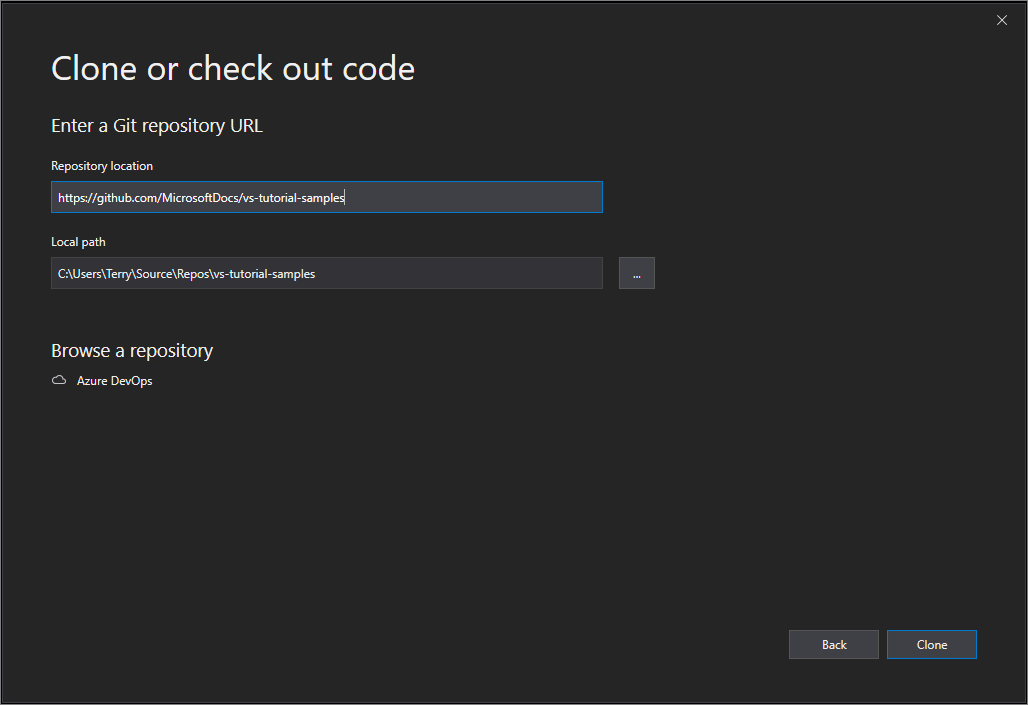
Visual Studio 從存放庫開啟專案。
如果您有可用的解決方案檔案,其將會出現在 [解決方案與資料夾] 飛出功能表中。 選取該檔案,然後 Visual Studio 會開啟您的解決方案。
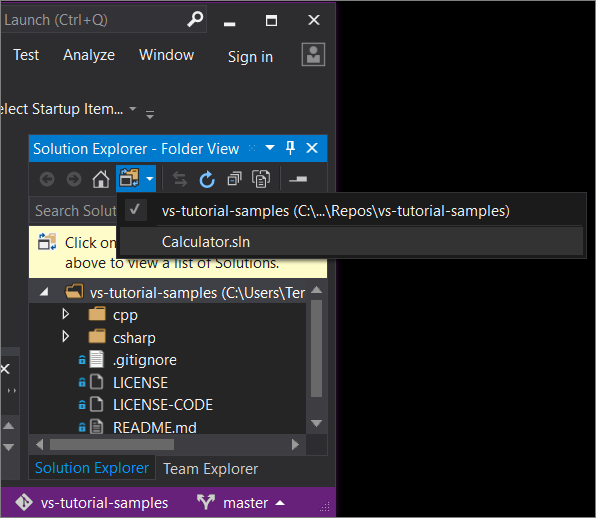
如果您的存放庫中沒有解決方案檔案 (具體來說,就是 .sln 檔案),飛出功能表將顯示「找不到任何解決方案」。不過,您可以從資料夾功能表中按兩下任一檔案,以便在 Visual Studio 程式碼編輯器中開啟該檔案。
開始編寫程式碼!
使用 Visual Studio 2019 瀏覽至 Azure DevOps 存放庫
使用 Visual Studio 2019 瀏覽至 Azure DevOps 存放庫並複製該存放庫時,您會看到什麼取決於您具有的版本。 具體而言,如果您已安裝 16.8 版或更新版本,我們已變更 UI,以配合 Visual Studio 中新的、更完整的 Git 體驗。
但是,無論您已安裝哪個版本,一律可以使用 Visual Studio 瀏覽至 Azure DevOps 存放庫並複製該存放庫。
Visual Studio 2019 16.8 版和更新版本
Visual Studio 2019 16.8 版或更新版本。
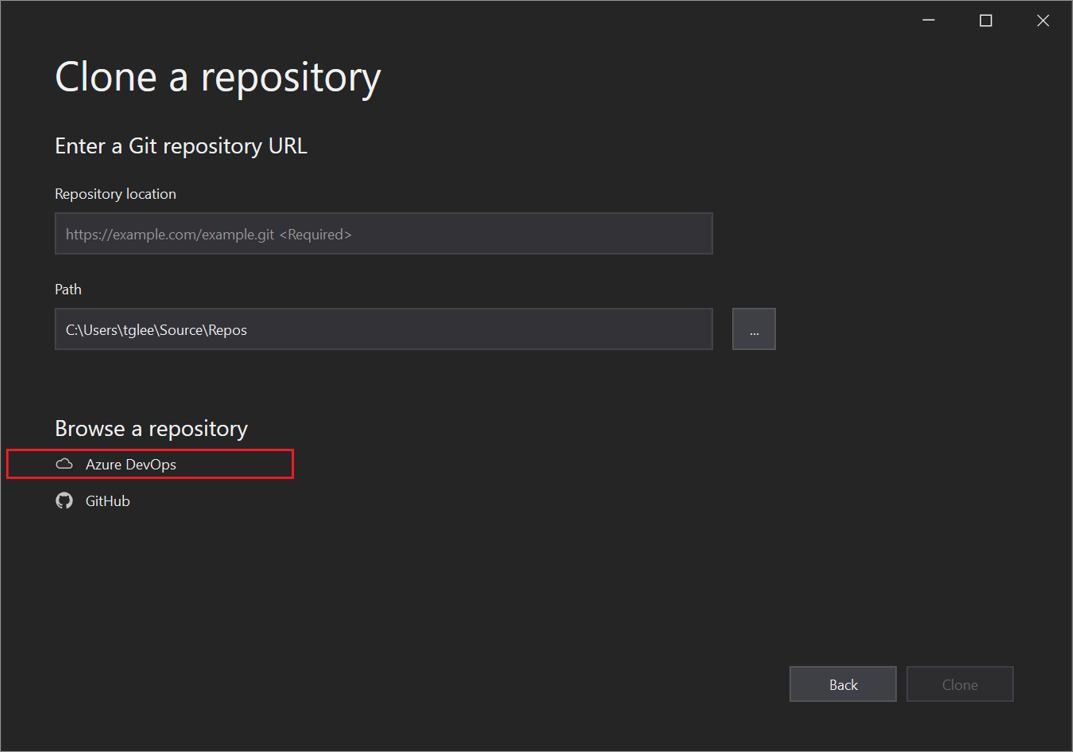
在 [開始] 視窗上,選取 [複製存放庫]。
在 [瀏覽存放庫] 區段中,選取 [Azure DevOps]。
如果您看到登入視窗,請登入您的帳戶。
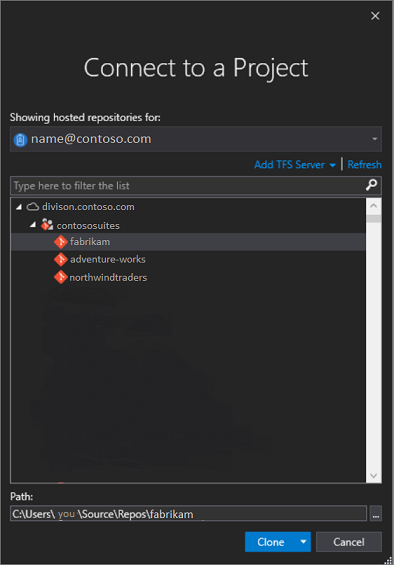
在 [連線到專案] 對話方塊中,選擇您想要連線的存放庫,然後選取 [複製]。

提示
如果您沒有看到預先填入的清單,其中列出要連線的存放庫,請選取 [新增 Azure DevOps Server] 以輸入伺服器 URL。 (或者,您可能會看到「找不到伺服器」提示,其中包含新增現有 Azure DevOps Server 或建立 Azure DevOps 帳戶的連結。)
接下來,Visual Studio 會開啟顯示資料夾和檔案的 [方案總管]。
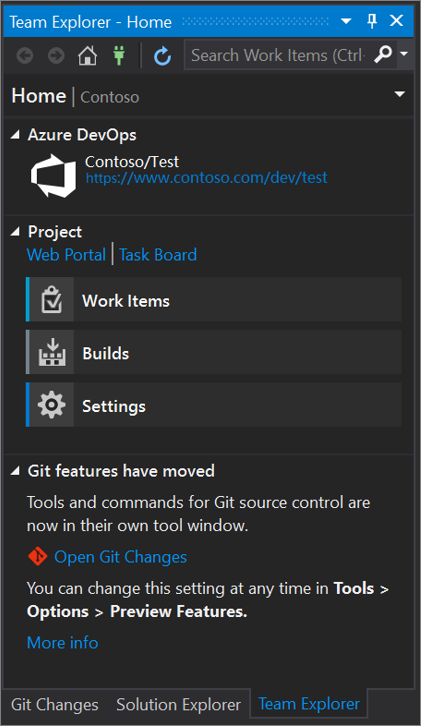
選取 [Team Explorer] 索引標籤以檢視 Azure DevOps 動作。
Visual Studio 2019 16.7 版及更舊版本
開啟 Visual Studio 2019 16.7 版或更舊版本。
在 [開始] 視窗上,選取 [複製或簽出程式碼]。
在 [瀏覽存放庫] 區段中,選取 [Azure DevOps]。
如果您看到登入視窗,請登入您的帳戶。
在 [連線到專案] 對話方塊中,選擇您想要連線的存放庫,然後選取 [複製]。
注意
您在清單方塊中看到的內容,取決於您有權存取的 Azure DevOps 存放庫。
Visual Studio 會開啟 [Team Explorer],並在複製完成時顯示通知。
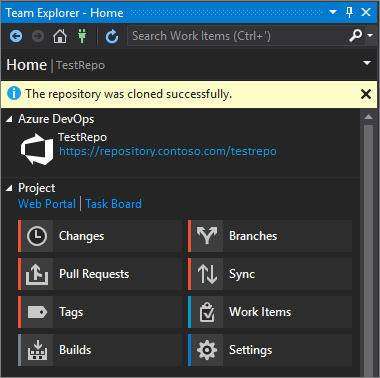
若要檢視您的資料夾和檔案,請選取 [顯示資料夾檢視] 連結。
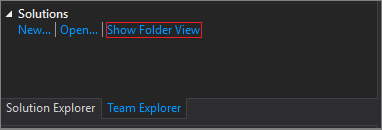
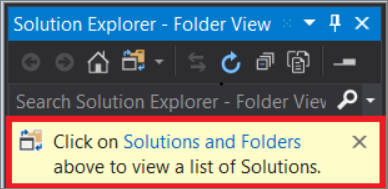
Visual Studio 會開啟 [方案總管]。
選擇 [解決方案與資料夾] 連結,搜尋要開啟的解決方案檔案 (具體來說,就是 .sln 檔案)。
如果您的存放庫中沒有解決方案檔案,則會顯示「找不到解決方案」的訊息。 不過,您可以從資料夾功能表中按兩下任一檔案,以便在 Visual Studio 程式碼編輯器中開啟該檔案。
下一步
請隨意深入探討下列任何語言特定教學課程:
- Visual Studio 教學課程 | C#
- Visual Studio 教學課程 | Visual Basic
- Visual Studio 教學課程 | C++
- Visual Studio 教學課程 | Python
- Visual Studio 教學課程 |JavaScript、TypeScript 和 Node.js
另請參閱
意見反應
即將登場:在 2024 年,我們將逐步淘汰 GitHub 問題作為內容的意見反應機制,並將它取代為新的意見反應系統。 如需詳細資訊,請參閱:https://aka.ms/ContentUserFeedback。
提交並檢視相關的意見反應