Use a blocklist in Azure OpenAI
The configurable content filters are sufficient for most content moderation needs. However, you may need to filter terms specific to your use case.
Prerequisites
- An Azure subscription. Create one for free.
- Once you have your Azure subscription, create an Azure OpenAI resource in the Azure portal to get your token, key and endpoint. Enter a unique name for your resource, select the subscription you entered on the application form, select a resource group, supported region, and supported pricing tier. Then select Create.
- The resource takes a few minutes to deploy. After it finishes, select go to resource. In the left pane, under Resource Management, select Subscription Key and Endpoint. The endpoint and either of the keys are used to call APIs.
- Azure CLI installed
- cURL installed
Use blocklists
You can create blocklists with the Azure OpenAI API. The following steps help you get started.
Get your token
First, you need to get a token for accessing the APIs for creating, editing and deleting blocklists. You can get this token using the following Azure CLI command:
az account get-access-token
Create or modify a blocklist
Copy the cURL command below to a text editor and make the following changes:
- Replace {subscriptionId} with your subscription ID.
- Replace {resourceGroupName} with your resource group name.
- Replace {accountName} with your resource name.
- Replace {raiBlocklistName} (in the URL) with a custom name for your list. Allowed characters:
0-9, A-Z, a-z, - . _ ~. - Replace {token} with the token you got from the "Get your token" step above.
- Optionally replace the value of the "description" field with a custom description.
curl --location --request PUT 'https://management.azure.com/subscriptions/{subscriptionId}/resourceGroups/{resourceGroupName}/providers/Microsoft.CognitiveServices/accounts/{accountName}/raiBlocklists/{raiBlocklistName}?api-version=2024-03-01-preview' \
--header 'Authorization: Bearer {token}' \
--header 'Content-Type: application/json' \
--data-raw '{
    "properties": {
        "description": "This is a prompt blocklist"
    }
}'
The response code should be 201 (created a new list) or 200 (updated an existing list).
Apply a blocklist to a content filter
If you haven't yet created a content filter, you can do so in the Studio in the Content Filters tab on the left hand side. In order to use the blocklist, make sure this Content Filter is applied to an Azure OpenAI deployment. You can do this in the Deployments tab on the left hand side.
To apply a completion blocklist to a content filter, use the following cURL command:
- Replace {subscriptionId} with your sub ID.
- Replace {resourceGroupName} with your resource group name.
- Replace {accountName} with your resource name.
- Replace {raiPolicyName} with the name of your Content Filter
- Replace {token} with the token you got from the "Get your token" step above.
- Replace "raiBlocklistName" in the body with a custom name for your list. Allowed characters:
0-9, A-Z, a-z, - . _ ~.
curl --location --request PUT 'https://management.azure.com/subscriptions/{subscriptionId}/resourceGroups/{resourceGroupName}/providers/Microsoft.CognitiveServices/accounts/{accountName}/raiPolicies/{raiPolicyName}?api-version=2024-03-01-preview' \
--header 'Authorization: Bearer {token}' \
--header 'Content-Type: application/json' \
--data-raw '{
    "properties": {
        "basePolicyName": "Microsoft.Default",
        "completionBlocklists": [{
            "blocklistName": "raiBlocklistName",
            "blocking": true
        }],
        "contentFilters": [ ]
    }
}'
Add blockItems to the list
Note
There is a maximum limit of 10,000 terms allowed in one list.
Copy the cURL command below to a text editor and make the following changes:
- Replace {subscriptionId} with your sub ID.
- Replace {resourceGroupName} with your resource group name.
- Replace {accountName} with your resource name.
- Replace {raiBlocklistName} (in the URL) with a custom name for your list. Allowed characters:
0-9, A-Z, a-z, - . _ ~. - Replace {raiBlocklistItemName} with a custom name for your list item.
- Replace {token} with the token you got from the "Get your token" step above.
- Replace the value of the
"blocking pattern"field with the item you'd like to add to your blocklist. The maximum length of a blockItem is 1000 characters. Also specify whether the pattern is regex or exact match.
curl --location --request PUT 'https://management.azure.com/subscriptions/{subscriptionId}/resourceGroups/{resourceGroupName}/providers/Microsoft.CognitiveServices/accounts/{accountName}/raiBlocklists/{raiBlocklistName}/raiBlocklistItems/{raiBlocklistItemName}?api-version=2024-03-01-preview' \
--header 'Authorization: Bearer {token}' \
--header 'Content-Type: application/json' \
--data-raw '{
    "properties": {
        "pattern": "blocking pattern",
        "isRegex": false
    }
}'
Note
It can take around 5 minutes for a new term to be added to the blocklist. Please test after 5 minutes.
The response code should be 200.
{
  "name": "raiBlocklistItemName",
  "id": "/subscriptions/subscriptionId/resourceGroups/resourceGroupName/providers/Microsoft.CognitiveServices/accounts/accountName/raiBlocklists/raiBlocklistName/raiBlocklistItems/raiBlocklistItemName",
  "properties": {
    "pattern": "blocking pattern",
    "isRegex": false
  }
}
Analyze text with a blocklist
Now you can test out your deployment that has the blocklist. The easiest way to do this is in the Azure OpenAI Studio. If the content was blocked either in prompt or completion, you should see an error message saying the content filtering system was triggered.
For instruction on calling the Azure OpenAI endpoints, visit the Quickstart.
In the below example, a GPT-35-Turbo deployment with a blocklist is blocking the prompt. The response returns a 400 error.
{
    "error": {
        "message": "The response was filtered due to the prompt triggering Azure OpenAI’s content management policy. Please modify your prompt and retry. To learn more about our content filtering policies please read our documentation: https://go.microsoft.com/fwlink/?linkid=2198766",
        "type": null,
        "param": "prompt",
        "code": "content_filter",
        "status": 400,
        "innererror": {
            "code": "ResponsibleAIPolicyViolation",
            "content_filter_result": {
                "custom_blocklists": [
                    {
                        "filtered": true,
                        "id": "raiBlocklistName"
                    }
                ],
                "hate": {
                    "filtered": false,
                    "severity": "safe"
                },
                "self_harm": {
                    "filtered": false,
                    "severity": "safe"
                },
                "sexual": {
                    "filtered": false,
                    "severity": "safe"
                },
                "violence": {
                    "filtered": false,
                    "severity": "safe"
                }
            }
        }
    }
}
If the completion itself is blocked, the response returns 200, as the completion only cuts off when the blocklist content is matched. The annotations show that a blocklist was matched.
{
    "id": "chatcmpl-85NkyY0AkeBMunOjyxivQSiTaxGAl",
    "object": "chat.completion",
    "created": 1696293652,
    "model": "gpt-35-turbo",
    "prompt_filter_results": [
        {
            "prompt_index": 0,
            "content_filter_results": {
                "hate": {
                    "filtered": false,
                    "severity": "safe"
                },
                "self_harm": {
                    "filtered": false,
                    "severity": "safe"
                },
                "sexual": {
                    "filtered": false,
                    "severity": "safe"
                },
                "violence": {
                    "filtered": false,
                    "severity": "safe"
                }
            }
        }
    ],
    "choices": [
        {
            "index": 0,
            "finish_reason": "content_filter",
            "message": {
                "role": "assistant"
            },
            "content_filter_results": {
                "custom_blocklists": [
                    {
                        "filtered": true,
                        "id": "myBlocklistName"
                    }
                ],
                "hate": {
                    "filtered": false,
                    "severity": "safe"
                },
                "self_harm": {
                    "filtered": false,
                    "severity": "safe"
                },
                "sexual": {
                    "filtered": false,
                    "severity": "safe"
                },
                "violence": {
                    "filtered": false,
                    "severity": "safe"
                }
            }
        }
    ],
    "usage": {
        "completion_tokens": 75,
        "prompt_tokens": 27,
        "total_tokens": 102
    }
}
Use blocklists in Azure OpenAI Studio
You can also create custom blocklists in the Azure OpenAI Studio as part of your content filtering configurations (public preview). Instructions on how to create custom content filters can be found here. The following steps show how to create custom blocklists as part of your content filters via Azure OpenAI Studio.
- Select the Blocklists tab next to Content filters tab.

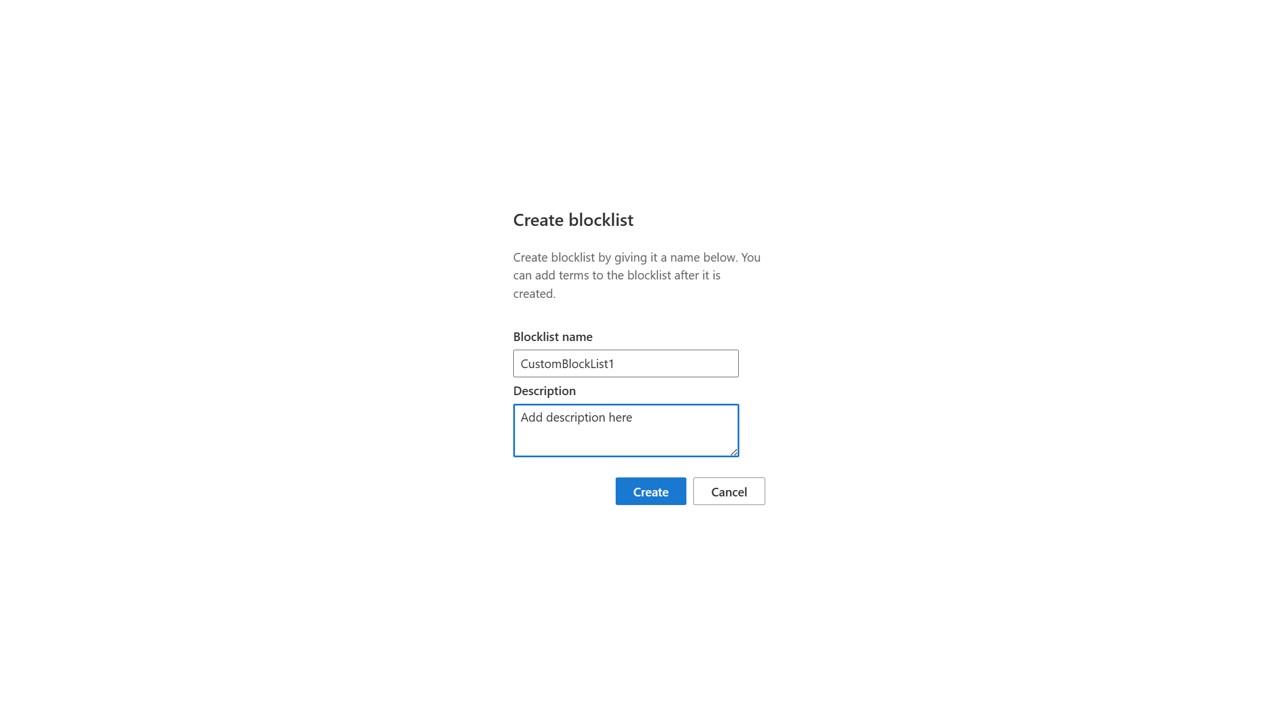
- Select Create blocklist

- Create a name for your blocklist, add a description and select on Create.
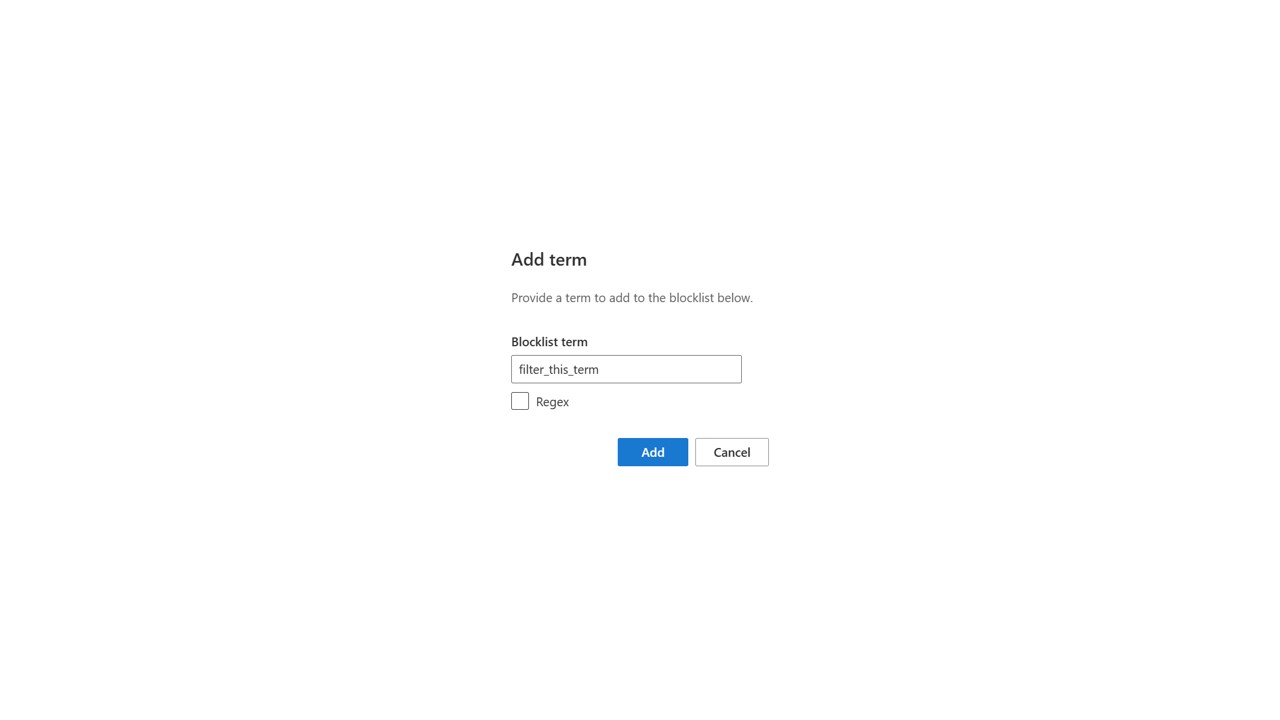
- Select your custom blocklist once it's created, and select Add term.

- Add a term that should be filtered, and select Create. You can also create a regex.
- You can Edit and Delete every term in your blocklist.

- Once the blocklist is ready, navigate to the Content filters (Preview) section and create a new customized content filter configuration. This opens a wizard with several AI content safety components. You can find more information on how to configure the main filters and optional models here. Go to Add blocklist (Optional).
- You'll now see all available blocklists. There are two types of blocklists – the blocklists you created, and prebuilt blocklists that Microsoft provides, in this case a Profanity blocklist (English)
- You can now decide which of the available blocklists you would like to include in your content filtering configuration, and you can select if it should apply to and filter prompts, completions or both. In the below example, we apply CustomBlocklist1 that we just created to prompts and completions, and the Profanity blocklist to completions only. The last step is to review and finish the content filtering configuration by clicking on Next.

- You can always go back and edit your configuration. Once it’s ready, select on Create content filter. The new configuration that includes your blocklists can now be applied to a deployment. Detailed instructions can be found here.


Next steps
Learn more about Responsible AI practices for Azure OpenAI: Overview of Responsible AI practices for Azure OpenAI models.
Read more about content filtering categories and severity levels with Azure OpenAI Service.
Learn more about red teaming from our: Introduction to red teaming large language models (LLMs) article.
Feedback
Coming soon: Throughout 2024 we will be phasing out GitHub Issues as the feedback mechanism for content and replacing it with a new feedback system. For more information see: https://aka.ms/ContentUserFeedback.
Submit and view feedback for