Quickstart: Add OPC UA assets to your Azure IoT Operations Preview cluster
Important
Azure IoT Operations Preview – enabled by Azure Arc is currently in PREVIEW. You shouldn't use this preview software in production environments.
See the Supplemental Terms of Use for Microsoft Azure Previews for legal terms that apply to Azure features that are in beta, preview, or otherwise not yet released into general availability.
In this quickstart, you manually add OPC UA assets to your Azure IoT Operations Preview cluster. These assets publish messages to the Azure IoT MQ Preview broker in your Azure IoT Operations cluster. Typically, an OT user completes these steps.
An asset is a physical device or logical entity that represents a device, a machine, a system, or a process. For example, a physical asset could be a pump, a motor, a tank, or a production line. A logical asset that you define can have properties, stream telemetry, or generate events.
OPC UA servers are software applications that communicate with assets. OPC UA tags are data points that OPC UA servers expose. OPC UA tags can provide real-time or historical data about the status, performance, quality, or condition of assets.
In this quickstart, you use the Azure IoT Operations (preview) portal to create your assets. You can also use the Azure CLI to complete some of these tasks.
Prerequisites
Complete Quickstart: Deploy Azure IoT Operations Preview to an Arc-enabled Kubernetes cluster before you begin this quickstart.
To sign in to the Azure IoT Operations (preview) portal, you need a work or school account in the tenant where you deployed Azure IoT Operations. If you're currently using a Microsoft account (MSA), you need to create a Microsoft Entra ID with at least contributor permissions for the resource group that contains your Kubernetes - Azure Arc instance. To learn more, see Known Issues > Create Entra account.
What problem will we solve?
The data that OPC UA servers expose can have a complex structure and can be difficult to understand. Azure IoT Operations provides a way to model OPC UA assets as tags, events, and properties. This modeling makes it easier to understand the data and to use it in downstream processes such as the MQ broker and Azure IoT Data Processor Preview pipelines.
Sign into the Azure IoT Operations (preview) portal
To create asset endpoints, assets and subscribe to OPC UA tags and events, use the Azure IoT Operations (preview) portal. Navigate to the Azure IoT Operations (preview) portal in your browser and sign in with your Microsoft Entra ID credentials.
Important
You must use a work or school account to sign in to the Azure IoT Operations (preview) portal. To learn more, see Known Issues > Create Entra account.
Select your site
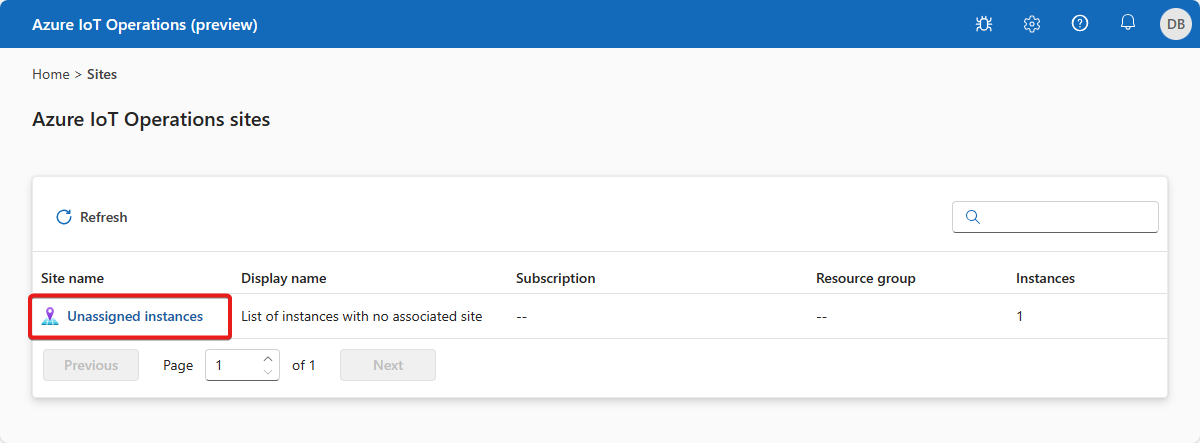
After you sign in, the portal displays a list of sites that you have access to. Each site is a collection of Azure IoT Operations instances where you can configure your assets. Your IT administrator is responsible for organizing instances in to sites and granting access to OT users in your organization. Because you're working with a new deployment, there are no sites yet. You can find the cluster you created in the previous quickstart by selecting Unassigned instances. In the portal, an instance represents a cluster where you deployed Azure IoT Operations.
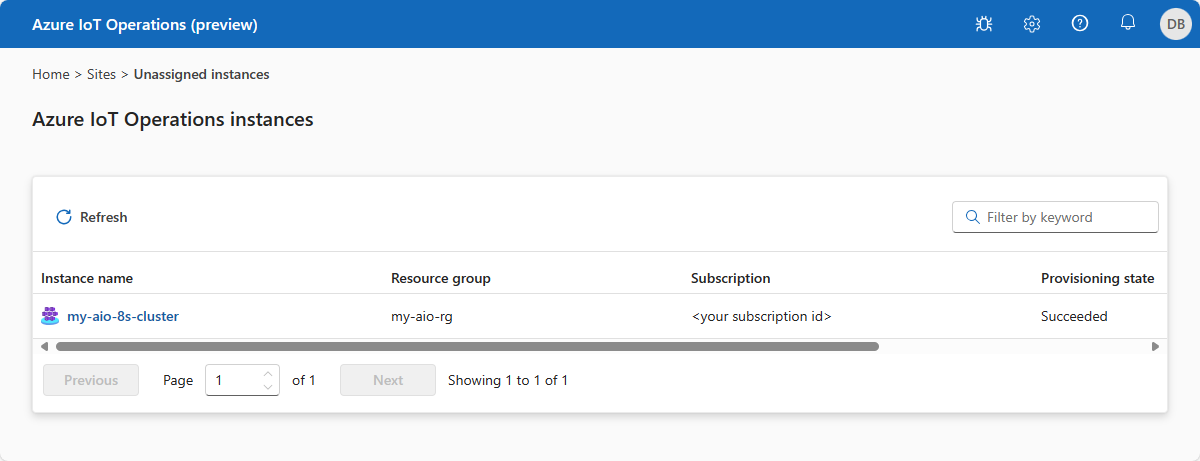
Select your instance
Select the instance that you deployed Azure IoT Operations to in the previous quickstart:
Tip
If you don't see any instances, you might not be in the right Azure Active Directory tenant. You can change the tenant from the top right menu in the portal.
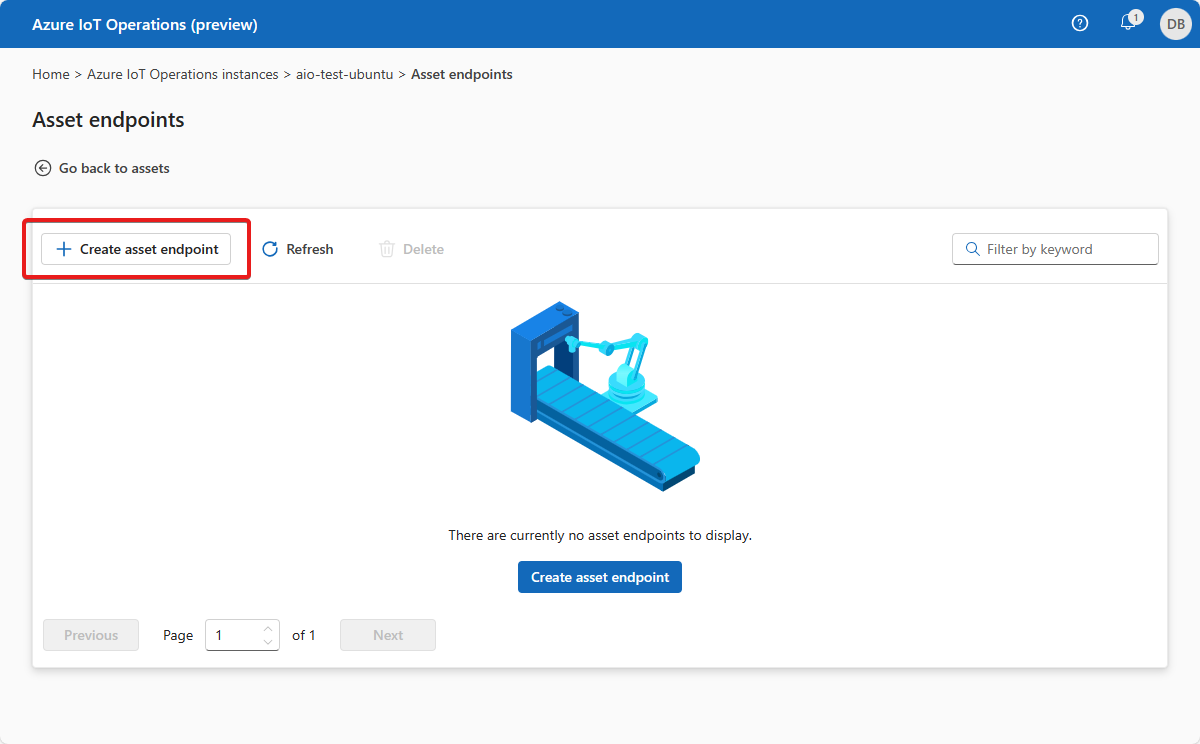
Add an asset endpoint
When you deployed Azure IoT Operations, you chose to include a built-in OPC PLC simulator. In this step, you add an asset endpoint that enables you to connect to the OPC PLC simulator.
To add an asset endpoint:
Select Manage asset endpoints and then Create asset endpoint:
Enter the following endpoint information:
Field Value Name opc-ua-connector-0OPC UA Broker URL opc.tcp://opcplc-000000:50000User authentication AnonymousTransport authentication Do not use transport authentication certificateTo save the definition, select Create.
This configuration deploys a new asset endpoint called
opc-ua-connector-0to the cluster. You can usekubectlto view the asset endpoints:kubectl get assetendpointprofile -n azure-iot-operations
These quickstarts use the OPC PLC simulator to generate sample data. To enable the quickstart scenario, you need to configure the OPC UA Broker to accept untrusted server certificates and your asset endpoint to connect without mutual trust established. This configuration is not recommended for production or pre-production environments. For more information, see Deploy the OPC PLC simulator:
To configure the simulator for the quickstart scenario, run the following command:
az k8s-extension update --version 0.3.0-preview --name opc-ua-broker --release-train preview --cluster-name <CLUSTER_NAME> --resource-group <RESOURCE_GROUP> --cluster-type connectedClusters --auto-upgrade-minor-version false --config opcPlcSimulation.deploy=true --config opcPlcSimulation.autoAcceptUntrustedCertificates=trueCaution
Don't use this configuration in production or pre-production environments. The configuration lowers the security level for the OPC PLC so that it accepts connections from any client without an explicit peer certificate trust operation.
To configure the asset endpoint for the quickstart scenario, run the following command:
kubectl patch AssetEndpointProfile opc-ua-connector-0 -n azure-iot-operations --type=merge -p '{"spec":{"additionalConfiguration":"{\"applicationName\":\"opc-ua-connector-0\",\"security\":{\"autoAcceptUntrustedServerCertificates\":true}}"}}'Caution
Don't use this configuration in production or pre-production environments. Exposing your cluster to the internet without proper authentication might lead to unauthorized access and even DDOS attacks.
To learn more, see Deploy the OPC PLC simulator section.
To enable the configuration changes to take effect immediately, first find the name of your
aio-opc-supervisorpod by using the following command:kubectl get pods -n azure-iot-operationsThe name of your pod looks like
aio-opc-supervisor-956fbb649-k9ppr.Restart the
aio-opc-supervisorpod by using a command that looks like the following example. Use theaio-opc-supervisorpod name from the previous step:kubectl delete pod aio-opc-supervisor-956fbb649-k9ppr -n azure-iot-operations
After you define an asset, an OPC UA connector pod discovers it. The pod uses the asset endpoint that you specify in the asset definition to connect to an OPC UA server. You can use kubectl to view the discovery pod that was created when you added the asset endpoint. The pod name looks like aio-opc-opc.tcp-1-8f96f76-kvdbt:
kubectl get pods -n azure-iot-operations
When the OPC PLC simulator is running, data flows from the simulator, to the connector, to the OPC UA broker, and finally to the MQ broker.
Manage your assets
After you select your instance in Azure IoT Operations (preview) portal, you see the available list of assets on the Assets page. If there are no assets yet, this list is empty:
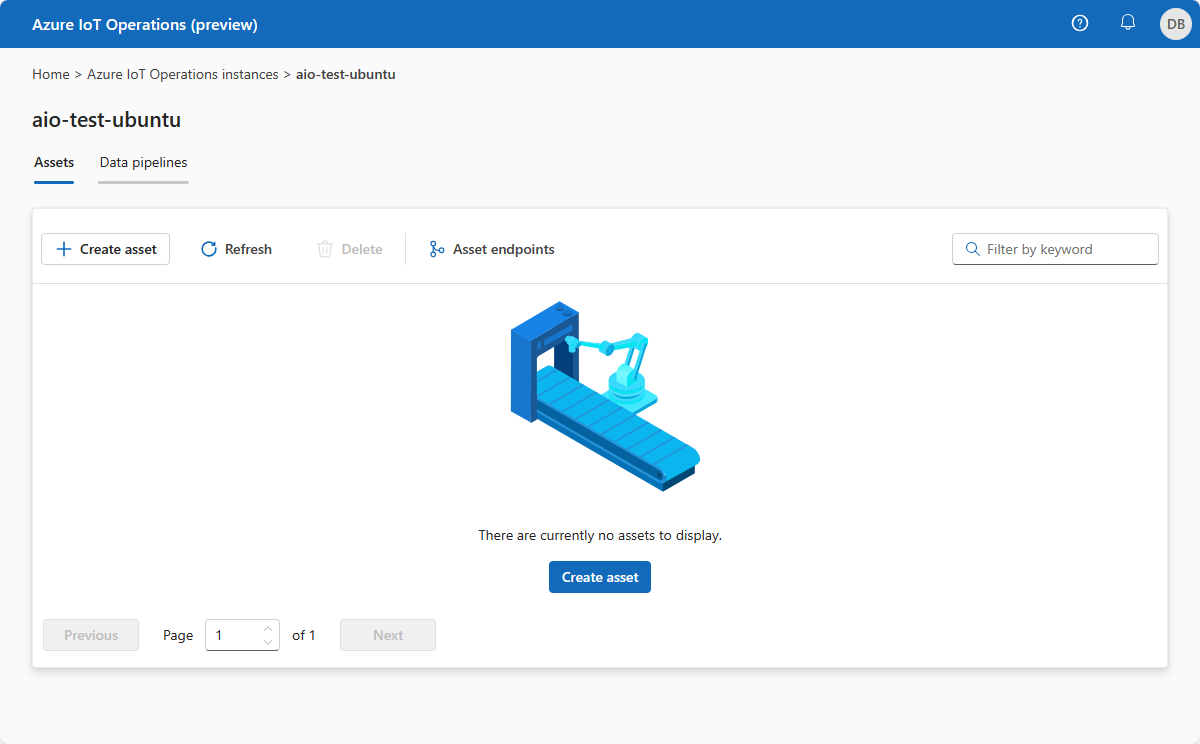
Create an asset
To create an asset, select Create asset.
Enter the following asset information:
| Field | Value |
|---|---|
| Asset name | thermostat |
| Asset Endpoint | opc-ua-connector-0 |
| Description | A simulated thermostat asset |
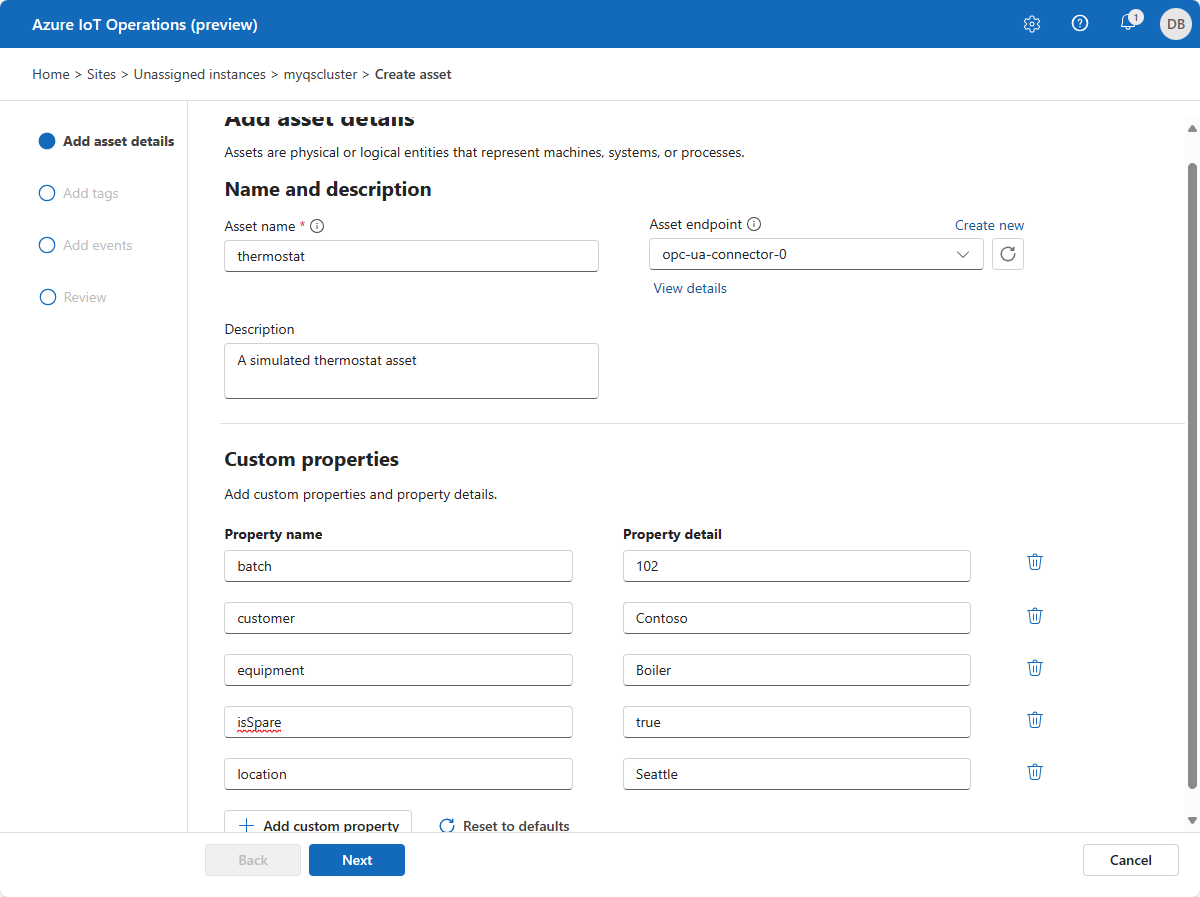
Scroll down on the Asset details page and configure any other properties for the asset such as:
- Manufacturer
- Manufacturer URI
- Model
- Product code
- Hardware version
- Software version
- Serial number
- Documentation URI
You can remove the sample properties that are already defined and add your own custom properties.
Select Next to go to the Add tags page.
Create OPC UA tags
Add two OPC UA tags on the Add tags page. To add each tag, select Add tag or CSV and then select Add tag. Enter the tag details shown in the following table:
| Node ID | Tag name | Observability mode |
|---|---|---|
| ns=3;s=FastUInt10 | temperature | none |
| ns=3;s=FastUInt100 | Tag 10 | none |
The Observability mode is one of the following values: none, gauge, counter, histogram, or log.
You can override the default sampling interval and queue size for each tag.
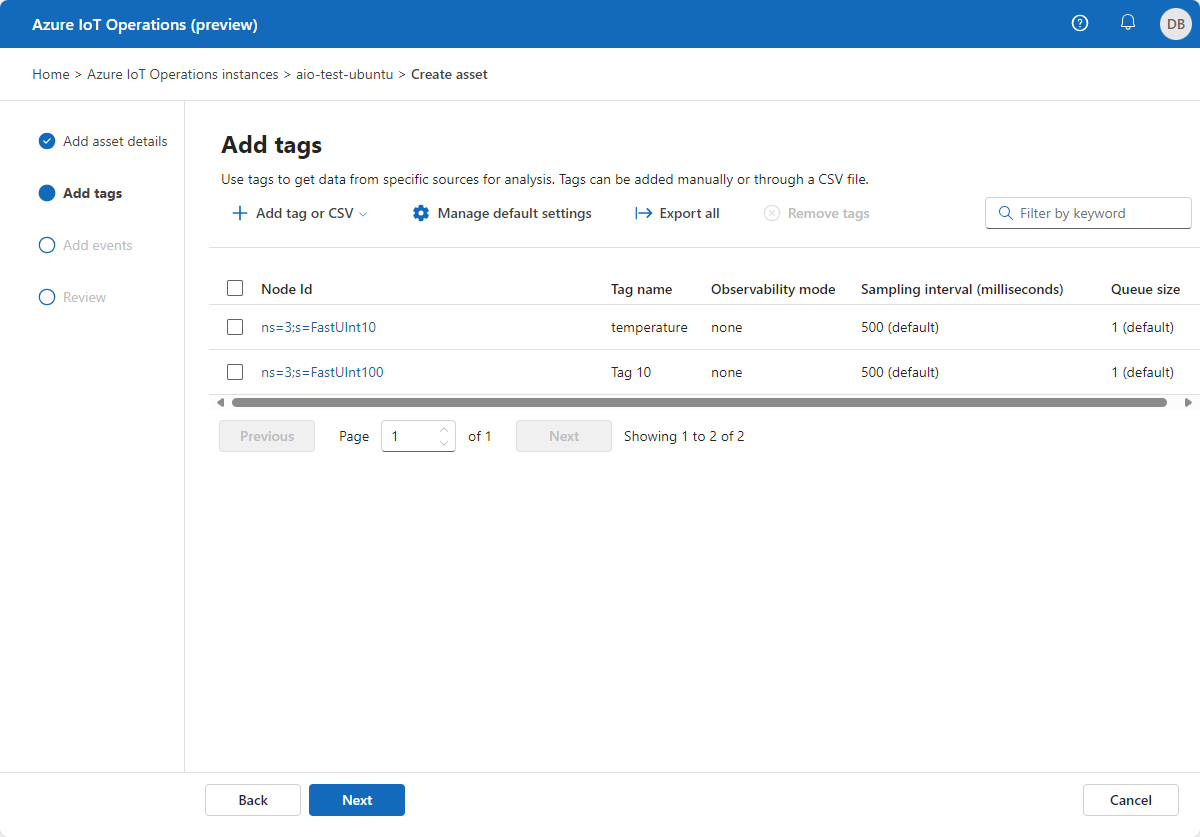
Select Next to go to the Add events page and then Next to go to the Review page.
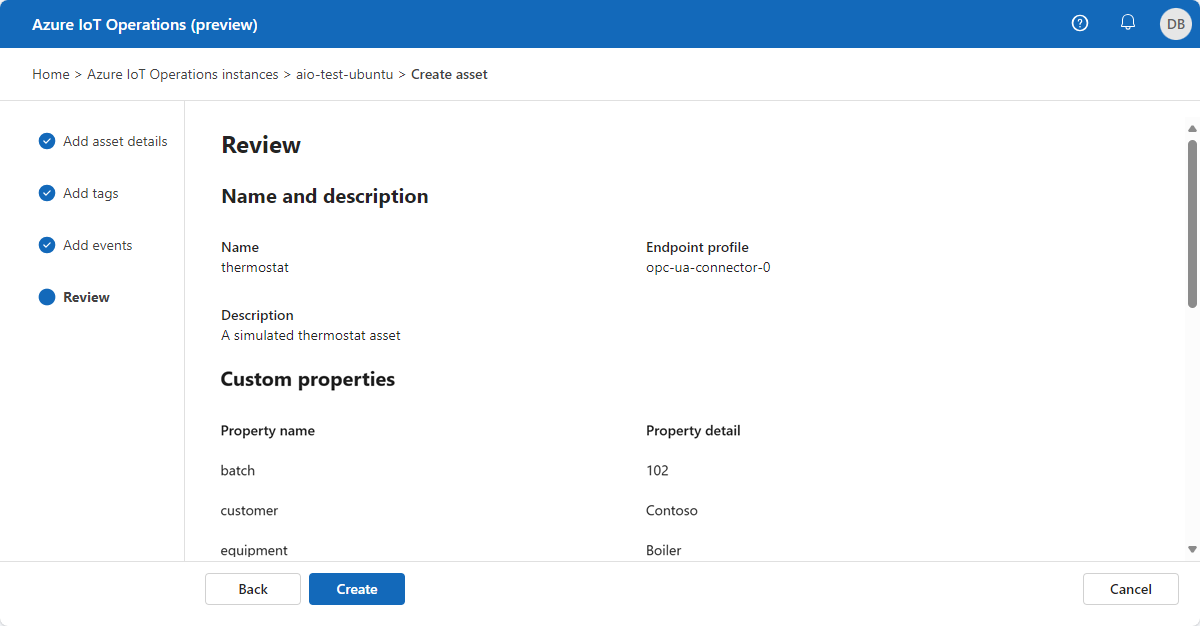
Review
Review your asset and tag details and make any adjustments you need before you select Create:
Verify data is flowing
Verify data is flowing to the MQTT broker by using the mqttui tool. In this example, you run the mqttui tool inside your Kubernetes cluster:
Run the following command to deploy a pod that includes the mqttui and mosquitto tools that are useful for interacting with the MQ broker in the cluster:
kubectl apply -f https://raw.githubusercontent.com/Azure-Samples/explore-iot-operations/main/samples/quickstarts/mqtt-client.yamlThe following snippet shows the YAML file that you applied:
# Important: do not use in production environments
# Creates a pod with mosquitto-clients and mqttui utilities in your cluster
apiVersion: v1
kind: Pod
metadata:
  name: mqtt-client
  # The namespace must match the IoT MQ BrokerListener's namespace
  # Otherwise use the long hostname: aio-mq-dmqtt-frontend.azure-iot-operations.svc.cluster.local
  namespace: azure-iot-operations
spec:
  # Use the "mqtt-client" service account which comes with default deployment
  # Otherwise create it with `kubectl create serviceaccount mqtt-client -n azure-iot-operations`
  serviceAccountName: mqtt-client
  containers:
    # Install mosquitto and mqttui utilities on Alpine linux
  - image: alpine
    name: mqtt-client
    command: ["sh", "-c"]
    args: ["apk add mosquitto-clients mqttui && sleep infinity"]
    volumeMounts:
    - name: mq-sat
      mountPath: /var/run/secrets/tokens
    - name: trust-bundle
      mountPath: /var/run/certs
  volumes:
  - name: mq-sat
    projected:
      sources:
      - serviceAccountToken:
          path: mq-sat
          audience: aio-mq # Must match audience in BrokerAuthentication
          expirationSeconds: 86400
  - name: trust-bundle
    configMap:
      name: aio-ca-trust-bundle-test-only # Default root CA cert
Caution
This configuration isn't secure. Don't use this configuration in a production environment.
When the mqtt-client pod is running, run the following command to create a shell environment in the pod you created:
kubectl exec --stdin --tty mqtt-client -n azure-iot-operations -- shAt the shell in the mqtt-client pod, run the following command to connect to the MQ broker using the mqttui tool:
mqttui -b mqtts://aio-mq-dmqtt-frontend:8883 -u '$sat' --password $(cat /var/run/secrets/tokens/mq-sat) --insecure
To verify that the thermostat asset you added is publishing data, view the telemetry in the azure-iot-operations/data topic:

If there's no data flowing, restart the aio-opc-opc.tcp-1 pod:
Find the name of your
aio-opc-opc.tcp-1pod by using the following command:kubectl get pods -n azure-iot-operationsThe name of your pod looks like
aio-opc-opc.tcp-1-849dd78866-vhmz6.Restart the
aio-opc-opc.tcp-1pod by using a command that looks like the following example. Use theaio-opc-opc.tcp-1pod name from the previous step:kubectl delete pod aio-opc-opc.tcp-1-849dd78866-vhmz6 -n azure-iot-operations
The sample tags you added in the previous quickstart generate messages from your asset that look like the following examples:
{
    "Timestamp": "2024-03-08T00:54:58.6572007Z",
    "MessageType": "ua-deltaframe",
    "payload": {
      "temperature": {
        "SourceTimestamp": "2023-08-10T00:54:58.2543129Z",
        "Value": 7109
      },
      "Tag 10": {
        "SourceTimestamp": "2023-08-10T00:54:58.2543482Z",
        "Value": 7109
      }
    },
    "DataSetWriterName": "thermostat",
    "SequenceNumber": 4660
}
Discover OPC UA data sources by using Azure IoT Akri Preview
In the previous section, you saw how to add assets manually. You can also use Azure IoT Akri Preview to automatically discover OPC UA data sources and create Akri instance custom resources that represent the discovered devices. Currently, Akri can't detect and create assets that can be ingested into the Azure Device Registry Preview.
When you deploy Azure IoT Operations, the deployment includes the Akri discovery handler pods. To verify these pods are running, run the following command:
kubectl get pods -n azure-iot-operations | grep akri
kubectl get pods -n azure-iot-operations | Select-String -Pattern "akri"
The output from the previous command looks like the following example:
akri-opcua-asset-discovery-daemonset-h47zk     1/1     Running   3 (4h15m ago)    2d23h
aio-akri-otel-collector-5c775f745b-g97qv       1/1     Running   3 (4h15m ago)    2d23h
aio-akri-agent-daemonset-mp6v7                 1/1     Running   3 (4h15m ago)    2d23h
On the machine where your Kubernetes cluster is running, run the following command to apply a new configuration for the discovery handler:
kubectl apply -f https://raw.githubusercontent.com/Azure-Samples/explore-iot-operations/main/samples/quickstarts/akri-opcua-asset.yaml
The following snippet shows the YAML file that you applied:
apiVersion: akri.sh/v0
kind: Configuration
metadata:
  name: akri-opcua-asset
  namespace: azure-iot-operations
spec:
  discoveryHandler:
    name: opcua-asset
    discoveryDetails: "opcuaDiscoveryMethod:\n  - asset:\n      endpointUrl: \"	opc.tcp://opcplc-000000:50000\"\n      useSecurity: false\n      autoAcceptUntrustedCertificates: true\n"
  brokerProperties: {}
  capacity: 1
To verify the configuration, run the following command to view the Akri instances that represent the OPC UA data sources discovered by Akri:
kubectl get akrii -n azure-iot-operations
It might take a few minutes for the instance to show up.
The output from the previous command looks like the following example.
NAMESPACE              NAME                      CONFIG             SHARED   NODES            AGE
azure-iot-operations   akri-opcua-asset-dbdef0   akri-opcua-asset   true     ["dom-aio-vm"]   35m
Now you can use these resources in the local cluster namespace.
To confirm that Akri connected to the OPC UA Broker, copy and paste the name of the Akri instance from the previous step into the following command:
kubectl get akrii <AKRI_INSTANCE_NAME> -n azure-iot-operations -o json
The command output looks like the following example. This example output shows the Akri instance brokerProperties values and confirms that the OPC UA Broker is connected.
"spec": {

        "brokerProperties": {
            "ApplicationUri": "Boiler #2",
            "AssetEndpointProfile": "{\"spec\":{\"uuid\":\"opc-ua-broker-opcplc-000000-azure-iot-operation\"……
How did we solve the problem?
In this quickstart, you added an asset endpoint and then defined an asset and tags. The assets and tags model data from the OPC UA server to make the data easier to use in an MQTT broker and other downstream processes. You use the thermostat asset you defined in the next quickstart.
Clean up resources
If you won't use this deployment further, delete the Kubernetes cluster that you deployed Azure IoT Operations to and remove the Azure resource group that contains the cluster.
Next step
Quickstart: Use Azure IoT Data Processor Preview pipelines to process data from your OPC UA assets.
Feedback
Coming soon: Throughout 2024 we will be phasing out GitHub Issues as the feedback mechanism for content and replacing it with a new feedback system. For more information see: https://aka.ms/ContentUserFeedback.
Submit and view feedback for