إشعار
يتطلب الوصول إلى هذه الصفحة تخويلاً. يمكنك محاولة تسجيل الدخول أو تغيير الدلائل.
يتطلب الوصول إلى هذه الصفحة تخويلاً. يمكنك محاولة تغيير الدلائل.
في هذا المقال، تقوم بدمج قائمة انتظار Azure Storage مع حساب الدالة وحساب storage الذي أنشأته في مقالة البداية السريعة السابقة. تحقق هذا التكامل باستخدام ربط مخرجات يكتب البيانات من طلب HTTP إلى رسالة في الطابور. لا يتطلب إكمال هذه المقالة أي تكاليف إضافية تتجاوز بضعة سنتات أمريكية من التشغيل السريع السابق. لمعرفة المزيد عن الربطات، راجع Azure Functions مفاهيم المحفزات والربط.
تكوين البيئة المحلية الخاصة بك
قبل أن تبدأ، يجب عليك إكمال المقالة Quickstart: أنشئ Azure Functions project من سطر الأوامر. إذا كنت قد نظفت الموارد بالفعل في نهاية المقال، فراجع الخطوات مرة أخرى لإعادة إنشاء تطبيق الدالة والموارد ذات الصلة في Azure.
قبل أن تبدأ، يجب عليك إكمال المقالة Quickstart: أنشئ Azure Functions project من سطر الأوامر. إذا كنت قد نظفت الموارد بالفعل في نهاية المقال، فراجع الخطوات مرة أخرى لإعادة إنشاء تطبيق الدالة والموارد ذات الصلة في Azure.
قبل أن تبدأ، يجب عليك إكمال المقالة Quickstart: أنشئ Azure Functions project من سطر الأوامر. إذا كنت قد نظفت الموارد بالفعل في نهاية المقال، فراجع الخطوات مرة أخرى لإعادة إنشاء تطبيق الدالة والموارد ذات الصلة في Azure.
قبل أن تبدأ، يجب عليك إكمال المقالة Quickstart: أنشئ Azure Functions project من سطر الأوامر. إذا كنت قد نظفت الموارد بالفعل في نهاية المقال، فراجع الخطوات مرة أخرى لإعادة إنشاء تطبيق الدالة والموارد ذات الصلة في Azure.
قبل أن تبدأ، يجب عليك إكمال المقالة Quickstart: أنشئ Azure Functions project من سطر الأوامر. إذا كنت قد نظفت الموارد بالفعل في نهاية المقال، فراجع الخطوات مرة أخرى لإعادة إنشاء تطبيق الدالة والموارد ذات الصلة في Azure.
قبل أن تبدأ، يجب عليك إكمال المقالة Quickstart: أنشئ Azure Functions project من سطر الأوامر. إذا كنت قد نظفت الموارد بالفعل في نهاية المقال، فراجع الخطوات مرة أخرى لإعادة إنشاء تطبيق الدالة والموارد ذات الصلة في Azure.
استرجع Azure Storage connection string
Important
توضح هذه المقالة حاليا كيفية الاتصال بحساب Azure Storage الخاص بك باستخدام connection string، التي تحتوي على مفتاح سري مشترك. استخدام connection string يسهل عليك التحقق من تحديثات البيانات في حساب storage. لأفضل أمان، يجب عليك بدلا من ذلك استخدام الهويات المدارة عند الاتصال بحساب storage الخاص بك. لمزيد من المعلومات، راجع الروابط في دليل المطورين.
في وقت سابق، أنشأت حساب Azure Storage لاستخدام تطبيق الوظائف. سلسلة connection string لهذا الحساب مخزنة بشكل آمن في إعدادات التطبيق في Azure. عن طريق تحميل الإعداد إلى ملف local.settings.json، يمكنك استخدام الاتصال للكتابة إلى قائمة انتظار Storage في نفس الحساب عند تشغيل الوظيفة محليا.
من جذر project، شغل الأمر التالي، واستبدل
<APP_NAME>باسم تطبيق الوظيفة الخاص بك من الخطوة السابقة. سيقوم هذا الأمر بالكتابة فوق أي قيم موجودة في الملف.func azure functionapp fetch-app-settings <APP_NAME>افتح ملف local.settings.json وابحث عن القيمة المسماة
AzureWebJobsStorage، وهي connection string الحساب Storage. تستخدم اسمAzureWebJobsStorageو connection string في أقسام أخرى من هذا المقال.
Important
نظرا لأن ملف local.settings.json يحتوي على أسرار تم تنزيلها من Azure، استبعد هذا الملف دائما من التحكم المصدري. ملف .gitignore الذي تم إنشاؤه باستخدام دوال محلية project يستبعد الملف بشكل افتراضي.
تسجيل ملحقات الربط
باستثناء HTTP والمشغلات الموقتة، يتم تنفيذ الارتباطات كحزم ملحقة. شغل الأمر التالي dotnet add package في نافذة الطرفية لإضافة حزمة Storage إلى project الخاص بك.
dotnet add package Microsoft.Azure.Functions.Worker.Extensions.Storage.Queues --prerelease
الآن، يمكنك إضافة ملف storage output binding إلى project الخاص بك.
إضافة تعريف ربط الإخراج إلى الوظيفة
على الرغم من أن الدالة يمكن أن يكون لها مشغل واحد فقط، إلا أنها يمكن أن تحتوي على عدة روابط إدخال وإخراج، مما يتيح لك الاتصال بخدمات وموارد Azure الأخرى دون كتابة كود تكامل مخصص.
عند استخدام نموذج برمجة Node.js v4، يتم تعريف سمات الربط مباشرة في ملف ./src/functions/HttpExample.js . من التشغيل السريع السابق، يحتوي الملف بالفعل على ربط HTTP معرف بواسطة app.http الأسلوب .
const { app } = require('@azure/functions');

app.http('httpTrigger', {
  methods: ['GET', 'POST'],
  authLevel: 'anonymous',
  handler: async (request, context) => {
    try {
      context.log(`Http function processed request for url "${request.url}"`);

      const name = request.query.get('name') || (await request.text());
      context.log(`Name: ${name}`);

      if (!name) {
        return { status: 404, body: 'Not Found' };
      }

      return { body: `Hello, ${name}!` };
    } catch (error) {
      context.log(`Error: ${error}`);
      return { status: 500, body: 'Internal Server Error' };
    }
  },
});
عند استخدام نموذج برمجة Node.js v4، يتم تعريف سمات الربط مباشرة في ملف ./src/functions/HttpExample.js . من التشغيل السريع السابق، يحتوي الملف بالفعل على ربط HTTP معرف بواسطة app.http الأسلوب .
import {
  app,
  HttpRequest,
  HttpResponseInit,
  InvocationContext,
} from '@azure/functions';

export async function httpTrigger1(
  request: HttpRequest,
  context: InvocationContext,
): Promise<HttpResponseInit> {
  context.log(`Http function processed request for url "${request.url}"`);

  const name = request.query.get('name') || (await request.text()) || 'world';

  return { body: `Hello, ${name}!` };
}

app.http('httpTrigger1', {
  methods: ['GET', 'POST'],
  authLevel: 'anonymous',
  handler: httpTrigger1,
});
تعلن عن هذه الروابط في ملف function.json في مجلد الوظائف الخاص بك. من البداية السريعة السابقة، يحتوي ملفك function.json في مجلد HttpExample على ربطين في المجموعة bindings :
عند استخدام نموذج برمجة Python v2، يتم تعريف سمات الربط مباشرة في ملف function_app.py كمزخرفات. من البداية السريعة السابقة، يحتوي ملفك function_app.py بالفعل على ربط واحد يعتمد على الديكور:
import azure.functions as func
import logging

app = func.FunctionApp()

@app.function_name(name="HttpTrigger1")
@app.route(route="hello", auth_level=func.AuthLevel.ANONYMOUS)
route يضيف مصمم الديكور ربط HttpTrigger وHttpOutput إلى الدالة، ما يتيح تشغيل الدالة الخاصة بك عندما تصل طلبات http إلى المسار المحدد.
للكتابة إلى طابور Azure Storage من هذه الدالة، أضف queue_output ديكور إلى كود الدالة الخاص بك:
@app.queue_output(arg_name="msg", queue_name="outqueue", connection="AzureWebJobsStorage")
في الديكوريتور، يحدد arg_name معامل الربط المشار إليه في الكود، queue_name هو اسم الطابور الذي يكتب عليه الربط، وconnection هو اسم إعداد التطبيق الذي يحتوي على connection string حساب Storage. في البداية السريعة تستخدم نفس حساب storage المستخدم في تطبيق الوظائف، والذي يكون في إعداد AzureWebJobsStorage (من ملف local.settings.json).
queue_name عندما لا يكون موجودا، يقوم الربط بإنشائه عند الاستخدام الأول.
"bindings": [
  {
    "authLevel": "function",
    "type": "httpTrigger",
    "direction": "in",
    "name": "Request",
    "methods": [
      "get",
      "post"
    ]
  },
  {
    "type": "http",
    "direction": "out",
    "name": "Response"
  }
]
للكتابة إلى صف انتظار Azure Storage:
إضافة خاصية
extraOutputsإلى تكوين الربط{ methods: ['GET', 'POST'], extraOutputs: [sendToQueue], // add output binding to HTTP trigger authLevel: 'anonymous', handler: () => {} }إضافة دالة
output.storageQueueفوقapp.httpالاستدعاءconst sendToQueue: StorageQueueOutput = output.storageQueue({ queueName: 'outqueue', connection: 'AzureWebJobsStorage', });
يسمى الربط الثاني في المجموعة res. هذا الرابط http عبارة عن ربط ناتج (out) يُستخدم لكتابة استجابة HTTP.
للكتابة إلى قائمة انتظار Azure Storage من هذه الدالة، أضف ربطا out من النوع queue باسم msg، كما هو موضح في الكود أدناه:
{
"authLevel": "function",
"type": "httpTrigger",
"direction": "in",
"name": "Request",
"methods": [
"get",
"post"
]
},
{
"type": "http",
"direction": "out",
"name": "Response"
},
{
"type": "queue",
"direction": "out",
"name": "msg",
"queueName": "outqueue",
"connection": "AzureWebJobsStorage"
}
]
}
بالنسبة لنوع queue، يجب تحديد اسم الطابور في queueName وتقديم name لاتصال Azure Storage (من ملف local.settings.json) في connection.
في project C#، تعرف الروابط كسمات ربط على طريقة الدالة. تعتمد التعريفات المحددة على ما إذا كان تطبيقك يعمل قيد المعالجة (مكتبة فئة C#) أو في عملية عامل معزولة.
افتح ملف HttpExample.cs project وأضف الفئة التالية MultiResponse:
public class MultiResponse
{
[QueueOutput("outqueue", Connection = "AzureWebJobsStorage")]
public string[] Messages { get; set; }
public IActionResult HttpResponse { get; set; }
}
فئة MultiResponse تتيح لك الكتابة إلى قائمة انتظار storage باسم outqueue ورسالة نجاح HTTP. يمكن إرسال رسائل متعددة إلى قائمة الانتظار لأن السمة QueueOutput يتم تطبيقها على صفيف سلسلة.
خاصية Connection تحدد connection string الحساب storage. في هذه الحالة، يمكنك حذف Connection لأنك بالفعل تستخدم حساب storage الافتراضي.
في project جافا، تعرف الروابط بأنها تعليقات ربط على طريقة الدالة. يتم إنشاء ملف function.json تلقائيًا بناءً على هذه التعليقات التوضيحية.
تصفح إلى موقع رمز الدالة الخاص بك تحت src/main/java، وافتح ملف Function.java project، وأضف المعلمة التالية إلى تعريف طريقة run:
@QueueOutput(name = "msg", queueName = "outqueue", connection = "AzureWebJobsStorage") OutputBinding<String> msg
معامل msg هو نوع OutputBinding<T>، والذي يمثل مجموعة من السلاسل النصية. هذه السلاسل تكتب كرسائل إلى بيانات الإخراج عندما تكتمل الدالة. في هذه الحالة، يكون الناتج طابور storage يسمى outqueue. يتم تحديد connection string حساب Storage بطريقة connection. تمر بإعداد التطبيق الذي يحتوي على connection string حساب Storage، بدلا من تمرير connection string نفسه.
يجب أن يبدو تعريف الأسلوب run الآن مثل المثال التالي:
@FunctionName("HttpTrigger-Java")
public HttpResponseMessage run(
@HttpTrigger(name = "req", methods = {HttpMethod.GET, HttpMethod.POST}, authLevel = AuthorizationLevel.FUNCTION)
HttpRequestMessage<Optional<String>> request,
@QueueOutput(name = "msg", queueName = "outqueue", connection = "AzureWebJobsStorage")
OutputBinding<String> msg, final ExecutionContext context) {
...
}
لمزيد من المعلومات حول تفاصيل الربطات، انظر
إضافة التعليمات البرمجية لاستخدام ربط الإخراج
مع تحديد ربط قائمة الانتظار، يمكنك الآن تحديث وظيفتك لتلقي معلمة الإخراج msg وكتابة الرسائل إلى قائمة الانتظار.
قم بتحديث HttpExample\function_app.py لمطابقة التعليمات البرمجية التالية، وأضف المعلمة msg إلى تعريف الدالة وضمن msg.set(name) العبارة if name: :
import azure.functions as func
import logging
app = func.FunctionApp(http_auth_level=func.AuthLevel.ANONYMOUS)
@app.route(route="HttpExample")
@app.queue_output(arg_name="msg", queue_name="outqueue", connection="AzureWebJobsStorage")
def HttpExample(req: func.HttpRequest, msg: func.Out [func.QueueMessage]) -> func.HttpResponse:
logging.info('Python HTTP trigger function processed a request.')
name = req.params.get('name')
if not name:
try:
req_body = req.get_json()
except ValueError:
pass
else:
name = req_body.get('name')
if name:
msg.set(name)
return func.HttpResponse(f"Hello, {name}. This HTTP triggered function executed successfully.")
else:
return func.HttpResponse(
"This HTTP triggered function executed successfully. Pass a name in the query string or in the request body for a personalized response.",
status_code=200
)
معامل msg هو مثال على azure.functions.Out class. يكتب الأسلوب set رسالة سلسلة إلى قائمة الانتظار. في هذه الحالة، يتم name تمريرها إلى الدالة في سلسلة استعلام URL.
أضف التعليمات البرمجية التي تستخدم كائن ربط الإخراج لإنشاء context.extraOutputs رسالة قائمة انتظار. أضف هذه التعليمة البرمجية قبل عبارة الإرجاع.
context.extraOutputs.set(sendToQueue, [msg]);
عند هذه النقطة، يمكن أن تبدو الدالة كما يلي:
const { app, output } = require('@azure/functions');
const sendToQueue = output.storageQueue({
queueName: 'outqueue',
connection: 'AzureWebJobsStorage',
});
app.http('HttpExample', {
methods: ['GET', 'POST'],
authLevel: 'anonymous',
extraOutputs: [sendToQueue],
handler: async (request, context) => {
try {
context.log(`Http function processed request for url "${request.url}"`);
const name = request.query.get('name') || (await request.text());
context.log(`Name: ${name}`);
if (name) {
const msg = `Name passed to the function ${name}`;
context.extraOutputs.set(sendToQueue, [msg]);
return { body: msg };
} else {
context.log('Missing required data');
return { status: 404, body: 'Missing required data' };
}
} catch (error) {
context.log(`Error: ${error}`);
return { status: 500, body: 'Internal Server Error' };
}
},
});
أضف التعليمات البرمجية التي تستخدم كائن ربط الإخراج لإنشاء context.extraOutputs رسالة قائمة انتظار. أضف هذه التعليمة البرمجية قبل عبارة الإرجاع.
context.extraOutputs.set(sendToQueue, [msg]);
عند هذه النقطة، يمكن أن تبدو الدالة كما يلي:
import {
app,
output,
HttpRequest,
HttpResponseInit,
InvocationContext,
StorageQueueOutput,
} from '@azure/functions';
const sendToQueue: StorageQueueOutput = output.storageQueue({
  queueName: 'outqueue',
  connection: 'AzureWebJobsStorage',
});
export async function HttpExample(
request: HttpRequest,
context: InvocationContext,
): Promise<HttpResponseInit> {
try {
context.log(`Http function processed request for url "${request.url}"`);
const name = request.query.get('name') || (await request.text());
context.log(`Name: ${name}`);
if (name) {
const msg = `Name passed to the function ${name}`;
context.extraOutputs.set(sendToQueue, [msg]);
return { body: msg };
} else {
context.log('Missing required data');
return { status: 404, body: 'Missing required data' };
}
} catch (error) {
context.log(`Error: ${error}`);
return { status: 500, body: 'Internal Server Error' };
}
}
app.http('HttpExample', {
methods: ['GET', 'POST'],
authLevel: 'anonymous',
handler: HttpExample,
});
إضافة التعليمات البرمجية التي تستخدم Push-OutputBinding cmdlet لكتابة نص إلى قائمة الانتظار باستخدام ربط الإخراج msg. إضافة هذه التعليمات البرمجية قبل تعيين حالة «موافق» في عبارة if.
$outputMsg = $name
Push-OutputBinding -name msg -Value $outputMsg
عند هذه النقطة، يجب أن تبدو دالتك كما يلي:
using namespace System.Net

# Input bindings are passed in via param block.
param($Request, $TriggerMetadata)

# Write to the Azure Functions log stream.
Write-Host "PowerShell HTTP trigger function processed a request."

# Interact with query parameters or the body of the request.
$name = $Request.Query.Name
if (-not $name) {
    $name = $Request.Body.Name
}

if ($name) {
    # Write the $name value to the queue,
    # which is the name passed to the function.
    $outputMsg = $name
    Push-OutputBinding -name msg -Value $outputMsg

    $status = [HttpStatusCode]::OK
    $body = "Hello $name"
}
else {
    $status = [HttpStatusCode]::BadRequest
    $body = "Please pass a name on the query string or in the request body."
}

# Associate values to output bindings by calling 'Push-OutputBinding'.
Push-OutputBinding -Name Response -Value ([HttpResponseContext]@{
    StatusCode = $status
    Body = $body
})
استبدل الطريقة الحالية Run بالرمز التالي:
[Function("HttpExample")]
public MultiResponse Run([HttpTrigger(AuthorizationLevel.Function, "get", "post")] HttpRequest req)
{
    _logger.LogInformation("C# HTTP trigger function processed a request.");

    var message = "Welcome to Azure Functions!";

    // Return a response to both HTTP trigger and storage output binding.
    return new MultiResponse()
    {
        // Write a single message.
        Messages = new string[] { message },
        HttpResponse = new OkObjectResult(message)
    };
}
الآن، يمكنك استخدام المعلمة الجديدة msg للكتابة إلى ربط الإخراج من التعليمات البرمجية للدالة. أضف السطر التالي من التعليمات البرمجية قبل استجابة النجاح لإضافة قيمة name إلى msg ربط الإخراج.
msg.setValue(name);
عندما تستخدم ربط الإخراج، لا تحتاج لاستخدام كود Azure Storage SDK للمصادقة، أو الحصول على مرجع للطابور، أو كتابة البيانات. يعمل وقت تشغيل الدوال، وربط إخراج قائمة الانتظار على أداء تلك المهام من أجلك.
يجب أن يبدو أسلوب run لديك الآن كالمثال التالي:
public HttpResponseMessage run(
        @HttpTrigger(name = "req", methods = {HttpMethod.GET, HttpMethod.POST}, authLevel = AuthorizationLevel.ANONYMOUS)
        HttpRequestMessage<Optional<String>> request,
        @QueueOutput(name = "msg", queueName = "outqueue",
        connection = "AzureWebJobsStorage") OutputBinding<String> msg,
        final ExecutionContext context) {
    context.getLogger().info("Java HTTP trigger processed a request.");

    // Parse query parameter
    String query = request.getQueryParameters().get("name");
    String name = request.getBody().orElse(query);

    if (name == null) {
        return request.createResponseBuilder(HttpStatus.BAD_REQUEST)
        .body("Please pass a name on the query string or in the request body").build();
    } else {
        // Write the name to the message queue.
        msg.setValue(name);

        return request.createResponseBuilder(HttpStatus.OK).body("Hello, " + name).build();
    }
}
تحديث الاختبارات
لأن النموذج الأصلي أيضًا ينشئ مجموعة من الاختبارات، فأنت تحتاج إلى تحديث هذه الاختبارات لمعالجة msg المعلمة run الجديدة في توقيع الأسلوب.
تصفح إلى موقع كود الاختبار الخاص بك تحت src/test/java، وافتح ملف Function.java project، واستبدل السطر من الكود تحت //Invoke بالرمز التالي:
@SuppressWarnings("unchecked")
final OutputBinding<String> msg = (OutputBinding<String>)mock(OutputBinding.class);
final HttpResponseMessage ret = new Function().run(req, msg, context);
لاحظ أنك لست بحاجة لكتابة أي كود للمصادقة، أو الحصول على مرجع في قائمة الانتظار، أو كتابة البيانات. يتم التعامل مع جميع مهام التكامل هذه بسهولة في وقت تشغيل Azure Functions وربط مخرجات الطابور.
تشغيل الدالة محليًا
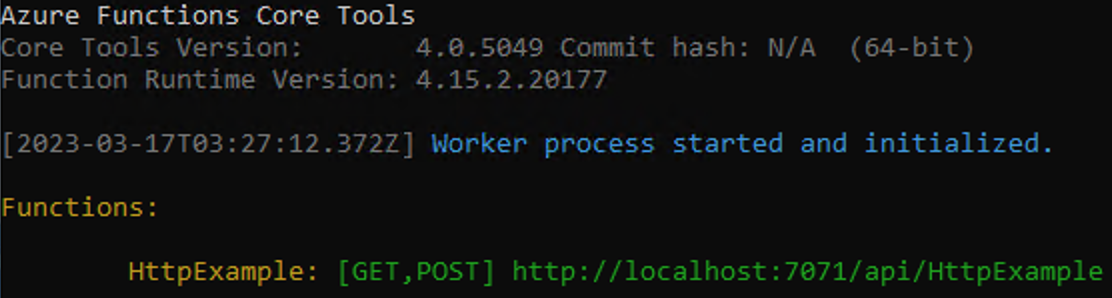
شغل وظيفتك عن طريق تشغيل مضيف وقت التشغيل المحلي Azure Functions من مجلد LocalFunctionProj.
func startقرب نهاية الإخراج، يجب أن تظهر الأسطر التالية:
Note
إذا لم يظهر HttpExample كما هو موضح أعلاه، فمن المحتمل أنك بدأت المضيف من خارج المجلد الجذري في project. في هذه الحالة، استخدم Ctrl+C لإيقاف المضيف، ثم انتقل إلى مجلد الجذر في project، وشغل الأمر السابق مرة أخرى.
انسخ عنوان URL لدالة HTTP من هذا الإخراج إلى مستعرض وألحق سلسلة
?name=<YOUR_NAME>الاستعلام ، مما يجعل عنوان URL الكامل مثلhttp://localhost:7071/api/HttpExample?name=Functions. يجب أن يعرض المستعرض رسالة استجابة التي تعكس قيمة سلسلة الاستعلام. الطرفية التي بدأت فيها project تظهر أيضا مخرجات السجل أثناء تقديم الطلبات.عند الانتهاء، اضغط على Ctrl + C واكتب
yلإيقاف مضيف الوظائف.
View the message in the Azure Storage queue
يمكنك عرض قائمة الانتظار في Azure portal أو في Microsoft Azure Storage Explorer. يمكنك أيضا عرض قائمة الانتظار في Azure CLI، كما هو موضح في الخطوات التالية:
افتح ملف الدالة project local.setting.json وانسخ قيمة connection string. في نافذة طرفية أو أوامر، شغل الأمر التالي لإنشاء متغير بيئي باسم
AZURE_STORAGE_CONNECTION_STRING، والصق connection string الخاص بك بدلا من<MY_CONNECTION_STRING>. (هذا المتغير البيئي يعني أنك لست بحاجة لتوفير connection string لكل أمر لاحق باستخدام وسيط--connection-string.)export AZURE_STORAGE_CONNECTION_STRING="<MY_CONNECTION_STRING>"(اختياري) استخدم أمر
az storage queue listلعرض طوابير Storage في حسابك. يجب أن يتضمن الإخراج من هذا الأمر قائمة انتظار تُسمى outqueue، والتي تم إنشاؤها عند كتابة الدالة لرسالتها الأولى إلى قائمة الانتظار تلك.az storage queue list --output tsvاستخدم أمر
az storage message getلقراءة الرسالة من هذا الطابور، والتي يجب أن تكون القيمة التي قدمتها عند اختبار الدالة سابقا. يقرأ الأمر الرسالة الأولى ثم يزيلها من قائمة الانتظار.echo `echo $(az storage message get --queue-name outqueue -o tsv --query '[].{Message:content}') | base64 --decode`نظرا لأن جسم الرسالة مخزن base64 مشفر، يجب فك تشفير الرسالة قبل عرضها. بعد تنفيذ
az storage message get، تزال الرسالة من الطابور. إذا كانت هناك رسالة واحدة فقط فيoutqueue، فلن تسترد رسالة عند تشغيل هذا الأمر مرة ثانية وبدلا من ذلك تحصل على خطأ.
إعادة نشر project إلى Azure
بعد أن تتحقق محليا من أن الدالة كتبت رسالة إلى قائمة انتظار Azure Storage، يمكنك إعادة نشر project لتحديث نقطة النهاية التي تعمل على Azure.
في مجلد LocalFunctionsProj، استخدم أمر func azure functionapp publish لإعادة نشر project، واستبدل<APP_NAME> باسم تطبيقك.
func azure functionapp publish <APP_NAME>
في مجلد project المحلي، استخدم أمر Maven التالي لإعادة نشر project:
mvn azure-functions:deploy
Verify in Azure
كما في Quickstart السابقة، استخدم متصفحًا أو CURL لاختبار الدالة المعاد نشرها.
افحص قائمة انتظار Storage مرة أخرى، كما هو موضح في القسم السابق، للتحقق من أنها تحتوي على الرسالة الجديدة المكتوبة على الطابور.
تنظيف الموارد
بعد الانتهاء، استخدم الأمر التالي لحذف مجموعة الموارد وجميع مواردها المضمنة لتجنب تكبد المزيد من التكاليف.
az group delete --name AzureFunctionsQuickstart-rg
الخطوات التالية
لقد قمت بتحديث وظيفة HTTP الخاصة بك لكتابة البيانات إلى قائمة انتظار Storage. الآن يمكنك معرفة المزيد عن تطوير الدوال من سطر الأوامر باستخدام Core Tools وAzure CLI: