إشعار
يتطلب الوصول إلى هذه الصفحة تخويلاً. يمكنك محاولة تسجيل الدخول أو تغيير الدلائل.
يتطلب الوصول إلى هذه الصفحة تخويلاً. يمكنك محاولة تغيير الدلائل.
يرشدك هذا البرنامج التعليمي خلال كيفية نشر البيانات إلى عملاء Socket.IO في وضع بلا خادم في Python عن طريق إنشاء تطبيق فهرس NASDAQ في الوقت الفعلي مدمج مع Azure Function.
ابحث عن نماذج التعليمات البرمجية الكاملة المستخدمة في هذا البرنامج التعليمي:
مهم
يحتاج الوضع الافتراضي إلى خادم ثابت، ولا يمكنك دمج Web PubSub ل Socket.IO في الوضع الافتراضي مع Azure Function.
Prerequisites
- حساب Azure مع اشتراك نشط. إذا لم يكن لديك حساب، يمكنك إنشاء حساب مجاني.
- الأداة الأساسية ل Azure Function
- بعض الإلمام بمكتبة Socket.IO.
إنشاء Web PubSub لمورد Socket.IO في وضع بلا خادم
لإنشاء Web PubSub ل Socket.IO، يمكنك استخدام أمر Azure CLI التالي:
az webpubsub create -g <resource-group> -n <resource-name>---kind socketio --service-mode serverless --sku Premium_P1
إنشاء مشروع Azure Function محليا
يجب عليك اتباع الخطوات لبدء مشروع Azure Function محلي.
اتبع الخطوة لتثبيت أحدث أداة أساسية ل Azure Function
في نافذة المحطة الطرفية أو من موجه الأوامر، قم بتشغيل الأمر التالي لإنشاء مشروع في
SocketIOProjectالمجلد:func init SocketIOProject --worker-runtime pythonيقوم هذا الأمر بإنشاء مشروع دالة يستند إلى Python. وأدخل المجلد
SocketIOProjectلتشغيل الأوامر التالية.حاليا، لا تتضمن حزمة الوظائف Socket.IO ربط الوظيفة، لذلك تحتاج إلى إضافة الحزمة يدويا.
لإزالة مرجع حزمة الوظائف ، قم بتحرير ملف host.json وإزالة الأسطر التالية.
"extensionBundle": {
    "id": "Microsoft.Azure.Functions.ExtensionBundle",
    "version": "[4.*, 5.0.0)"
}
شغَّل الأمر :
func extensions install -p Microsoft.Azure.WebJobs.Extensions.WebPubSubForSocketIO -v 1.0.0-beta.4
استبدل المحتوى بالرموز
function_app.py:import random import azure.functions as func from azure.functions.decorators.core import DataType from azure.functions import Context import json app = func.FunctionApp() current_index= 14000 @app.timer_trigger(schedule="* * * * * *", arg_name="myTimer", run_on_startup=False, use_monitor=False) @app.generic_output_binding("sio", type="socketio", data_type=DataType.STRING, hub="hub") def publish_data(myTimer: func.TimerRequest, sio: func.Out[str]) -> None: change = round(random.uniform(-10, 10), 2) global current_index current_index = current_index + change sio.set(json.dumps({ 'actionName': 'sendToNamespace', 'namespace': '/', 'eventName': 'update', 'parameters': [ current_index ] })) @app.function_name(name="negotiate") @app.route(auth_level=func.AuthLevel.ANONYMOUS) @app.generic_input_binding("negotiationResult", type="socketionegotiation", hub="hub") def negotiate(req: func.HttpRequest, negotiationResult) -> func.HttpResponse: return func.HttpResponse(negotiationResult) @app.function_name(name="index") @app.route(auth_level=func.AuthLevel.ANONYMOUS) def index(req: func.HttpRequest) -> func.HttpResponse: path = './index.html' with open(path, 'rb') as f: return func.HttpResponse(f.read(), mimetype='text/html')فيما يلي شرح لهذه الوظائف:
publish_dataتقوم هذه الوظيفة بتحديث فهرس NASDAQ كل ثانية بتغيير عشوائي وبثه إلى العملاء المتصلين باستخدام ربط الإخراج Socket.IO.:negotiateتستجيب هذه الوظيفة نتيجة تفاوض للعميل.:indexترجع هذه الدالة صفحة HTML ثابتة.:
ثم أضف ملفا
index.htmlقم بإنشاء ملف index.html يحتوي على المحتوى:
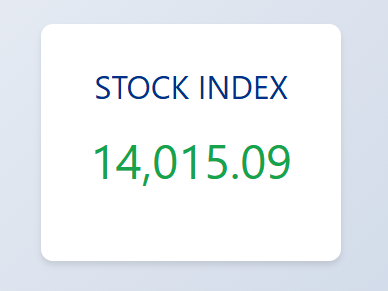
<!DOCTYPE html>
<html lang="en">
<head>
    <meta charset="UTF-8">
    <meta name="viewport" content="width=device-width, initial-scale=1.0">
    <title>Nasdaq Index</title>
    <style>
        /* Reset some default styles */
        * {
            margin: 0;
            padding: 0;
            box-sizing: border-box;
        }

        body {
            font-family: 'Segoe UI', Tahoma, Geneva, Verdana, sans-serif;
            background: linear-gradient(135deg, #f5f7fa, #c3cfe2);
            height: 100vh;
            display: flex;
            justify-content: center;
            align-items: center;
        }

        .container {
            background-color: white;
            padding: 40px;
            border-radius: 12px;
            box-shadow: 0 4px 6px rgba(0,0,0,0.1);
            text-align: center;
            max-width: 300px;
            width: 100%;
        }

        .nasdaq-title {
            font-size: 2em;
            color: #003087;
            margin-bottom: 20px;
        }

        .index-value {
            font-size: 3em;
            color: #16a34a;
            margin-bottom: 30px;
            transition: color 0.3s ease;
        }

        .update-button {
            padding: 10px 20px;
            font-size: 1em;
            color: white;
            background-color: #003087;
            border: none;
            border-radius: 6px;
            cursor: pointer;
            transition: background-color 0.3s ease;
        }

        .update-button:hover {
            background-color: #002070;
        }
    </style>
</head>
<body>
    <div class="container">
        <div class="nasdaq-title">STOCK INDEX</div>
        <div id="nasdaqIndex" class="index-value">14,000.00</div>
    </div>

    <script src="https://cdn.socket.io/4.7.5/socket.io.min.js"></script>
    <script>
        function updateIndexCore(newIndex) {
            newIndex = parseFloat(newIndex);
            currentIndex = parseFloat(document.getElementById('nasdaqIndex').innerText.replace(/,/g, ''))
            change = newIndex - currentIndex;
            // Update the index value in the DOM
            document.getElementById('nasdaqIndex').innerText = newIndex.toLocaleString('en-US', {minimumFractionDigits: 2, maximumFractionDigits: 2});

            // Optionally, change the color based on increase or decrease
            const indexElement = document.getElementById('nasdaqIndex');
            if (change > 0) {
                indexElement.style.color = '#16a34a'; // Green for increase
            } else if (change < 0) {
                indexElement.style.color = '#dc2626'; // Red for decrease
            } else {
                indexElement.style.color = '#16a34a'; // Neutral color
            }
        }

        async function init() {
            const negotiateResponse = await fetch(`/api/negotiate`);
            if (!negotiateResponse.ok) {
                console.log("Failed to negotiate, status code =", negotiateResponse.status);
                return;
            }
            const negotiateJson = await negotiateResponse.json();
            socket = io(negotiateJson.endpoint, {
                path: negotiateJson.path,
                query: { access_token: negotiateJson.token}
            });

            socket.on('update', (index) => {
                updateIndexCore(index);
            });
        }

        init();
    </script>
</body>
</html>
الجزء الرئيسي في
index.html:async function init() { const negotiateResponse = await fetch(`/api/negotiate`); if (!negotiateResponse.ok) { console.log("Failed to negotiate, status code =", negotiateResponse.status); return; } const negotiateJson = await negotiateResponse.json(); socket = io(negotiateJson.endpoint, { path: negotiateJson.path, query: { access_token: negotiateJson.token} }); socket.on('update', (index) => { updateIndexCore(index); }); }يتفاوض أولا مع تطبيق الوظائف للحصول على Uri والمسار إلى الخدمة. وتسجيل معاودة الاتصال لتحديث الفهرس.
كيفية تشغيل التطبيق محليا
بعد إعداد التعليمات البرمجية، اتبع الإرشادات لتشغيل العينة.
إعداد Azure Storage ل Azure Function
تتطلب Azure Functions حساب تخزين للعمل حتى أثناء التشغيل محليا. اختر أيا من الخيارين التاليين:
- قم بتشغيل محاكي Azurite المجاني.
- استخدم خدمة Azure Storage. قد يؤدي ذلك إلى تكبد تكاليف إذا واصلت استخدامه.
قم بتثبيت Azurite
npm install -g azuriteابدأ تشغيل محاكي تخزين Azurite:
azurite -l azurite -d azurite\debug.logتأكد من
AzureWebJobsStorageضبط local.settings.json علىUseDevelopmentStorage=true.
إعداد تكوين Web PubSub ل Socket.IO
إضافة سلسلة اتصال إلى تطبيق الوظيفة:
func settings add WebPubSubForSocketIOConnectionString "<connection string>"
تشغيل نموذج التطبيق
بعد تشغيل أداة النفق، يمكنك تشغيل تطبيق الوظائف محليا:
func start
وقم بزيارة صفحة الويب على http://localhost:7071/api/index.
الخطوات التالية
بعد ذلك ، يمكنك محاولة استخدام Bicep لنشر التطبيق عبر الإنترنت باستخدام المصادقة المستندة إلى الهوية: