إشعار
يتطلب الوصول إلى هذه الصفحة تخويلاً. يمكنك محاولة تسجيل الدخول أو تغيير الدلائل.
يتطلب الوصول إلى هذه الصفحة تخويلاً. يمكنك محاولة تغيير الدلائل.
ملاحظة
يشير هذا المستند إلى مدخل Microsoft Foundry (الكلاسيكي).
الوكلاء (الكلاسيكيون) الآن مهجورون وسيتم تقاعدهم في 31 مارس 2027. استخدم الوكلاء الجدد في خدمة Microsoft Foundry Agents المتوفرة عموما. اتبع دليل الترحيل لتحديث أعباء عملك.
ملاحظة
هذا البدء السريع مخصص للإصدار السابق من الوكلاء. راجع البدء السريع لمايكروسوفت فاوندري لاستخدام النسخة الجديدة من واجهة برمجة التطبيقات.
تتيح لك خدمة وكلاء المسبك إنشاء وكلاء الذكاء الاصطناعي المصممين على احتياجاتك من خلال تعليمات مخصصة ومدعومة بأدوات متقدمة مثل مفسر الكود والوظائف المخصصة.
المتطلبات المسبقه
- اشتراك Azure - إنشاء واحد مجانا.
- تأكد من أن الشخص الذي ينشئ الحساب والمشروع لديه دور Azure مالك حساب الذكاء الاصطناعي في نطاق الاشتراك، والذي سيمنح الأذونات اللازمة لإنشاء المشروع
- بدلا من ذلك، وجود دور المساهم أو المالك على مستوى الاشتراك سيسمح بإنشاء المشروع
- بمجرد إنشاء المشروع، تأكد من أن الشخص الذي ينشئ الوكيل داخل المشروع لديه دور Azure الذكاء الاصطناعي للمستخدم على مستوى المشروع
مهم
بوابة مايكروسوفت فاوندري تدعم فقط إعداد الوكلاء الأساسي في الوقت الحالي. إذا كنت ترغب في إجراء إعداد عامل قياسي، فراجع مقالة إعداد البيئة لمعرفة المزيد.
أنشئ حساب ومشروع في Foundry في بوابة Foundry
لإنشاء حساب ومشروع في Foundry، اتبع الخطوات التالية:
اذهب إلى فاوندري. إذا كنت في مشروع، اختر Foundry في أعلى يسار الصفحة للذهاب إلى الصفحة الرئيسية.
استخدم تدفق إنشاء بدء تشغيل العامل للحصول على أسرع تجربة. انقر فوق إنشاء عامل.
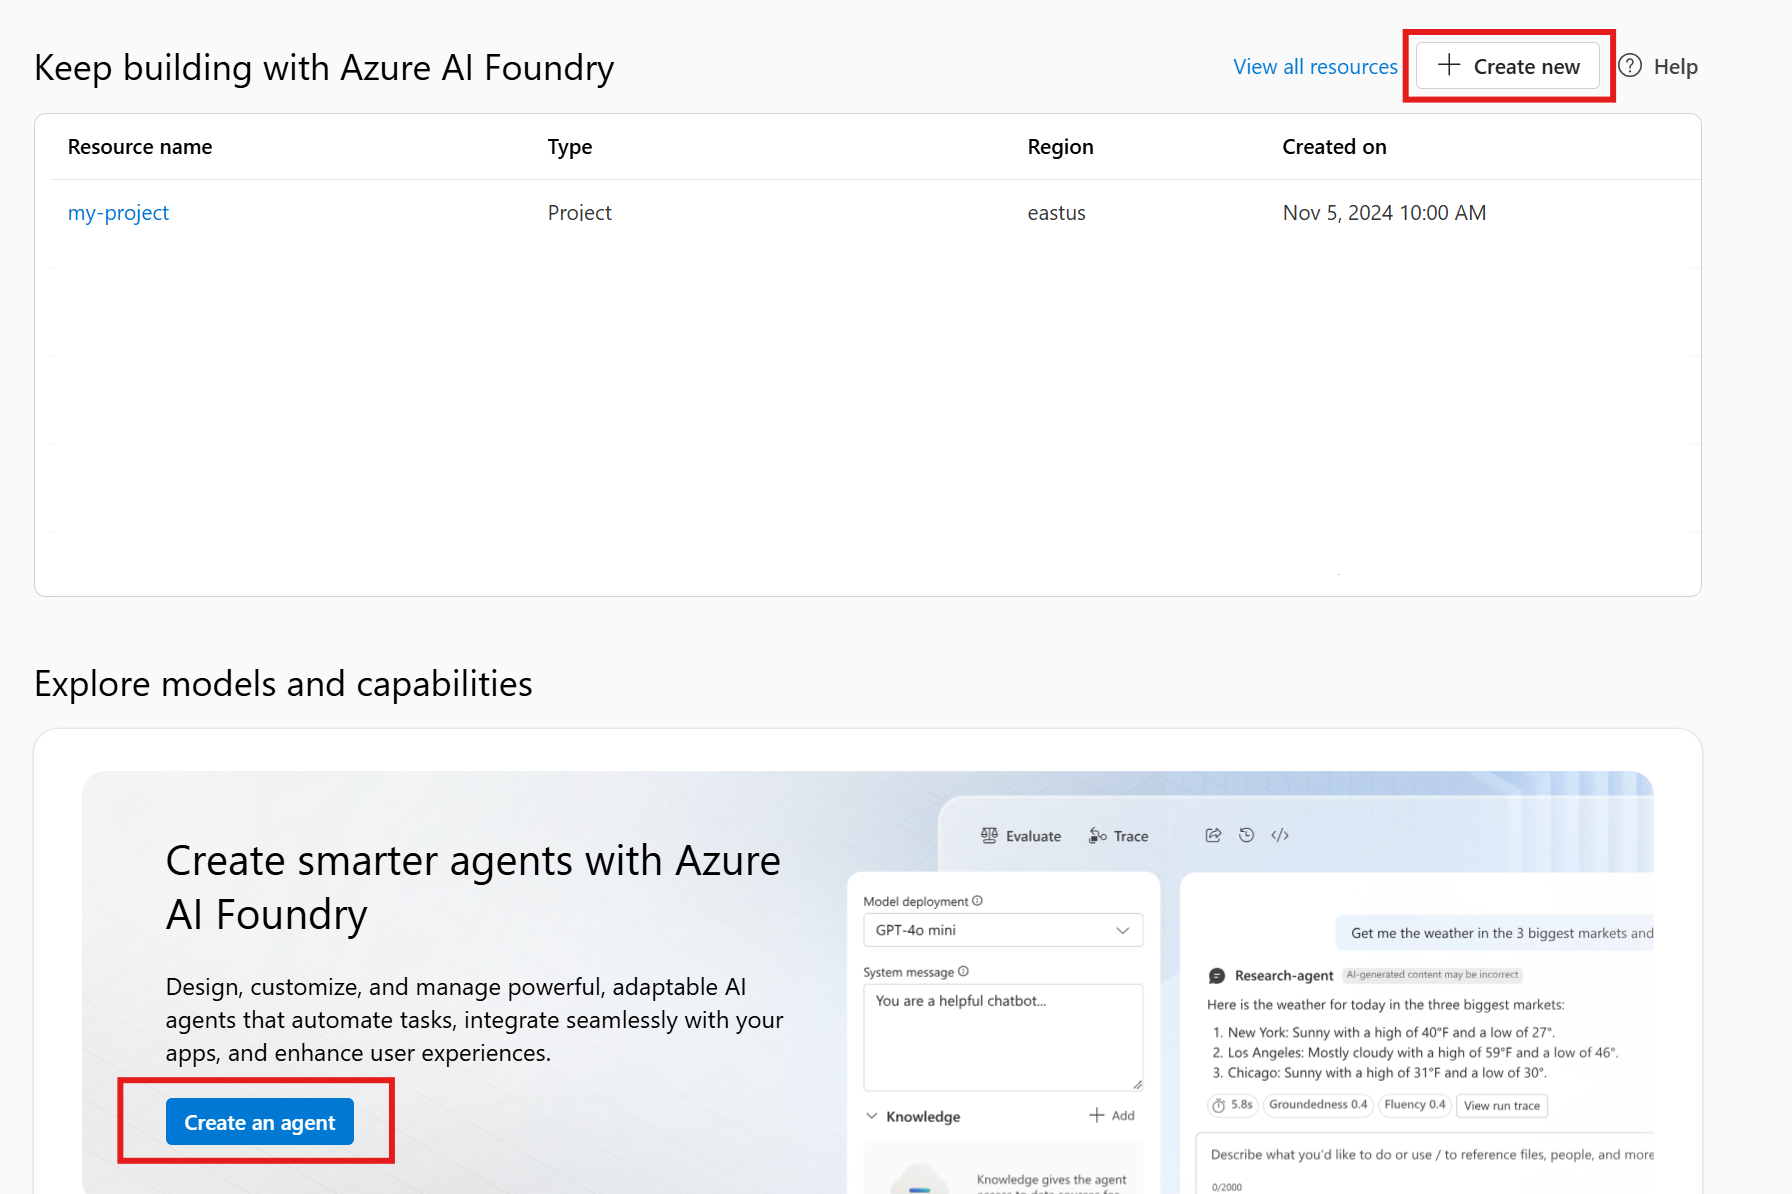
أدخل اسمًا للمشروع. إذا كنت ترغب في تخصيص القيم الافتراضية، فحدد خيارات متقدمة.

حدد إنشاء.
انتظر حتى يتم توفير الموارد الخاصة بك.
- سيتم إنشاء حساب ومشروع (مورد تابع لحسابك).
- سيتم نشر نموذج gpt-4o تلقائيا
- سيتم إنشاء عامل افتراضي
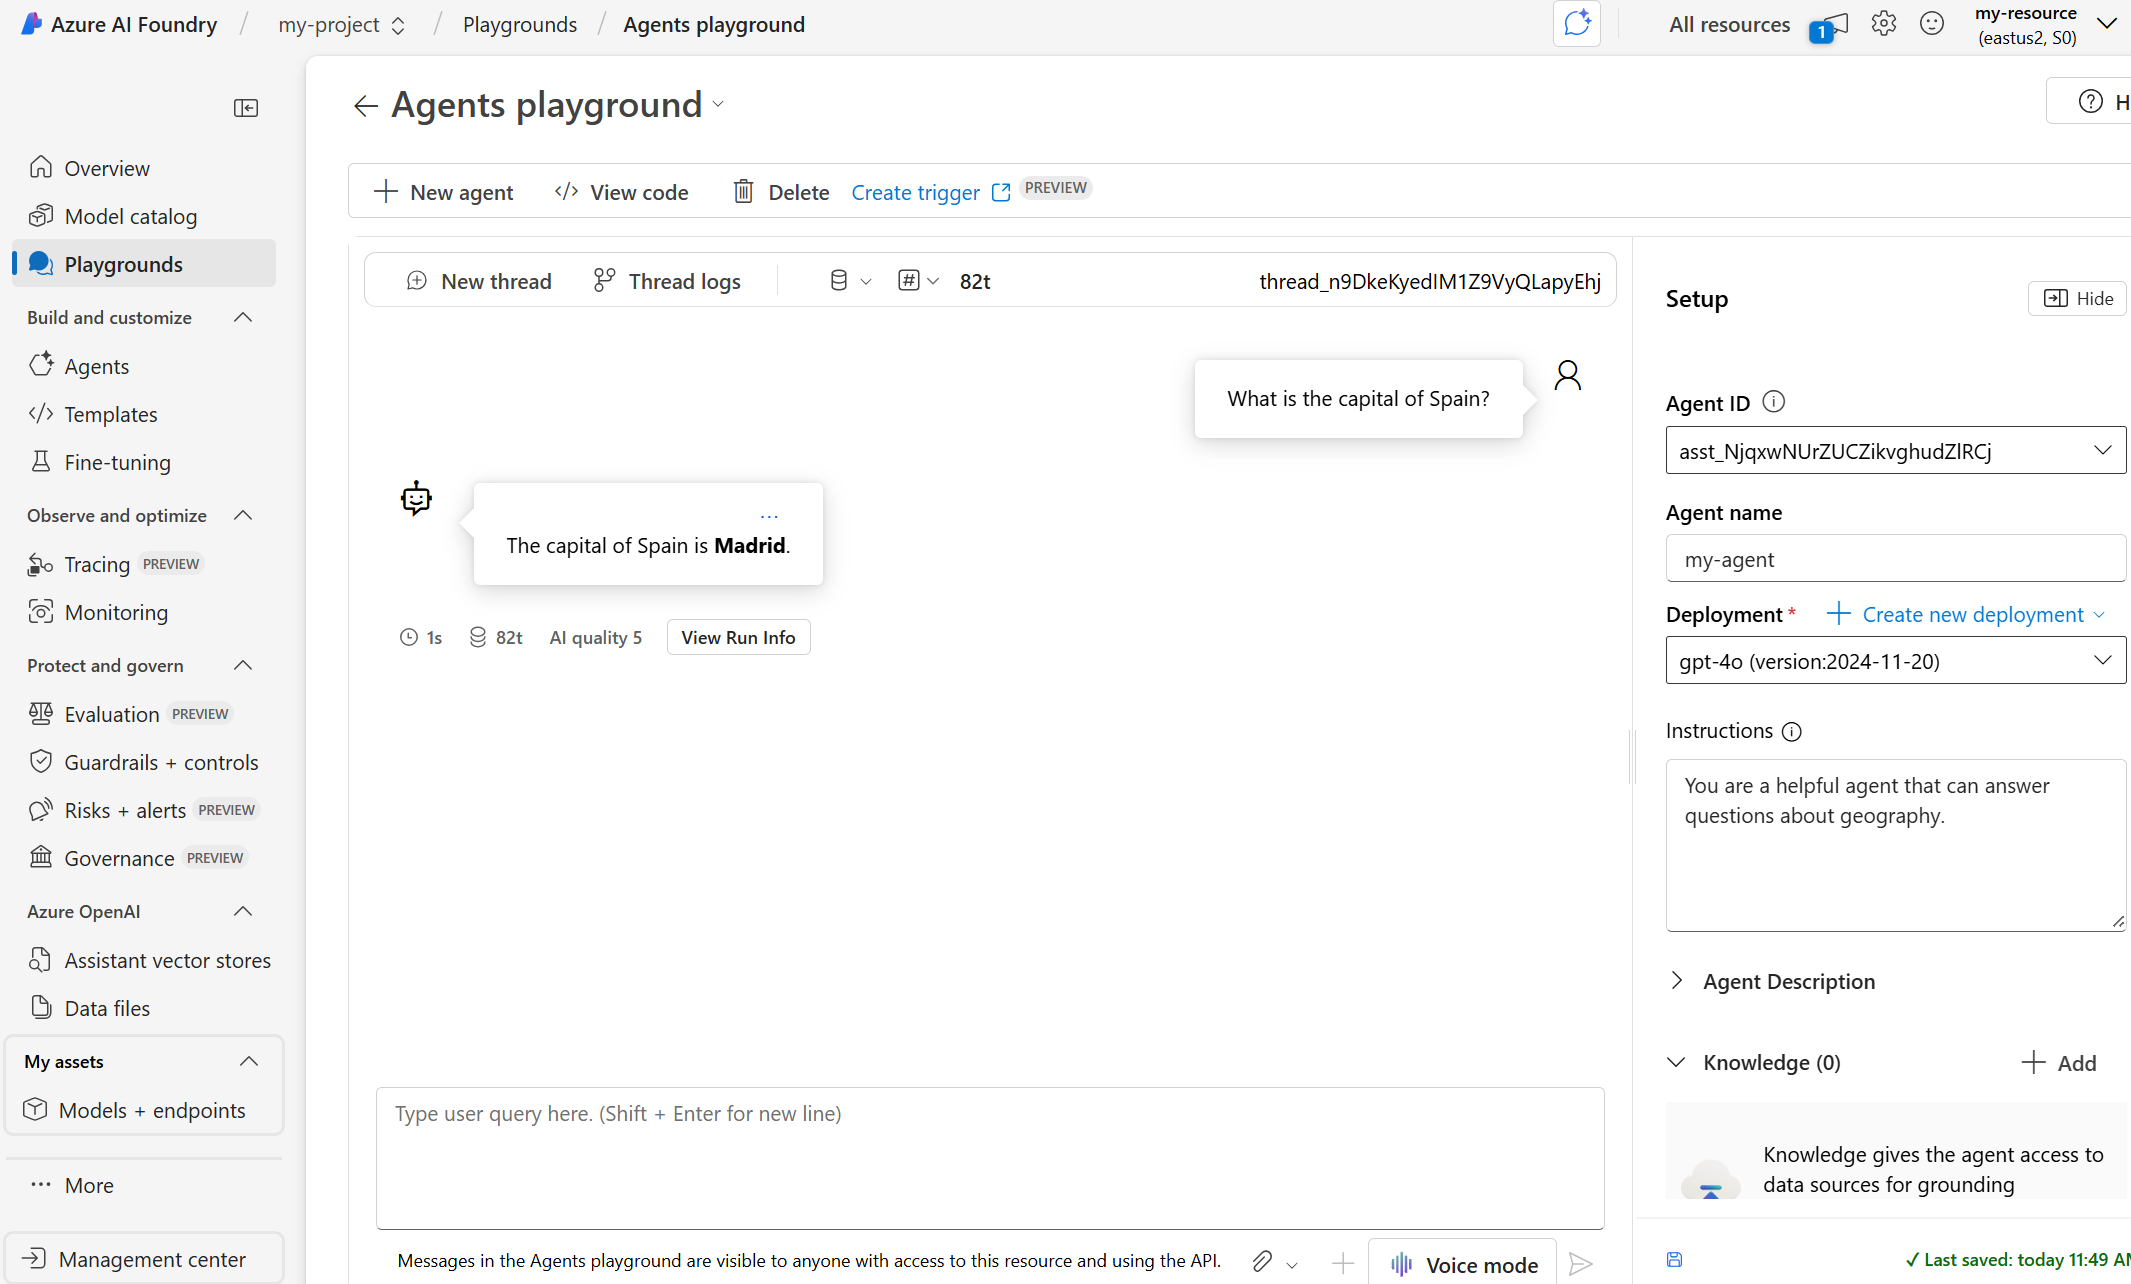
بمجرد الانتهاء، ستهبط مباشرة في ملعب العامل ويمكنك البدء في إنشاء وكلاء. يمكنك إعطاء وكيلك إرشادات حول ما يجب القيام به وكيفية القيام بذلك. على سبيل المثال: "أنت وكيل مفيد يمكنه الإجابة عن أسئلة حول الجغرافيا". ثم يمكنك البدء في الدردشة مع وكيلك.
ملاحظة
إذا كنت تحصل على خطأ في الإذن عند محاولة تكوين أو إنشاء وكلاء، تأكد من وجود Azure AI User على المشروع.


| وثائق المرجع | Samples | مصدر المكتبة | Package (NuGet) |
المتطلبات المسبقه
- بيئة عامل إعداد
- تعيين دور Azure AI UserRBAC لكل عضو في الفريق يحتاج إلى إنشاء أو تعديل الوكلاء باستخدام SDK أو ملعب الوكلاء
- يجب تعيين هذا الدور في نطاق المشروع
- الحد الأدنى من الأذونات المطلوبة: الوكلاء /*/القراءة ، الوكلاء /*/الإجراء ، الوكلاء /*/حذف
تكوين عامل وتشغيله
أنشئ مشروع وحدة تحكم .NET.
dotnet new console
قم بتثبيت حزمة .NET على مشروعك. على سبيل المثال، إذا كنت تستخدم واجهة تحكم .NET، شغل الأمر التالي.
dotnet add package Azure.AI.Agents.Persistent
dotnet add package Azure.Identity
بعد ذلك، لتوثيق طلبات واجهة برمجة التطبيقات وتشغيل البرنامج، استخدم أمر az login لتسجيل الدخول إلى اشتراك Azure الخاص بك.
az login
استخدم التعليمات البرمجية التالية لإنشاء عامل وتشغيله. لتشغيل هذه التعليمات البرمجية، ستحتاج إلى الحصول على نقطة النهاية لمشروعك. هذه السلسلة بالتنسيق:
https://<AIFoundryResourceName>.services.ai.azure.com/api/projects/<ProjectName>
مهم
بدءا من مايو 2025، تستخدم خدمة وكلاء الذكاء الاصطناعي Azure نقطة نهاية لمشاريع Foundry بدلا من connection string التي كانت تستخدم سابقا للمشاريع المعتمدة على المركز. إذا كنت تستخدم مشروعا قائما على المركز، فلن تتمكن من استخدام الإصدارات الحالية من SDK وواجهة برمجة تطبيقات REST. لمزيد من المعلومات، راجع استخدام SDK مع المشاريع المستندة إلى المركز.
يمكنك العثور على نقطة النهاية في نظرة عامة لمشروعك في بوابة مايكروسوفت فاوندري، تحت قسم مكتبات>المكتبات.

قم بتعيين نقطة النهاية هذه في متغير بيئة يسمى ProjectEndpoint.
تحتاج أيضا إلى اسم توزيع النموذج الخاص بك. يمكنك العثور عليه في Models + Endpoints في قائمة التنقل اليسرى.

احفظ اسم اسم نشر النموذج كمتغير بيئة يسمى ModelDeploymentName.
using Azure;
using Azure.AI.Agents.Persistent;
using Azure.Identity;
using System.Diagnostics;

var projectEndpoint = System.Environment.GetEnvironmentVariable("ProjectEndpoint");
var modelDeploymentName = System.Environment.GetEnvironmentVariable("ModelDeploymentName");


//Create a PersistentAgentsClient and PersistentAgent.
PersistentAgentsClient client = new(projectEndpoint, new DefaultAzureCredential());

//Give PersistentAgent a tool to execute code using CodeInterpreterToolDefinition.
PersistentAgent agent = client.Administration.CreateAgent(
    model: modelDeploymentName,
    name: "My Test Agent",
    instructions: "You politely help with math questions. Use the code interpreter tool when asked to visualize numbers.",
    tools: [new CodeInterpreterToolDefinition()]
);

//Create a thread to establish a session between Agent and a User.
PersistentAgentThread thread = client.Threads.CreateThread();

//Ask a question of the Agent.
client.Messages.CreateMessage(
    thread.Id,
    MessageRole.User,
    "Hi, Agent! Draw a graph for a line with a slope of 4 and y-intercept of 9.");

//Have Agent begin processing user's question with some additional instructions associated with the ThreadRun.
ThreadRun run = client.Runs.CreateRun(
    thread.Id,
    agent.Id,
    additionalInstructions: "Please address the user as Jane Doe. The user has a premium account.");

//Poll for completion.
do
{
    Thread.Sleep(TimeSpan.FromMilliseconds(500));
    run = client.Runs.GetRun(thread.Id, run.Id);
}
while (run.Status == RunStatus.Queued
    || run.Status == RunStatus.InProgress
    || run.Status == RunStatus.RequiresAction);

//Get the messages in the PersistentAgentThread. Includes Agent (Assistant Role) and User (User Role) messages.
Pageable<PersistentThreadMessage> messages = client.Messages.GetMessages(
    threadId: thread.Id,
    order: ListSortOrder.Ascending);

//Display each message and open the image generated using CodeInterpreterToolDefinition.
foreach (PersistentThreadMessage threadMessage in messages)
{
    foreach (MessageContent content in threadMessage.ContentItems)
    {
        switch (content)
        {
            case MessageTextContent textItem:
                Console.WriteLine($"[{threadMessage.Role}]: {textItem.Text}");
                break;
            case MessageImageFileContent imageFileContent:
                Console.WriteLine($"[{threadMessage.Role}]: Image content file ID = {imageFileContent.FileId}");
                BinaryData imageContent = client.Files.GetFileContent(imageFileContent.FileId);
                string tempFilePath = Path.Combine(AppContext.BaseDirectory, $"{Guid.NewGuid()}.png");
                File.WriteAllBytes(tempFilePath, imageContent.ToArray());
                client.Files.DeleteFile(imageFileContent.FileId);

                ProcessStartInfo psi = new()
                {
                    FileName = tempFilePath,
                    UseShellExecute = true
                };
                Process.Start(psi);
                break;
        }
    }
}

//If you want to delete your agent, uncomment the following lines:
//client.Threads.DeleteThread(threadId: thread.Id);
//client.Administration.DeleteAgent(agentId: agent.Id);
| الوثائق | العينات | كود | الحزمة (PyPi) |
المتطلبات المسبقه
- بيئة عامل إعداد
- تعيين دور Azure AI UserRBAC لكل عضو في الفريق يحتاج إلى إنشاء أو تعديل الوكلاء باستخدام SDK أو ملعب الوكلاء
- يجب تعيين هذا الدور في نطاق المشروع
- الحد الأدنى من الأذونات المطلوبة: الوكلاء /*/القراءة ، الوكلاء /*/الإجراء ، الوكلاء /*/حذف
تكوين عامل وتشغيله
قم بتشغيل الأوامر التالية لتثبيت حزم python.
pip install azure-ai-projects
pip install azure-identity
بعد ذلك، لتوثيق طلبات واجهة برمجة التطبيقات وتشغيل البرنامج، استخدم أمر az login لتسجيل الدخول إلى اشتراك Azure الخاص بك.
az login
استخدم التعليمات البرمجية التالية لإنشاء عامل وتشغيله. لتشغيل هذه التعليمات البرمجية، ستحتاج إلى الحصول على نقطة النهاية لمشروعك. هذه السلسلة بالتنسيق:
https://<AIFoundryResourceName>.services.ai.azure.com/api/projects/<ProjectName>
مهم
بدءا من مايو 2025، تستخدم خدمة وكلاء الذكاء الاصطناعي Azure نقطة نهاية لمشاريع Foundry بدلا من connection string التي كانت تستخدم سابقا للمشاريع المعتمدة على المركز. إذا كنت تستخدم مشروعا قائما على المركز، فلن تتمكن من استخدام الإصدارات الحالية من SDK وواجهة برمجة تطبيقات REST. لمزيد من المعلومات، راجع استخدام SDK مع المشاريع المستندة إلى المركز.
يمكنك العثور على نقطة النهاية في نظرة عامة لمشروعك في بوابة مايكروسوفت فاوندري، تحت قسم مكتبات>المكتبات.
قم بتعيين نقطة النهاية هذه كمتغير بيئة يسمى PROJECT_ENDPOINT.
تحتاج أيضا إلى اسم توزيع النموذج الخاص بك. يمكنك العثور عليه في Models + Endpoints في قائمة التنقل اليسرى.
احفظ اسم اسم نشر النموذج كمتغير بيئة يسمى MODEL_DEPLOYMENT_NAME.
import os
from pathlib import Path
from azure.ai.projects import AIProjectClient
from azure.identity import DefaultAzureCredential
from azure.ai.agents.models import CodeInterpreterTool

# Create an AIProjectClient instance
project_client = AIProjectClient(
    endpoint=os.getenv("PROJECT_ENDPOINT"),
    credential=DefaultAzureCredential(),
    # Use Azure Default Credential for authentication
)

with project_client:

    code_interpreter = CodeInterpreterTool()

    agent = project_client.agents.create_agent(
        model=os.getenv("MODEL_DEPLOYMENT_NAME"),  # Model deployment name
        name="my-agent",  # Name of the agent
        instructions="""You politely help with math questions.
        Use the Code Interpreter tool when asked to visualize numbers.""",
        # Instructions for the agent
        tools=code_interpreter.definitions,  # Attach the tool
        tool_resources=code_interpreter.resources,  # Attach tool resources
    )
    print(f"Created agent, ID: {agent.id}")

    # Create a thread for communication
    thread = project_client.agents.threads.create()
    print(f"Created thread, ID: {thread.id}")

    question = """Draw a graph for a line with a slope of 4
    and y-intercept of 9 and provide the file to me?"""

    # Add a message to the thread
    message = project_client.agents.messages.create(
        thread_id=thread.id,
        role="user",  # Role of the message sender
        content=question,  # Message content
    )
    print(f"Created message, ID: {message['id']}")

    # Create and process an agent run
    run = project_client.agents.runs.create_and_process(
        thread_id=thread.id,
        agent_id=agent.id,
        additional_instructions="""Please address the user as Jane Doe.
        The user has a premium account.""",
    )

    print(f"Run finished with status: {run.status}")

    # Check if the run failed
    if run.status == "failed":
        print(f"Run failed: {run.last_error}")

    # Fetch and log all messages
    messages = project_client.agents.messages.list(thread_id=thread.id)
    print(f"Messages: {messages}")

    for message in messages:
        print(f"Role: {message.role}, Content: {message.content}")
        for this_content in message.content:
            print(f"Content Type: {this_content.type}, Content Data: {this_content}")
            if this_content.text.annotations:
                for annotation in this_content.text.annotations:
                    print(f"Annotation Type: {annotation.type}, Text: {annotation.text}")
                    print(f"Start Index: {annotation.start_index}")
                    print(f"End Index: {annotation.end_index}")
                    print(f"File ID: {annotation.file_path.file_id}")
                    # Save every image file in the message
                    file_id = annotation.file_path.file_id
                    file_name = f"{file_id}_image_file.png"
                    project_client.agents.files.save(file_id=file_id, file_name=file_name)
                    print(f"Saved image file to: {Path.cwd() / file_name}")
    #Uncomment these lines to delete the agent when done
    #project_client.agents.delete_agent(agent.id)
    #print("Deleted agent")
| وثائق المرجع | العينات | الرمز المصدري للمكتبة | Package (npm) |
المتطلبات المسبقه
- بيئة عامل إعداد
- تعيين دور Azure AI UserRBAC لكل عضو في الفريق يحتاج إلى إنشاء أو تعديل الوكلاء باستخدام SDK أو ملعب الوكلاء
- يجب تعيين هذا الدور في نطاق المشروع
- الحد الأدنى من الأذونات المطلوبة: الوكلاء /*/القراءة ، الوكلاء /*/الإجراء ، الوكلاء /*/حذف
تكوين عامل وتشغيله
تتضمن الكائنات الرئيسية في هذه التعليمة البرمجية ما يلي:
أولا، قم بتهيئة مشروع TypeScript جديد عن طريق تشغيل:
npm init -y
npm pkg set type="module"
قم بتشغيل الأوامر التالية لتثبيت حزم npm المطلوبة.
npm install @azure/ai-agents @azure/identity
npm install @types/node typescript --save-dev
بعد ذلك، لتوثيق طلبات واجهة برمجة التطبيقات وتشغيل البرنامج، استخدم أمر az login لتسجيل الدخول إلى اشتراك Azure الخاص بك.
az login
استخدم الكود التالي للإجابة على سؤال I need to solve the equation '3x + 11 = 14'. Can you help me?الرياضيات. لتشغيل هذه التعليمة البرمجية، ستحتاج إلى الحصول على نقطة النهاية لمشروعك. هذه السلسلة بالتنسيق:
https://<AIFoundryResourceName>.services.ai.azure.com/api/projects/<ProjectName>
يمكنك العثور على نقطة النهاية في نظرة عامة لمشروعك في بوابة مايكروسوفت فاوندري، تحت قسم مكتبات>المكتبات.
تعيين نقطة النهاية هذه كمتغير بيئة يسمى PROJECT_ENDPOINT في .env ملف.
تحتاج أيضا إلى اسم توزيع النموذج الخاص بك. يمكنك العثور عليه في Models + Endpoints في قائمة التنقل اليسرى.
احفظ اسم اسم نشر النموذج كمتغير بيئة يسمى MODEL_DEPLOYMENT_NAME.
مهم
- تستخدم التعليمات البرمجية للتشغيل السريع هذه متغيرات البيئة للتكوين الحساس. لا تقم أبدا بتثبيت الملف بالتحكم
.envبالإصدار عن طريق التأكد من.envإدراجه في الملف..gitignore - تذكر: إذا قمت بتثبيت معلومات حساسة عن طريق الخطأ، ففكر في اختراق بيانات الاعتماد هذه وقم بتدويرها على الفور.
قم بإنشاء ملف tsconfig.json بالمحتوى التالي:
{
  "compilerOptions": {
    "module": "nodenext",
    "target": "esnext",
    "types": ["node"],
    "lib": ["esnext"],
    "sourceMap": true,
    "declaration": true,
    "declarationMap": true,
    "noUncheckedIndexedAccess": true,
    "exactOptionalPropertyTypes": true,
    "strict": true,
    "verbatimModuleSyntax": true,
    "isolatedModules": true,
    "noUncheckedSideEffectImports": true,
    "moduleDetection": "force",
    "skipLibCheck": true,
  }
}
بعد ذلك، قم بإنشاء index.ts ملف ولصقه في التعليمات البرمجية التالية:
import { AgentsClient } from "@azure/ai-agents";
import { DefaultAzureCredential } from "@azure/identity";

const projectEndpoint = process.env["PROJECT_ENDPOINT"] || "<project endpoint>";
const modelDeploymentName = process.env["MODEL_DEPLOYMENT_NAME"] || "gpt-4o";

export async function main(): Promise<void> {
  // Create an Azure AI Client
  const client = new AgentsClient(projectEndpoint, new DefaultAzureCredential());

  // Create an agent
  const agent = await client.createAgent(modelDeploymentName, {
    name: "my-agent",
    instructions: "You are a helpful agent specialized in math. When providing mathematical explanations, use plain text formatting with simple characters like +, -, *, / for operations. Do not use LaTeX formatting with backslashes or special notation. Make your explanations clear and easy to read in a terminal.",
  });
  console.log(`Created agent, agent ID : ${agent.id}`);

  // Create a thread
  const thread = await client.threads.create();
  console.log(`Created thread, thread ID : ${thread.id}`);

  // List all threads for the agent
  const threads = client.threads.list();
  console.log(`Threads for agent ${agent.id}:`);
  for await (const t of threads) {
    console.log(`Thread ID: ${t.id} created at: ${t.createdAt}`);
  }

  // Create a message
  const message = await client.messages.create(thread.id, "user", "I need to solve the equation `3x + 11 = 14`. Can you help me?");
  console.log(`Created message, message ID : ${message.id}`);

  // Create and poll a run
  console.log("Creating run...");
  const run = await client.runs.createAndPoll(thread.id, agent.id, {
    pollingOptions: {
      intervalInMs: 2000,
    },
    onResponse: (response): void => {
      const parsedBody =
        typeof response.parsedBody === "object" && response.parsedBody !== null
          ? response.parsedBody
          : null;
      const status = parsedBody && "status" in parsedBody ? parsedBody.status : "unknown";
      console.log(`Received response with status: ${status}`);
    },
  });
  console.log(`Run finished with status: ${run.status}`);

  const messagesIterator = client.messages.list(thread.id);
  console.log("\n\n========================================================");
  console.log("=================== CONVERSATION RESULTS ===================");
  console.log("========================================================\n");

  // Collect all messages first
  const messages = [];
  for await (const m of messagesIterator) {
    messages.push(m);
  }

  // Reverse the order of messages (or sort by timestamp if available)
  messages.reverse();

  // Display messages in the new order
  for (const m of messages) {
    if (m.role === "user") {
      console.log(`\n❓ USER QUESTION: ${
        Array.isArray(m.content) && m.content[0]?.type === "text" && 'text' in m.content[0]
          ? m.content[0].text.value
          : JSON.stringify(m.content)
      }`);
    } else if (m.role === "assistant") {
      console.log("\n🤖 ASSISTANT'S ANSWER:");
      console.log("--------------------------------------------------");

      // Extract and print the text content in a more readable format
      if (m.content && Array.isArray(m.content)) {
        for (const content of m.content) {
          if (content.type === "text" && 'text' in content) {
            console.log(content.text?.value);
          } else {
            console.log(content);
          }
        }
      } else {
        console.log(JSON.stringify(m.content, null, 2));
      }
      console.log("--------------------------------------------------\n");
    }
  }

  console.log("\n========================================================");
  console.log("====================== END OF RESULTS ======================");
  console.log("========================================================\n");

  // Clean up
  await client.threads.delete(thread.id);
  await client.deleteAgent(agent.id);
}

main().catch((err) => {
  console.error("The sample encountered an error:", err);
});
تشغيل التعليمات البرمجية باستخدام npx tsx -r dotenv/config index.ts. يجيب هذا الرمز على السؤال I need to solve the equation '3x + 11 = 14'. Can you help me?. الردود ليست حتمية ، سيبدو مخرجاتك مشابها للإخراج أدناه:
Created agent, agent ID : asst_X4yDNWrdWKb8LN0SQ6xlzhWk
Created thread, thread ID : thread_TxqZcHL2BqkNWl9dFzBYMIU6
Threads for agent asst_X4yDNWrdWKb8LN0SQ6xlzhWk:
...
Created message, message ID : msg_R0zDsXdc2UbfsNXvS1zeS6hk
Creating run...
Received response with status: queued
Received response with status: in_progress
Received response with status: completed
Run finished with status: completed

========================================================
=================== CONVERSATION RESULTS ===================
========================================================

❓ USER QUESTION: I need to solve the equation `3x + 11 = 14`. Can you help me?

🤖 ASSISTANT'S ANSWER:
--------------------------------------------------
Certainly! Let's solve the equation step by step:

We have:
3x + 11 = 14

### Step 1: Eliminate the constant (+11) on the left-hand side.
Subtract 11 from both sides:
3x + 11 - 11 = 14 - 11
This simplifies to:
3x = 3

We have:
3x + 11 = 14

### Step 1: Eliminate the constant (+11) on the left-hand side.
Subtract 11 from both sides:
3x + 11 - 11 = 14 - 11
This simplifies to:
3x = 3

### Step 2: Solve for x.
Divide both sides by 3:
3x / 3 = 3 / 3
This simplifies to:
x = 1

### Final Answer:
x = 1
--------------------------------------------------

========================================================
====================== END OF RESULTS ======================
========================================================
الشفرة المصدرية الكاملة عينة الرمز متاحة.
| وثائق المرجع | العينات | المكتبة | Package (Maven) |
المتطلبات المسبقه
- بيئة عامل إعداد
- تعيين دور Azure AI UserRBAC لكل عضو في الفريق يحتاج إلى إنشاء أو تعديل الوكلاء باستخدام SDK أو ملعب الوكلاء
- يجب تعيين هذا الدور في نطاق المشروع
- الحد الأدنى من الأذونات المطلوبة: الوكلاء /*/القراءة ، الوكلاء /*/الإجراء ، الوكلاء /*/حذف
تكوين عامل وتشغيله
أولا، أنشئ مشروع لجهاز تحكم Java جديد. ستحتاج إلى التبعيات التالية لتشغيل التعليمات البرمجية:
<dependencies>
    <dependency>
        <groupId>com.azure</groupId>
        <artifactId>azure-ai-agents-persistent</artifactId>
        <version>1.0.0-beta.2</version>
    </dependency>
    <dependency>
        <groupId>com.azure</groupId>
        <artifactId>azure-identity</artifactId>
        <version>1.17.0-beta.1</version>
    </dependency>
</dependencies>
بعد ذلك، لتوثيق طلبات واجهة برمجة التطبيقات وتشغيل البرنامج، استخدم أمر az login لتسجيل الدخول إلى اشتراك Azure الخاص بك.
az login
استخدم التعليمات البرمجية التالية لإنشاء عامل وتشغيله. لتشغيل هذه التعليمة البرمجية، ستحتاج إلى الحصول على نقطة النهاية لمشروعك. هذه السلسلة بالتنسيق:
https://<AIFoundryResourceName>.services.ai.azure.com/api/projects/<ProjectName>
مهم
بدءا من مايو 2025، تستخدم خدمة وكلاء الذكاء الاصطناعي Azure نقطة نهاية لمشاريع Foundry بدلا من connection string التي كانت تستخدم سابقا للمشاريع المعتمدة على المركز. إذا كنت تستخدم مشروعا قائما على المركز، فلن تتمكن من استخدام الإصدارات الحالية من SDK وواجهة برمجة تطبيقات REST. لمزيد من المعلومات، راجع استخدام SDK مع المشاريع المستندة إلى المركز.
يمكنك العثور على نقطة النهاية في نظرة عامة لمشروعك في بوابة مايكروسوفت فاوندري، تحت قسم مكتبات>المكتبات.
قم بتعيين نقطة النهاية هذه في متغير بيئة يسمى PROJECT_ENDPOINT.
تحتاج أيضا إلى اسم توزيع النموذج الخاص بك. يمكنك العثور عليه في Models + Endpoints في قائمة التنقل اليسرى.
احفظ اسم اسم نشر النموذج كمتغير بيئة يسمى MODEL_DEPLOYMENT_NAME.
مثال عَلى الرمز
package com.example.agents;

import com.azure.ai.agents.persistent.MessagesClient;
import com.azure.ai.agents.persistent.PersistentAgentsAdministrationClient;
import com.azure.ai.agents.persistent.PersistentAgentsClient;
import com.azure.ai.agents.persistent.PersistentAgentsClientBuilder;
import com.azure.ai.agents.persistent.RunsClient;
import com.azure.ai.agents.persistent.ThreadsClient;
import com.azure.ai.agents.persistent.models.CodeInterpreterToolDefinition;
import com.azure.ai.agents.persistent.models.CreateAgentOptions;
import com.azure.ai.agents.persistent.models.CreateRunOptions;
import com.azure.ai.agents.persistent.models.MessageImageFileContent;
import com.azure.ai.agents.persistent.models.MessageRole;
import com.azure.ai.agents.persistent.models.MessageTextContent;
import com.azure.ai.agents.persistent.models.PersistentAgent;
import com.azure.ai.agents.persistent.models.PersistentAgentThread;
import com.azure.ai.agents.persistent.models.RunStatus;
import com.azure.ai.agents.persistent.models.ThreadMessage;
import com.azure.ai.agents.persistent.models.ThreadRun;
import com.azure.ai.agents.persistent.models.MessageContent;
import com.azure.core.http.rest.PagedIterable;
import com.azure.identity.DefaultAzureCredentialBuilder;
import java.util.Arrays;

public class AgentSample {

    public static void main(String[] args) {
        // variables for authenticating requests to the agent service
        String projectEndpoint = System.getenv("PROJECT_ENDPOINT");
        String modelName = System.getenv("MODEL_DEPLOYMENT_NAME");

        // initialize clients to manage various aspects of agent runtime
        PersistentAgentsClientBuilder clientBuilder = new PersistentAgentsClientBuilder()
            .endpoint(projectEndpoint)
            .credential(new DefaultAzureCredentialBuilder().build());
        PersistentAgentsClient agentsClient = clientBuilder.buildClient();
        PersistentAgentsAdministrationClient administrationClient = agentsClient.getPersistentAgentsAdministrationClient();
        ThreadsClient threadsClient = agentsClient.getThreadsClient();
        MessagesClient messagesClient = agentsClient.getMessagesClient();
        RunsClient runsClient = agentsClient.getRunsClient();


        String agentName = "my-agent"; // the name of the agent
        CreateAgentOptions createAgentOptions = new CreateAgentOptions(modelName)
            .setName(agentName)
            .setInstructions("You are a helpful agent") // system instructions
            .setTools(Arrays.asList(new CodeInterpreterToolDefinition()));
        PersistentAgent agent = administrationClient.createAgent(createAgentOptions);

        PersistentAgentThread thread = threadsClient.createThread();
        ThreadMessage createdMessage = messagesClient.createMessage(
            thread.getId(),
            MessageRole.USER,
            "I need to solve the equation `3x + 11 = 14`. Can you help me?"); // The message to the agent

        try {
            //run the agent
            CreateRunOptions createRunOptions = new CreateRunOptions(thread.getId(), agent.getId())
                .setAdditionalInstructions("");
            ThreadRun threadRun = runsClient.createRun(createRunOptions);
            // wait for the run to complete before printing the message
            waitForRunCompletion(thread.getId(), threadRun, runsClient);
            printRunMessages(messagesClient, thread.getId());
        } catch (InterruptedException e) {
            throw new RuntimeException(e);
        } finally {
            //cleanup - uncomment these lines if you want to delete the agent
            //threadsClient.deleteThread(thread.getId());
            //administrationClient.deleteAgent(agent.getId());
        }
    }

    // A helper function to print messages from the agent
    public static void printRunMessages(MessagesClient messagesClient, String threadId) {

        PagedIterable<ThreadMessage> runMessages = messagesClient.listMessages(threadId);
        for (ThreadMessage message : runMessages) {
            System.out.print(String.format("%1$s - %2$s : ", message.getCreatedAt(), message.getRole()));
            for (MessageContent contentItem : message.getContent()) {
                if (contentItem instanceof MessageTextContent) {
                    System.out.print((((MessageTextContent) contentItem).getText().getValue()));
                } else if (contentItem instanceof MessageImageFileContent) {
                    String imageFileId = (((MessageImageFileContent) contentItem).getImageFile().getFileId());
                    System.out.print("Image from ID: " + imageFileId);
                }
                System.out.println();
            }
        }
    }

    // a helper function to wait until a run has completed running
    public static void waitForRunCompletion(String threadId, ThreadRun threadRun, RunsClient runsClient)
        throws InterruptedException {

        do {
            Thread.sleep(500);
            threadRun = runsClient.getRun(threadId, threadRun.getId());
        }
        while (
            threadRun.getStatus() == RunStatus.QUEUED
                || threadRun.getStatus() == RunStatus.IN_PROGRESS
                || threadRun.getStatus() == RunStatus.REQUIRES_ACTION);

        if (threadRun.getStatus() == RunStatus.FAILED) {
            System.out.println(threadRun.getLastError().getMessage());
        }
    }
}
| الوثائق المرجعية |
المتطلبات المسبقه
- بيئة عامل إعداد
- تعيين دور Azure AI UserRBAC لكل عضو في الفريق يحتاج إلى إنشاء أو تعديل الوكلاء باستخدام SDK أو ملعب الوكلاء
- يجب تعيين هذا الدور في نطاق المشروع
- الحد الأدنى من الأذونات المطلوبة: الوكلاء /*/القراءة ، الوكلاء /*/الإجراء ، الوكلاء /*/حذف
تكوين عامل وتشغيله
لتوثيق طلبات واجهة برمجة التطبيقات الخاصة بك، استخدم أمر az login لتسجيل الدخول إلى اشتراك Azure الخاص بك.
az login
بعد ذلك، ستحتاج إلى جلب الرمز المميز لمعرف Entra لتقديمه كتفويض لاستدعاءات واجهة برمجة التطبيقات. إحضار الرمز المميز باستخدام أمر CLI:
az account get-access-token --resource 'https://ai.azure.com' | jq -r .accessToken | tr -d '"'
تعيين الرمز المميز للوصول كمتغير بيئة يسمى AGENT_TOKEN.
لإجراء استدعاءات واجهة برمجة تطبيقات REST بنجاح إلى خدمة وكلاء الصيادة، ستحتاج إلى استخدام نقطة نهاية مشروعك:
https://<your_ai_service_name>.services.ai.azure.com/api/projects/<your_project_name>
على سبيل المثال، ستبدو نقطة النهاية كما يلي:
https://exampleaiservice.services.ai.azure.com/api/projects/project
قم بتعيين نقطة النهاية هذه كمتغير بيئة يسمى AZURE_AI_FOUNDRY_PROJECT_ENDPOINT.
ملاحظة
- بالنسبة للمعلمة
api-version، إصدار واجهة برمجة تطبيقات GA هو2025-05-01وأحدث إصدار لواجهة برمجة تطبيقات المعاينة هو2025-05-15-preview. يجب استخدام واجهة برمجة تطبيقات المعاينة للأدوات الموجودة في المعاينة. - ضع في اعتبارك جعل إصدار واجهة برمجة التطبيقات الخاص بك متغير بيئة، مثل
$API_VERSION.
إنشَاء مندوب
ملاحظة
مع خدمة وكلاء الذكاء الاصطناعي Azure، يتطلب معامل model اسم نشر النموذج. إذا كان اسم توزيع النموذج الخاص بك مختلفا عن اسم النموذج الأساسي، يمكنك ضبط التعليمات البرمجية الخاصة بك إلى "model": "{your-custom-model-deployment-name}".
curl --request POST \
  --url $AZURE_AI_FOUNDRY_PROJECT_ENDPOINT/assistants?api-version=2025-05-01 \
  -H "Authorization: Bearer $AGENT_TOKEN" \
  -H "Content-Type: application/json" \
  -d '{
    "instructions": "You are a helpful agent.",
    "name": "my-agent",
    "tools": [{"type": "code_interpreter"}],
    "model": "gpt-4o-mini"
  }'
إنشاء مؤشر ترابط
curl --request POST \
  --url $AZURE_AI_FOUNDRY_PROJECT_ENDPOINT/threads?api-version=2025-05-01 \
  -H "Authorization: Bearer $AGENT_TOKEN" \
  -H "Content-Type: application/json" \
  -d ''
إضافة سؤال مستخدم إلى مؤشر الترابط
curl --request POST \
  --url $AZURE_AI_FOUNDRY_PROJECT_ENDPOINT/threads/thread_abc123/messages?api-version=2025-05-01 \
  -H "Authorization: Bearer $AGENT_TOKEN" \
  -H "Content-Type: application/json" \
  -d '{
      "role": "user",
      "content": "I need to solve the equation `3x + 11 = 14`. Can you help me?"
    }'
تشغيل مؤشر الترابط
curl --request POST \
  --url $AZURE_AI_FOUNDRY_PROJECT_ENDPOINT/threads/thread_abc123/runs?api-version=2025-05-01 \
  -H "Authorization: Bearer $AGENT_TOKEN" \
  -H "Content-Type: application/json" \
  -d '{
    "assistant_id": "asst_abc123",
  }'
استرداد حالة التشغيل
curl --request GET \
  --url $AZURE_AI_FOUNDRY_PROJECT_ENDPOINT/threads/thread_abc123/runs/run_abc123?api-version=2025-05-01 \
  -H "Authorization: Bearer $AGENT_TOKEN"
استرداد استجابة العامل
curl --request GET \
  --url $AZURE_AI_FOUNDRY_PROJECT_ENDPOINT/threads/thread_abc123/messages?api-version=2025-05-01 \
  -H "Authorization: Bearer $AGENT_TOKEN"
الخطوات التالية
تعرف على الأدوات التي يمكنك استخدامها لتوسيع قدرات وكلائك، مثل الوصول إلى الويب وتوفير معلومات التأريض والمزيد.