Use the Append Variable activity in Fabric
Use the Append Variable activity to add a value to an existing array variable defined in a Fabric pipeline.
Prerequisites
To get started, you must complete the following prerequisites:
- A tenant account with an active subscription. Create an account for free.
- A workspace is created.
Add an Append Variable activity to a pipeline with UI
To use an Append Variable activity in a pipeline, complete the following steps:
Creating the activity
Create a new pipeline in your workspace.
Before you use the Append Variable activity, you need an array type variable in your pipeline. First select the pipeline canvas background, so the pipeline settings appear on the lower part of the screen. There, select the Variables tab, and then select + New, to add a variable of Array type.
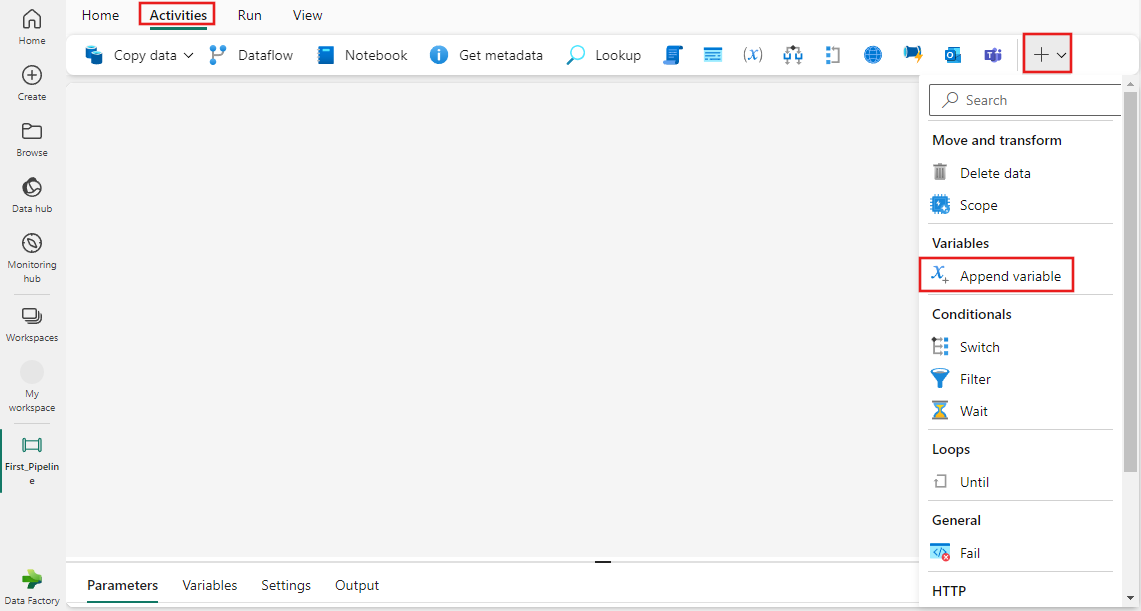
Now that you have an array type variable in your pipeline, search for Append Variable in the pipeline Activities pane, and select it to add it to the pipeline canvas. You may need to expand the list of available activities using the dropdown + button at the far right of the toolbar.
Select the new activity on the canvas if it isn't already selected.
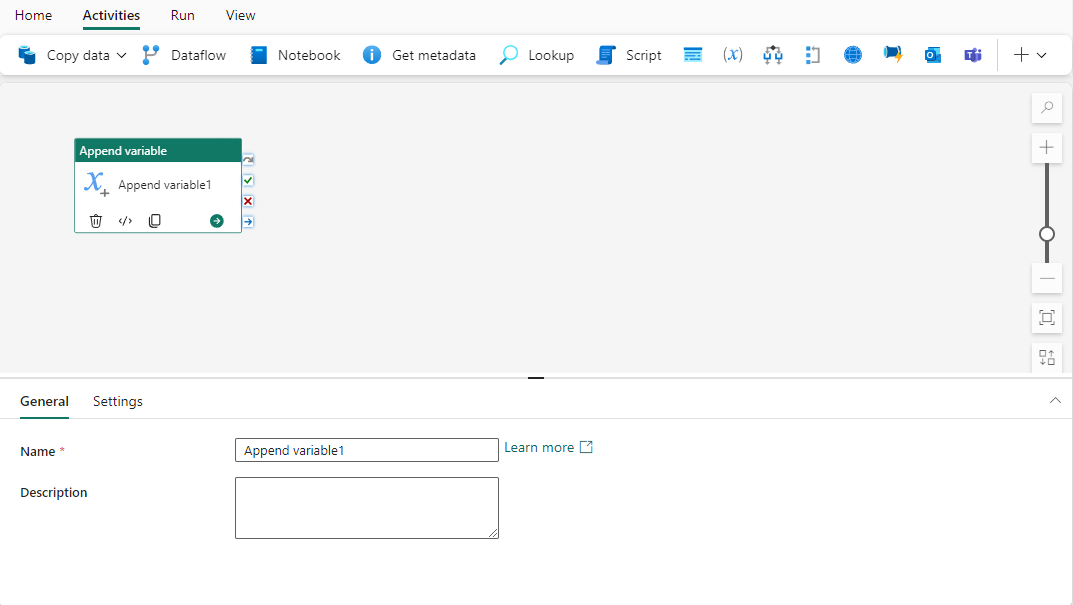
Refer to the General settings guidance to configure the General settings tab.
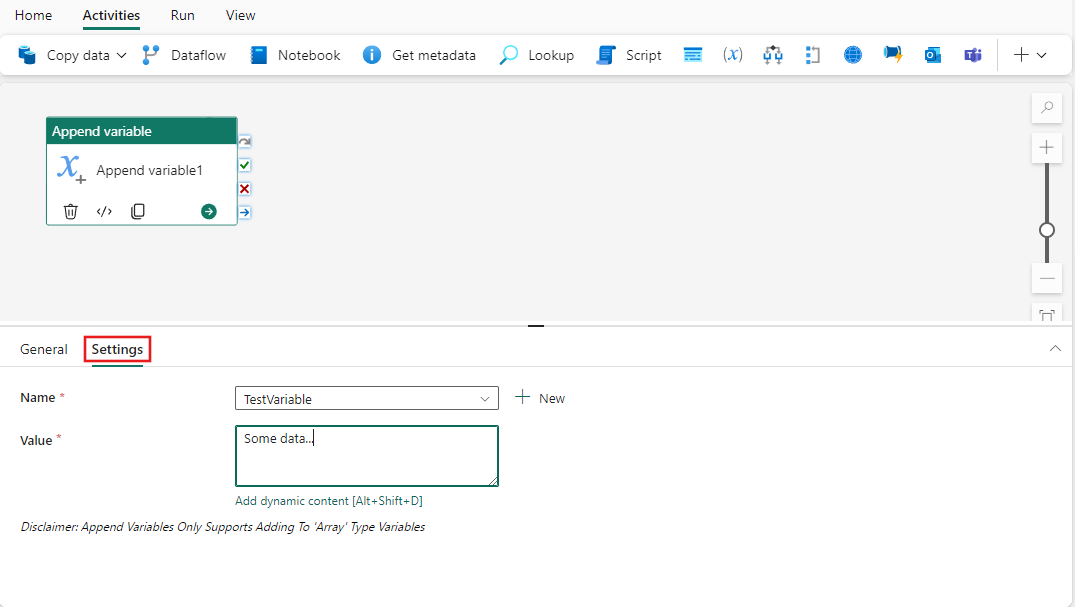
Append variable settings
Select the Settings tab, then use the Name dropdown to select your previously created array type variable. You can also use the + New button to create a new variable in the pipeline directly if you didn't create one previously. Provide data to be appended to the array variable. You can use dynamic expressions here or directly enter data, of which the type is always string.
Save and run or schedule the pipeline
Although Append Variable is typically used with other activities, it can be run directly as is. To run the example pipeline here, switch to the Home tab at the top of the pipeline editor, and select the save button to save your pipeline. Select Run to run it directly, or Schedule to schedule it. You can also view the run history here or configure other settings.

Related content
الملاحظات
قريبًا: خلال عام 2024، سنتخلص تدريجيًا من GitHub Issues بوصفها آلية إرسال ملاحظات للمحتوى ونستبدلها بنظام ملاحظات جديد. لمزيد من المعلومات، راجع https://aka.ms/ContentUserFeedback.
إرسال الملاحظات وعرضها المتعلقة بـ