Use the Delete data activity to look up data from a data source
The Fabric Delete data activity can delete data from any of the data sources supported by Microsoft Fabric.
You can use the Delete Activity in Data Factory to delete files or folders from any supported storage stores. Use this activity to clean up or archive files when they are no longer needed.
Prerequisites
To get started, you must complete the following prerequisites:
- A tenant account with an active subscription. Create an account for free.
- A workspace is created.
Add a lookup activity to a pipeline with UI
To use a Delete data activity in a pipeline, complete the following steps:
Creating the activity
Create a new pipeline in your workspace.
Search for Delete data in the pipeline Activities pane, and select it to add it to the pipeline canvas.

Select the new Delete data activity on the canvas if it isn't already selected.
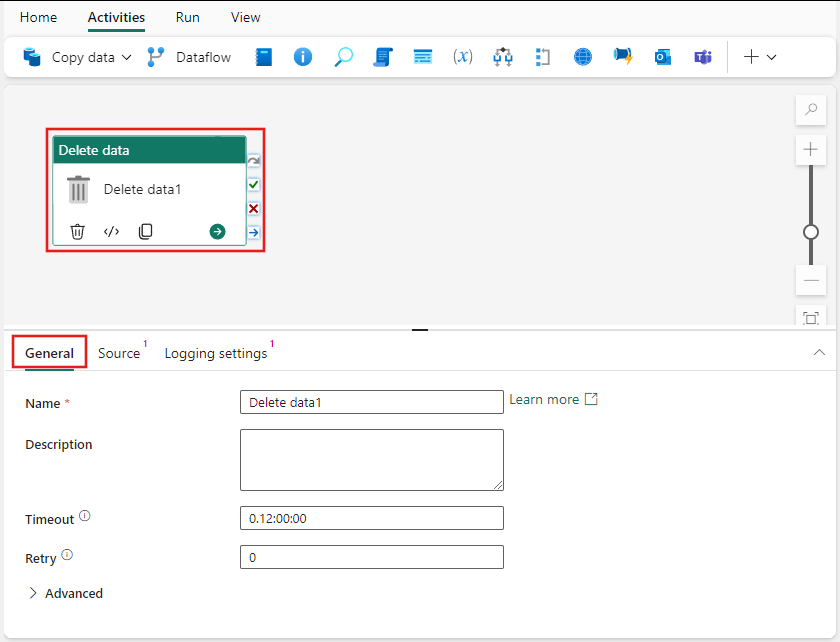
Refer to the General settings guidance to configure the General settings tab.
Choose a data source
Select the Source tab, and select an existing connection from the Connection dropdown, or use the + New button to create a new connection, and specify its configuration details.
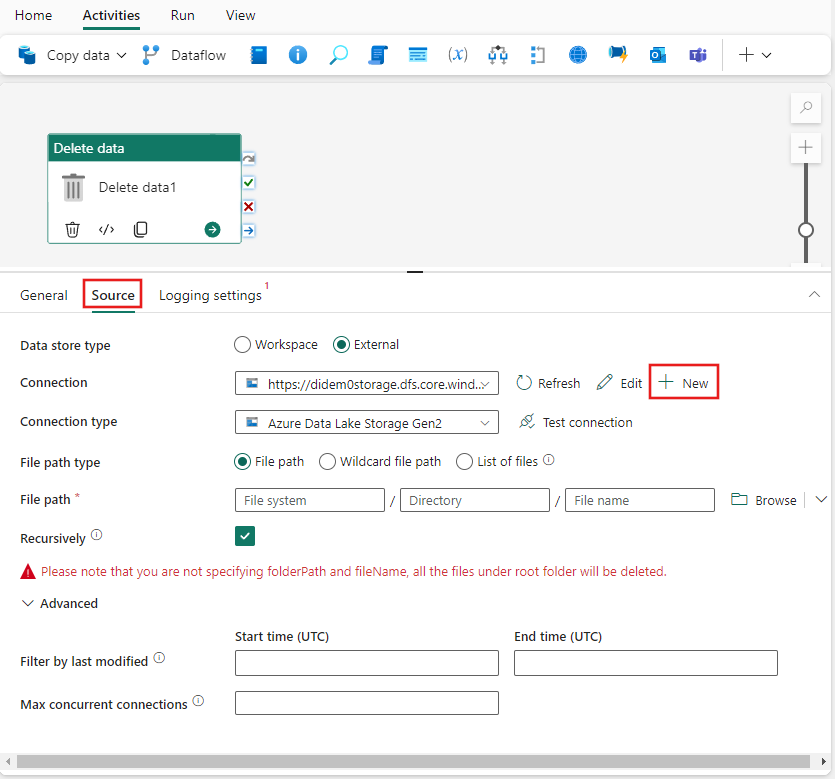
The example in the previous image shows a blob storage connection, but each connection type has its own configuration details specific to the data source selected.
Supported data stores
Fabric supports the data stores listed in the Connector overview article. Any source that supports the Delete data activity can be used.
Examples of using the Delete activity
Delete specific folders or files
The store has the following folder structure:
Root/
Folder_A_1/
1.txt
2.txt
3.csv
Folder_A_2/
4.txt
5.csv
Folder_B_1/
6.txt
7.csv
Folder_B_2/
8.txt
Now you are using the Delete activity to delete folder or files by the combination of different property value from the dataset and the Delete activity:
| folderPath | fileName | recursive | Output |
|---|---|---|---|
| Root/ Folder_A_2 | NULL | False | Root/ Folder_A_1/ 1.txt 2.txt 3.csv Folder_A_2/ Folder_B_1/ 6.txt 7.csv Folder_B_2/ 8.txt |
| Root/ Folder_A_2 | NULL | True | Root/ Folder_A_1/ 1.txt 2.txt 3.csv |
| Root/ Folder_A_2 | *.txt | False | Root/ Folder_A_1/ 1.txt 2.txt 3.csv Folder_A_2/ 5.csv Folder_B_1/ 6.txt 7.csv Folder_B_2/ 8.txt |
| Root/ Folder_A_2 | *.txt | True | Root/ Folder_A_1/ 1.txt 2.txt 3.csv Folder_A_2/ 5.csv Folder_B_1/ 7.csv Folder_B_2/ |
Save and run or schedule the pipeline
- Switch to the Home tab at the top of the pipeline editor, and select the save button to save your pipeline.
- Select Run to run it directly, or Schedule to schedule it.
- You can also view the run history here or configure other settings.

Related content
الملاحظات
قريبًا: خلال عام 2024، سنتخلص تدريجيًا من GitHub Issues بوصفها آلية إرسال ملاحظات للمحتوى ونستبدلها بنظام ملاحظات جديد. لمزيد من المعلومات، راجع https://aka.ms/ContentUserFeedback.
إرسال الملاحظات وعرضها المتعلقة بـ