إشعار
يتطلب الوصول إلى هذه الصفحة تخويلاً. يمكنك محاولة تسجيل الدخول أو تغيير الدلائل.
يتطلب الوصول إلى هذه الصفحة تخويلاً. يمكنك محاولة تغيير الدلائل.
In this article, you learn how to add a new SQL Script activity, add a new connection, and configure script content. The Script activity runs both query and nonquery SQL scripts against data stores that support Data Manipulation Language (DML) and Data Definition Language (DDL).
You can use the Script activity to invoke a SQL script in one of the following data stores:
- Fabric SQL database
- Fabric Data Warehouse
- Azure Database for PostgreSQL
- Azure SQL Database
- Azure SQL Managed Instance
- Azure Synapse Analytics
- Oracle database
- SQL Server Database
- Snowflake
Prerequisites
To get started, complete the following prerequisites:
- A tenant account with an active subscription. Create an account for free.
- A workspace is created.
Add a Script activity to a Pipeline with UI
Open an existing pipeline or create a new pipeline.
Select Add a pipeline activity and search for Script.
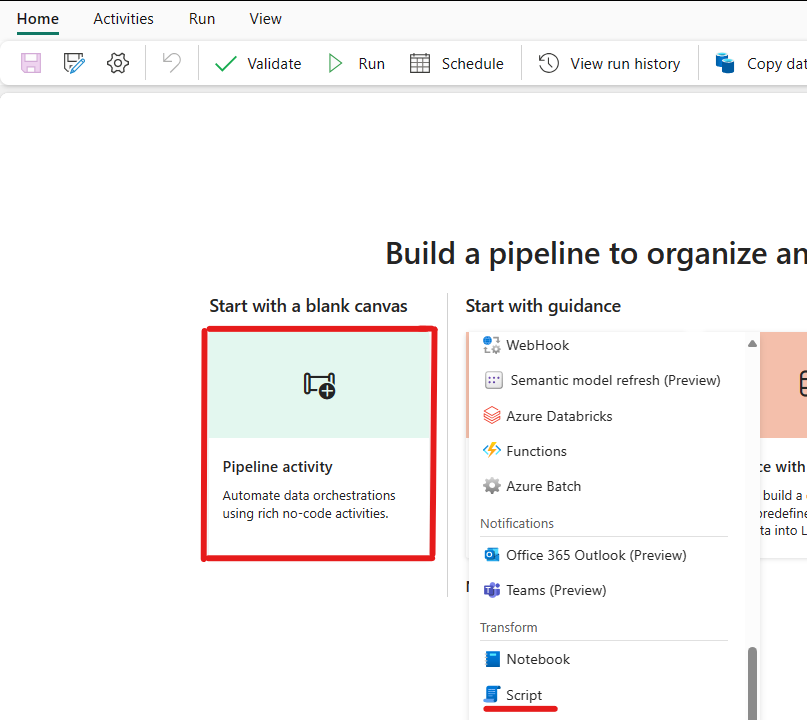
Alternately, you can search for Script Activity in the pipeline Activities ribbon at the top, and select it to add it to the pipeline canvas.

Select the new Script activity on the canvas if it isn't already selected.
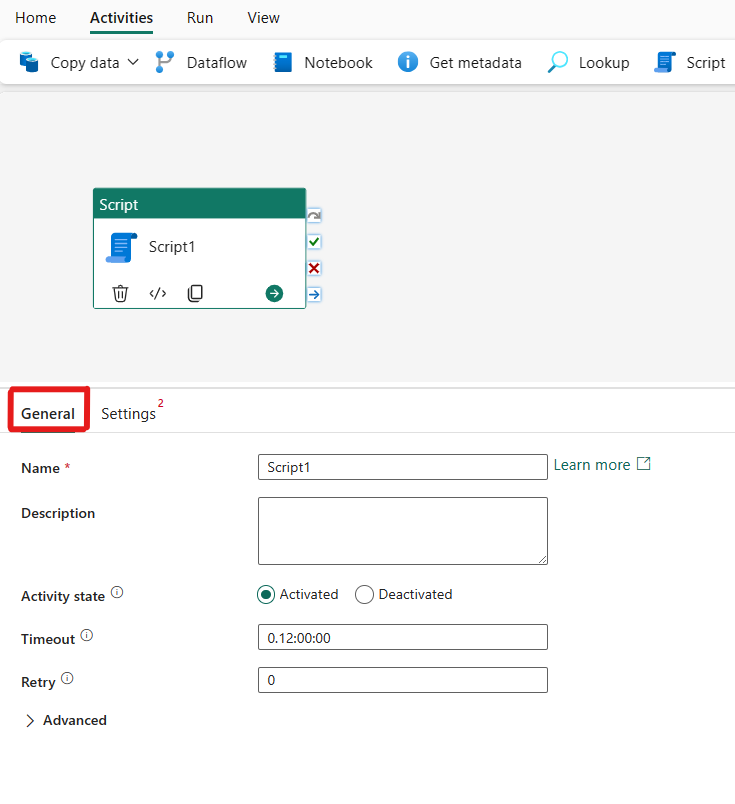


For guidance on General settings, see General settings.
Configure the script activity
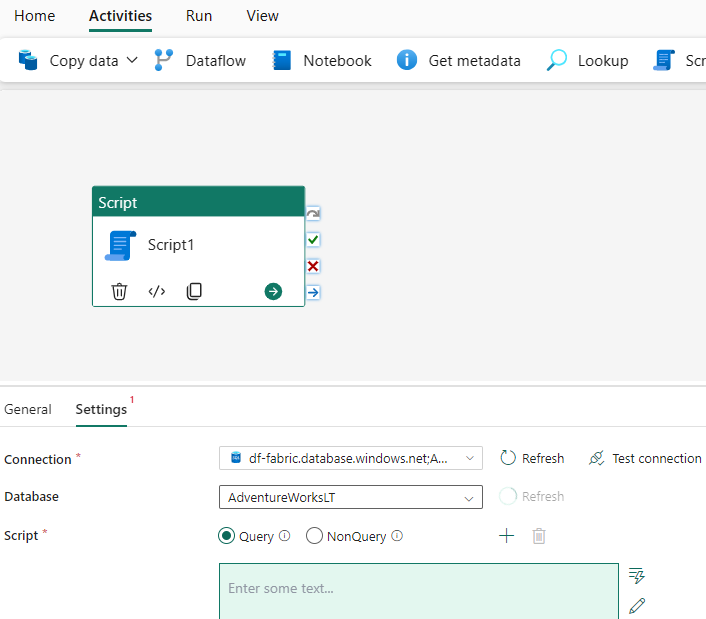
Select the Settings tab, and choose an existing connection from the dropdown list, or create a new one.
After selecting your connection, choose either Query to get a data result or NonQuery for any catalog operations. Query returns a result set (SELECT statements). NonQuery runs statements that don't return data (INSERT, UPDATE, DELETE, CREATE, DROP).
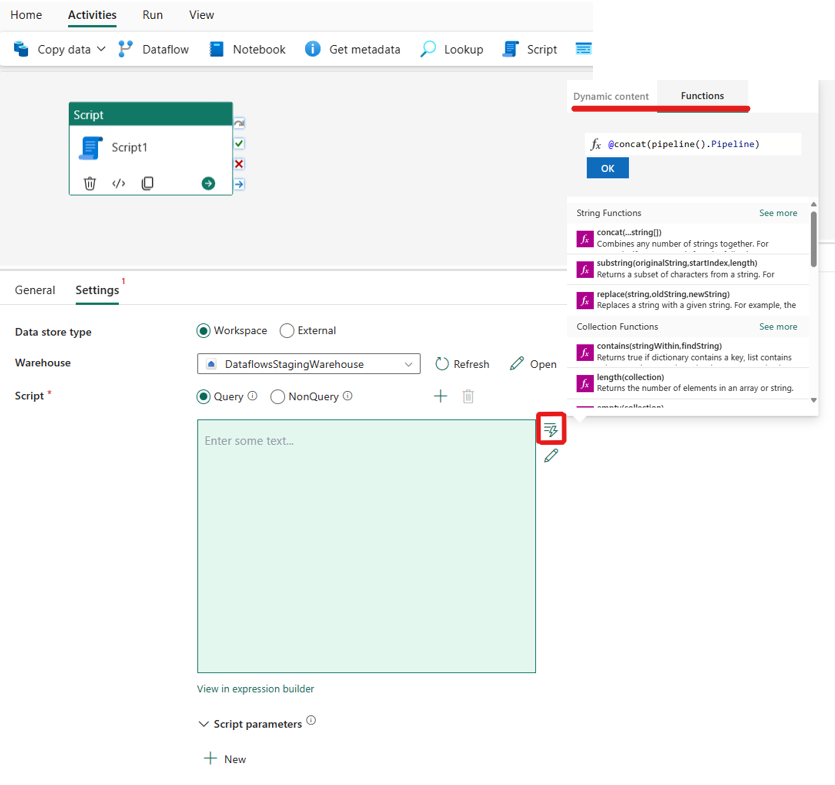
Enter content into the script expression box. You can input script content into the expression box in multiple ways:
Add dynamic content by either selecting in the box or selecting the dynamic content icon on the right-hand side. A flyout appears, as seen in the following screenshot, that showcases dynamic content and functions that you can use to build your expressions. If you're familiar with Power Automate, the experience is similar.
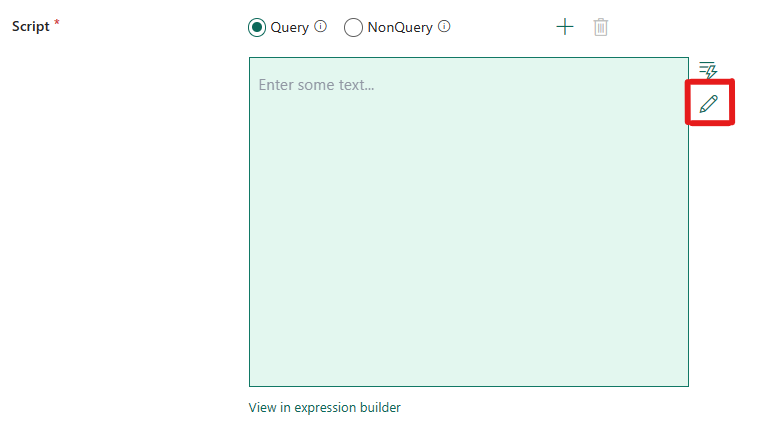
Directly edit your script code in the code editor by selecting the pencil icon on the right-hand side, as seen in the following screenshot. After you select it, a new dialog box pops up so that you can write and edit your code.
Use the expression builder that uses IntelliSense code completion for highlighting, syntax checking, and autocompleting to create expressions. For more information, see Expression language.


Save and run or schedule the pipeline
Switch to the Home tab at the top of the pipeline editor and select the save button to save your pipeline. Select Run to run it directly or Schedule to schedule runs at specific times or intervals. For more information on pipeline runs, see: schedule pipeline runs.

After running, you can monitor the pipeline execution and view run history from the Output tab below the canvas.