Integrate OneLake with Azure Databricks
This scenario shows how to connect to OneLake via Azure Databricks. After completing this tutorial, you'll be able to read and write to a Microsoft Fabric lakehouse from your Azure Databricks workspace.
Prerequisites
Before you connect, you must have:
- A Fabric workspace and lakehouse.
- A premium Azure Databricks workspace. Only premium Azure Databricks workspaces support Microsoft Entra credential passthrough, which you need for this scenario.
Set up your Databricks workspace
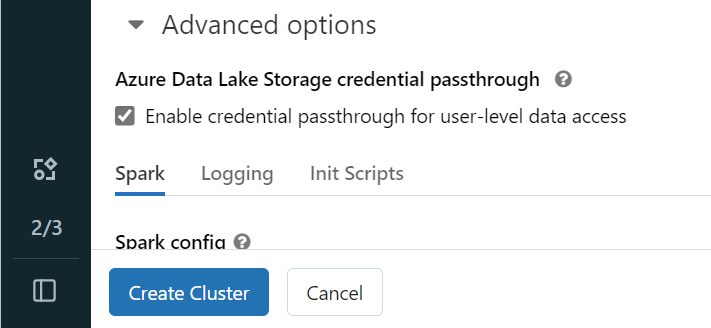
Open your Azure Databricks workspace and select Create > Cluster.
To authenticate to OneLake with your Microsoft Entra identity, you must enable Azure Data Lake Storage (ADLS) credential passthrough on your cluster in the Advanced Options.
Note
You can also connect Databricks to OneLake using a service principal. For more information about authenticating Azure Databricks using a service principal, see Manage service principals.
Create the cluster with your preferred parameters. For more information on creating a Databricks cluster, see Configure clusters - Azure Databricks.
Open a notebook and connect it to your newly created cluster.
Author your notebook
Navigate to your Fabric lakehouse and copy the Azure Blob Filesystem (ABFS) path to your lakehouse. You can find it in the Properties pane.
Note
Azure Databricks only supports the Azure Blob Filesystem (ABFS) driver when reading and writing to ADLS Gen2 and OneLake:
abfss://myWorkspace@onelake.dfs.fabric.microsoft.com/.Save the path to your lakehouse in your Databricks notebook. This lakehouse is where you write your processed data later:
oneLakePath = 'abfss://myWorkspace@onelake.dfs.fabric.microsoft.com/myLakehouse.lakehouse/Files/'Load data from a Databricks public dataset into a dataframe. You can also read a file from elsewhere in Fabric or choose a file from another ADLS Gen2 account you already own.
yellowTaxiDF = spark.read.format("csv").option("header", "true").option("inferSchema", "true").load("/databricks-datasets/nyctaxi/tripdata/yellow/yellow_tripdata_2019-12.csv.gz")Filter, transform, or prep your data. For this scenario, you can trim down your dataset for faster loading, join with other datasets, or filter down to specific results.
filteredTaxiDF = yellowTaxiDF.where(yellowTaxiDF.fare_amount<4).where(yellowTaxiDF.passenger_count==4)
display(filteredTaxiDF)
Write your filtered dataframe to your Fabric lakehouse using your OneLake path.
filteredTaxiDF.write.format("csv").option("header", "true").mode("overwrite").csv(oneLakePath)Test that your data was successfully written by reading your newly loaded file.
lakehouseRead = spark.read.format('csv').option("header", "true").load(oneLakePath)
display(lakehouseRead.limit(10))
Congratulations. You can now read and write data in Fabric using Azure Databricks.