Mesh user controls
Mesh Dashboard
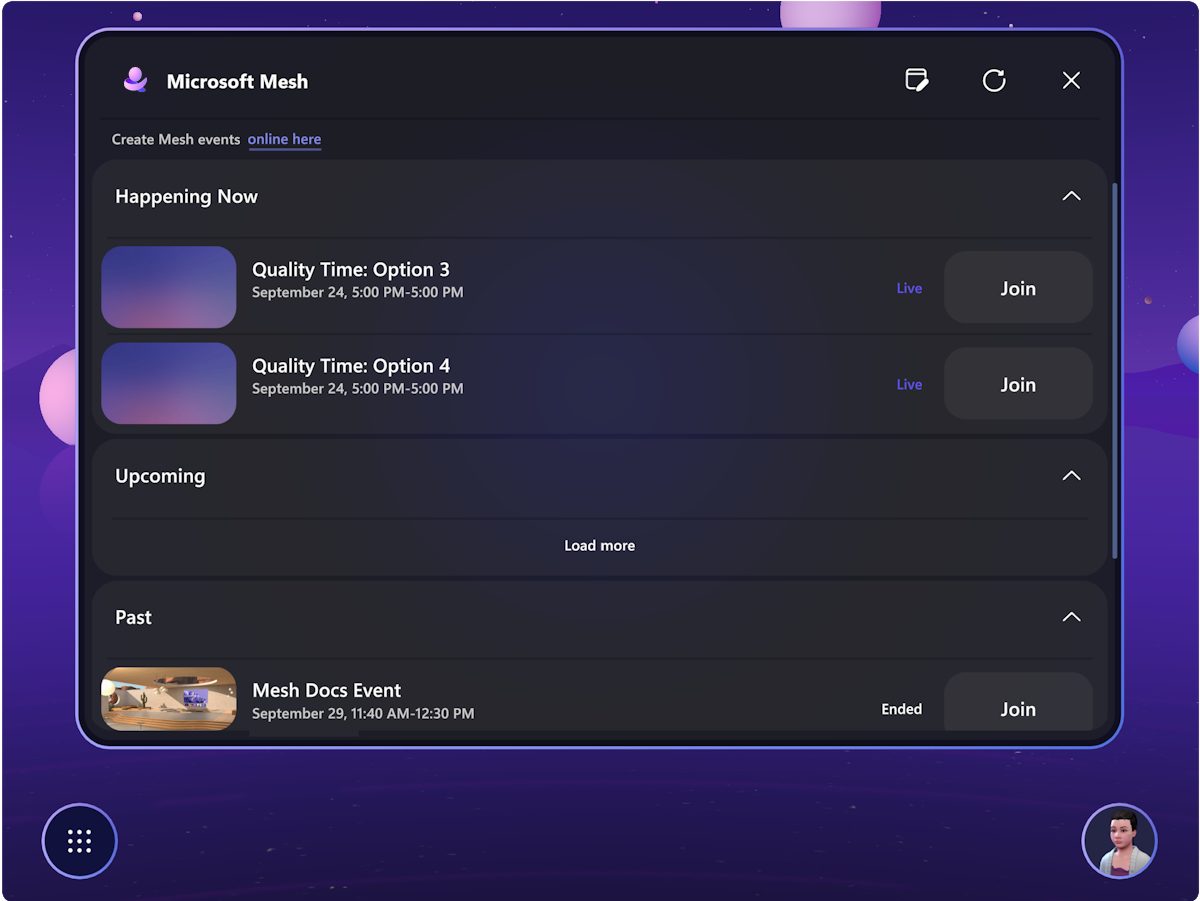
The Mesh Dashboard displays all Mesh events available to you. The Mesh Dashboard is the main interface you can use to explore what Mesh has to offer.
The Dashboard is viewable using the Mesh app on PC or Quest.
Note
On the Dashboard, the changes from upcoming to live events are updated automatically.
Move around in your event
On PC
You can look around, walk, run, teleport around, or just sit at the table with other avatars. To move around, press the WASD keys.
For details, you can also access the Control tutorial from the Help menu:
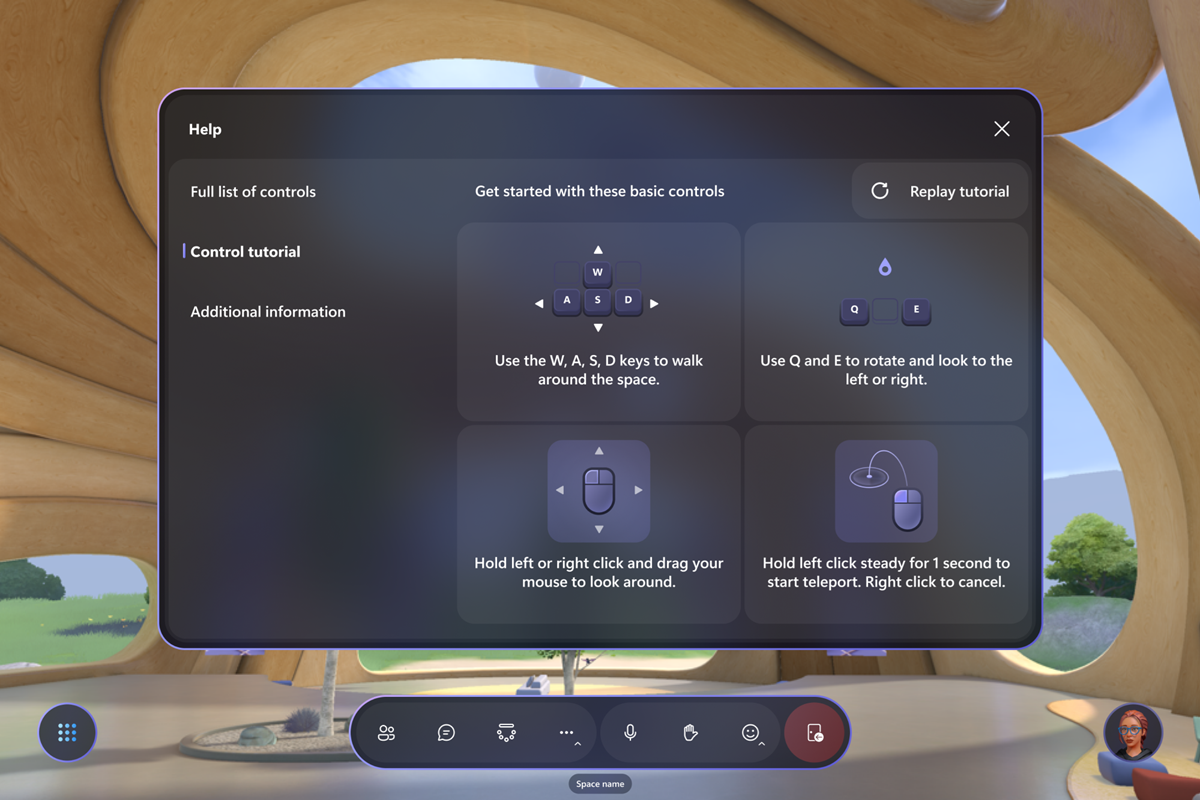
To change your view, use V to toggle between 1st person view and two 3rd person views with different camera zoom level and use the mouse scroll wheel to change the camera zoom level.
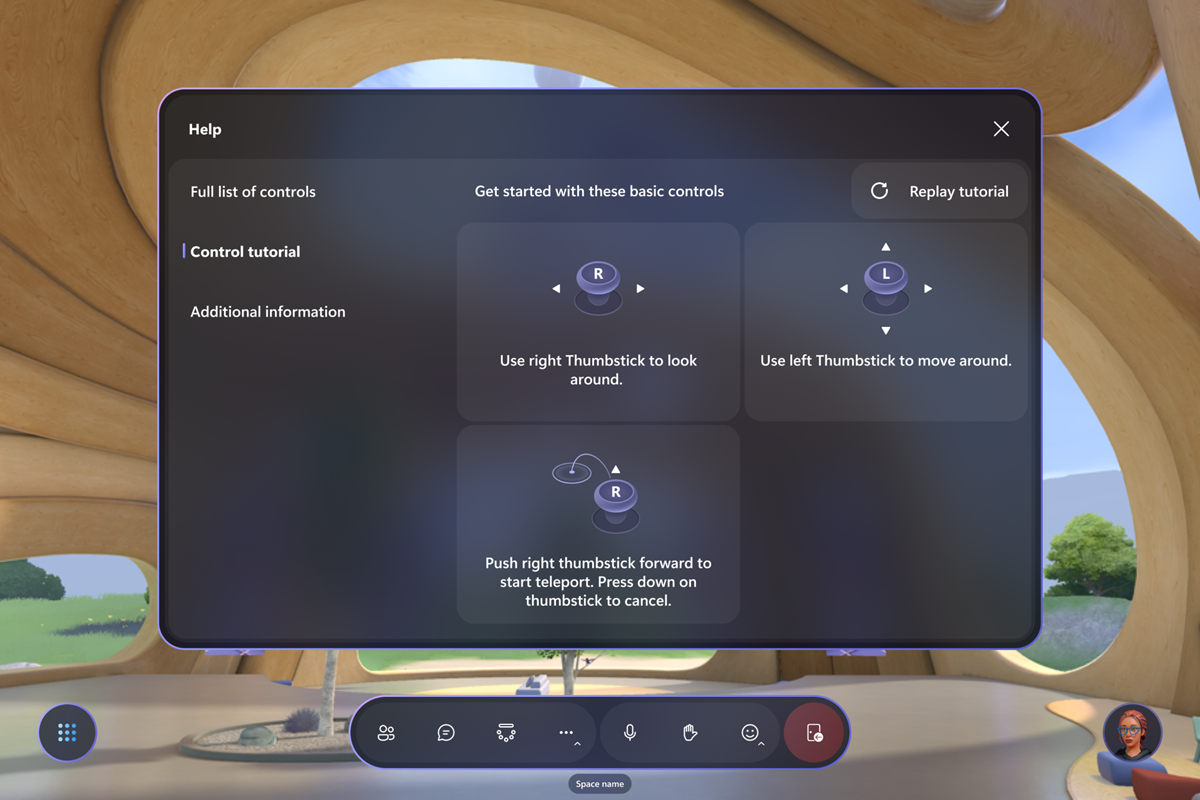
On Quest
For details on how to move around with your Quest devices, you can access the Control tutorial from the Help menu.
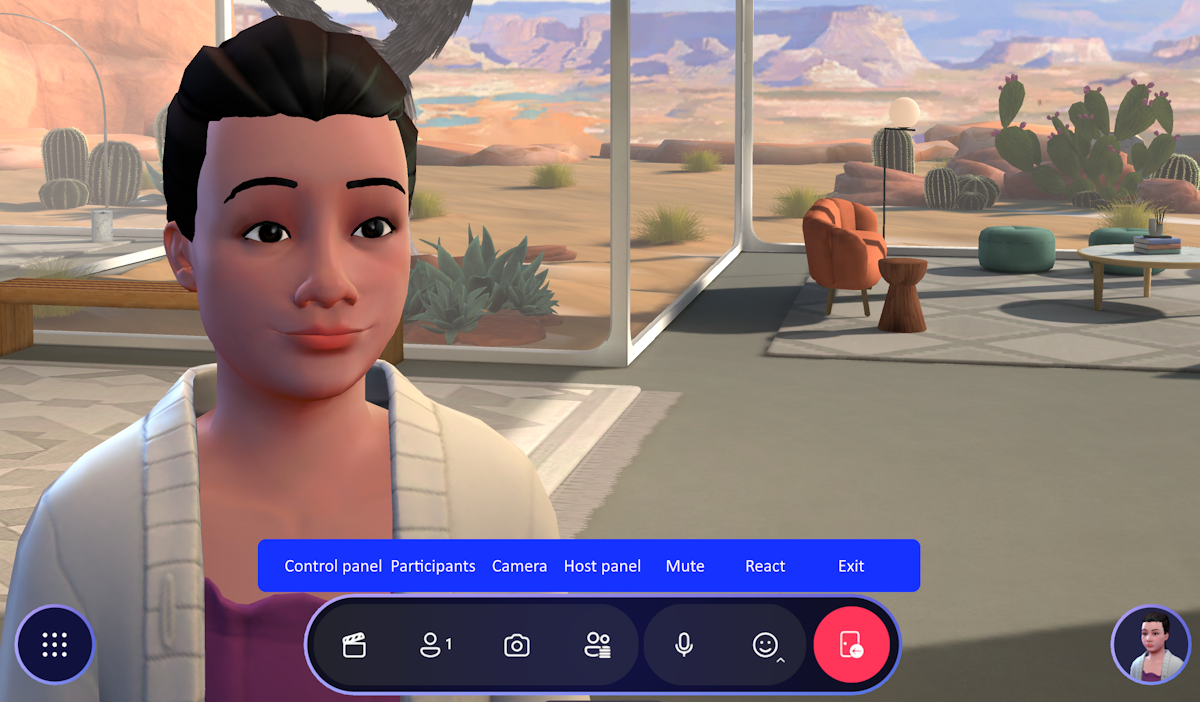
Mesh controls overview
Now that you're in an event, explore the interface to see what controls are available. To the left, we have the System Menu with Dashboard, Settings, Feedback, and Quit Mesh. The app bar in the middle holds the Participants, Selfie, Hand raise, and Reactions buttons. The Profile button in the lower right corner holds the Customize button for customizing your avatars.
You can also click on the Nametag and contact card of other participants to find out more information about them.
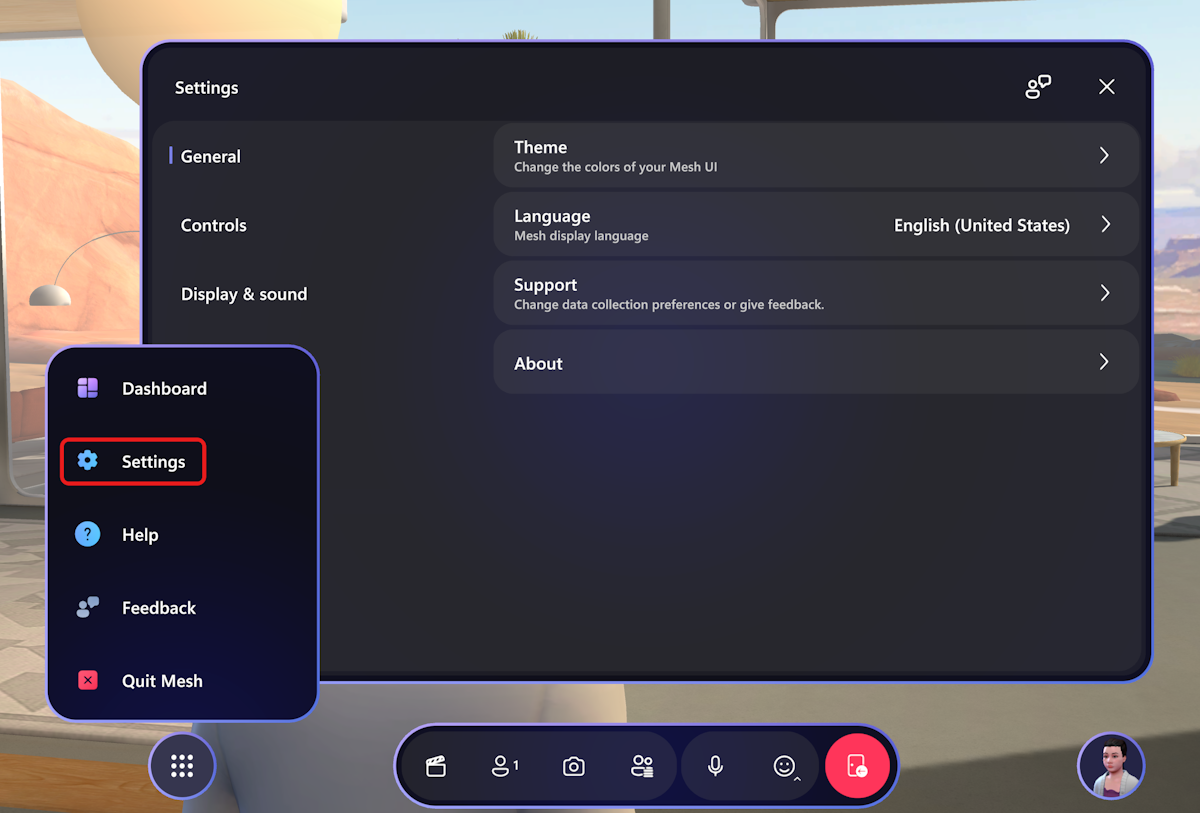
Adjust settings
The Settings menu helps you to set up the app according to your preferences. There are many options available here. It can be accessed directly from the bottom left menu button of the Mesh menu bar.
You can also select and setup your audio devices in the Settings dialog, Display & sound -> Devices.
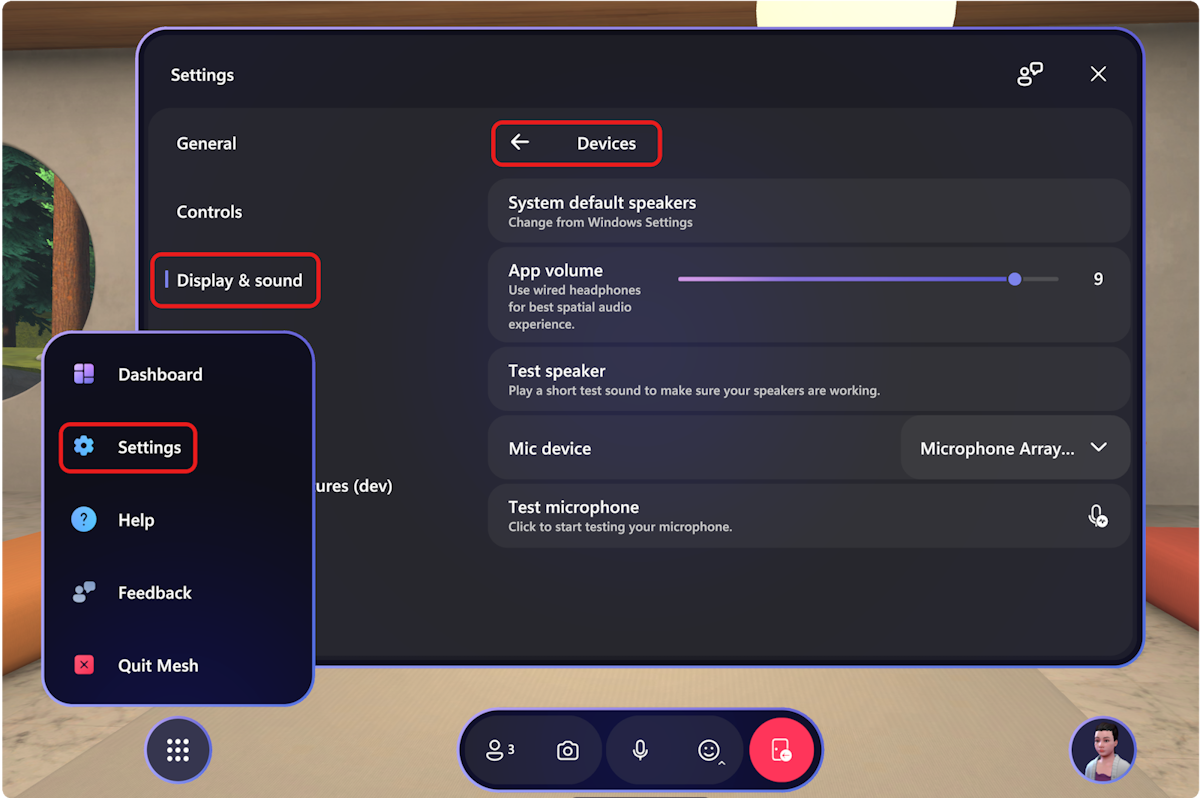
Learn more about frequently asked questions related to audio in Mesh here.
Participants
The Participants button will show the number of participants in an event.
Take a photo or selfie
Use the Camera button on the app bar to take a selfie of yourself with friends or snap a picture from the view of your avatar!
Note
Avatars nametags are turned off by default when taking a photo or selfie. You can still turn on the nametag by clicking on ... in the App bar.
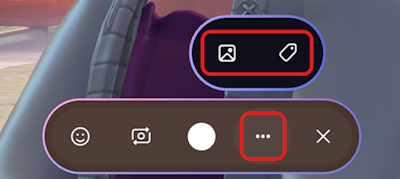
Selecting on the photo icon in the menu will take you to the SharePoint folder where your photos are stored.
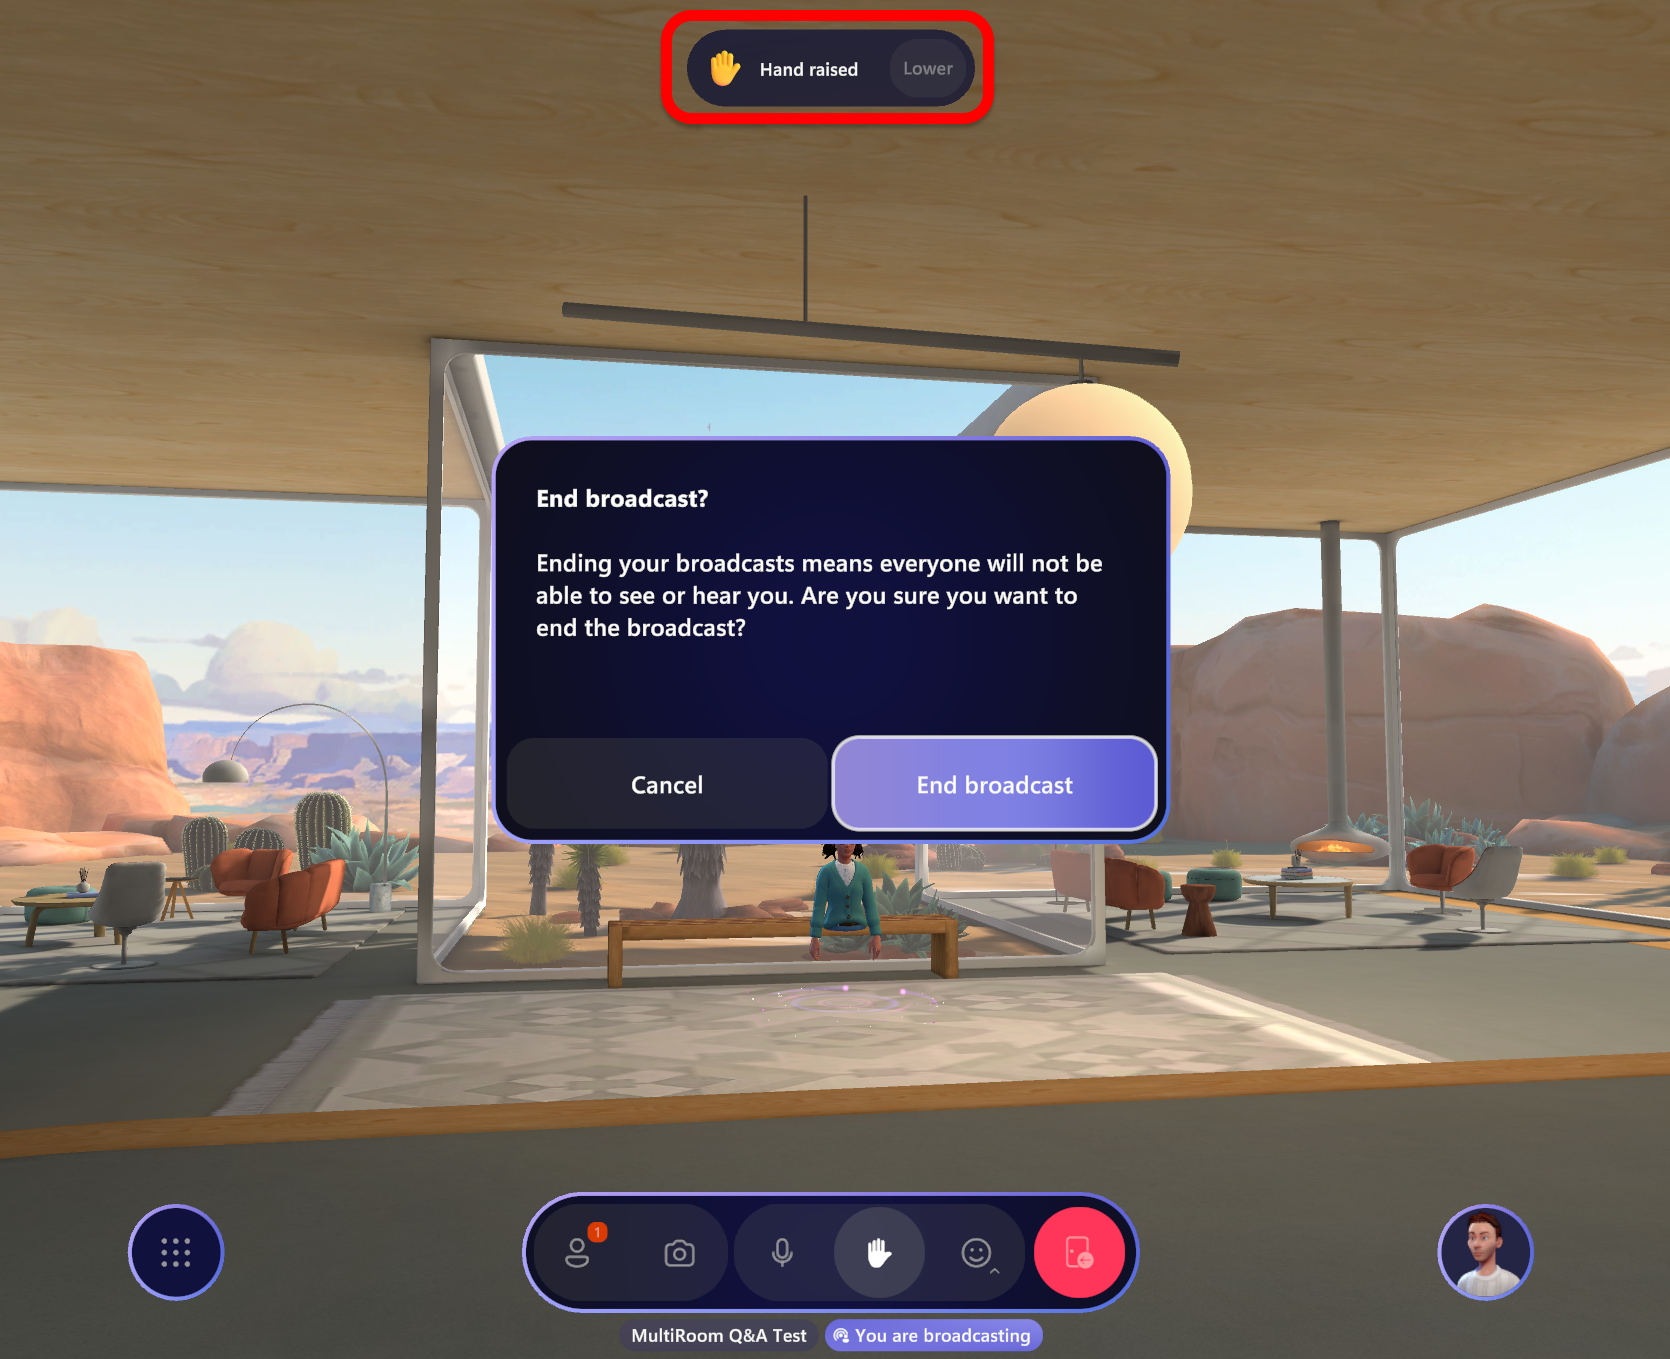
Raise hand to speak to hosts and all participants
If a host has enabled Hand Raise, you should see the hand raise button in the Menu bar.
Simply select the Hand Raise button, wait for the host to call on you, then you can comment or ask questions to the whole event.

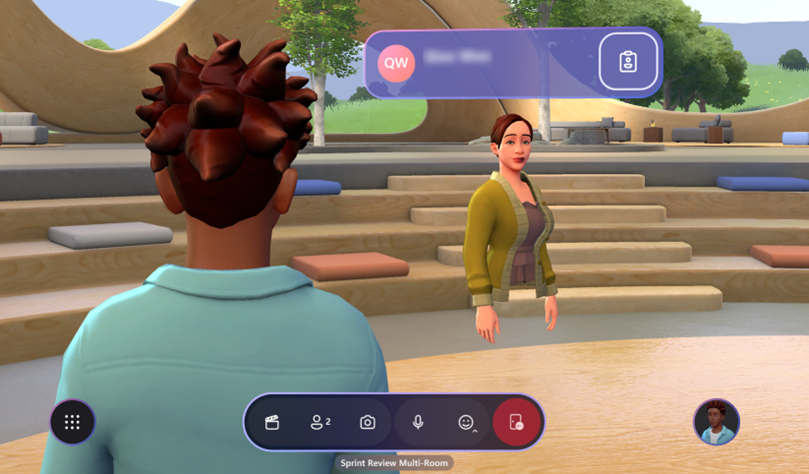
Lower your hand to finish answering your question and speaking to the whole event. You may need to select End broadcast in a multi-room event, as shown below:
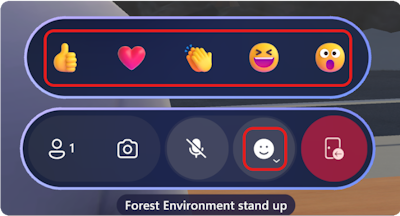
React with emotes
In the app bar, you can trigger Reactions, that cause your avatar to react with body gestures as well as emojis. When you use emojis, hosts in other rooms wil able to see your emojis emanate from your location!
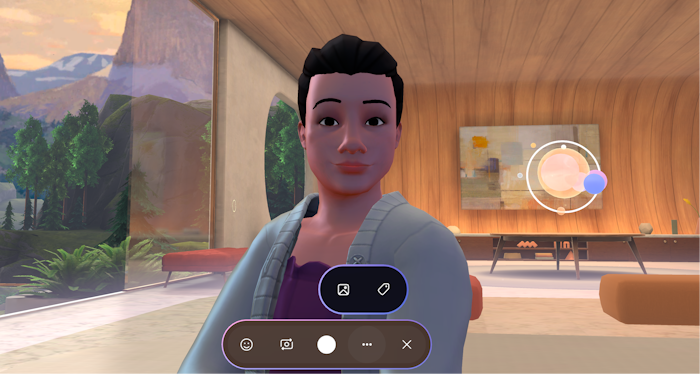
Profile
The Profile button in the lower right corner gives you access to your personal details and avatar customization options.
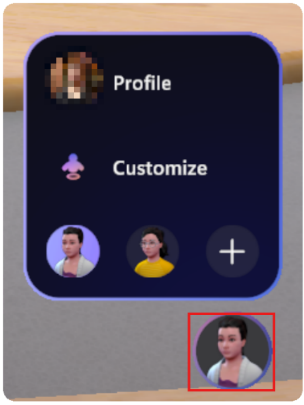
Select Customize to fine tune your Avatar's appearance while in an event!
![]()
Nametag and contact card
To find out about another participant in your event, click the nametag above an avatar, and then select the Contact card icon.