إشعار
يتطلب الوصول إلى هذه الصفحة تخويلاً. يمكنك محاولة تسجيل الدخول أو تغيير الدلائل.
يتطلب الوصول إلى هذه الصفحة تخويلاً. يمكنك محاولة تغيير الدلائل.
By opening table data in Microsoft Excel, you can quickly and easily view and edit data by using the Microsoft Power Apps Excel Add-in.

To install the Power Apps Excel add-in, see Microsoft PowerApps Office Add-in. For more information about how to add or remove an Office Excel Add-in, see Add or remove add-ins in Excel.
Open table data in Excel
Sign in to Power Apps.
In the left navigation pane, select Tables. If the item isn’t in the side panel pane, select …More and then select the item you want.
Select the ellipsis (...) to the right of the table that you're interested in, and then select Edit data in Excel.
Open the Excel worksheet that is downloaded to your browser's default download folder named similar to table-name (1591125669213).xlsx. This workbook has binding information for the table, a pointer to your environment, and a pointer to the Power Apps Excel add-in.
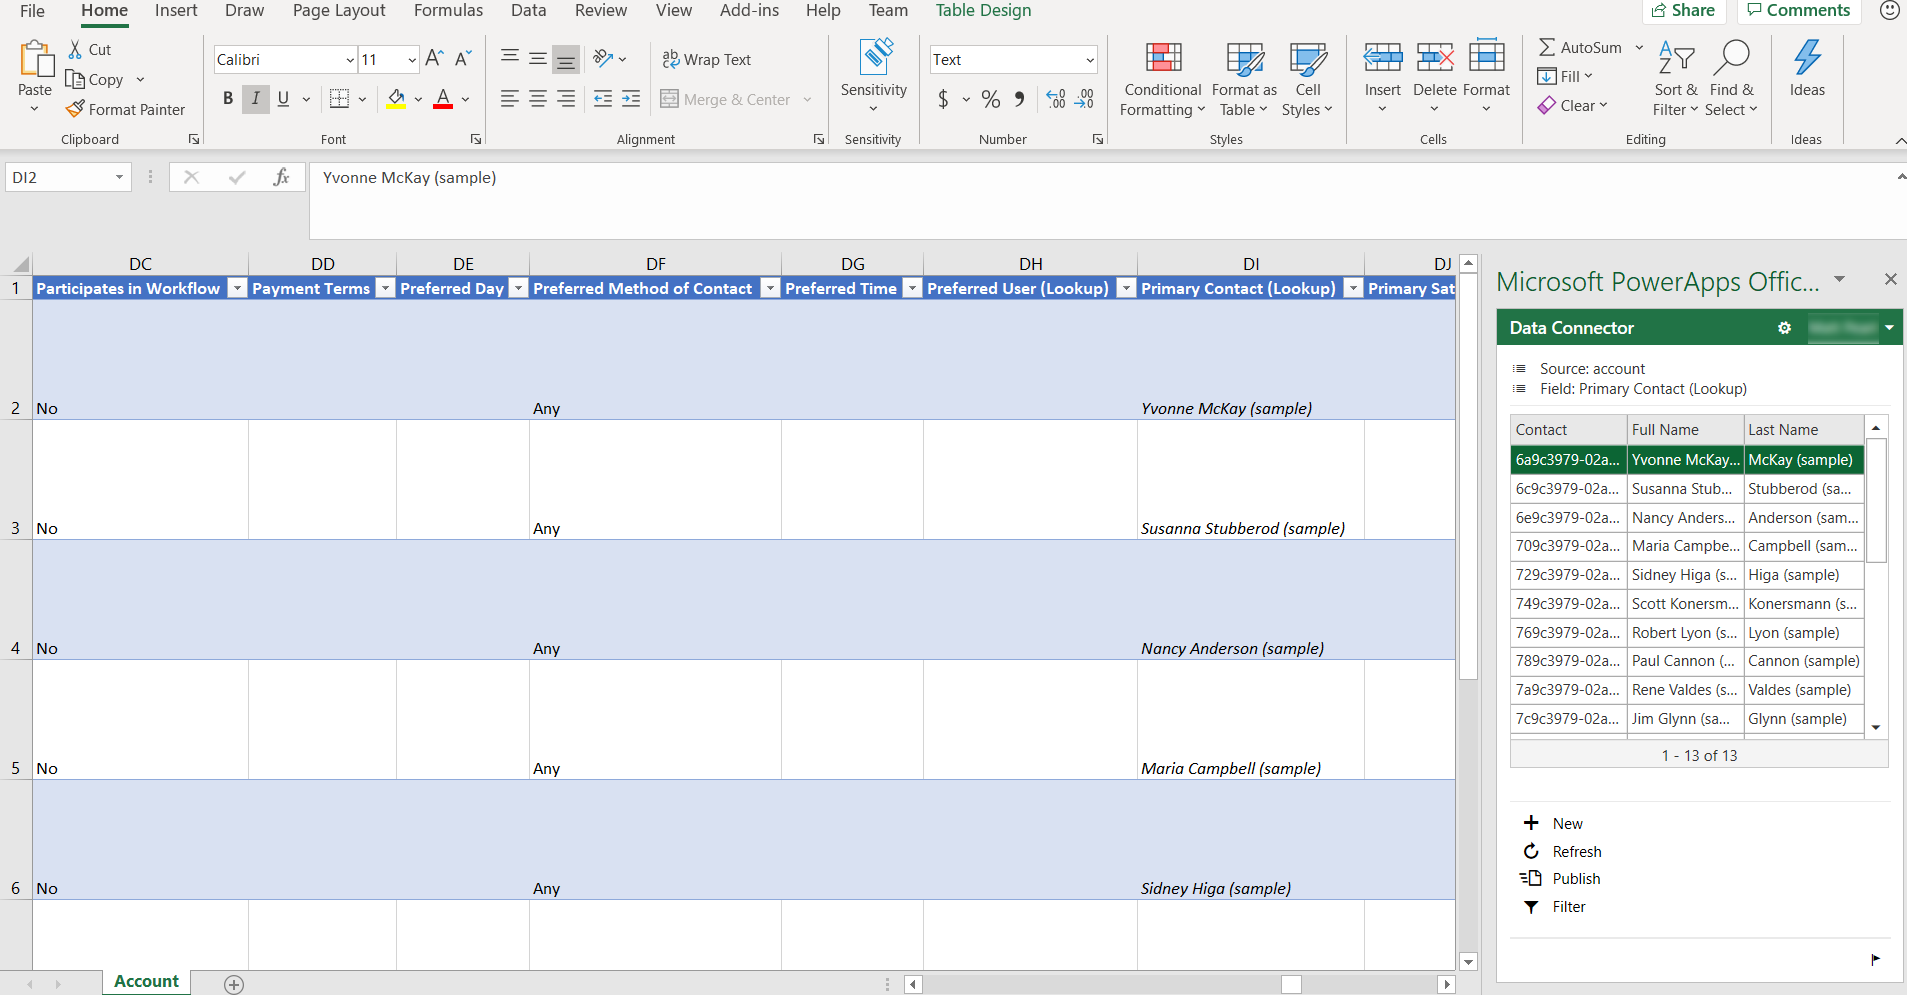
In Excel, select Enable editing to enable the Power Apps Excel Add-in to run. The Excel add-in runs in a pane on the right side of the Excel window.
Important
If the pane displays an error message, see Office Store Add-in download disabling.
If this is the first time that you've run the Power Apps Excel add-in, select Trust this Add-in to allow the Excel add-in to run.
If you're prompted to sign in, select Sign in, and then sign in by using the same credentials that you used on Power Apps. The Excel add-in will use a previous sign-in context and automatically sign you in if it can. Therefore, verify the user name in the upper right of the Excel add-in.
The Excel add-in automatically reads the data for the table that you selected. Note that there will be no data in the workbook until the Excel add-in reads it in.
View and refresh data in Excel
After the Excel add-in reads table data into the workbook, you can update the data at any time by selecting Refresh in the Excel add-in.
Edit data in Excel
You can change table data as you require and then publish it back by selecting Publish in the Excel Add-in.
To edit a row, select a cell in the worksheet, and then change the cell value.
To add a new row, follow one of these steps:
- Select anywhere in the worksheet, and then select New in the Excel add-in.
- Select in the last row of the worksheet, and then press the Tab key until the cursor moves out of the last column of that row, and a new row is created.
- Select in the row immediately below the worksheet and start to enter data in a cell. When you move the focus out of that cell, the worksheet expands to include the new row.
To delete a row, follow one of these steps:
- Right-click the row number next to the worksheet row to delete, and then select Delete.
- Right-click in the worksheet row to delete, and then select Delete > Table Rows.
Configure the add-in to adjust tables and columns
You can use the data source designer in the Excel add-on to adjust the columns and tables that are automatically added to the worksheet.
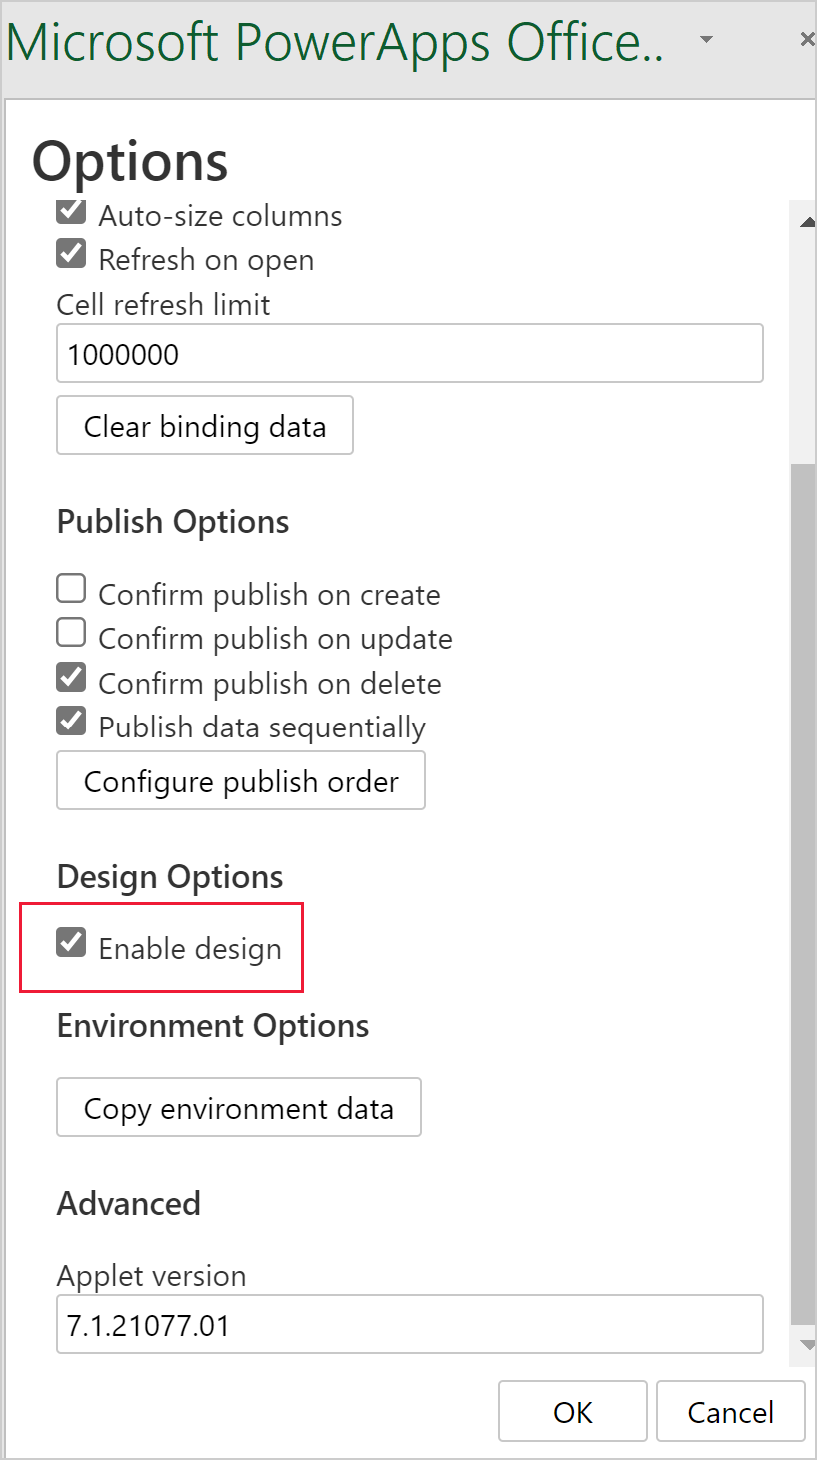
Enable the data source designer of the Excel add-in by selecting the Options button (the gear symbol).

Expand the Data Connector section, and then select the Enable design check box, and then select OK.

Select Design in the Excel add-in. All the data sources are listed.
Next to the data source, select the Edit button (the pencil symbol).
Adjust the list in the Selected columns column as you require:
- To add a column from the Available columns column to the Selected columns column, select the column, and then select Add. Alternatively, double-click the column.
- To remove a column from the Selected columns column, select the column, and then select Remove. Alternatively, double-click the column.
- To change the order of columns, select the column in the Selected columns column, and then select Up or Down.
Apply your changes to the data source by selecting Update, and then select Done to exit the designer. If you added a column (column), select Refresh to pull in an updated set of data.
Note
- Make sure to always include the ID and required columns in your workbook, as you may receive errors when publishing.
- When adding look up columns, make sure to add both the ID and the Display columns.
Troubleshooting
- Not all tables support editing and creation of new rows, these tables will open in Excel and allow you to view data but publishing will be disabled.
- Look up columns must be edited using the add-in to ensure the correct row is referenced, updating these columns via copy and past or typing directly into the column is not supported.
- Image and file columns are not supported. You won’t be able to see any data when you open an Excel worksheet that includes those data types.
- The maximum table size when editing in Excel is one million cells. If there are too many rows or columns, not all data will be read or published.
- Rows are processed sequentially. If there is an error in saving a row, changes to subsequent rows will be aborted. Changes to preceding rows are kept.
- Centralized deployment is not supported. This add-in requires access to the Office store.
- Manually configuring the add-in might cause unexpected behavior. For best results, download the Excel file with Power Apps instead of starting from a blank Excel workbook.
If you encounter an issue that isn't described here, contact us via the support pages.
Office Store add-in download disabling
If Office Store add-in downloading has been disabled for your organization, you might receive the following error message when you open the Excel worksheet after selecting the Edit data in Excel command.
Office 365 has been configured to prevent individual acquisition and execution of Office Store Add-ins.
This setting prevents the Power Apps Excel Add-in from downloading. When this occurs, table row data will not be displayed in Excel.
For more information about enabling Office Store Add-in downloading, contact your Office app administrator.
For more information about preventing Office Store Add-in downloading from the Office Store, see Prevent add-in downloads by turning off the Office Store across all clients.
Other ways to export and view table row data
For more information about ways to export and view table row data, see these articles.
- Export data to CSV
- Export your data to Excel Online
- Export table data to Azure Data Lake Storage Gen2
- Self-service data prep with dataflows