إشعار
يتطلب الوصول إلى هذه الصفحة تخويلاً. يمكنك محاولة تسجيل الدخول أو تغيير الدلائل.
يتطلب الوصول إلى هذه الصفحة تخويلاً. يمكنك محاولة تغيير الدلائل.
In this tutorial, you'll learn how to add a page to your Power Pages site. You can use this page to display static content to your audience such as text or images or use it to allow your site visitors to interact with information from Dataverse using lists and forms.
In this tutorial, you learn how to:
- Add a new page to a site
- Add and modify content on the page
- Move the page in the site map
Prerequisites
- A Power Pages subscription or trial. Get a Power Pages trial here.
- A Power Pages site created. Create a Power Pages site.
Create a page using a blank layout
In these steps, you'll create a page using a blank layout. As you learn more about Power Pages, you can use other layouts or even create your own custom layouts.
This video provides an overview of the steps to create a page using a blank layout.
Go to Power Pages.
Select Edit on the site you want to add a page. If you don't have a site, create a site before continuing.
Select Pages and then select + Page in the upper-left corner.
Select Other ways to add a page.
Provide a name for your page and select the Start from blank page layout.
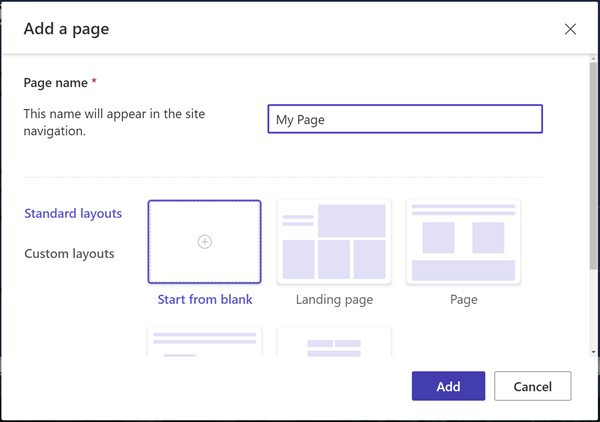
Select Add.
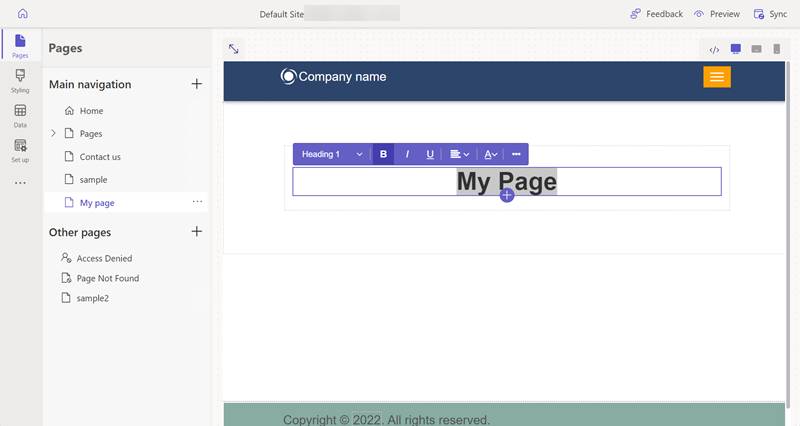
After a few moments, you should see blank page with a selection of components to add to the section.
Design the page and add content
Select the Text icon.
Enter a name for your page (for example, My Page).
- Change the style to Heading 1
- Select the B icon to make the text bold.
- Adjust the alignment so the text appears centered
Below the text, select the + icon and select the Spacer icon to add the spacer component.
Below the spacer, select the + icon and select the Text icon to add another text box.
Add some text to the text box. Experiment with the style and colors.
Select the + icon below the text and add another spacer.
Select the Button component.
Configure the following details for the button:
- Button label: Contact us
- Choose Link to a page
- Select Contact us page from the dropdown.
- Select OK
- Use the properties menu to center the button
Select the entire section and select Background from the properties menu and change the background color of the section.
Experiment by adding addition sections, components, and colors to your page.

Preview your page
You can preview what your page will look like on the site at any time.
Select Preview from the main menu in the design studio.
Choose Desktop for the page to appear in your browser, or you can view the page on your mobile device by scanning the QR code.
Move the page in the sitemap
Adding the page to the Main navigation will add a menu option. The page can be moved to different spots in the overall site hierarchy using the design studio.
This video will provide an overview of the steps to move a page in the site map.
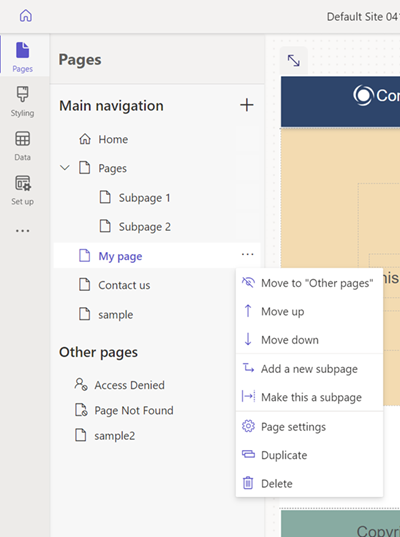
Under the Main navigation, select the ellipse (...) icon and choose Move to other pages.
The page should now appear in the Other pages section. If you now preview the page, notice that there isn't menu item for the page.
Under Other pages, select your page again and choose to Move to "Main navigation".
Select the page and select the ellipse (...), move the page up and down in the hierarchy using the Move up and Move down options.
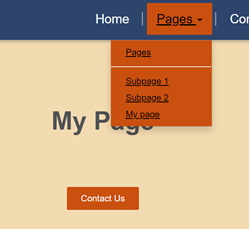
Move the page underneath the Pages link. Select the Make this a subpage option to make it a subpage of the Pages page.
Preview the page and note how your page is a sublink under pages and also how the URL reflects that this page is now a subpage.
See also
Next steps
Advance to the next article to learn how to apply styles to your site.