إشعار
يتطلب الوصول إلى هذه الصفحة تخويلاً. يمكنك محاولة تسجيل الدخول أو تغيير الدلائل.
يتطلب الوصول إلى هذه الصفحة تخويلاً. يمكنك محاولة تغيير الدلائل.
The ability to dynamically interact with Microsoft Dataverse is one of the key features of Power Pages. Users visiting a site can perform actions such as view a list of programs, register their children, schedule a meeting or apply for a building permit. The information tracked in Dataverse can be accessed by other Power Platform services such as Power Apps, Power Automate, or Power BI.
In this tutorial, you'll build a web application in Power Pages that will allow users the ability to create, read, and update Dataverse records. You can use the site as a foundation to build your own Dataverse powered websites.
Watch this video (no audio) to see records created and updated on a page:
In this tutorial, you learn how to:
- Create a Dataverse table
- Create a Dataverse view
- Create a Dataverse form
- Configure table permissions to allow you to read, create and update records
- Add a list to the page
- Add a page with a form to create records
- Add a page with a form to view/edit records
- Update the list to allow your to navigate to pages to create records and view/edit records
Prerequisites
- A Power Pages subscription or trial. Get a Power Pages trial here.
- A Power Pages site created. Create a Power Pages site.
Create a Dataverse table
In this section, you'll use the Data workspace to create a Dataverse table. A table is used to store information about specific objects. A scholarship, an application, or company are some examples of tables. A table is made up of a series of columns. A column is a specific piece of information about the object, like name, description, application date, or a choice of options, like color.
Use the steps below to create a table and columns using the Data workspace.
Go to Power Pages.
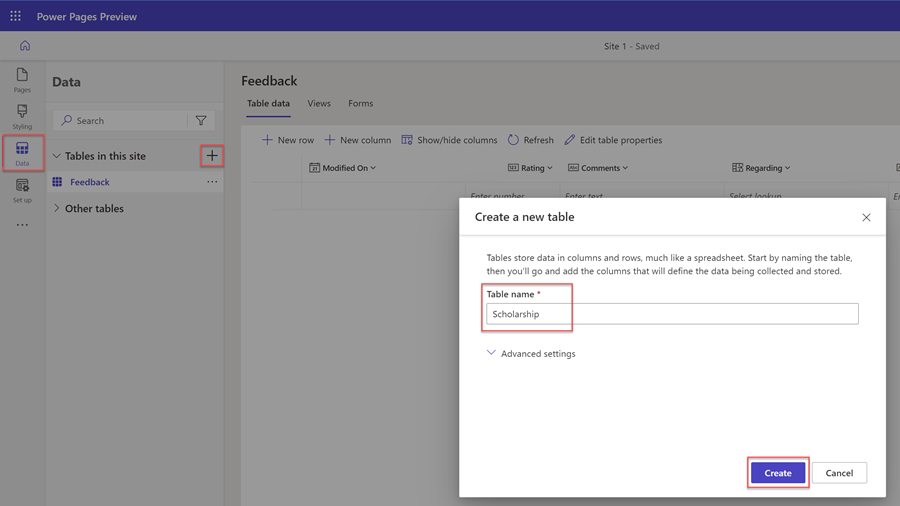
Select the Data icon on the left navigation to go into the Data workspace.
Select the new table (+) button, to the right of the Tables in this site heading.
Give your new table an appropriate name.
Select Create to create the table in Dataverse.
To add a column to the table, choose + New column. Enter a Display name and select the Data type and choose any other options. Select Save.
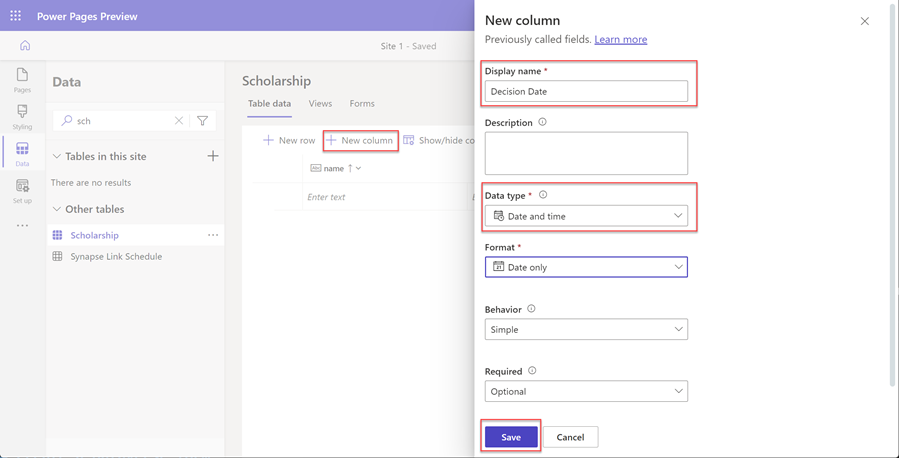
Repeat the previous step until you've created all the columns required for your table.
Create a Dataverse view
A Dataverse view is a type of query to display specific rows and columns of data from a Dataverse table. When you create a view, you specify certain criteria such as which columns to show, how the records are sorted, and how the rows are filtered (for example, you may want to only show records that have certain criteria, like events where the event date is happening in the future).
This view will be used to configure a list on a webpage.
In this section, you'll use the Data workspace to create a Dataverse view.
Select the table from the list of tables in Data workspace to which you want to create a new view.
Select the Views tab.
Select New view.
Enter in the name of your view and optionally, a description.
Select Create.

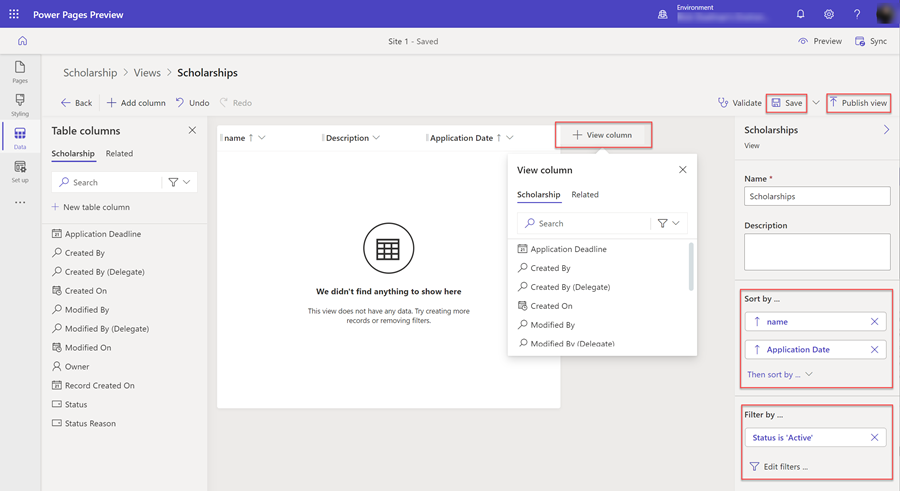
The view designer will appear. You can add columns to the view and adjust the width.
You can select to sort by specific table columns in the Sort by... section on the right side flyout panel.
You can also choose to configure specific row filtering options by selecting Edit filters... on the Filter by section on the right side flyout panel.
When you're finished configuring the view, select Save and then Publish view.
Create a Dataverse form
A Dataverse form provides a surface that shows an arrangement of specific columns (fields) from a table to be used as a foundation for end users to add, read, or update individual records.
The Dataverse form will be used to configure a form component on a webpage.
In this section, you'll use the Data workspace to create a Dataverse form.
Select the table from the list of tables in Data workspace to which you want to create a new form.
Select the Forms tab.
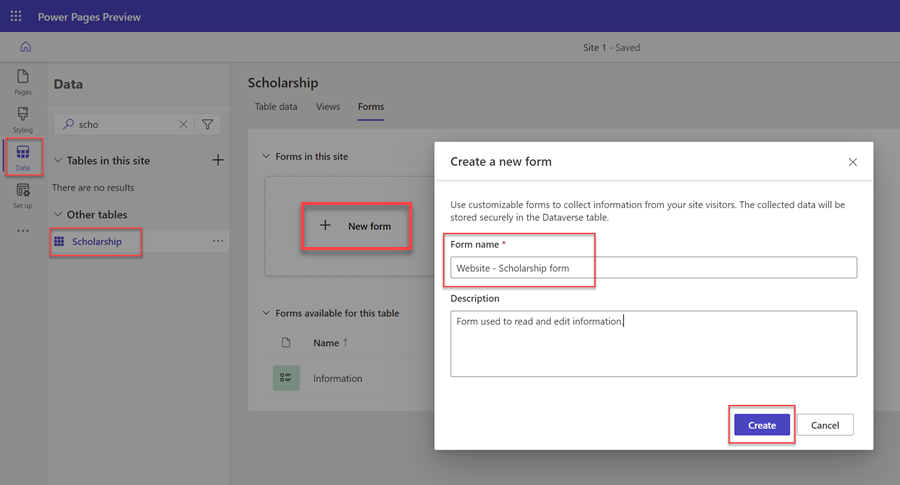
Select New form.
Enter in the name of your form and optionally, a description.
Select Create.
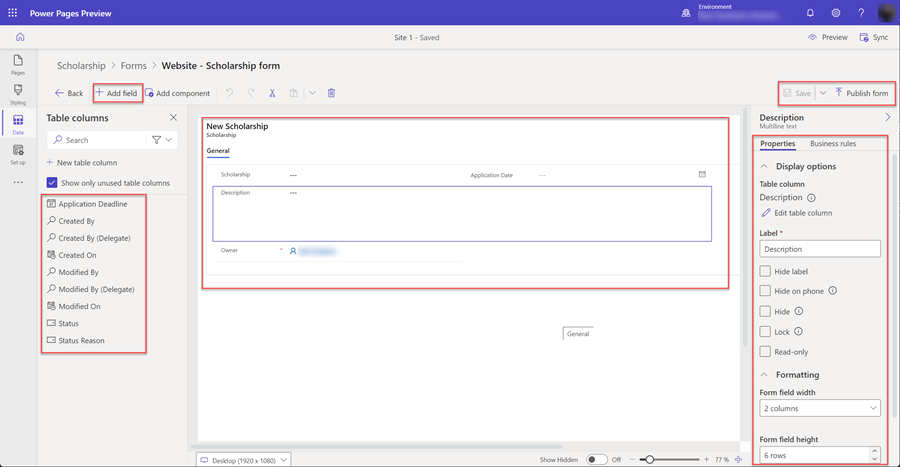
The Dataverse form designer will appear. With this tool you can design and configure various aspects for your form:
- Select + Add field will display the list of table columns and allow you to drag and drop them onto the form canvas.
- The form canvas allows you to arrange the fields.
- The properties fly-out panel on the right allows you to configure various options of the selected form, tabs, sections and fields, such as the number of columns per section, width and height of fields, label names, and other aspects.
Note
Certain fields (such as Owner will not be visible on a webpage).
When you're finished configuring the form, select Save and then Publish form.
Configure table permissions
By default, users of the site won't have access to view, create, or edit records. You'll need to configure specific table permissions and assign web roles. To ensure your data remains protected and secure, you should only provide access to specific users of the site.
In this section, you'll use the Security workspace to create a table permission and assign web roles.
Select the Security workspace icon.
Under Protect, select Table permissions.
Select + New permission.
A fly-out section will appear. Enter a Name for the table permission.
Select the Table for which you want to set up permissions.
Select an appropriate Access Type depending on how you want to specify the relationship of the records to the signed-in user. For purposes of this tutorial, we'll provide access to all site visitors, so we'll select Global. Consider other options as you build your sites.
Select the Permission to options based on how you want users to interact with the data. For purposes of this tutorial, we'll choose Read, Write, Create, and Delete. Consider limiting these options as you build your own sites.
Select + Add roles and choose the web roles that you want to assign to this table permission. For purposes of this tutorial, we'll choose the Anonymous Users and Authenticated Users roles. Consider creating custom web roles and assigning specific users as you build your own sites.
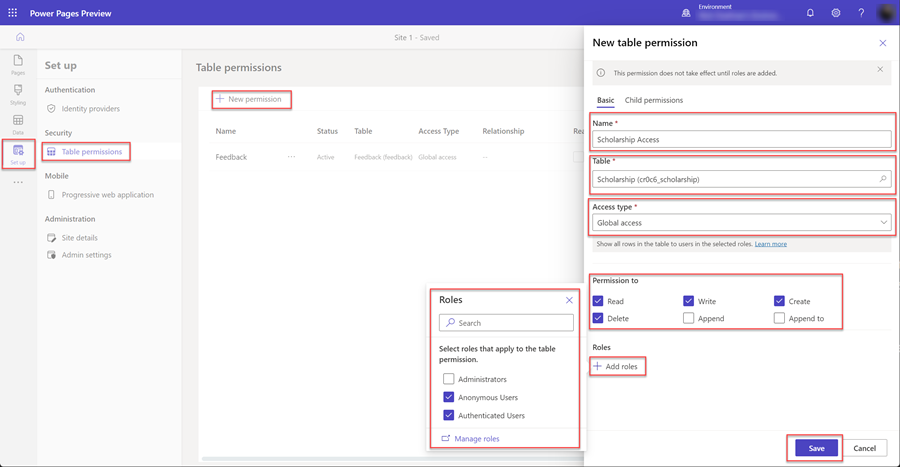
Select Save to save the table permission.
Add pages to your site
You'll need to create pages in your site to interact with Dataverse records.
In this tutorial, we'll create three pages;
- A page that will show a list of Dataverse records.
- A page to create new records.
- A page to view and update existing records.
Add a list to a page
Adding a list component to a web page will allow users to search, browse and select from a list of records stored in Dataverse.
In this section, you'll use the Pages workspace to create a page with a list component.
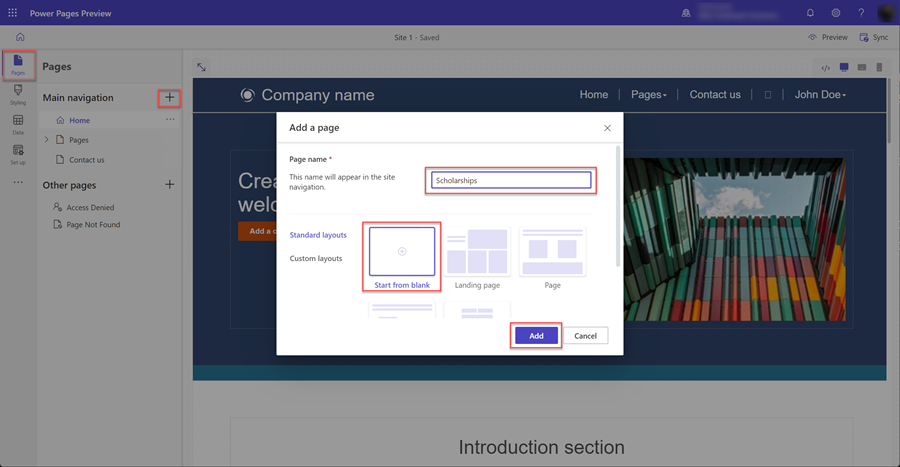
Select the Pages workspace icon.
Select the + to the right of Main navigation.
Give the web page an appropriate name.
In Standard layouts, select the Start from blank layout and select Add.
When the new page appears, you'll be presented with a list of components to add to your new page. Select the List component.
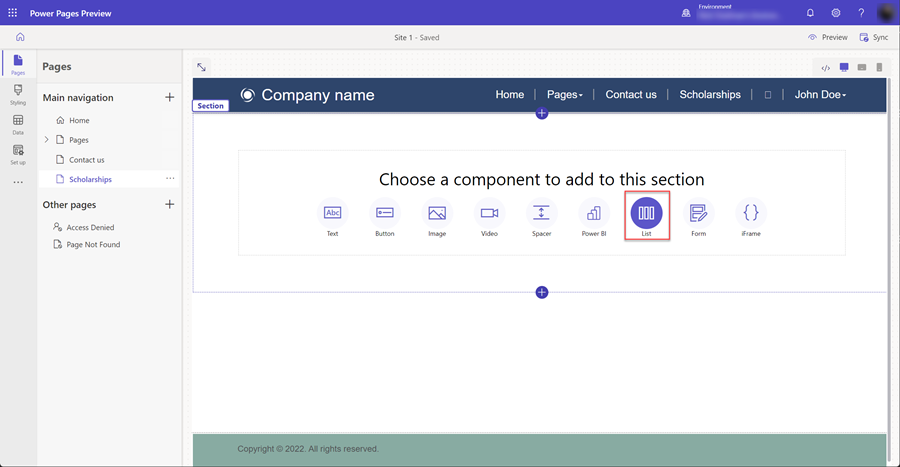
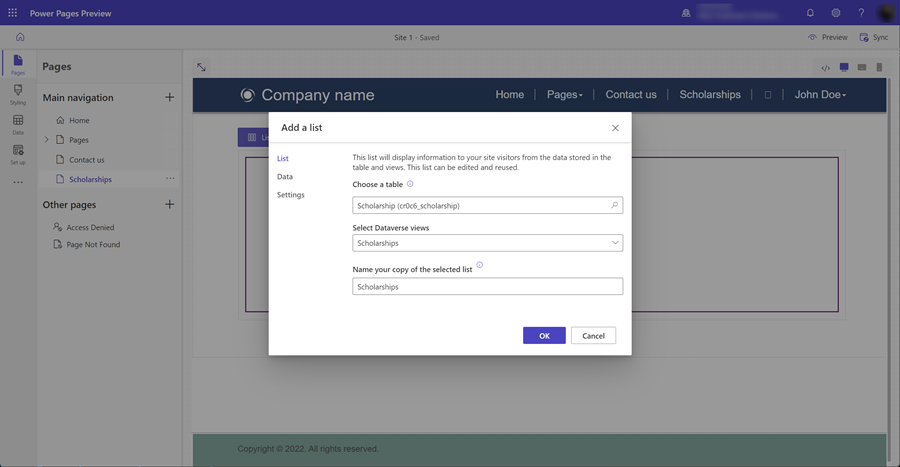
The Add a list window will appear.
- Choose the table.
- Select one or more Dataverse views.
- Leave the default name or give the list a new name.
- Select Ok.
The blank list will appear on the page.
Add a page with a form to create records
Adding a form component to a page configured to insert data will allow users to create new records in Dataverse. A form component on a page is based on the Dataverse form created in the data workspace.
In this section, you'll use the Pages workspace to create a page with a form component configured to insert new records.
Select the Pages workspace icon.
Select the ... icon to the right of the web page you created earlier to contain the list component, a fly-out menu will appear, select Add a new subpage.

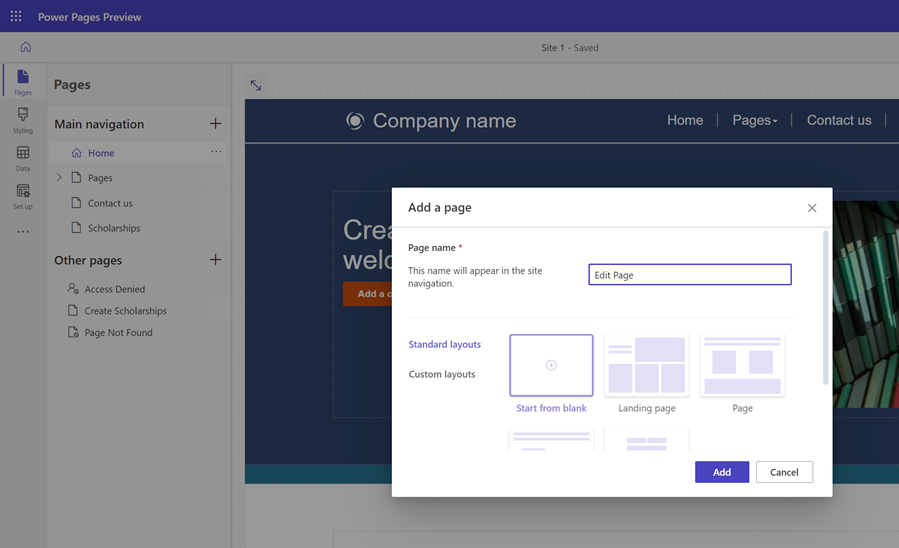
Give the page an appropriate name (for example, Create record) and choose the Start from blank page layout.
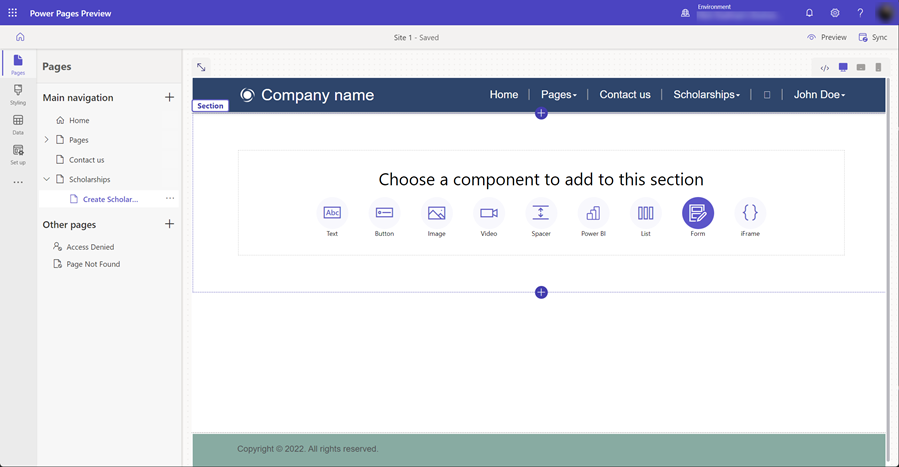
When the new page appears, you'll be presented with a list of components to add to your new page. Select the Form component.
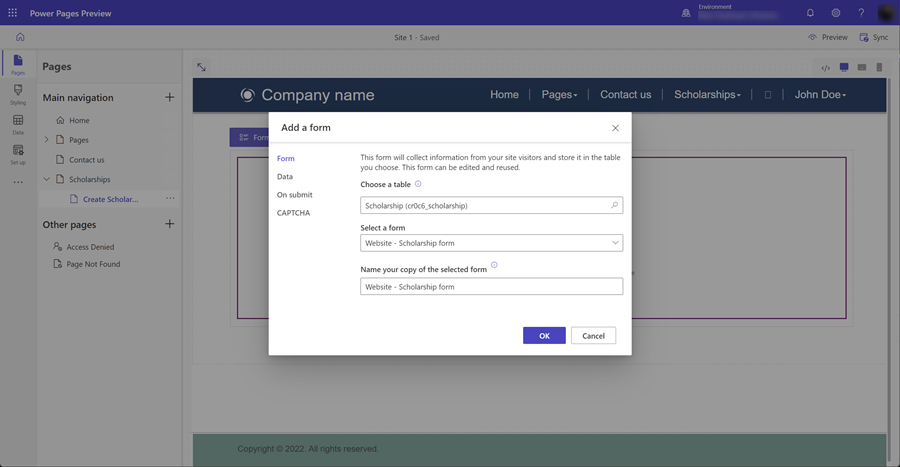
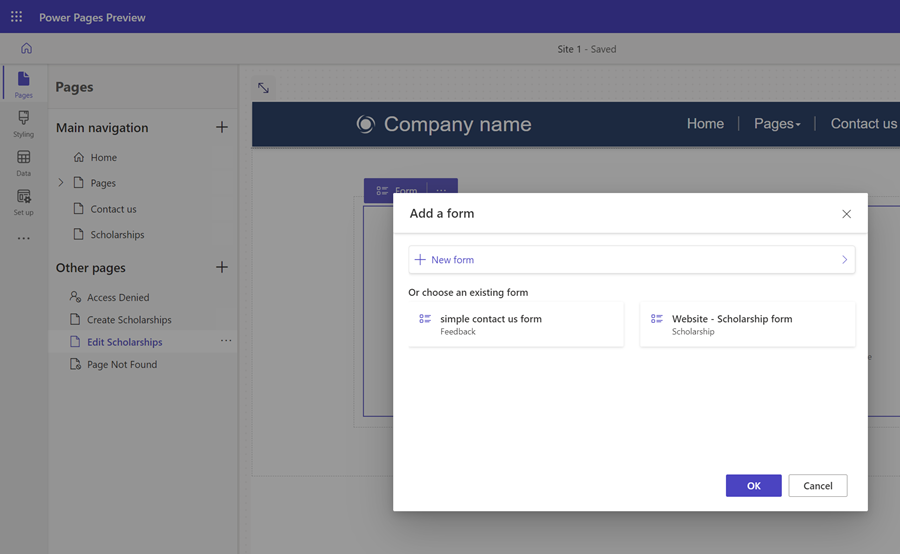
The Add a form window will appear. Select + New form.
You'll then need to configure the form.
- Select the Dataverse table for your form.
- Select the Dataverse form that will be used as layout for your form component on your page.
- Leave the default or give the form component a name (for example create record).
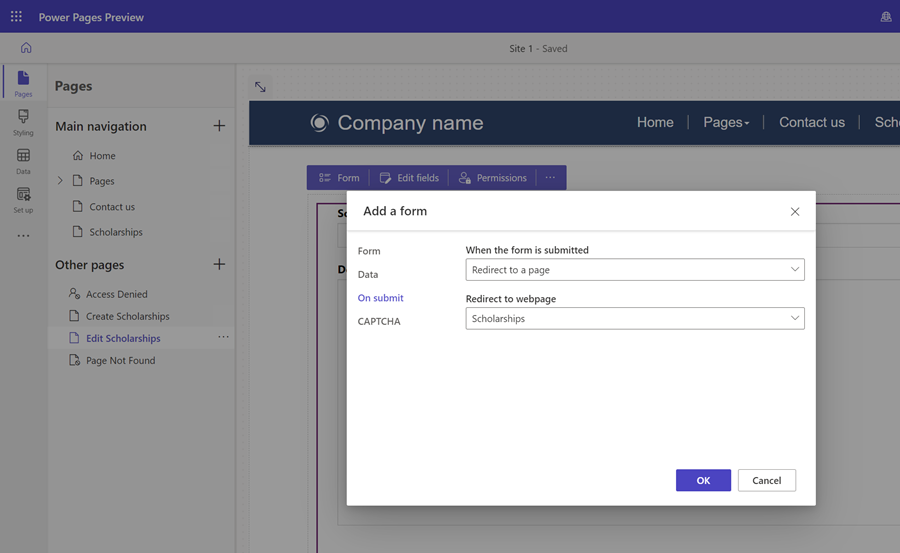
You can configure other form component properties. On the Data section, make sure that Data from this form option is set to Creates a new record. You can configure other options such as turning off or turning on CAPTCHA or configuring the navigation when the form is submitted.
Select Save.
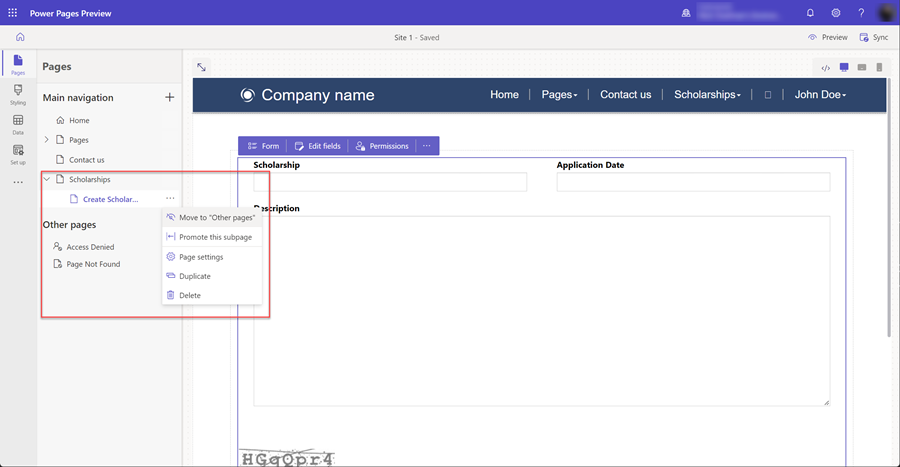
We will remove this new page from the main page navigation. We'll add a create record option on the page with the list component. Select the ... and select Move to "Other pages".
Add a page with a form to view/edit records
Along with creating new records, we'll also want to allow our users to be able to edit existing records. We'll again use a form component on a page but instead configured to edit records in Dataverse.
Again we'll add a new web page and add a form component as we did in the previous steps.
In this section, you'll use the Pages workspace to create a page with a form component and configure it to edit existing records.
Select the Pages workspace icon.
Select the + icon (add webpage) to the right of the Other pages section. Give the page an appropriate name and use the Start from blank layout.
You'll see the page. Choose the Form option that will appear to open the Add a form window.
Select the + New form option.
You'll then need to configure the form with similar options as the insert form component.
- Select the Dataverse table for your form.
- Select the Dataverse form that will be used as layout for your form component on your page.
- Leave the default or give the form component a name (for example Edit record).
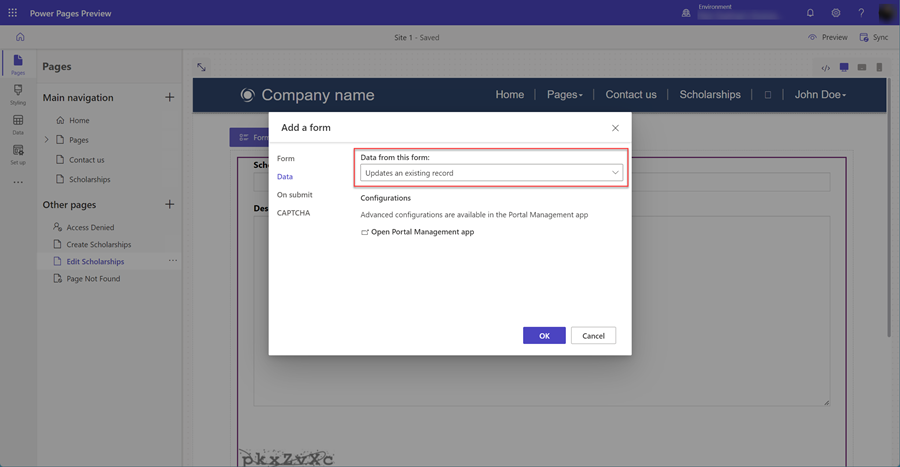
You can configure other form component properties. On the Data section, make sure that Data from this form option is set to Updates an existing record. You can configure other options such as turning off or turning on CAPTCHA or configuring the navigation when the form is submitted.
Select OK.
Update the list to allow you to navigate to pages to create records and view/edit records
Now that the pages with form components have been created, we need to configure the page with the list component to be able to navigate to both the create and edit pages.
In this section, you'll use the Pages workspace to configure the list component to have an option to create new records and also configure the list so a user can select on a listed record and navigate to an edit page.
Select the Pages workspace icon.
Select the page with the list component.
Select the list component on the page and then select the List button to open the Add a list window.
Select the Data tab.
Select the Create a new record option.
In the Target type, choose Webpage, and select the webpage with the form component configured for creating records.
Select the View details option.
In the Target type, choose Webpage, and select the webpage with the form component configured for editing and viewing records.
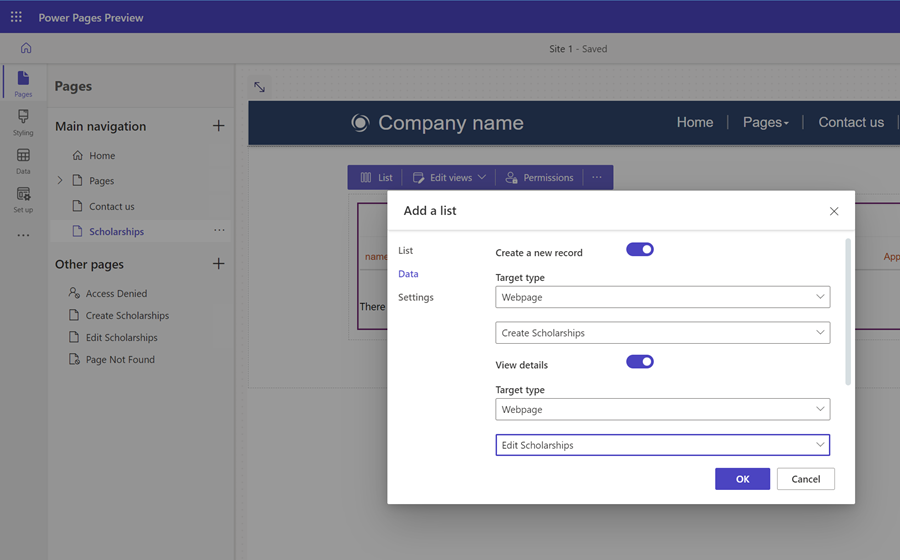
Select Ok.
Test the site
In the design studio, select Preview, followed by Desktop to preview your site.
Create some new records. When you have a list of records, select the first column of the list to open up a page to edit the record.
Extra enhancements
To make your site more usable for end users and reduce navigation, you can configure the form to instead redirect back to the list page instead of a message. Depending on your site, you may want to turn off the CAPTCHA.