Add a Windows 10 operating system image using Configuration Manager
Applies to:
- Windows 10
Operating system images are typically the production image used for deployment throughout the organization. This article shows you how to add a Windows 10 operating system image created with Microsoft Configuration Manager, and how to distribute the image to a distribution point.
Infrastructure
For the purposes of this guide, we'll use one server computer: CM01.
- CM01 is a domain member server and Configuration Manager software distribution point. In this guide, CM01 is a standalone primary site server.
- CM01 is running Windows Server 2019. However, an earlier, supported version of Windows Server can also be used.
An existing Configuration Manager infrastructure that is integrated with MDT is used for the following procedures. For more information about the setup for this article, see Prepare for Zero Touch Installation of Windows 10 with Configuration Manager.
Important
The procedures in this article require a reference image. Our reference images is named REFW10-X64-001.wim. If you have not already created a reference image, then perform all the steps in Create a Windows 10 reference image on CM01, replacing MDT01 with CM01. The final result will be a reference image located in the D:\MDTBuildLab\Captures folder that you can use for the procedure below.
Add a Windows 10 operating system image
On CM01:
Using File Explorer, in the
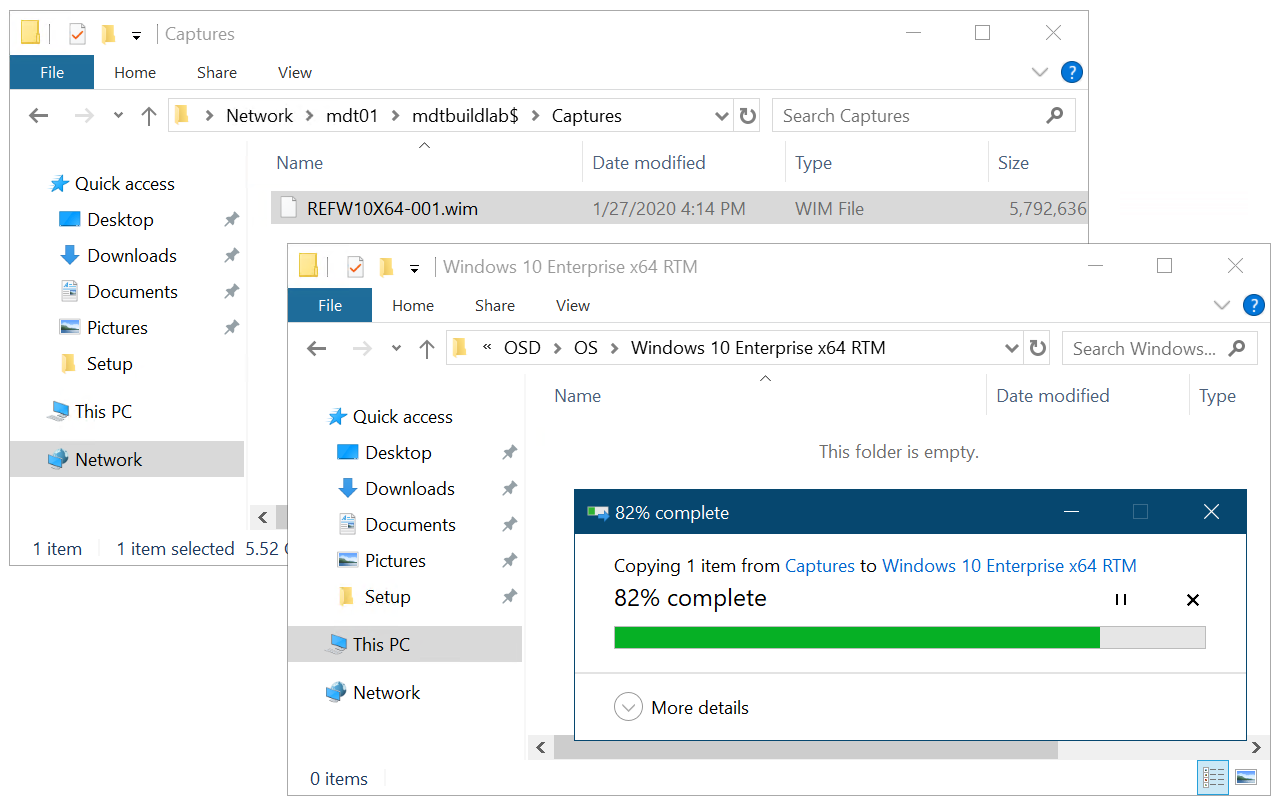
D:\Sources\OSD\OSfolder, create a subfolder named Windows 10 Enterprise x64 RTM.Copy the
REFW10-X64-001.wimfile to theD:\Sources\OSD\OS\Windows 10 Enterprise x64 RTMfolder.
The Windows 10 image being copied to the Sources folder structure.
Using the Configuration Manager Console, in the Software Library workspace, right-click Operating System Images, and select Add Operating System Image.
On the Data Source page, in the Path: text box, browse to
\\CM01\Sources$\OSD\OS\Windows 10 Enterprise x64 RTM\REFW10-X64-001.wim, select x64 next to Architecture and choose a language, then select Next.On the General page, assign the name Windows 10 Enterprise x64 RTM, select Next twice, and then select Close.
Distribute the operating system image to the CM01 distribution point by right-clicking the Windows 10 Enterprise x64 RTM operating system image and then clicking Distribute Content.
In the Distribute Content Wizard, add the CM01 distribution point, select Next and select Close.
View the content status for the Windows 10 Enterprise x64 RTM package. Don't continue until the distribution is completed (it might take a few minutes). You also can review the
D:\Program Files\Microsoft Configuration Manager\Logs\distmgr.logfile and look for the STATMSG: ID=2301 line.
The distributed Windows 10 Enterprise x64 RTM package.
Next, see Create an application to deploy with Windows 10 using Configuration Manager.
Related articles
Prepare for Zero Touch Installation of Windows 10 with Configuration Manager
Create a custom Windows PE boot image with Configuration Manager
Create an application to deploy with Windows 10 using Configuration Manager
Add drivers to a Windows 10 deployment with Windows PE using Configuration Manager
Create a task sequence with Configuration Manager and MDT
Deploy Windows 10 using PXE and Configuration Manager
Refresh a Windows 7 SP1 client with Windows 10 using Configuration Manager
Replace a Windows 7 SP1 client with Windows 10 using Configuration Manager