إشعار
يتطلب الوصول إلى هذه الصفحة تخويلاً. يمكنك محاولة تسجيل الدخول أو تغيير الدلائل.
يتطلب الوصول إلى هذه الصفحة تخويلاً. يمكنك محاولة تغيير الدلائل.
This article shows you how to register for the Microsoft Windows Hardware Developer Program. When you register for the Hardware Developer Program, you're prompted to accept the following agreements
- Code Signing Agreement
- Windows Hardware Compatibility Agreement
- Microsoft Marks License Agreement (MMLA) (ver. 2024)
- Windows Analytics Agreement (ver. 2.0)
Prerequisites
- If you have an existing organization Dev Center account that you want to use for the hardware program, sign in with it before you begin registration.
- You must have an extended validation (EV) code signing certificate. Check whether your organization already has a code signing certificate. If your company already has a certificate, have the certificate available. If your organization doesn't have a certificate, you must purchase an EV certificate. You only need the certificate to register for the Hardware Developer Program. You don't need to sign your driver with it.
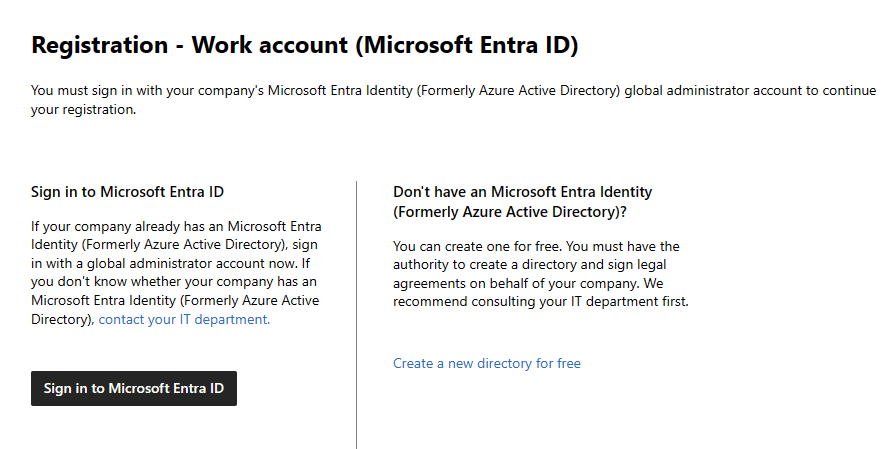
- Sign in with your organization's Microsoft Entra ID global administrator account. If you don't know whether your organization has a Microsoft Entra ID directory, contact your IT department. If your organization doesn't have a Microsoft Entra ID directory, you can create one for free during the registration process.
- You must have the authority to sign legal agreements on behalf of your organization.
Register for the Hardware Developer Program
To register for the Hardware Developer Program:
Go to the Hardware Developer Program registration.
If your organization has a Microsoft Entra ID global administrator account, select Login with work account. If your organization doesn't have a Microsoft Entra ID directory, select Create work account. Follow the directions to create an account and sign in with your new global administrator user name and password.
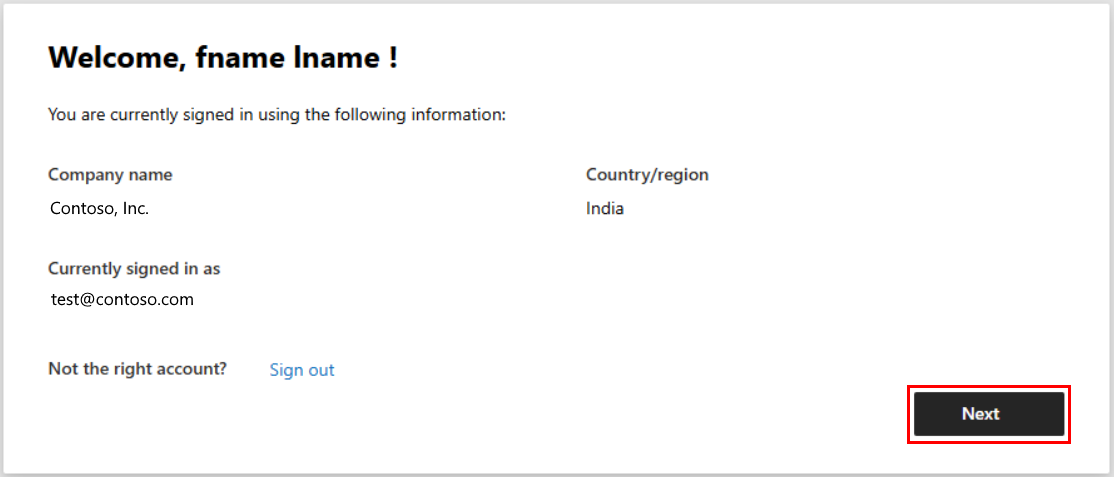
Confirm that you signed in with global administrator credentials and select Next.
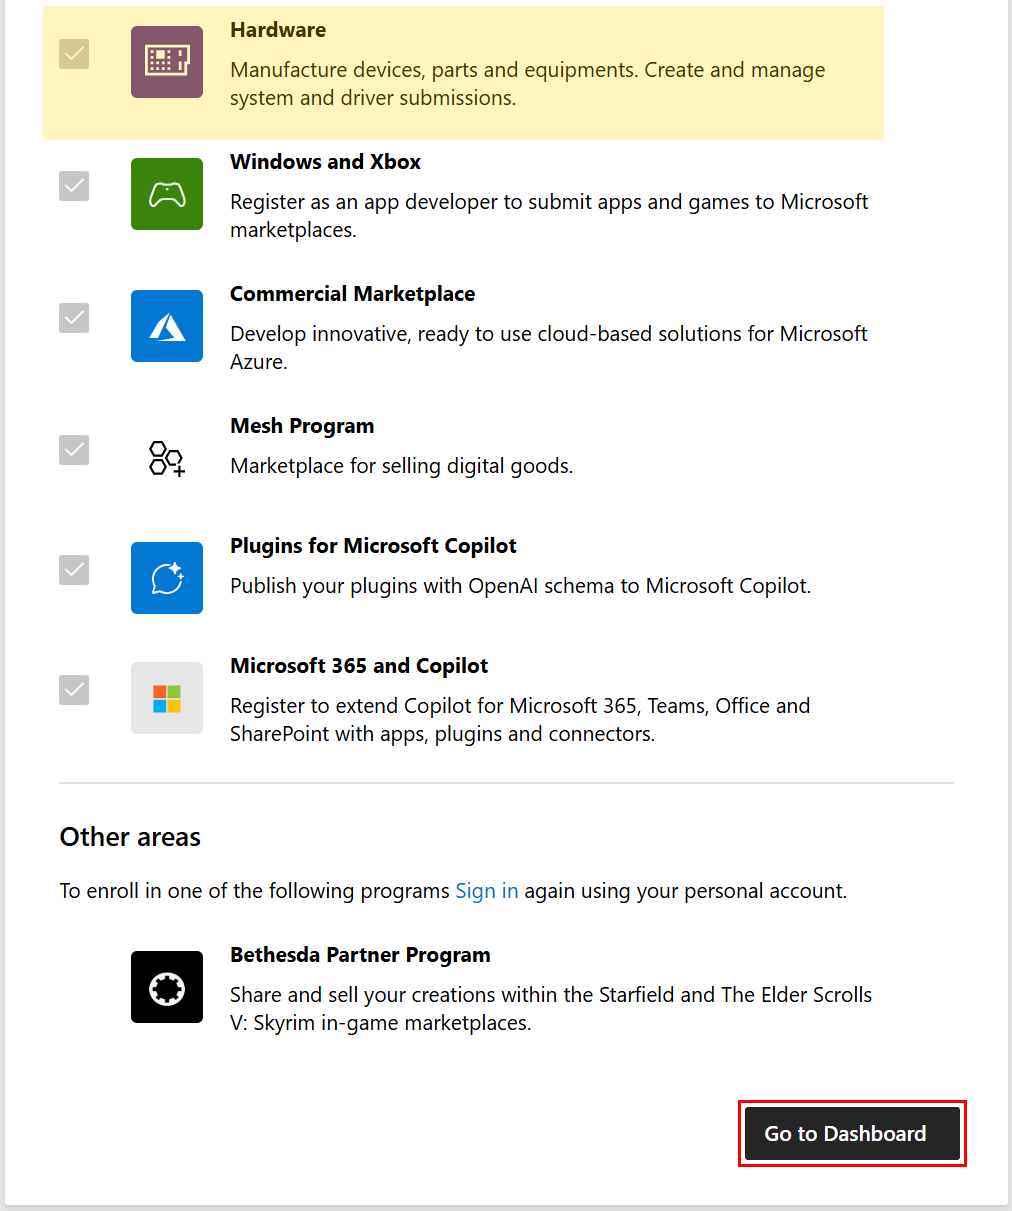
In next screen, you'll see list of available programs in Partner Center. The Hardware program is selected by default. Select Go to Dashboard.
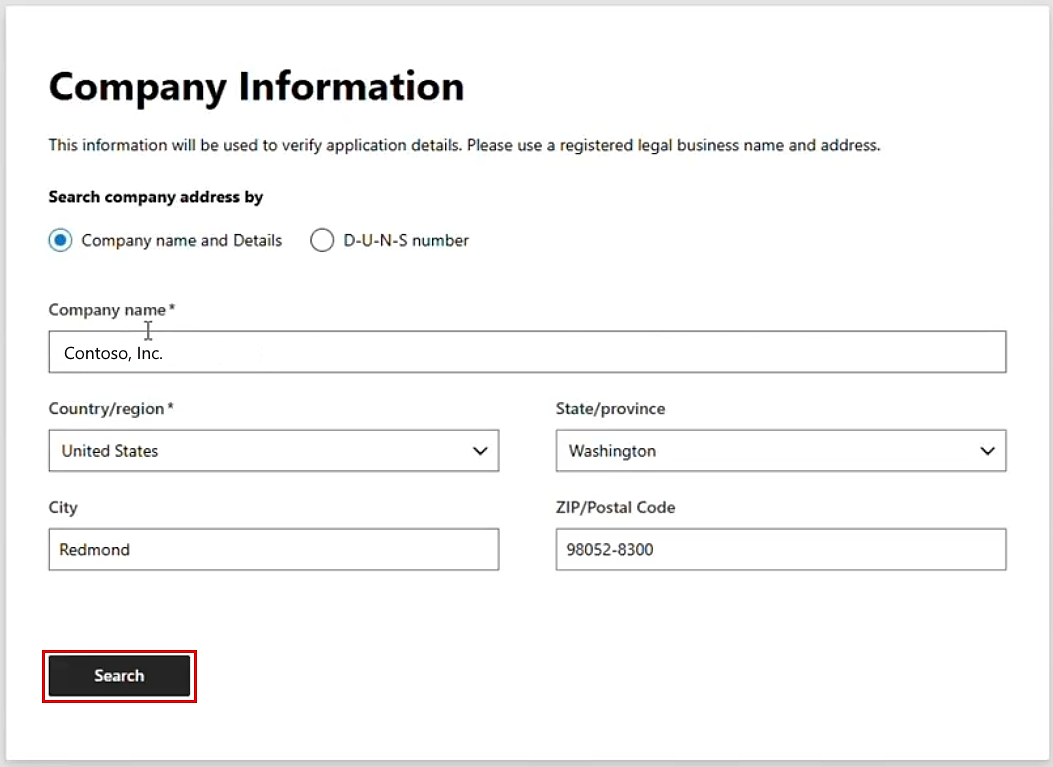
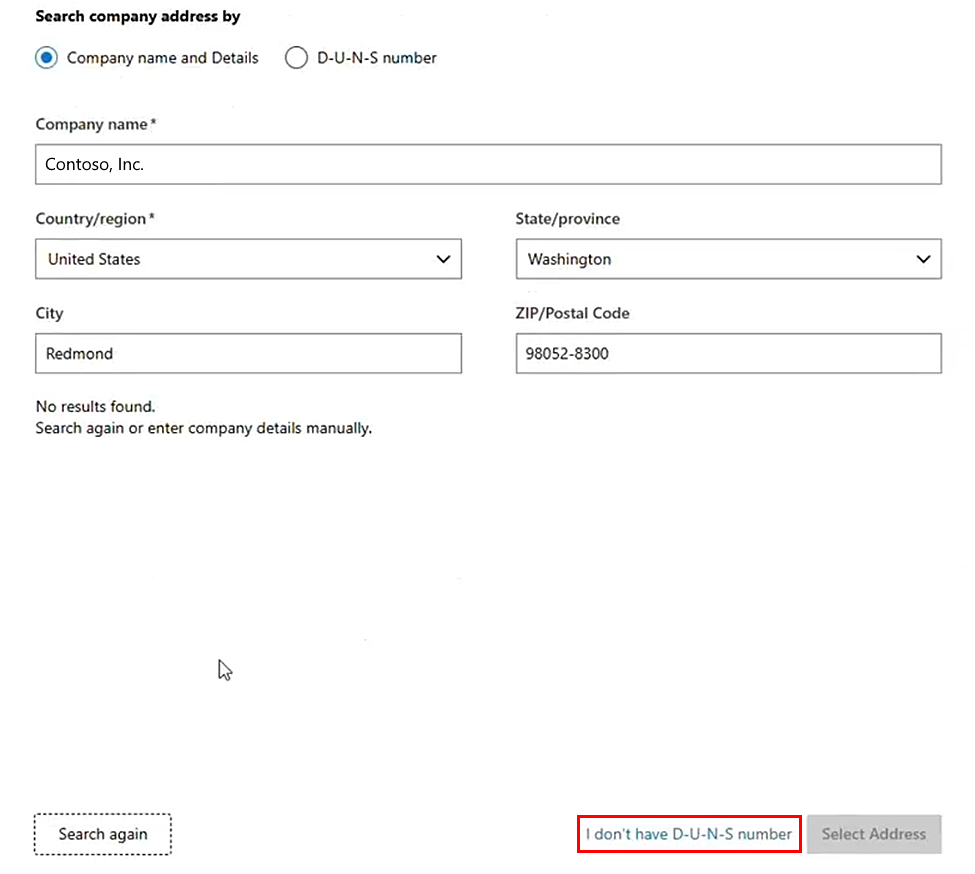
Provide your company information or D-U-N-S number and select Search to find your company details in external company databases.
Select a record from search results that represents your company. If no record matches, you can choose to provide company details manually by selecting I don't have D-U-N-S number at bottom right corner of screen.
Provide company information and ensure the details are accurate.
Provide a legal contact with the authority to sign agreements on behalf of your company.
Important
Microsoft emails the legal contact for account verification purposes. It's important to respond to the email.
If you're authorized by your company to accept legal agreements, review the agreement terms and select Accept and Continue. If you aren't authorized to accept agreements, pause the registration and get someone who is authorized to review and select Accept and Continue.
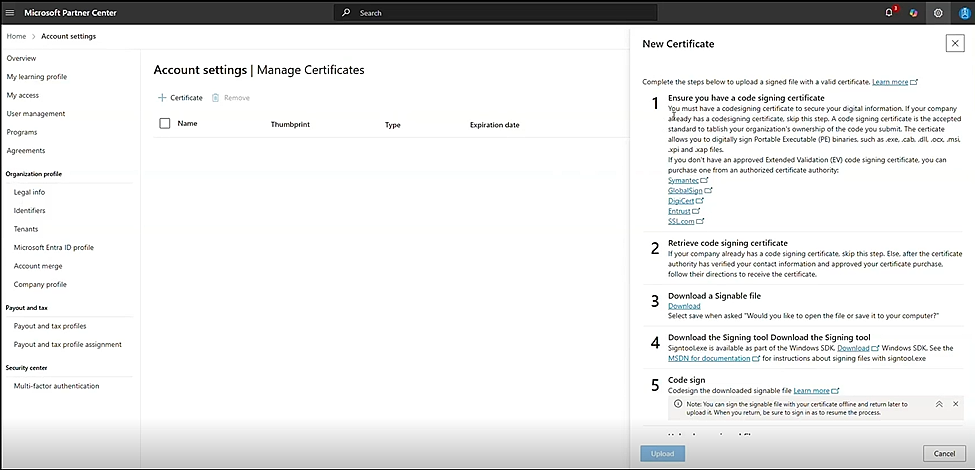
Your registration request is now submitted. Now, upload the extended validation (EV) code signing certificate from Manage certificates page. Review the instructions and upload the EV certificate. The EV certificate is required for your request to be considered for approval.
After uploading the certificate, monitor the global administrator mail box for a questionnaire requiring more information about your business. Complete the questionnaire when received.
Important
Enable the global administrator mailbox to receive the questionnaire or provide a preferred email address under My Preferences. Registration doesn't proceed until the questionnaire is completed.
After all approvals are complete, your global administrator will receive an email confirming approvals and next steps.
Next Steps
To learn how to create your first hardware submission, see:
Support
If you need support during the registration process, you can open a support ticket.