Note
Access to this page requires authorization. You can try signing in or changing directories.
Access to this page requires authorization. You can try changing directories.
Important
Update Azure Stack Hub to a supported version if necessary, before you deploy or update the Azure App Service resource provider. Be sure to read the release notes for the resource provider to learn about new functionality, fixes, and any known issues that can affect your deployment.
| Supported minimum Azure Stack Hub version | App Service resource provider version |
|---|---|
| 2311 and later | 25R1 installer, 25R1 offline package (release notes) |
In this article, you learn how to upgrade the Azure App Service resource provider deployed in an Azure Stack Hub environment that is connected or disconnected from the Internet and, secured by Entra ID or Active Directory Federation Services (AD FS).
Important
Before running the upgrade, you must complete deployment of Azure App Service on Azure Stack Hub.
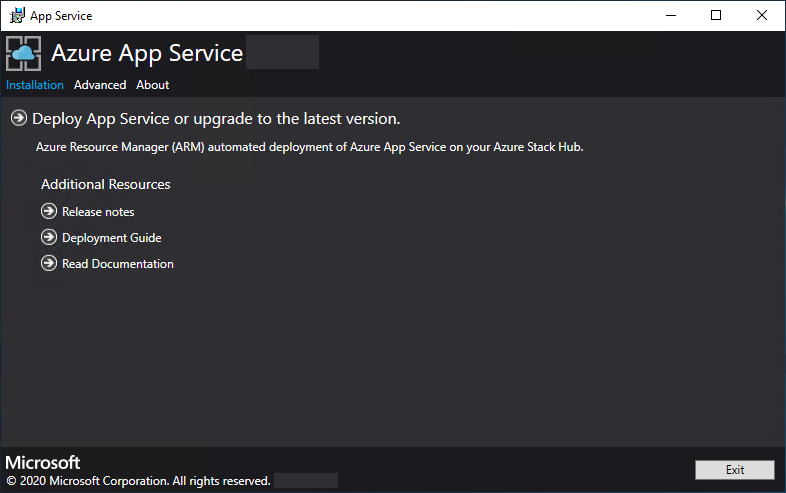
Run the App Service resource provider installer
To upgrade the App Service resource provider in an Azure Stack Hub environment, you must complete these tasks:
- Download the Azure App Service Installer
- Download the Azure App Service Installer Offline Package
- Run the App Service installer (appservice.exe) and complete the upgrade.
During this process, the upgrade will:
- Detect prior deployment of App Service
- Upload to Storage
- Upgrade all App Service roles (Controllers, Management, Front-End, Publisher, and Worker roles)
- Update App Service scale set definitions
- Update App Service Resource Provider Manifest
Complete the upgrade of App Service on Azure Stack Hub
Important
The Azure App Service installer must be run on a machine, which can reach the Azure Stack Hub Administrator Azure Resource Manager Endpoint.
Run appservice.exe as an administrator.
Select Advanced > Complete offline installation or upgrade.
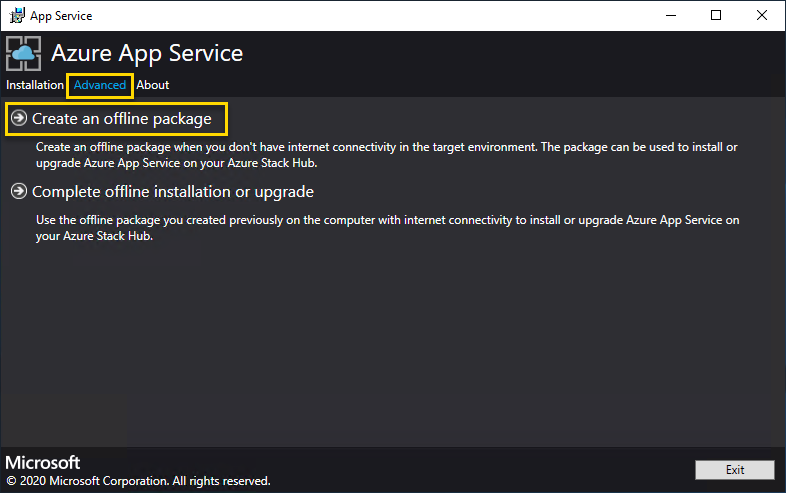
Browse to the location of the offline upgrade package you previously downloaded and then select Next.
Review and accept the Microsoft Software License Terms and then select Next.
Review and accept the third-party license terms and then select Next.
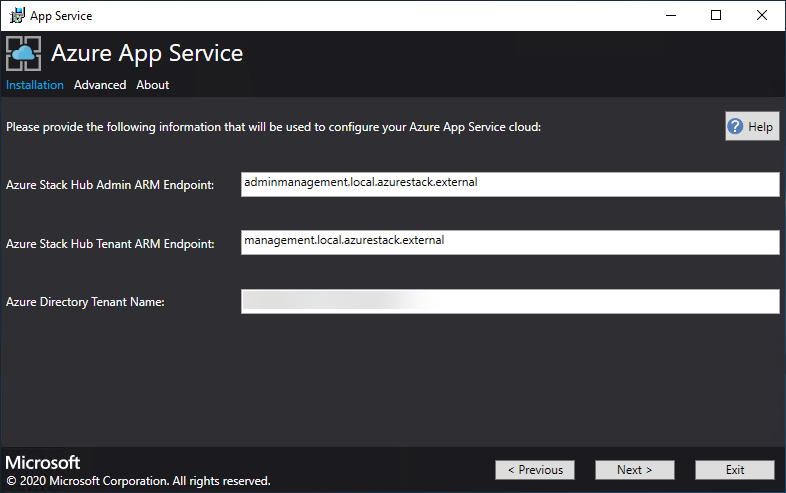
Make sure that the Azure Stack Hub Azure Resource Manager endpoint and Active Directory Tenant information is correct. If you used the default settings during Azure Stack Development Kit deployment, you can accept the default values here. However, if you customized the options when you deployed Azure Stack Hub, you must edit the values in this window. For example, if you use the domain suffix mycloud.com, your Azure Stack Hub Azure Resource Manager endpoint must change to management.region.mycloud.com. After you confirm your information, select Next.
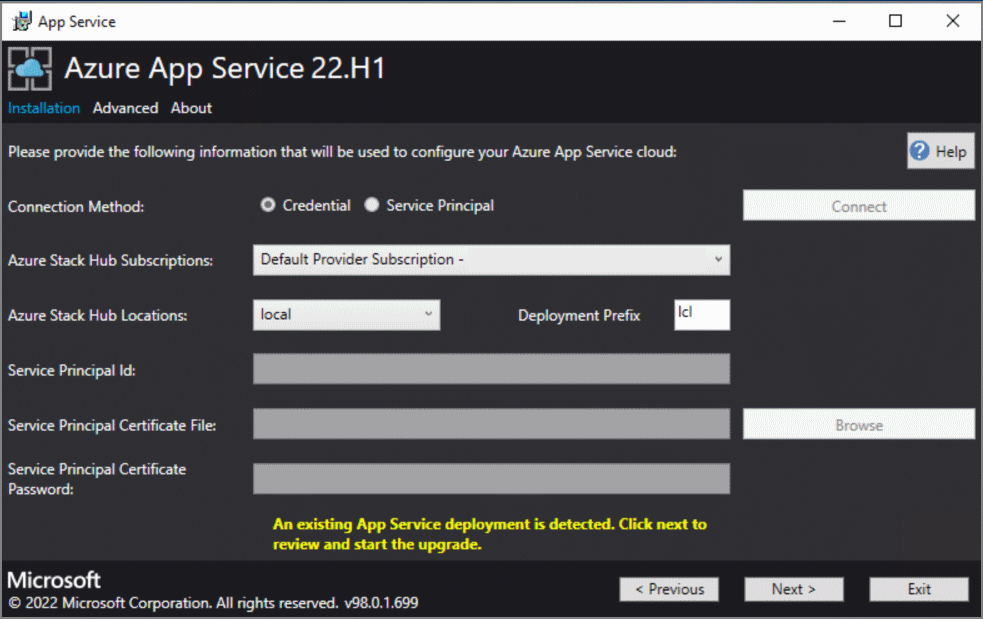
On the next page:
Select the connection method you wish to use - Credential or Service Principal
- Credential
- If you're using Microsoft Entra ID, enter the Microsoft Entra admin account, and password that you provided when you deployed Azure Stack Hub. Select Connect.
- If you're using Active Directory Federation Services (AD FS), provide your admin account. For example, cloudadmin@azurestack.local. Enter your password, and then select Connect.
- Service Principal
- The service principal that you use must have Owner rights on the Default Provider Subscription
- Provide the Service Principal ID, Certificate File, and Password and select Connect.
- Credential
In Azure Stack Hub Subscriptions, select the Default Provider Subscription. Azure App Service on Azure Stack Hub must be deployed in the Default Provider Subscription.
In the Azure Stack Hub Locations, select the location that corresponds to the region you're deploying to. For example, select local if you're deploying to the Azure Stack Deployment Kit.
If an existing App Service deployment is detected, then the resource group and storage account will be populated and greyed out.
NEW: Administrators can specify a three character Deployment Prefix for the individual instances in each Virtual Machine Scale Set that are deployed. The Deployment Prefix is useful if managing multiple Azure Stack Hub instances.
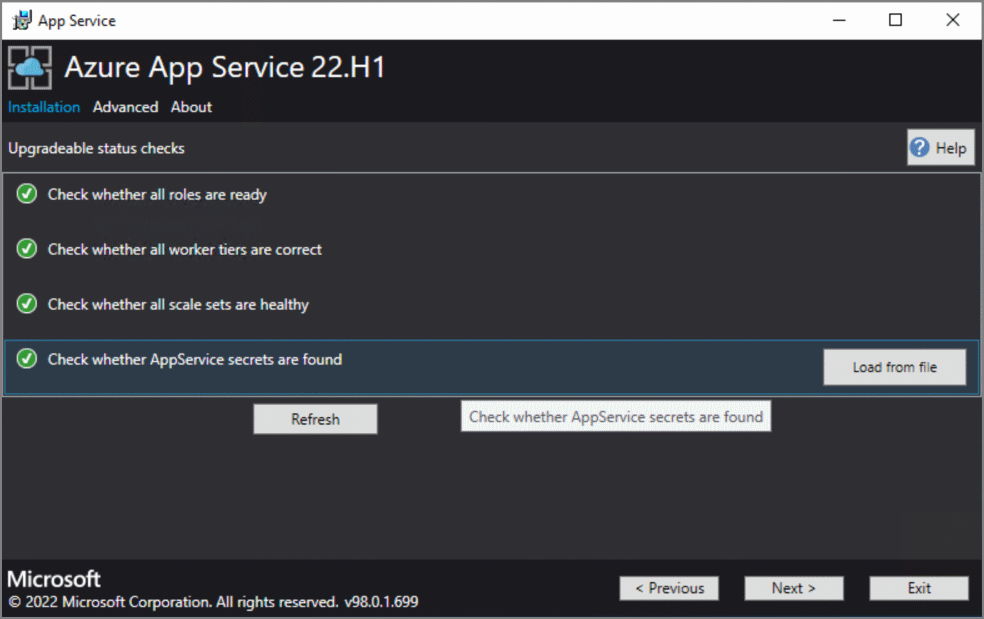
In the next screen, you'll see the results of a status check performed against the App Service Resource Provider. This status check was added to verify the deployment is in the correct state to be upgraded. The status check verifies that all roles are ready, all worker tiers are valid, all virtual machine scale sets are healthy and verifies access to the App Service secrets.
The Platform Image and SKU screen, gives Administrators the opportunity to choose the correct Windows 2022 Platform image to be used to deploy the new role instances.
- Select the correct Platform Image
- Over time the minimum recommended spec of VM/VM Scale Set instance SKUs has changed and here you see the details of what is currently deployed and the new recommended SKU.
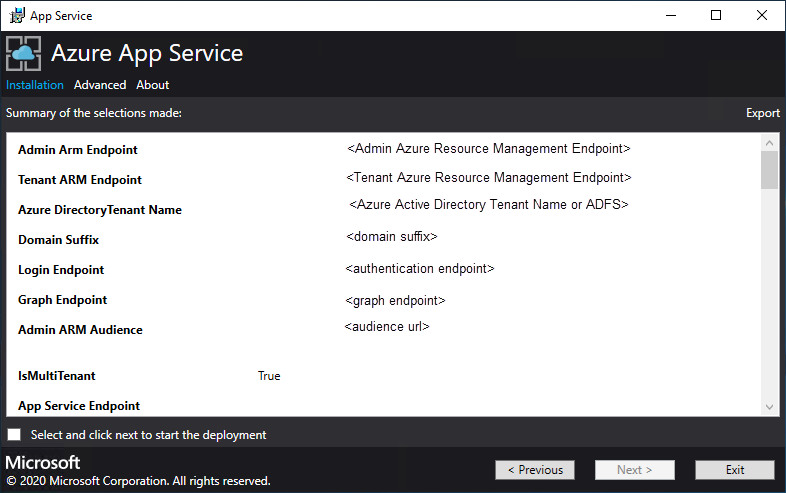
On the summary page:
Verify the selections you made. To make changes, use the Previous buttons to visit previous pages.
If the configurations are correct, select the check box.
To start the upgrade, select Next.
Note
Upgrade to 25R1 can take a considerable amount of time dependent on the number of role instances within the App Service on Azure Stack Hub Resource Provider deployment.
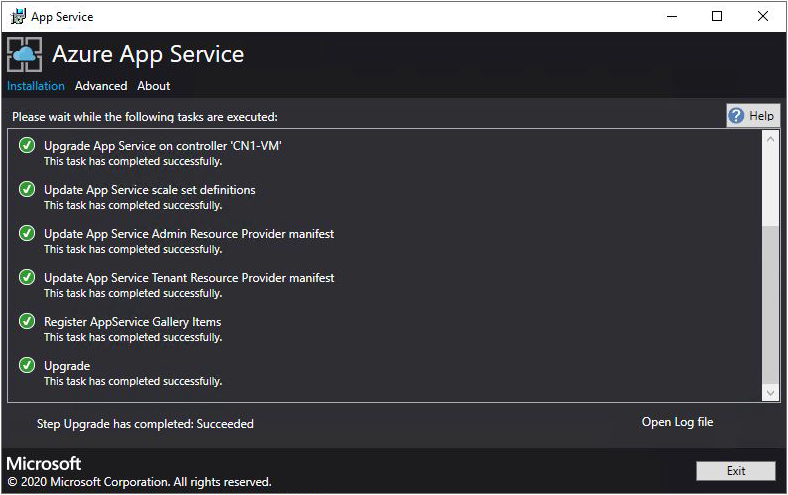
- Upgrade progress page:
Track the upgrade progress. The duration of the upgrade of App Service on Azure Stack Hub varies dependent on number of role instances deployed.
After the upgrade successfully completes, select Exit.
Post Upgrade
Windows update behavior: Based on customer feedback, we've changed the way Windows Update is configured on App Service roles from Update 7:
Three modes: Disabled - Windows Update service disabled, Windows is updated with the KB that's shipped with Azure App Service on Azure Stack Hub releases; Automatic - Windows Update service enabled and Windows Update determines how and when to update; Managed - Windows Update service is disabled, Azure App Service performs a Windows Update cycle during OnStart of the individual role. (Default).
This setting can be changed in the Web Management Console application on the App Service Controller instance(s).
Next steps
Prepare for other admin operations for Azure App Service on Azure Stack Hub: