Note
Access to this page requires authorization. You can try signing in or changing directories.
Access to this page requires authorization. You can try changing directories.
In this article, learn how to create, use and manage snapshots in Azure App Configuration. Snapshot is a set of App Configuration settings stored in an immutable state.
Prerequisites
- An App Configuration store, as shown in the tutorial for creating a store.
- "DataOwner" role in the App Configuration store. Details on required role and permissions for snapshots
Add key-values to the App configuration store
In your App Configuration store, go to Operations > Configuration explorer and add the following key-values. Leave Content Type with its default value. For more information about how to add key-values to a store using the Azure portal or the CLI, go to Create a key-value.
| Key | Value | Label |
|---|---|---|
| app2/bgcolor | Light Gray | label2 |
| app1/color | Black | No label |
| app1/color | Blue | label1 |
| app1/color | Green | label2 |
| app1/color | Yellow | label3 |
| app1/message | Hello | label1 |
| app1/message | Hi! | label2 |
| app2/message | Good morning! | label1 |
Create a snapshot
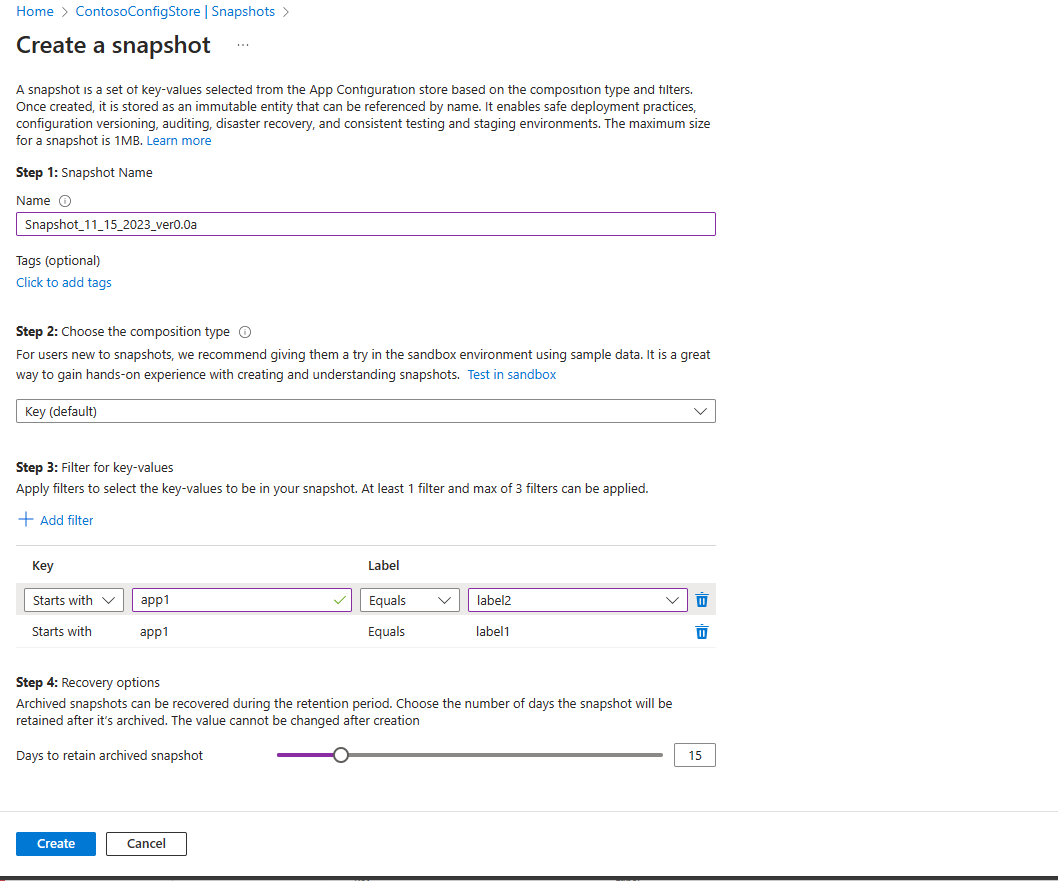
Under Operations > Snapshots, select Create a new snapshot.
Enter a snapshot name and optionally also add Tags.
Under Choose the composition type, keep the default value Key (default).
- With the Key composition type, if your store has identical keys with different labels, only the key-value specified in the last applicable filter is included in the snapshot. Identical key-values with other labels are left out of the snapshot.
- With the Key-Label composition type, if your store has identical keys with different labels, all key-values with identical keys but different labels are included in the snapshot depending on the specified filters.
Select Add filters to select the key-values for your snapshot. Filtering is done by selecting filters: Equals, Starts with, Any of and All for keys and for labels. You can enter between one and three filters.
- Add the first filter:
- Under Key, select Starts with and enter app1
- Under Label, select Equals and select label2 from the drop-down menu.
- Add the second filter:
- Under Key, select Starts with and enter app1
- Under Label, select Equals and select label1 from the drop-down menu.
- Add the first filter:
If you archive a snapshot, by default, it will be retained for 30 days after archival. Optionally, under Recovery options, decrease the number of retention days the snapshot will be available after archival.
Note
The duration of the retention period can't be updated once the snapshot has been created.
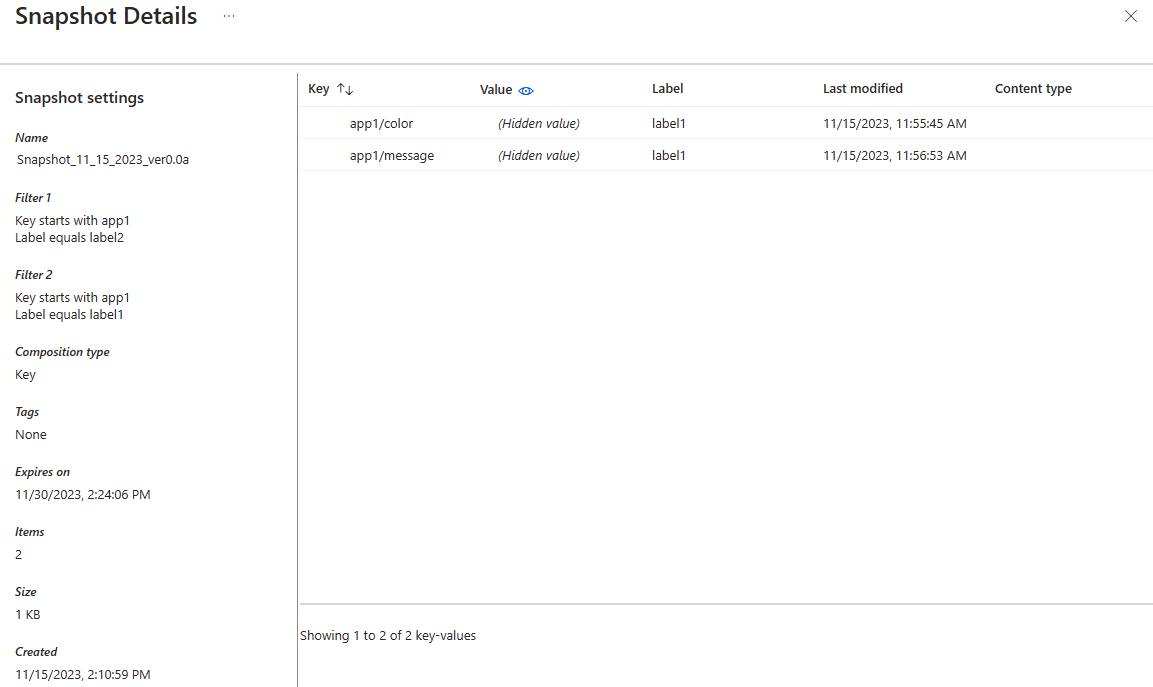
Select Create to generate the snapshot. In this example, the created snapshot has Key composition type and below filters:
- Keys that start with app1, with label2 label
- Keys that start with app1, with label1 label.
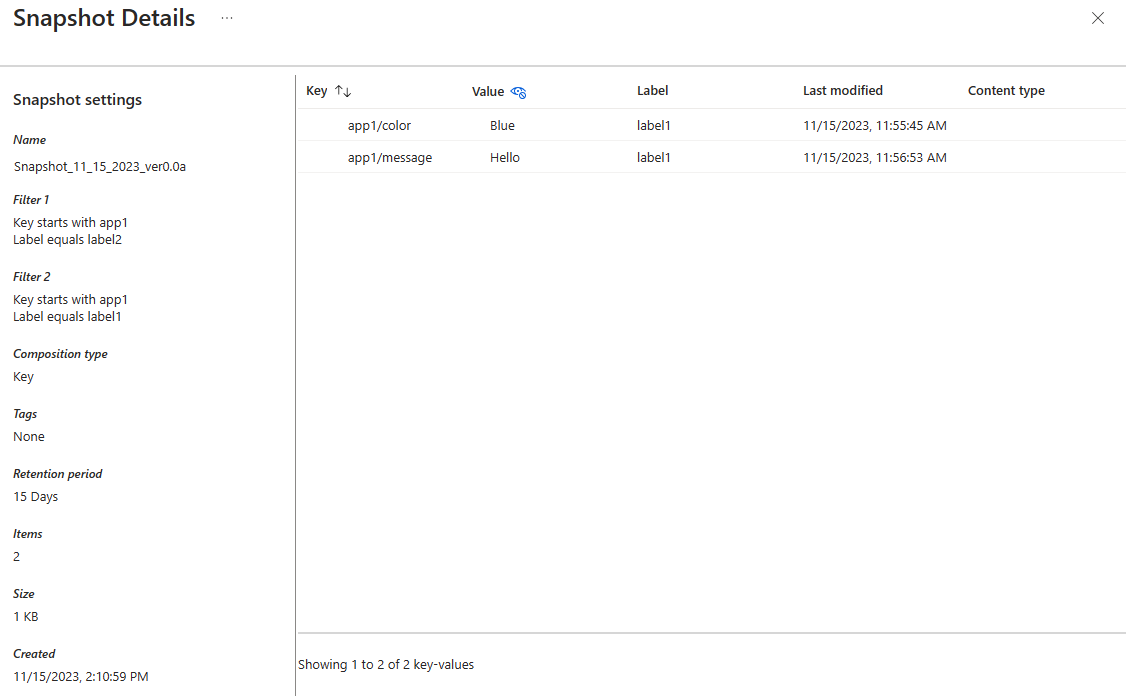
Check the table to understand which key-values from the configuration store end up in the snapshot based on the provided parameters.
Key Value Label Included in snapshot app2/bgcolor Light Gray label2 No: doesn't start with app1. app1/color Black No label No: doesn't have the label label2 or label1. app1/color Blue label1 Yes: Has the right label label1 from the last of applicable filters. app1/color Green label2 No: Same key with label label1 selected by the second filter overrides this one though it has the selected label, label2. app1/color Yellow label3 No: doesn't have the label label2 or label1. app1/message Hello label1 Yes: Has the right label label1 from the last of applicable filters. app1/message Hi! label2 No: Same key with label label1 selected by the second filter overrides this one though it has the selected label, label2. app2/message Good morning! label1 No: doesn't start with app1.
Create sample snapshots
To create sample snapshots and check how the snapshots feature work, use the snapshot sandbox. This sandbox contains sample data you can play with to better understand how snapshot's composition type and filters work.
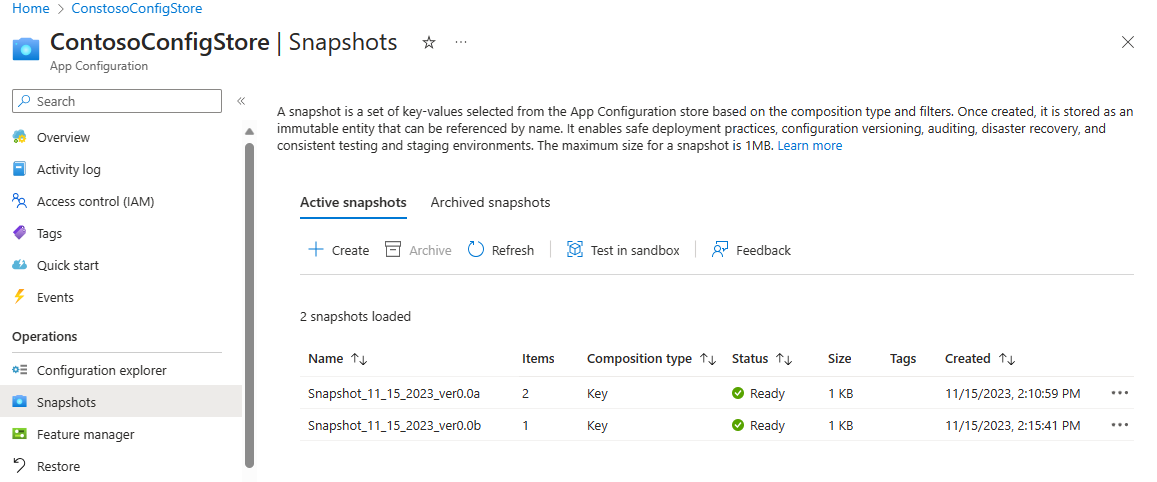
- In Operations > Snapshots > Active snapshots, select Test in sandbox.
- Review the sample data and practice creating snapshots by filling out the form with a composition type and one or more filters.
- Select Create to generate the sample snapshot.
- Check out the snapshot result generated under Generated sample snapshot. The sample snapshot displays all keys that are included in the sample snapshot, according to your selection.
Use snapshots
You can select any number of snapshots for the application's configuration. Selecting a snapshot adds all of its key-values. Once added to a configuration, the key-values from snapshots are treated the same as any other key-value.
If you have an application using Azure App Configuration, you can update it with the following sample code to use snapshots. You only need to provide the name of the snapshot, which is case-sensitive.
Edit the call to the AddAzureAppConfiguration method, which is often found in the Program.cs file of your application. If you don't have an application, you can reference any of the .NET quickstart guides, like creating an ASP.NET core app with Azure App Configuration.
Add snapshots to your configuration
configurationBuilder.AddAzureAppConfiguration(options =>
{
    string endpoint = Environment.GetEnvironmentVariable("Endpoint");
    options.Connect(new Uri(endpoint), new DefaultAzureCredential());
    // Select an existing snapshot by name. This will add all of the key-values from the snapshot to this application's configuration.
    options.SelectSnapshot("SnapshotName");

    // Other changes to options
});
Note
Snapshot support is available if you use version 7.0.0 or later of any of the following packages.
Microsoft.Extensions.Configuration.AzureAppConfigurationMicrosoft.Azure.AppConfiguration.AspNetCoreMicrosoft.Azure.AppConfiguration.Functions.Worker
Note
Only snapshots created with composition type Key can be loaded using the code samples shown above.
Manage active snapshots
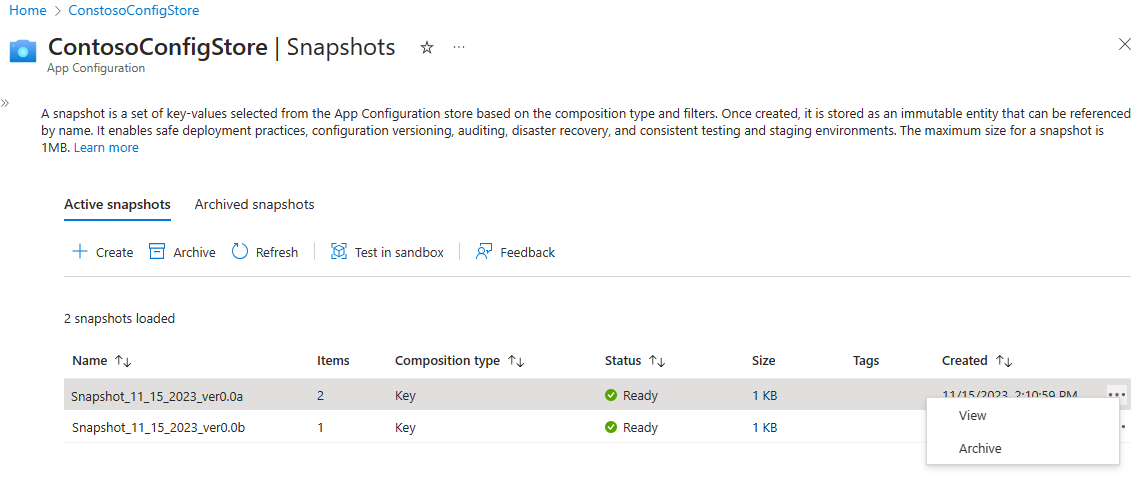
The page under Operations > Snapshots displays two tabs: Active snapshots and Archived snapshots. Select Active snapshots to view the list of all active snapshots in an App Configuration store.
View existing snapshot
In the Active snapshots tab, select the ellipsis ... on the right of an existing snapshot and select View to view a snapshot. This action opens a Snapshot details page that displays the snapshot's settings and the key-values included in the snapshot.
Archive a snapshot
In the Active snapshots tab, select the ellipsis ... on the right of an existing snapshot and select Archive to archive a snapshot. Confirm archival by selecting Yes or cancel with No. Once a snapshot has been archived, a notification appears to confirm the operation and the list of active snapshots is updated.
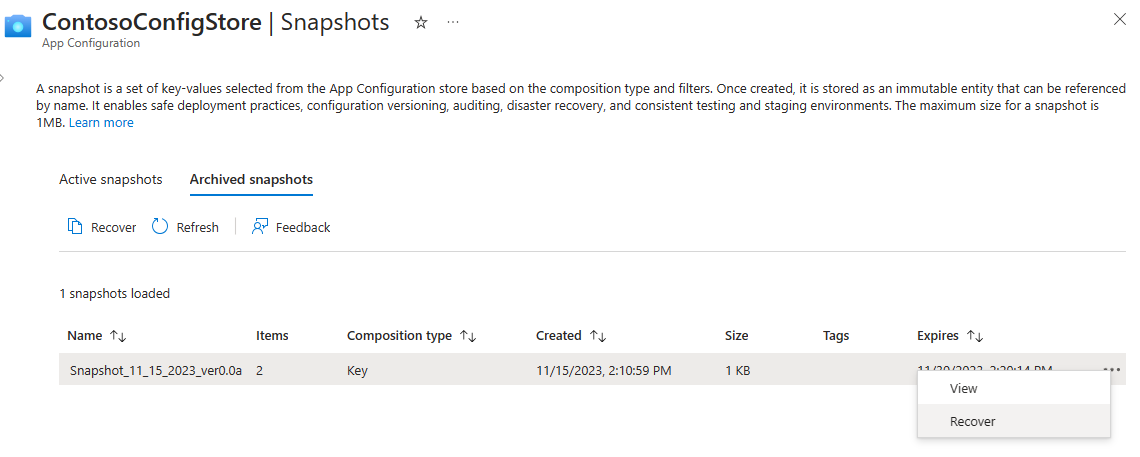
Manage archived snapshots
Go to Operations > Snapshots > Archived snapshots to view the list of all archived snapshots in an App Configuration store. Archived snapshots remain accessible for the retention period that was selected during their creation.
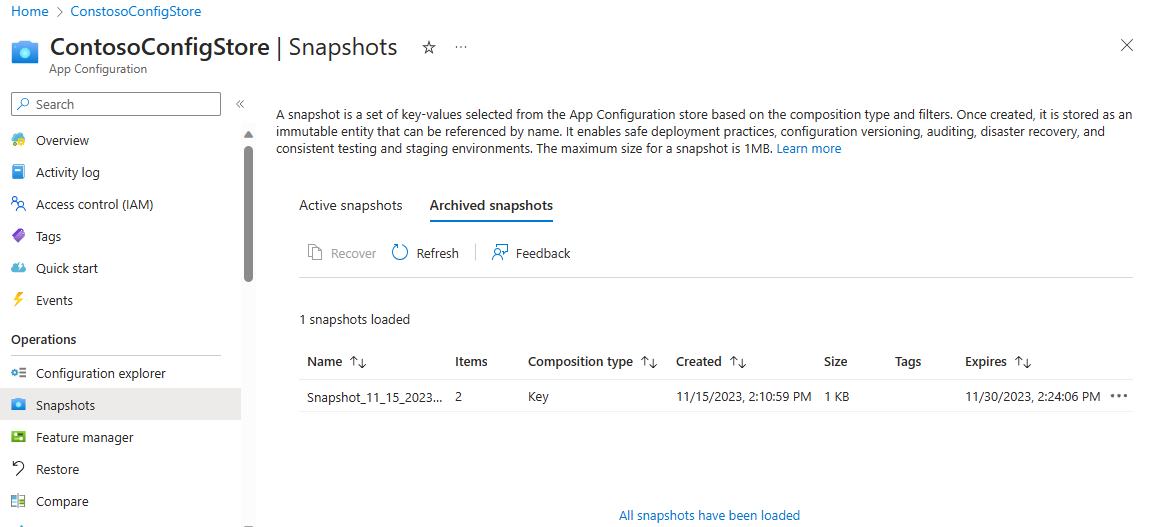
View archived snapshot
Detailed view of snapshot is available in the archive state as well. In the Archived snapshots tab, select the ellipsis ... on the right of an existing snapshot and select View to view a snapshot. This action opens a Snapshot details page that displays the snapshot's settings and the key-values included in the snapshot.
Recover an archived snapshot
In the Archived snapshots tab, select the ellipsis ... on the right of an archived snapshot and select Recover to recover a snapshot. Once a snapshot has been recovered, a notification appears to confirm the operation and the list of archived snapshots is updated.