Managed identity for storage
Managed identities are a common tool used in Azure to help developers minimize the burden of managing secrets and sign-in information. Managed identities are useful when Azure services connect to each other. Instead of managing authorization between each service, Microsoft Entra ID can be used to provide a managed identity that makes the authentication process more streamlined and secure.
Use managed identity with storage accounts
Presently, Azure Cache for Redis can use a managed identity to connect with a storage account, useful in two scenarios:
Data Persistence--scheduled backups of data in your cache through an RDB or AOF file.
Import or Export--saving snapshots of cache data or importing data from a saved file.
Managed identity lets you simplify the process of securely connecting to your chosen storage account for these tasks.
Azure Cache for Redis supports both types of managed identity:
System-assigned identity is specific to the resource. In this case, the cache is the resource. When the cache is deleted, the identity is deleted.
User-assigned identity is specific to a user, not the resource. It can be assigned to any resource that supports managed identity and remains even when you delete the cache.
Each type of managed identity has advantages, but in Azure Cache for Redis, the functionality is the same.
Enable managed identity
Managed identity can be enabled either when you create a cache instance or after the cache has been created. During the creation of a cache, only a system-assigned identity can be assigned. Either identity type can be added to an existing cache.
Scope of availability
| Tier | Basic, Standard | Premium | Enterprise, Enterprise Flash |
|---|---|---|---|
| Available | No | Yes | No |
Prerequisites and limitations
Managed identity for storage is only used with the import/export feature and persistence feature now, which limits its use to the Premium tier of Azure Cache for Redis.
Managed identity for storage isn't supported on caches that have a dependency on Cloud Services (classic). For more information on how to check on whether your cache is using Cloud Services (classic), see How do I know if a cache is affected?.
Create a new cache with managed identity using the portal
Sign in to the Azure portal.
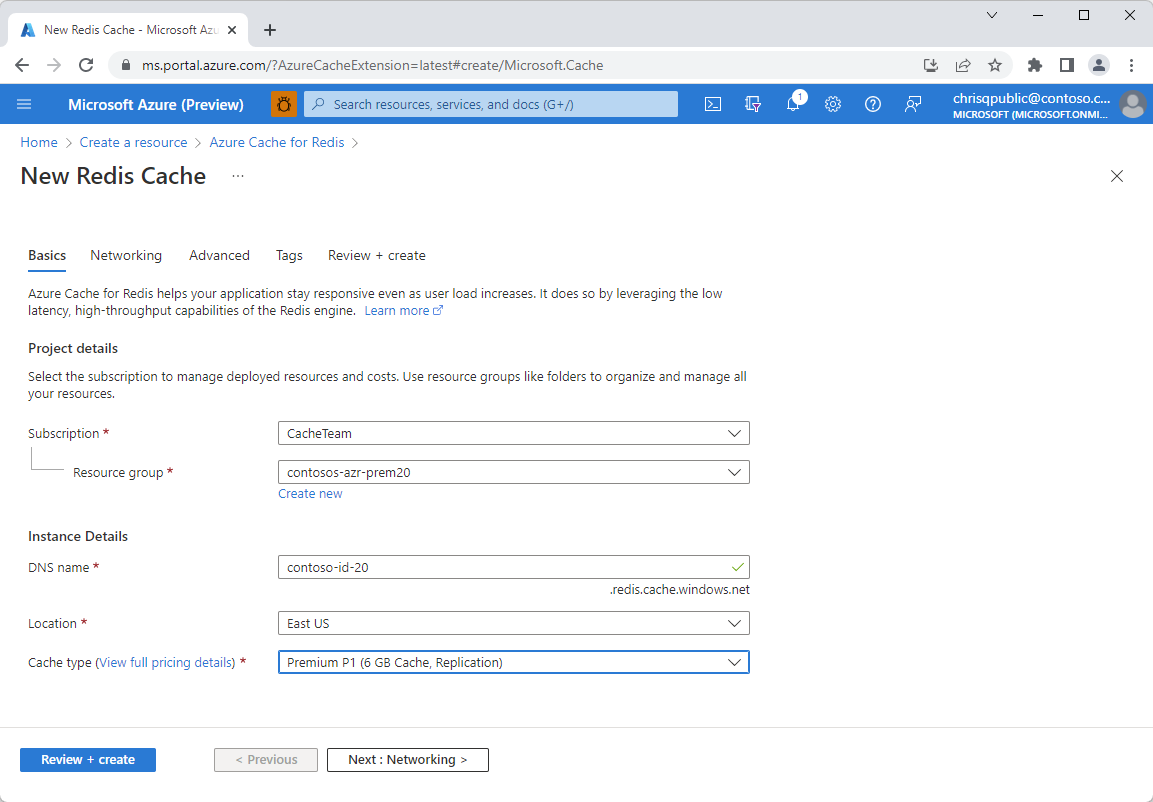
Create a new Azure Cache for Redis resource with a Cache type of any of the premium tiers. Complete Basics tab with all the required information.
Select the Advanced tab. Then, scroll down to System assigned managed identity and select On.

Complete the creation process. Once the cache has been created and deployed, open it, and select the Identity tab under the Settings section on the left. You see that a system-assigned object ID has been assigned to the cache Identity.
Add system assigned identity to an existing cache
Navigate to your Azure Cache for Redis resource from the Azure portal. Select Identity from the Resource menu on the left.
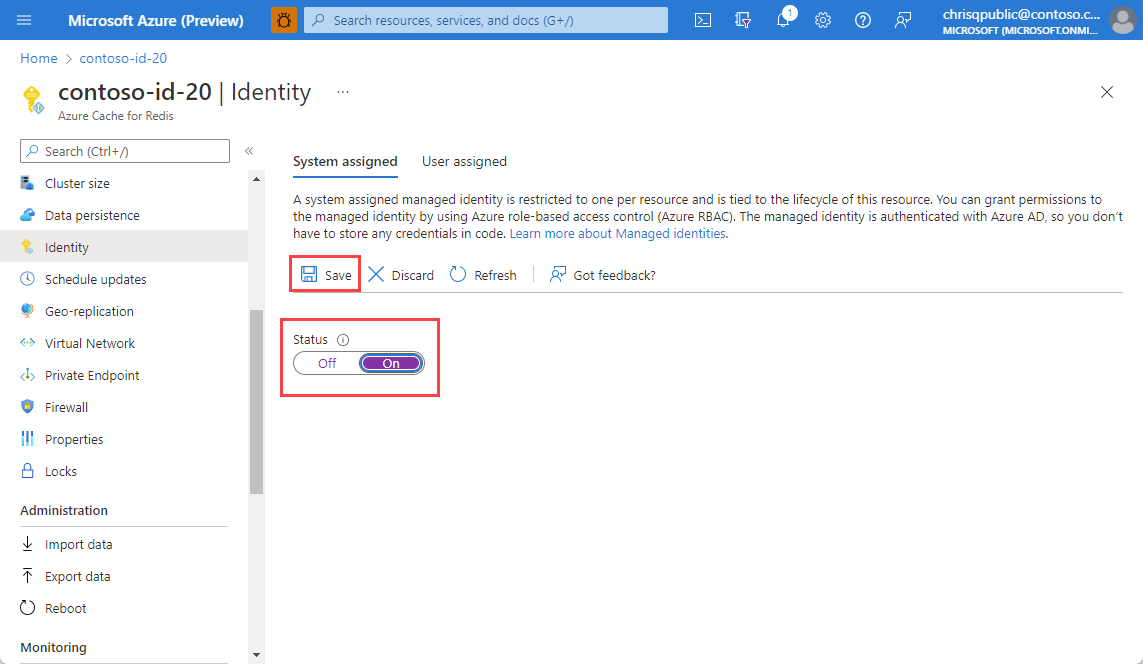
To enable a system-assigned identity, select the System assigned tab, and select On under Status. Select Save to confirm.
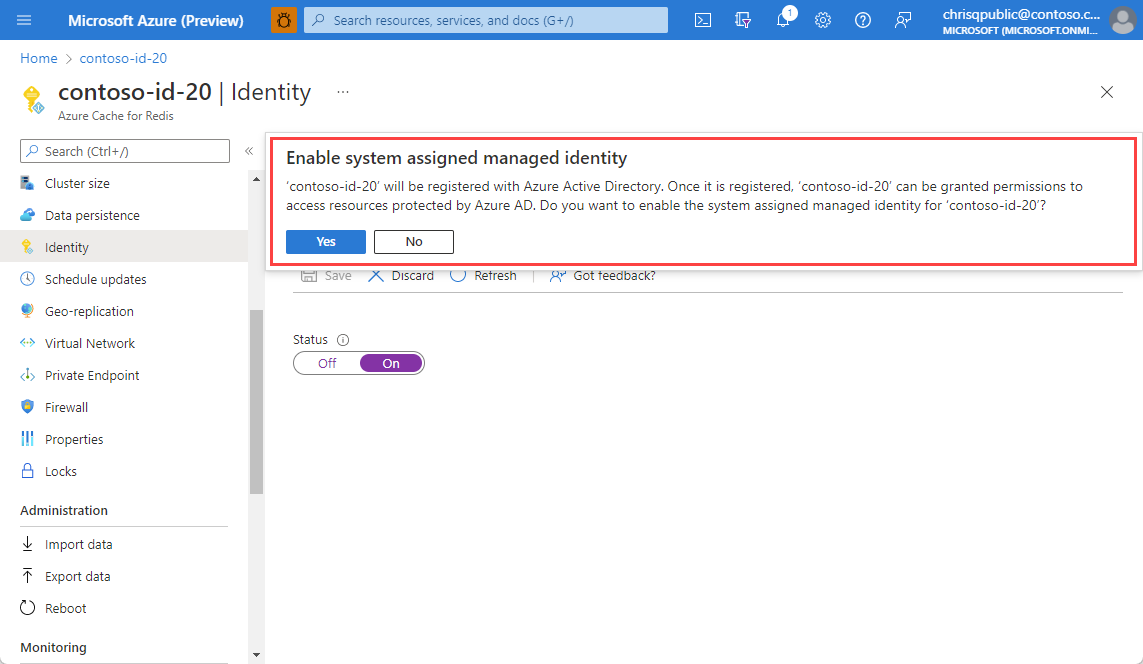
A dialog pops up saying that your cache will be registered with Microsoft Entra ID and that it can be granted permissions to access resources protected by Microsoft Entra ID. Select Yes.
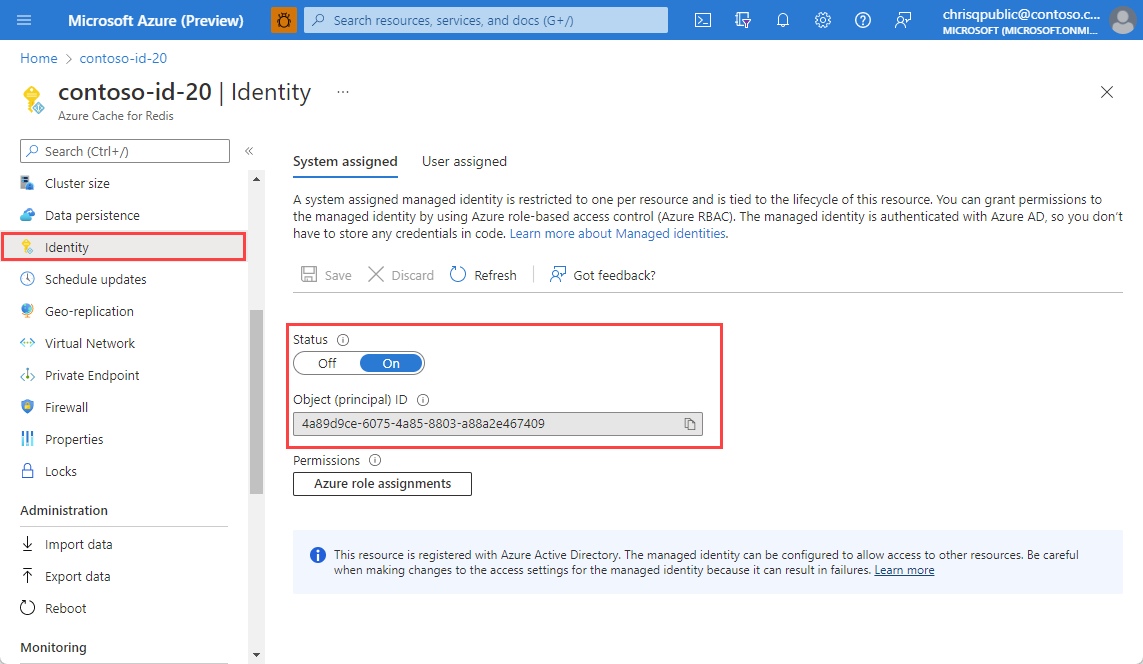
You see an Object (principal) ID, indicating that the identity has been assigned.

Add a user assigned identity to an existing cache
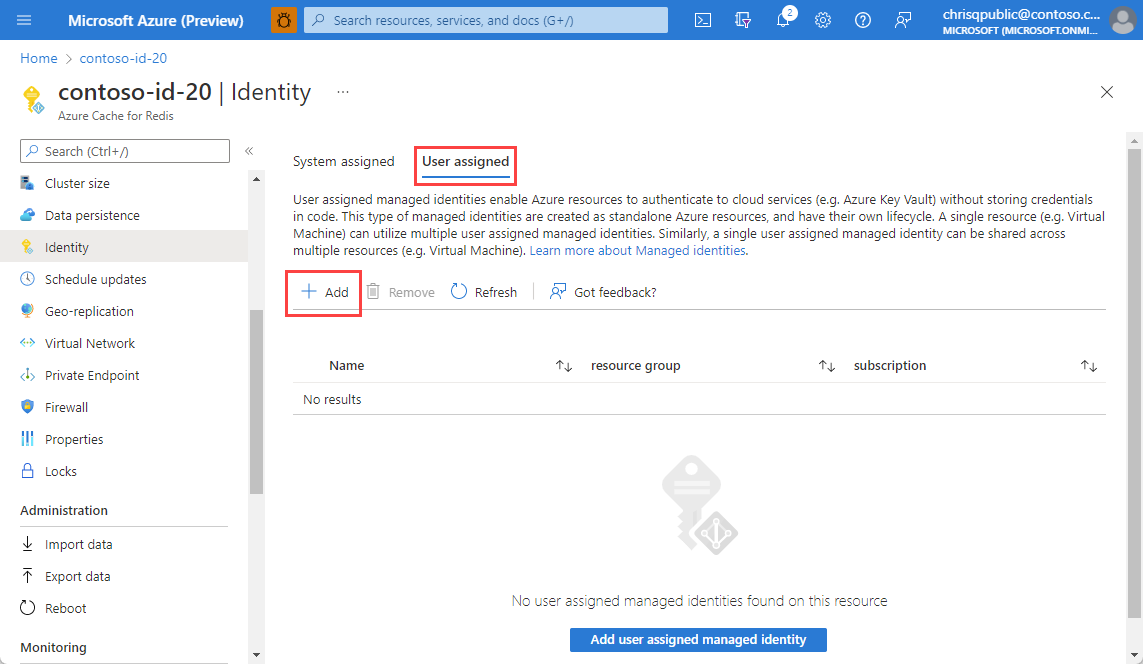
Navigate to your Azure Cache for Redis resource from the Azure portal. Select Identity from the Resource menu on the left.
To enable user assigned identity, select the User assigned tab and select Add.
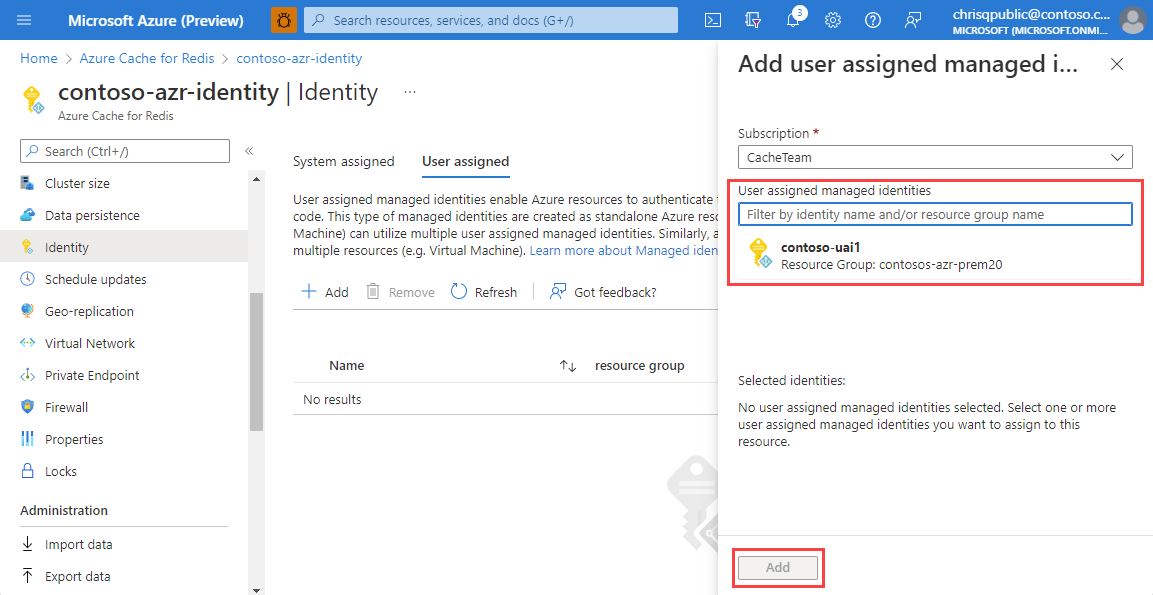
A sidebar pops up to allow you to select any available user-assigned identity to your subscription. Choose an identity and select Add. For more information on user assigned managed identities, see manage user-assigned identity.
Note
You need to create a user assigned identity in advance of this step.
You see the user-assigned identity listed in the User assigned pane.

Enable managed identity using the Azure CLI
Use the Azure CLI for creating a new cache with managed identity or updating an existing cache to use managed identity. For more information, see az redis create or az redis identity.
For example, to update a cache to use system-managed identity use the following CLI command:
az redis identity assign \--mi-system-assigned \--name MyCacheName \--resource-group MyResource Group
Enable managed identity using Azure PowerShell
Use Azure PowerShell for creating a new cache with managed identity or updating an existing cache to use managed identity. For more information, see New-AzRedisCache or Set-AzRedisCache.
For example, to update a cache to use system-managed identity, use the following PowerShell command:
Set-AzRedisCache -ResourceGroupName \"MyGroup\" -Name \"MyCache\" -IdentityType "SystemAssigned"
Configure storage account to use managed identity
Important
Managed identity must be configured in the storage account before Azure Cache for Redis can access the account for persistence or import/export functionality. If this step is not done correctly, you see errors or no data written.
Create a new storage account or open an existing storage account that you would like to connect to your cache instance.
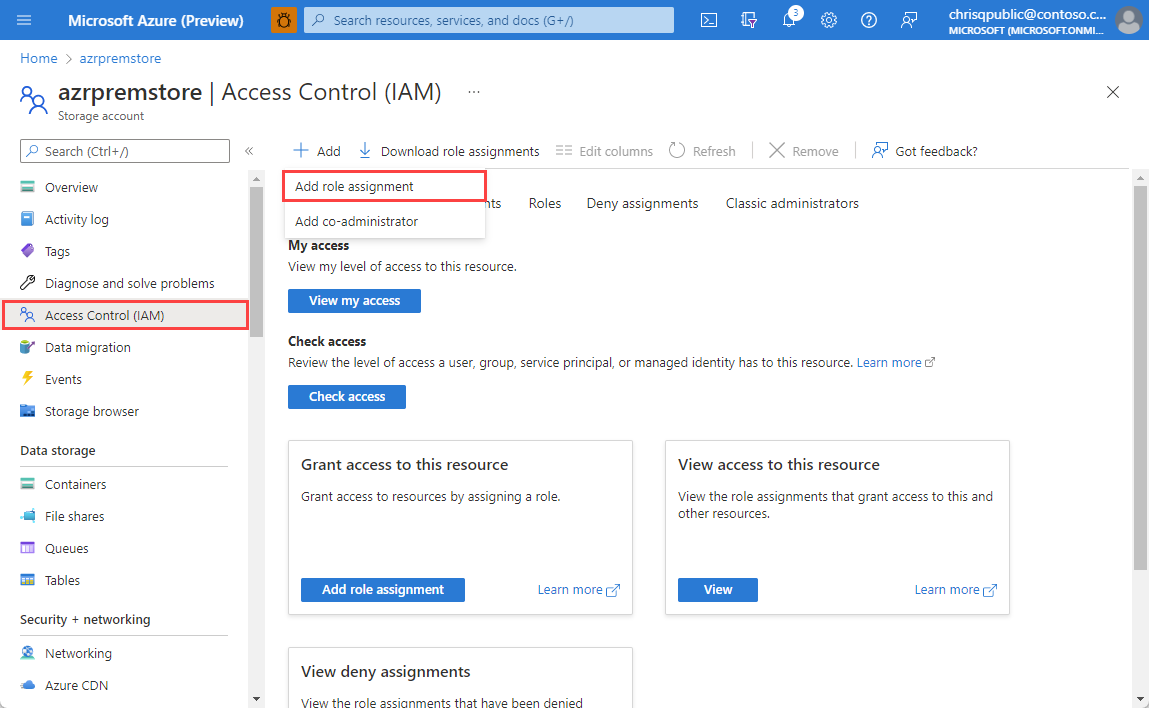
Open the Access control (IAM) from the Resource menu. Then, select Add, and Add role assignment.
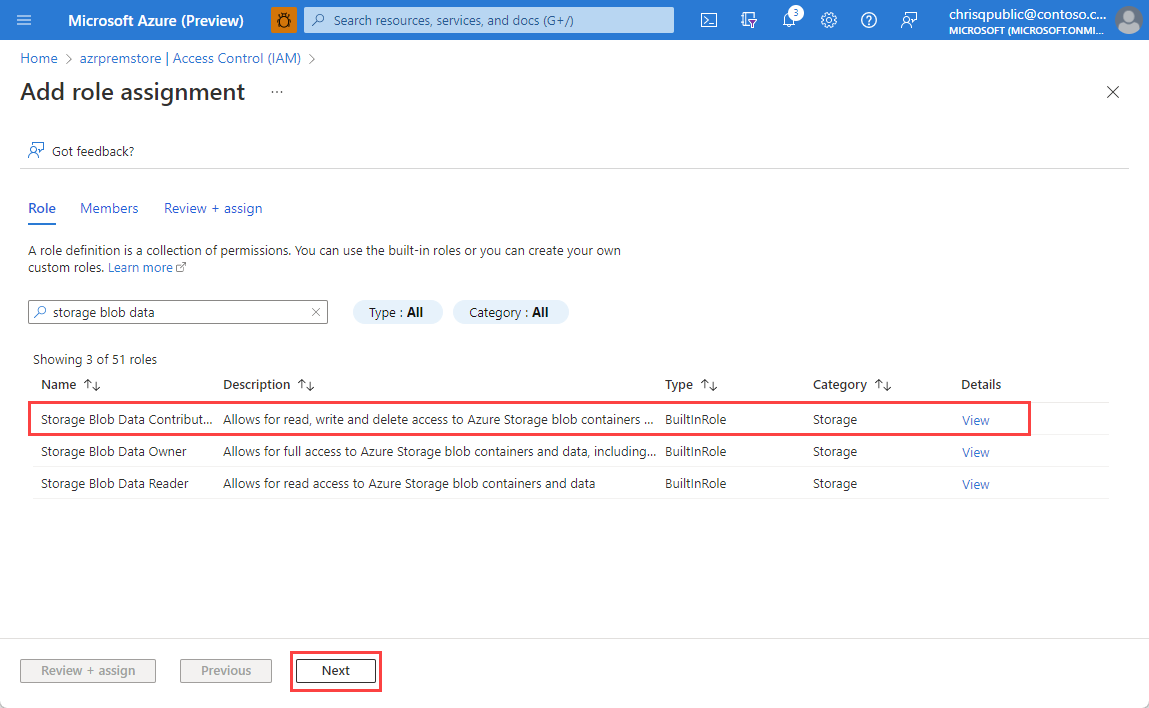
Search for the Storage Blob Data Contributor on the Role pane. Select it and Next.
Select the Members tab. Under Assign access to select Managed Identity, and select on Select members. A sidebar pops up next to the working pane.
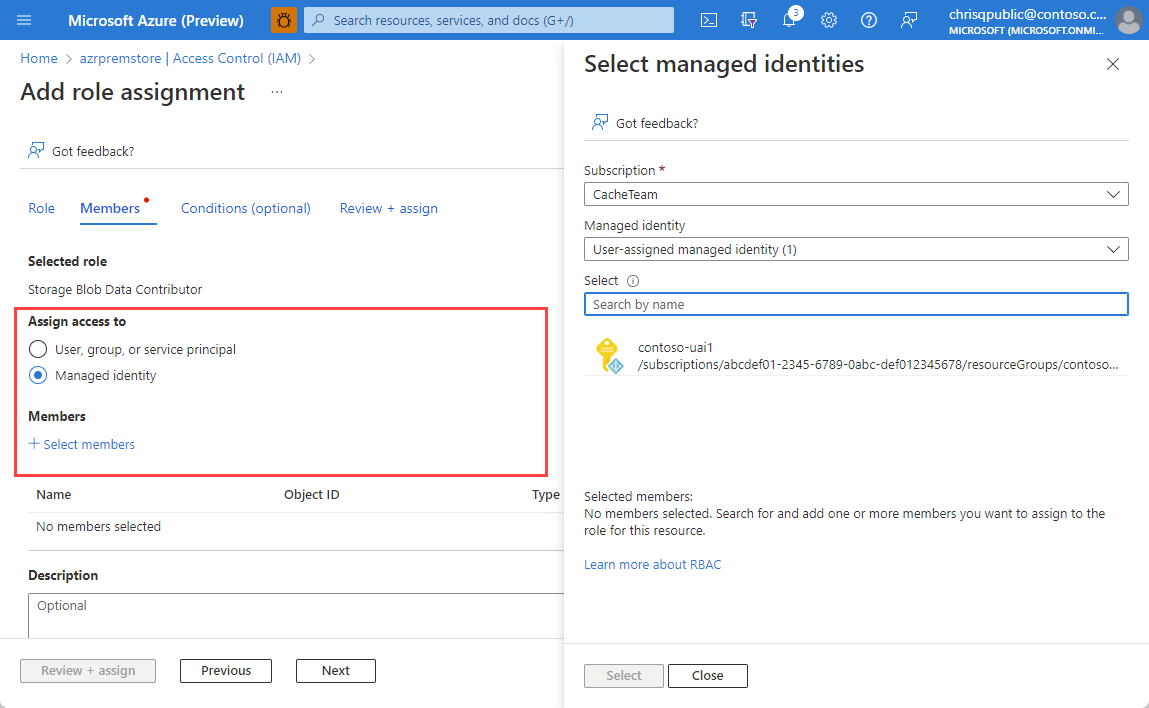
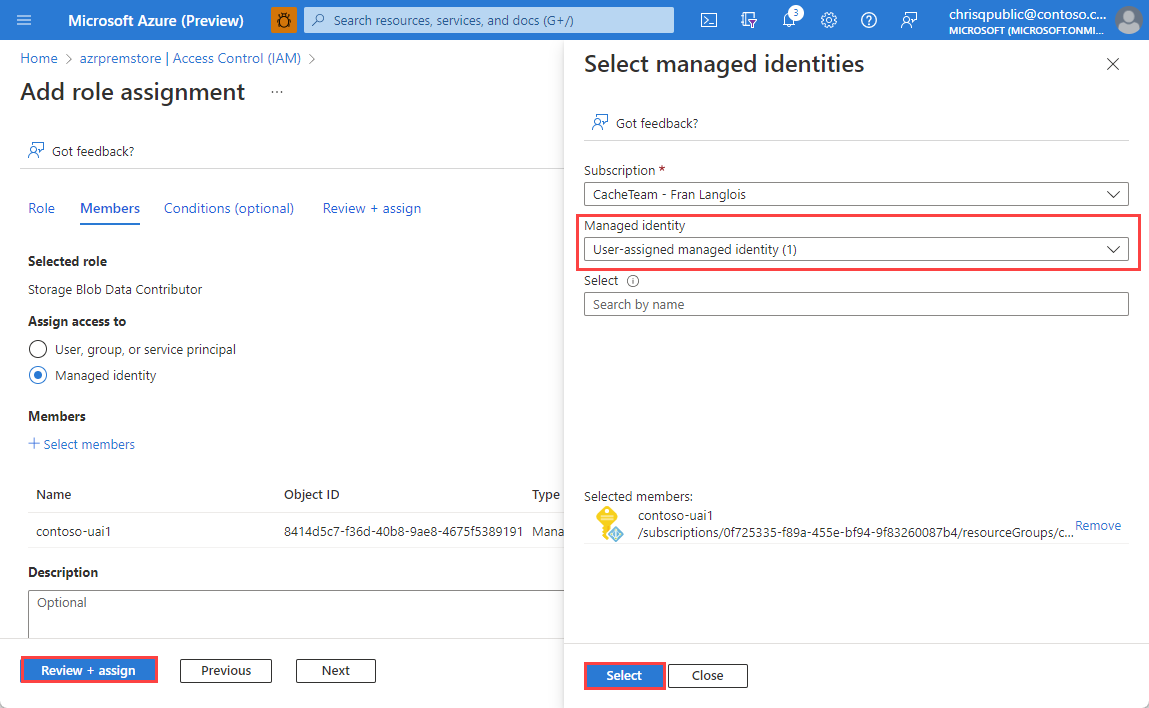
Use the drop-down under Managed Identity to choose either a User-assigned managed identity or a System-assigned managed identity. If you have many managed identities, you can search by name. Choose the managed identities you want and then Select. Then, Review + assign to confirm.
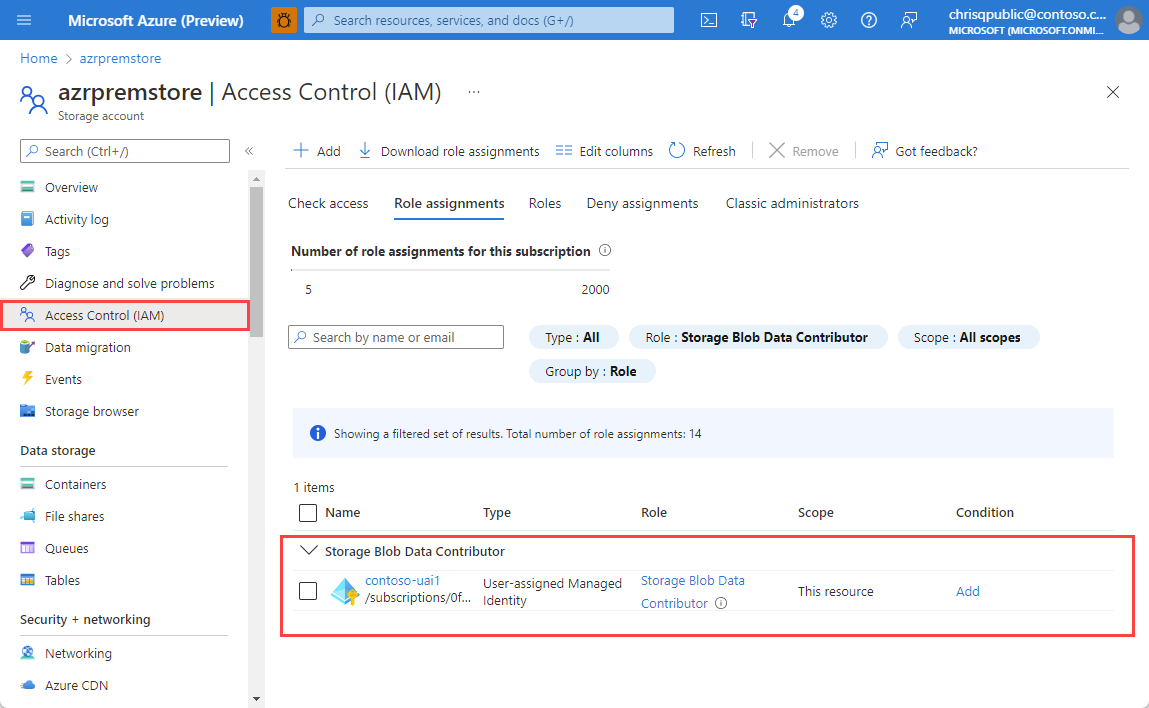
You can confirm if the identity has been assigned successfully by checking your storage account's role assignments under Storage Blob Data Contributor.
Note
For export to work with a storage account with firewall exceptions, you must:
- add an Azure Cache for Redis instance as a storage blob data contributor through system-assigned identity, and
- check Allow Azure services on the trusted services list to access this storage account.
If you're not using managed identity and instead authorizing a storage account with a key, then having firewall exceptions on the storage account breaks the persistence process and the import-export processes.
Use managed identity to access a storage account
Use managed identity with data persistence
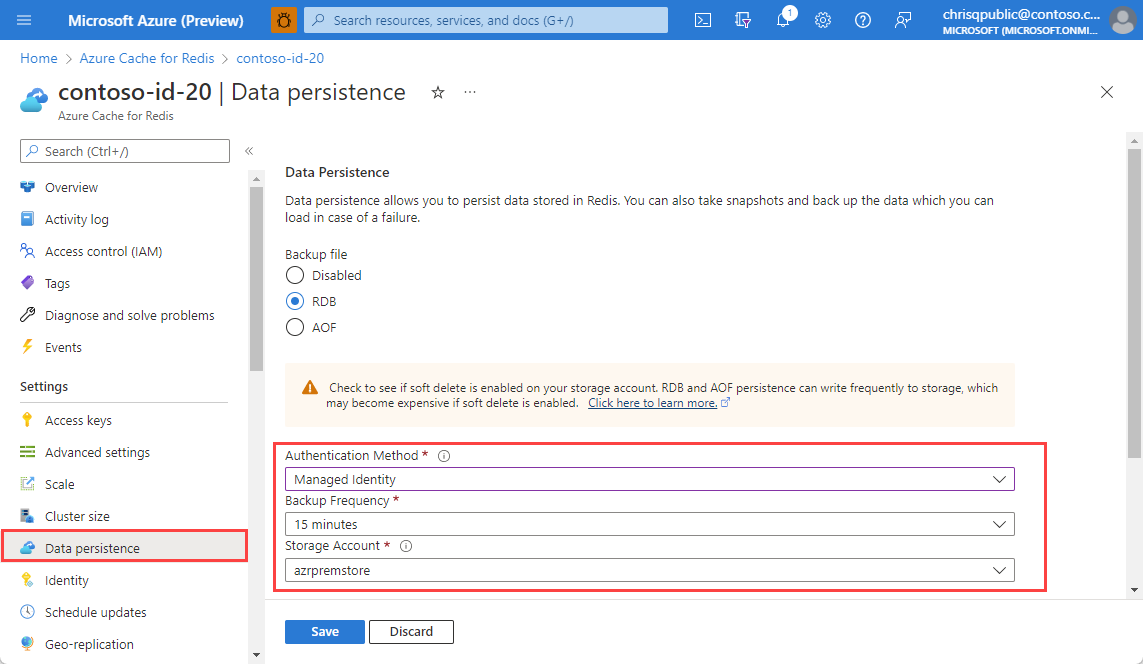
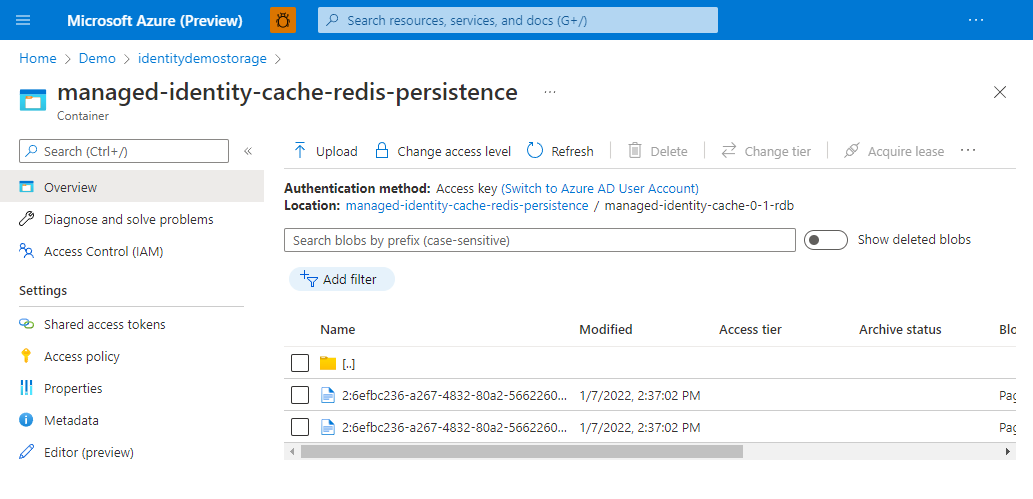
Open the Azure Cache for Redis instance that has been assigned the Storage Blob Data Contributor role and go to the Data persistence on the Resource menu.
Change the Authentication Method to Managed Identity and select the storage account you configured earlier in the article. select Save.
Important
The identity defaults to the system-assigned identity if it is enabled. Otherwise, the first listed user-assigned identity is used.
Data persistence backups can now be saved to the storage account using managed identity authentication.
Use managed identity to import and export cache data
Open your Azure Cache for Redis instance that has been assigned the Storage Blob Data Contributor role and go to the Import or Export tab under Administration.
If importing data, choose the blob storage location that holds your chosen RDB file. If exporting data, type your desired blob name prefix and storage container. In both situations, you must use the storage account you've configured for managed identity access.
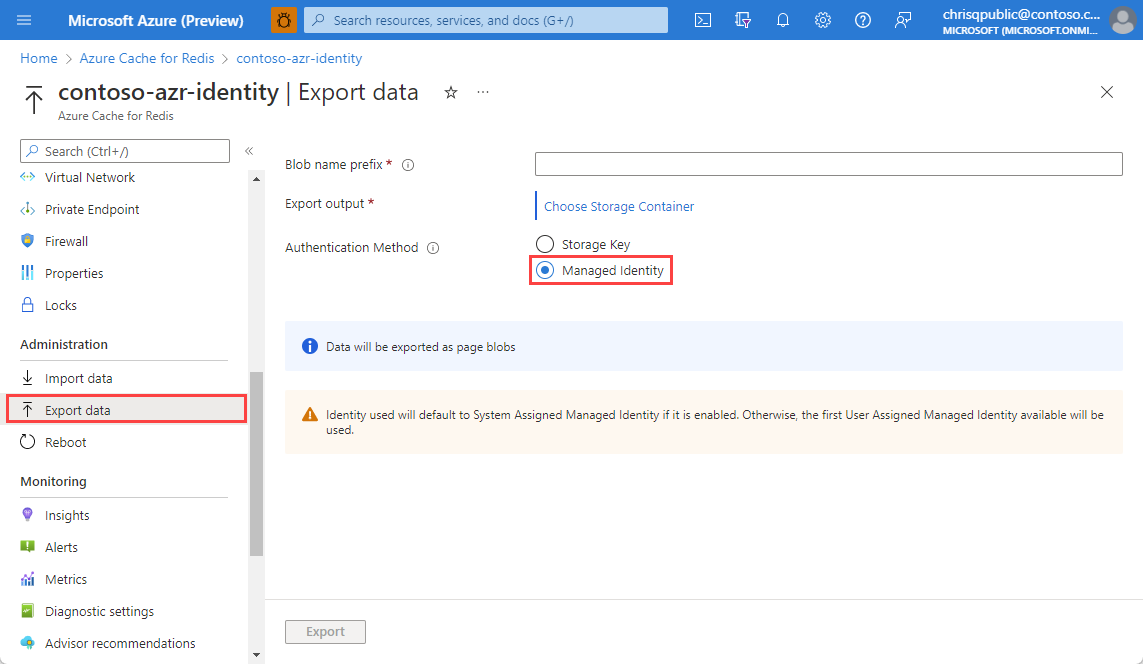
Under Authentication Method, choose Managed Identity and select Import or Export, respectively.
Note
It will take a few minutes to import or export the data.
Important
If you see an export or import failure, double check that your storage account has been configured with your cache's system-assigned or user-assigned identity. The identity used will default to system-assigned identity if it is enabled. Otherwise, the first listed user-assigned identity is used.
Related content
- Learn more about Azure Cache for Redis features
- What are managed identities
Feedback
Coming soon: Throughout 2024 we will be phasing out GitHub Issues as the feedback mechanism for content and replacing it with a new feedback system. For more information see: https://aka.ms/ContentUserFeedback.
Submit and view feedback for