Note
Access to this page requires authorization. You can try signing in or changing directories.
Access to this page requires authorization. You can try changing directories.
In this tutorial, you use this sample to connect with an Azure Cache for Redis or Azure Managed Redis instance.
Prerequisites
- An Azure subscription. If you don't have an Azure subscription, create a free account.
- An Azure Kubernetes Service Cluster - For more information on creating a cluster, see Quickstart: Deploy an Azure Kubernetes Service (AKS) cluster using the Azure portal.
- A user assigned managed identity that you want to use to connect to your Azure Cache for Redis instance.
Important
This tutorial assumes that you are familiar with basic Kubernetes concepts like containers, pods and service.
Set up an Azure Cache Redis instance
Create a new Azure Cache for Redis instance by using the Azure portal or your preferred CLI tool. Use the quickstart guide to get started. Alternately, you can create an Azure Managed Redis instance too.
For this tutorial, use a Standard C1 cache.

Complete the steps to create the cache.
Once your Redis cache instance is created, navigate to the Authentication tab. Select the user assigned managed identity you want to use to connect to your Redis cache instance, then select Save.
Alternatively, you can navigate to Data Access Configuration on the Resource menu to create a new Redis user with your user assigned managed identity to connect to your cache.
Take note of the user name for your Redis user from the portal. You use this user name with the AKS workload.
Run sample locally
To run this sample locally, configure your user principal as a Redis User on your Redis instance. The code sample uses your user principal through DefaultAzureCredential to connect to Redis instance.
Configure your AKS cluster
Follow these steps to configure a workload identity for your AKS cluster.
Then, complete the following steps:
- Enable OIDC issuer and workload identity
- Skip the step to create user assigned managed identity if you already created your managed identity. If you create a new managed identity, ensure that you create a new Redis User for your managed identity and assign appropriate data access permissions.
- Create a Kubernetes Service account annotated with the client ID of your user assigned managed identity
- Create a federated identity credential for your AKS cluster.
Configure your workload that connects to Azure Cache for Redis
Next, set up the AKS workload to connect to Azure Cache for Redis after you configure the AKS cluster.
Download the code for the sample app.
Build and push docker image to your Azure Container Registry using az acr build command.
az acr build --image sample/connect-from-aks-sample:1.0 --registry yourcontainerregistry --file Dockerfile .Attach your container registry to your AKS cluster using following command:
az aks update --name clustername --resource-group mygroup --attach-acr youracrname
Deploy your workload
In this section, you first install the Kubernetes CLI and then connect to an AKS cluster.
Install the Kubernetes CLI
Use the Kubernetes CLI, kubectl, to connect to the Kubernetes cluster from your local computer. If you're running locally, then you can use the following command to install kubectl.
az aks install-cli
If you use Azure Cloud Shell, kubectl is already installed, and you can skip this step.
Connect to your AKS cluster
Use the portal to copy the resource group and cluster name for your AKS cluster. To configure kubectl to connect to your AKS cluster, use the following command with your resource group and cluster name:
az aks get-credentials --resource-group myResourceGroup --name myClusterNameVerify that you're able to connect to your cluster by running the following command:
kubectl get nodesYou should see similar output showing the list of your cluster nodes.
NAME                                STATUS   ROLES   AGE   VERSION
aks-agentpool-21274953-vmss000001   Ready    agent   1d    v1.29.7
aks-agentpool-21274953-vmss000003   Ready    agent   1d    v1.29.7
aks-agentpool-21274953-vmss000006   Ready    agent   1d    v1.29.7
Run your workload
The following code describes the pod specification file that you use to run our workload. Take note that the pod has the label azure.workloadidentity/use: "true" and is annotated with serviceAccountName as required by AKS workload identity. When using access key authentication, replace the value of AUTHENTICATION_TYPE, REDIS_HOSTNAME, REDIS_ACCESSKEY and REDIS_PORT environment variables. For Azure Managed Redis instance, set the value of REDIS_PORT to 10000.
 apiVersion: v1
 kind: Pod
 metadata:
   name: entrademo-pod
   labels:
     azure.workload.identity/use: "true"  # Required. Only pods with this label can use workload identity.
 spec:
   serviceAccountName: workload-identity-sa
   containers:
   - name: entrademo-container
     image: youracr.azurecr.io/connect-from-aks-sample:1.0
     imagePullPolicy: Always
     command: ["dotnet", "ConnectFromAKS.dll"]
     resources:
       limits:
         memory: "256Mi"
         cpu: "500m"
       requests:
         memory: "128Mi"
         cpu: "250m"
     env:
          - name: AUTHENTICATION_TYPE
            value: "MANAGED_IDENTITY" # change to ACCESS_KEY to authenticate using access key
          - name: REDIS_HOSTNAME
            value: "your redis hostname"
          - name: REDIS_ACCESSKEY
            value: "your access key"
          - name: REDIS_PORT
            value: "6380" # change to 10000 for Azure Managed Redis
   restartPolicy: Never
Save this file as podspec.yaml and then apply it to your AKS cluster by running the folloWing command:
kubectl apply -f podspec.yamlYou get a response indicating your pod was created:
pod/entrademo-pod createdTo test the application, run the following command to check if the pod is running:
kubectl get podsYou see your pod running successfully like:
NAME                       READY   STATUS      RESTARTS       AGE
entrademo-pod              0/1     Completed   0              42s
Because this tutorial is a console app, you need to check the logs of the pod to verify that it ran as expected using this command.
kubectl logs entrademo-appYou see the following logs that indicate your pod successfully connected to your Redis instance using user assigned managed identity
Connecting with managed identity..
Retrieved value from Redis: Hello, Redis!
Success! Previous value: Hello, Redis!
Clean up your cluster
To clean up your cluster, run the following commands:
kubectl delete pod entrademo-pod
Clean up resources
If you want to continue to use the resources you created in this article, keep the resource group.
Otherwise, if you're finished with the resources, you can delete the Azure resource group that you created to avoid charges.
Important
Deleting a resource group is irreversible. When you delete a resource group, all the resources in it are permanently deleted. Make sure that you do not accidentally delete the wrong resource group or resources. If you created the resources inside an existing resource group that contains resources you want to keep, you can delete each resource individually instead of deleting the resource group.
To delete a resource group
Sign in to the Azure portal, and then select Resource groups.
Select the resource group you want to delete.
If there are many resource groups, use the Filter for any field... box, type the name of your resource group you created for this article. Select the resource group in the results list.

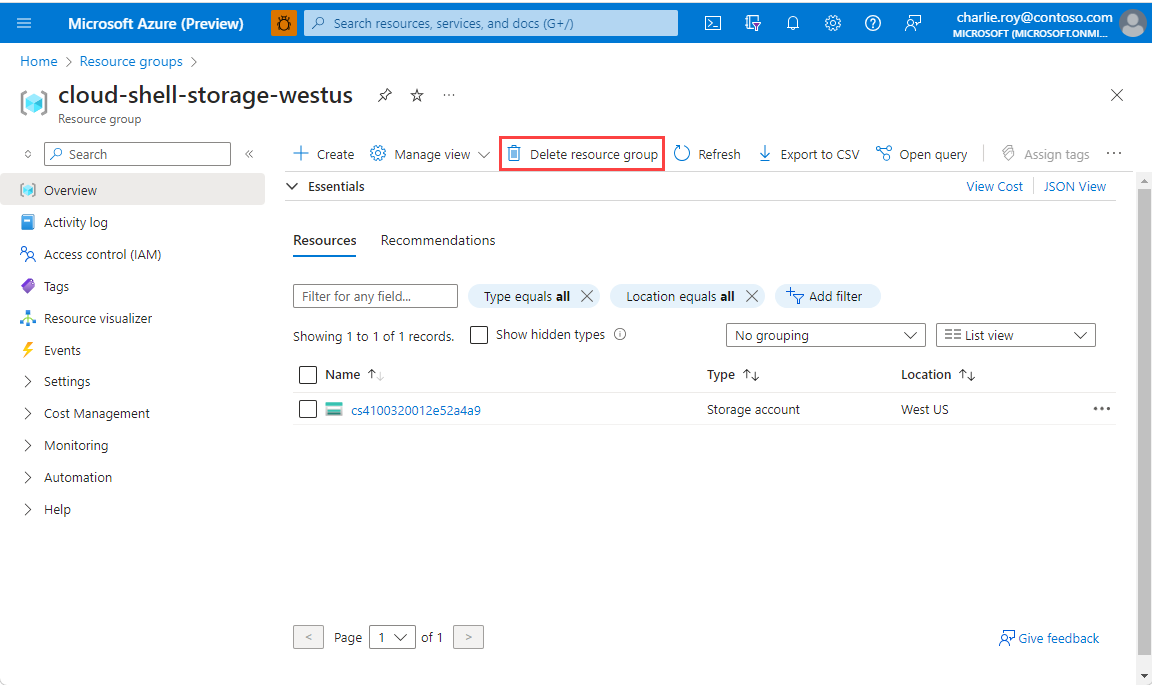
Select Delete resource group.
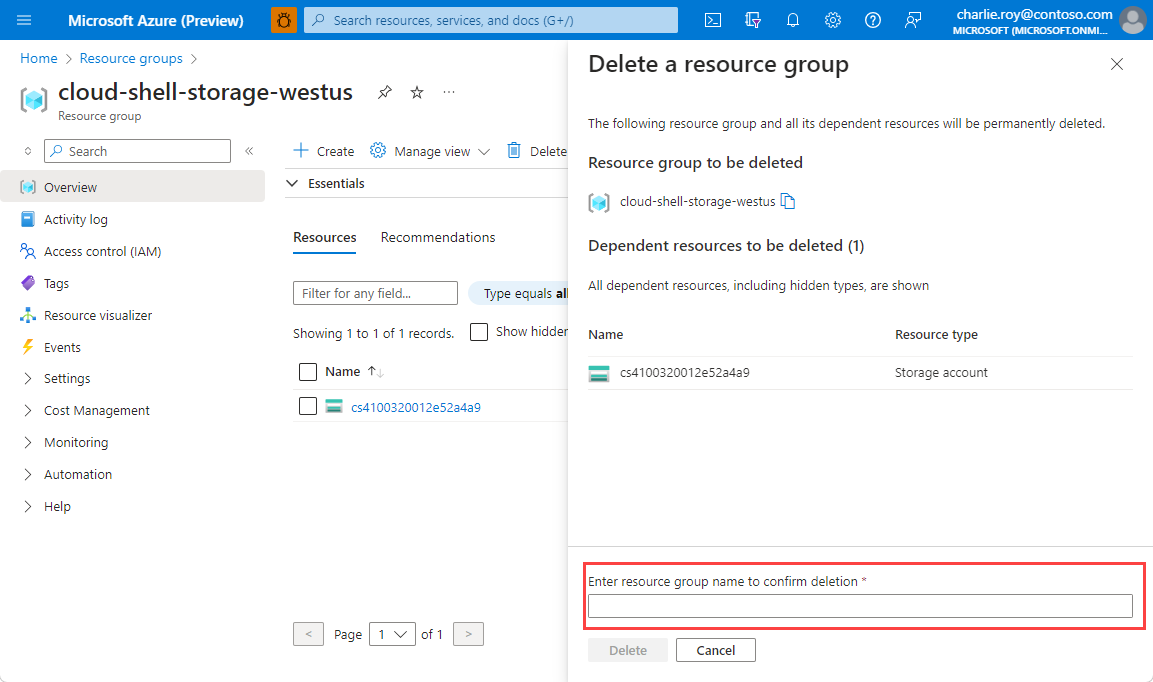
You're asked to confirm the deletion of the resource group. Type the name of your resource group to confirm, and then select Delete.

After a few moments, the resource group and all of its resources are deleted.