Note
Access to this page requires authorization. You can try signing in or changing directories.
Access to this page requires authorization. You can try changing directories.
Applies to: Azure Logic Apps (Consumption + Standard)
To pause workflow execution and delay the next action, you can set up your workflow to wait an amount of time before the next action runs by using the built-in action named Delay. To pause the workflow until a specific date and time, add the built-in action named Delay until.
The following descriptions provide more information about these actions:
- Delay: Wait for the specified number of time units, such as seconds, minutes, hours, days, weeks, or months, before the next action runs.
- Delay until: Wait until the specified date and time before the next action runs.
Here are some example ways to use these actions:
- Wait until a weekday to send a status update over email.
- Delay your workflow until an HTTP call finishes before resuming and retrieving data.
Prerequisites
An Azure account and subscription. If you don't have a subscription, you can sign up for a free Azure account.
Basic knowledge about logic apps. To use an action, your workflow must start with a trigger. You can use any trigger you want and add other actions before you add a delay action.
Add the Delay action
To add a Delay action to your workflow, follow these steps:
In the Azure portal, open your logic app resource.
Based on whether you have a Consumption or Standard logic app resource, follow the corresponding steps:
Consumption: On the resource sidebar, under Development Tools, select the designer to open your workflow.
Standard: On the resource sidebar, under Workflows, select Workflows, and then select your workflow. On the workflow sidebar, under Tools, select the designer to open the workflow.
On the designer, follow these general steps to add the action named Delay to your workflow.
In the Delay action, specify the amount of time to wait before the next action runs.
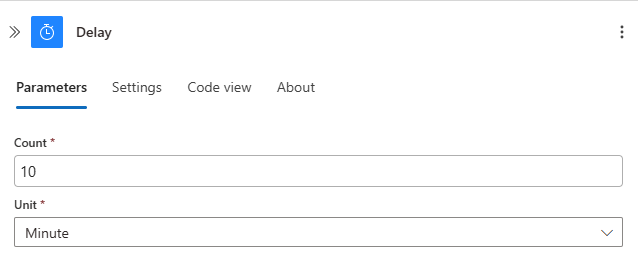
Parameter JSON name Required Type Description Count countYes Integer The number of time units to delay. Unit unitYes String The unit of time, for example: Second, Minute, Hour, Day, Week, or Month. Add any other actions that you want to run in your workflow.
When you're done, save your workflow.
Add the Delay until action
To add a Delay until action to your workflow, follow these steps:
In the Azure portal, open your logic app resource.
Based on whether you have a Consumption or Standard logic app resource, follow the corresponding steps:
Consumption: On the resource sidebar, under Development Tools, select the designer to open your workflow.
Standard: On the resource sidebar, under Workflows, select Workflows, and then select your workflow. On the workflow sidebar, under Tools, select the designer to open the workflow.
On the designer, follow these general steps to add the action named Delay until to your workflow.
In the Delay until action, provide the date and time for when you want to resume the workflow.
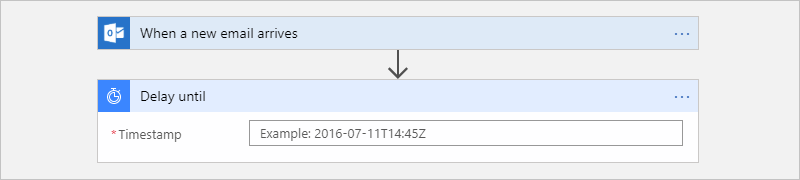
Parameter JSON name Required Type Description Timestamp timestampYes String The date and time for resuming the workflow using the following format:
YYYY-MM-DDThh:mm:ssZ
So for example, if you want September 18, 2025 at 2:00 PM, specify "2025-09-18T14:00:00Z".
Note: This time format must follow the ISO 8601 date time specification in UTC date time format, but without a UTC offset. Without a time zone, you must add the letter "Z" at the end without any spaces. This "Z" refers to the equivalent nautical time.Add any other actions that you want to run in your workflow.
When you're done, save your workflow.