Note
Access to this page requires authorization. You can try signing in or changing directories.
Access to this page requires authorization. You can try changing directories.
Azure Private Link is a powerful service that allows users to connect to Azure DocumentDB through a designated private endpoint. This private endpoint consists of private IP addresses located in a subnet within your own virtual network. The endpoint enables you to restrict access to the Azure DocumentDB product solely over private IPs. The risk of data exfiltration is substantially reduced, by integrating Private Link with stringent NSG policies. For a deeper understanding of private endpoints, consider checking out What is Azure Private Link?.
Note
Private Link secures your connection, however, it doesn't prevent your Azure DocumentDB endpoints from being resolved by public DNS. The filtration of incoming requests is handled at the application level, not at the transport or network level.
Private Link offers the flexibility to access the Azure DocumentDB either from within your virtual network or from any connected peered virtual network. Additionally, resources linked to Private Link are accessible on-premises via private peering, through VPN or Azure ExpressRoute.
To establish a connection, Azure DocumentDB with Private Link supports both automatic and manual approval methods.
Prerequisites
An Azure subscription
- If you don't have an Azure subscription, create a free account
An existing Azure DocumentDB cluster
- If you don't have a cluster, create a new cluster
Create a cluster with a private endpoint by using the Azure portal
Follow these steps to create a new Azure DocumentDB cluster with a private endpoint by using the Azure portal:
Sign in to the Azure portal, then select Create a resource in the upper left-hand corner of the Azure portal.
On the Create a resource page, select Databases and then select Azure DocumentDB.
On the Select API option page, on the MongoDB tile, select Create.
Choose the cluster resource type.
On the Create an Azure DocumentDB cluster page, select or create a Resource group, enter a Cluster name and Location, and enter and confirm the administrator Password.
Select Next: Networking.
Select Networking tab, for Connectivity method, select Private access.
On the Create private endpoint screen, enter or select appropriate values for:
Setting Value Resource group Select a resource group. Name Enter any name for your private endpoint. If this name is taken, create a unique one. Network Interface name Enter any name for your Network Interface. If this name is taken, create a unique one. Location Select the region where you want to deploy Private Link. Create the private endpoint in the same location where your virtual network exists. Resource type Select Microsoft.DocumentDB/mongoClusters.Target resource Select the Azure DocumentDB resource you created. Target subresource Select the type of subresource for the resource selected previously that your private endpoint should have the ability to access. Virtual network Select your virtual network. Subnet Select your subnet. Integrate with private DNS zone Select Yes. To connect privately with your private endpoint, you need a DNS record. We recommend that you integrate your private endpoint with a private DNS zone. You can also use your own DNS servers or create DNS records by using the host files on your virtual machines. When you select yes for this option, a private DNS zone group is also created. DNS zone group is a link between the private DNS zone and the private endpoint. This link helps you to auto update the private DNS zone when there's an update to the private endpoint. For example, when you add or remove regions, the private DNS zone is automatically updated. Configuration name Select your subscription and resource group. The private DNS zone is determined automatically. You can't change it by using the Azure portal. Select Ok.
Select Next: Tags > Review + create. On the Review + create page, then select Create.
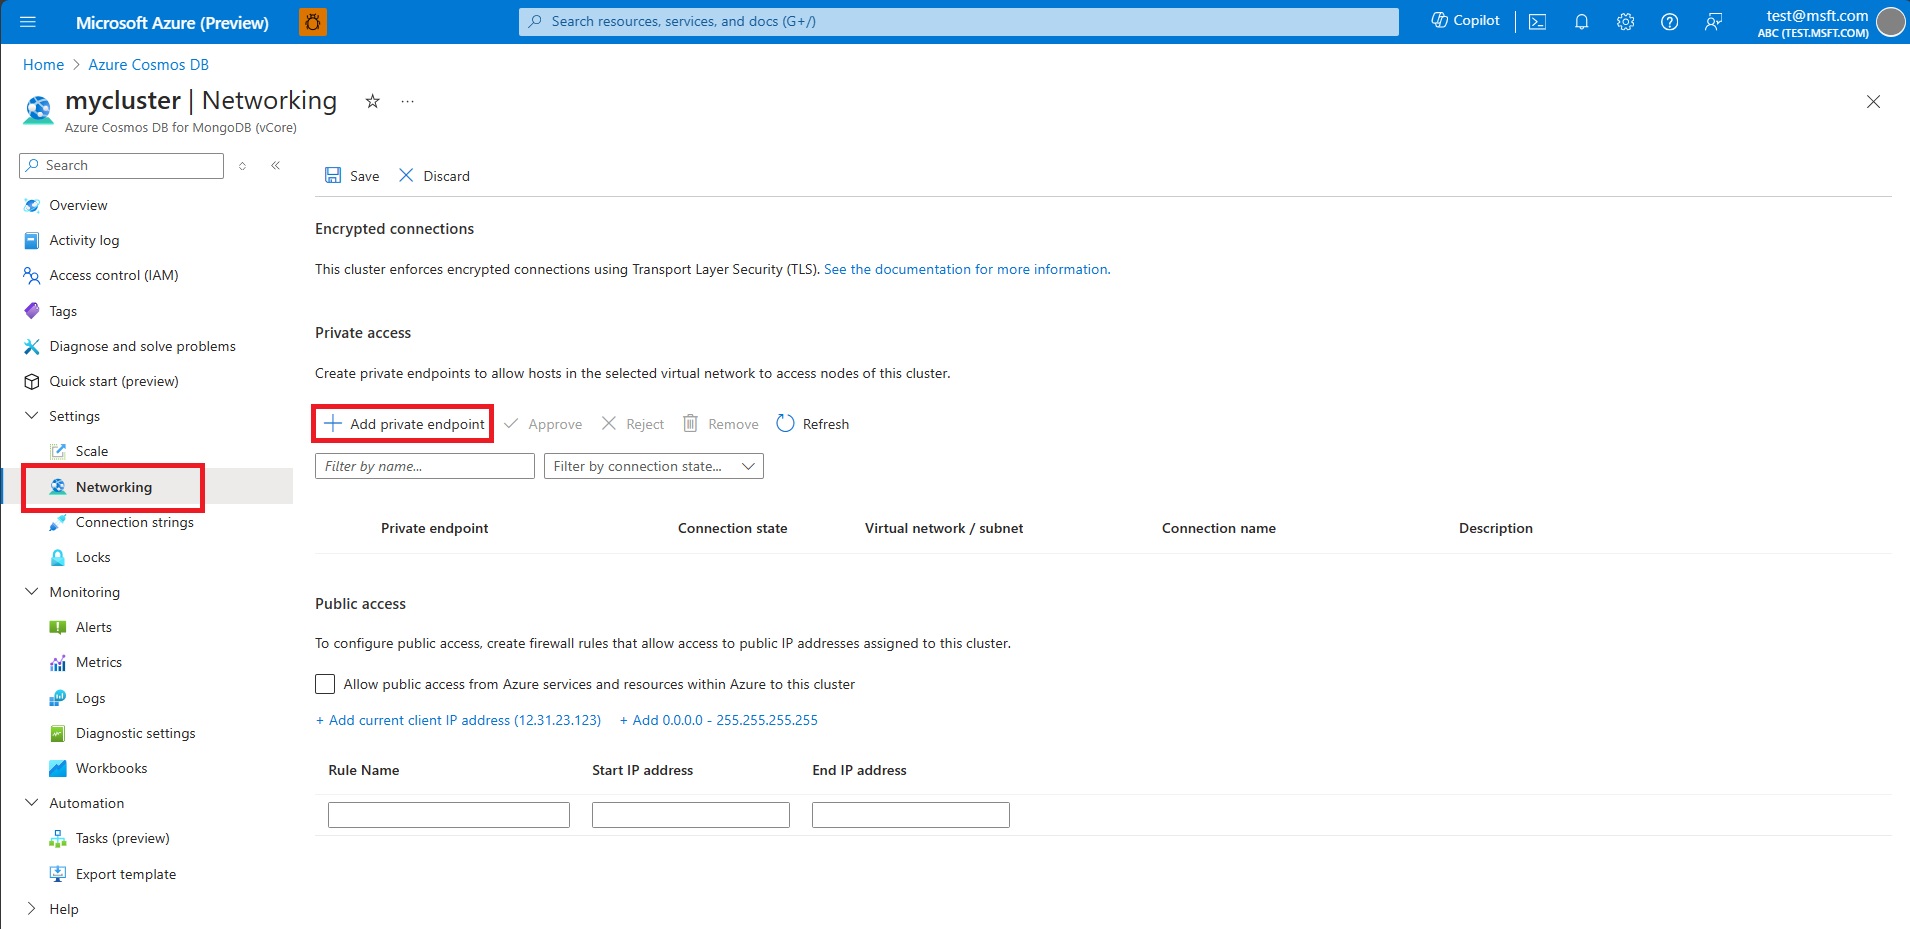
Enable private access on an existing cluster
To create a private endpoint to a node in an existing cluster, open the Networking page for the cluster.
Select Add private endpoint.
On the Basics tab of the Create a private endpoint screen, confirm the Subscription, Resource group, and Region. Enter a Name for the endpoint, such as my-cluster-1, and a Network interface name, such as my-cluster-1-nic.
Note
Unless you have a good reason to choose otherwise, we recommend picking a subscription and region that match those of your cluster. The default values for the form fields might not be correct. Check them and update if necessary.
Select Next: Resource. Choose "Microsoft.DocumentDB/mongoClusters" for Resource type, and choose the target cluster for Resource. For Target sub-resource, choose "MongoCluster".
Select Next: Virtual Network. Choose the desired Virtual network and Subnet. Under Private IP configuration, select Statically allocate IP address or keep the default, Dynamically allocate IP address.
Select Next: DNS.
Under Private DNS integration, for Integrate with private DNS zone, keep the default Yes or select No.
Note
Private DNS integration needs to be enabled on the cluster for proper DNS resolution.
Select Next: Tags, and add any desired tags.
Select Review + create. Review the settings, and select Create when satisfied.
Create a private endpoint by using Azure CLI
Run the following Azure CLI script to create a private endpoint named myPrivateEndpoint for an existing Azure DocumentDB account. Replace the variable values with the details for your environment.
# Resource group where the Azure DocumentDB account and virtual network resources are located
ResourceGroupName="myResourceGroup"

# Name of the existing Azure DocumentDB account
ClusterName="myMongoCluster"

# Subscription ID where the Azure DocumentDB account and virtual network resources are located
SubscriptionId="<your Azure subscription ID>"

# API type of your Azure DocumentDB account: Sql, SqlDedicated, MongoCluster, Cassandra, Gremlin, or Table
SubResourceType="MongoCluster"

# Name of the virtual network to create
VNetName="myVnet"

# Name of the subnet to create
SubnetName="mySubnet"

# Name of the private endpoint to create
PrivateEndpointName="myPrivateEndpoint"

# Name of the private endpoint connection to create
PrivateConnectionName="myConnection"

az network vnet create \
  --name $VNetName \
  --resource-group $ResourceGroupName \
  --subnet-name $SubnetName

az network vnet subnet update \
  --name <name> \
  --resource-group $ResourceGroupName \
  --vnet-name $VNetName \
  --disable-private-endpoint-network-policies true

az network private-endpoint create \
  --name $PrivateEndpointName \
  --resource-group $ResourceGroupName \
  --vnet-name $VNetName \
  --subnet $SubnetName \
  --private-connection-resource-id "/subscriptions/$SubscriptionId/resourceGroups/$ResourceGroupName/providers/Microsoft.DocumentDB/mongoClusters/$ClusterName" \
  --group-ids MongoCluster --connection-name $PrivateConnectionName
Integrate the private endpoint with a private DNS zone
After you create the private endpoint, you should integrate it with a private DNS zone by using the following Azure CLI script:
Note
Private DNS integration needs to be enabled on the cluster for proper DNS resolution.
#Zone name differs based on the API type and group ID you are using.
zoneName="privatelink.mongocluster.cosmos.azure.com"

az network private-dns zone create \
  --resource-group $ResourceGroupName \
  --name $zoneName

az network private-dns link vnet create --resource-group $ResourceGroupName \
  --zone-name $zoneName \
  --name <dns-link-name> \
  --virtual-network $VNetName \
  --registration-enabled false

#Create a DNS zone group
az network private-endpoint dns-zone-group create \
  --resource-group $ResourceGroupName \
  --endpoint-name <pe-name> \
  --name <zone-group-name> \
  --private-dns-zone $zoneName \
  --zone-name mongocluster
Get connection string to connect
Always use mongodb+srv connection string to connect to database from a client with a private IP address that has access to the private endpoint assigned to Azure DocumentDB cluster.
- Select an existing Azure DocumentDB cluster.
- On the cluster sidebar, under Settings, select Connection strings.
- Copy global read-write or self connection string for native DocumentDB authentication or Microsoft Entra ID authentication.
Note
On a replica cluster only self connection strings are provided.
- Use copied connection string in your application or management tools to connect to the cluster.
MongoClusters commands on Private Link
az network private-link-resource list \
  -g <rg-name> \
  -n <resource-name> \
  --type Microsoft.DocumentDB/mongoClusters